
You may remember a while back we did a temporary makeover on our guest bathroom. We made some temporary fixes, putting off a full renovation. Well, it’s finally time for that renovation and I’m so excited!
Here’s the latest update:
When we first moved in, we did a little decor refresh in the guest bathroom, leaving us here!
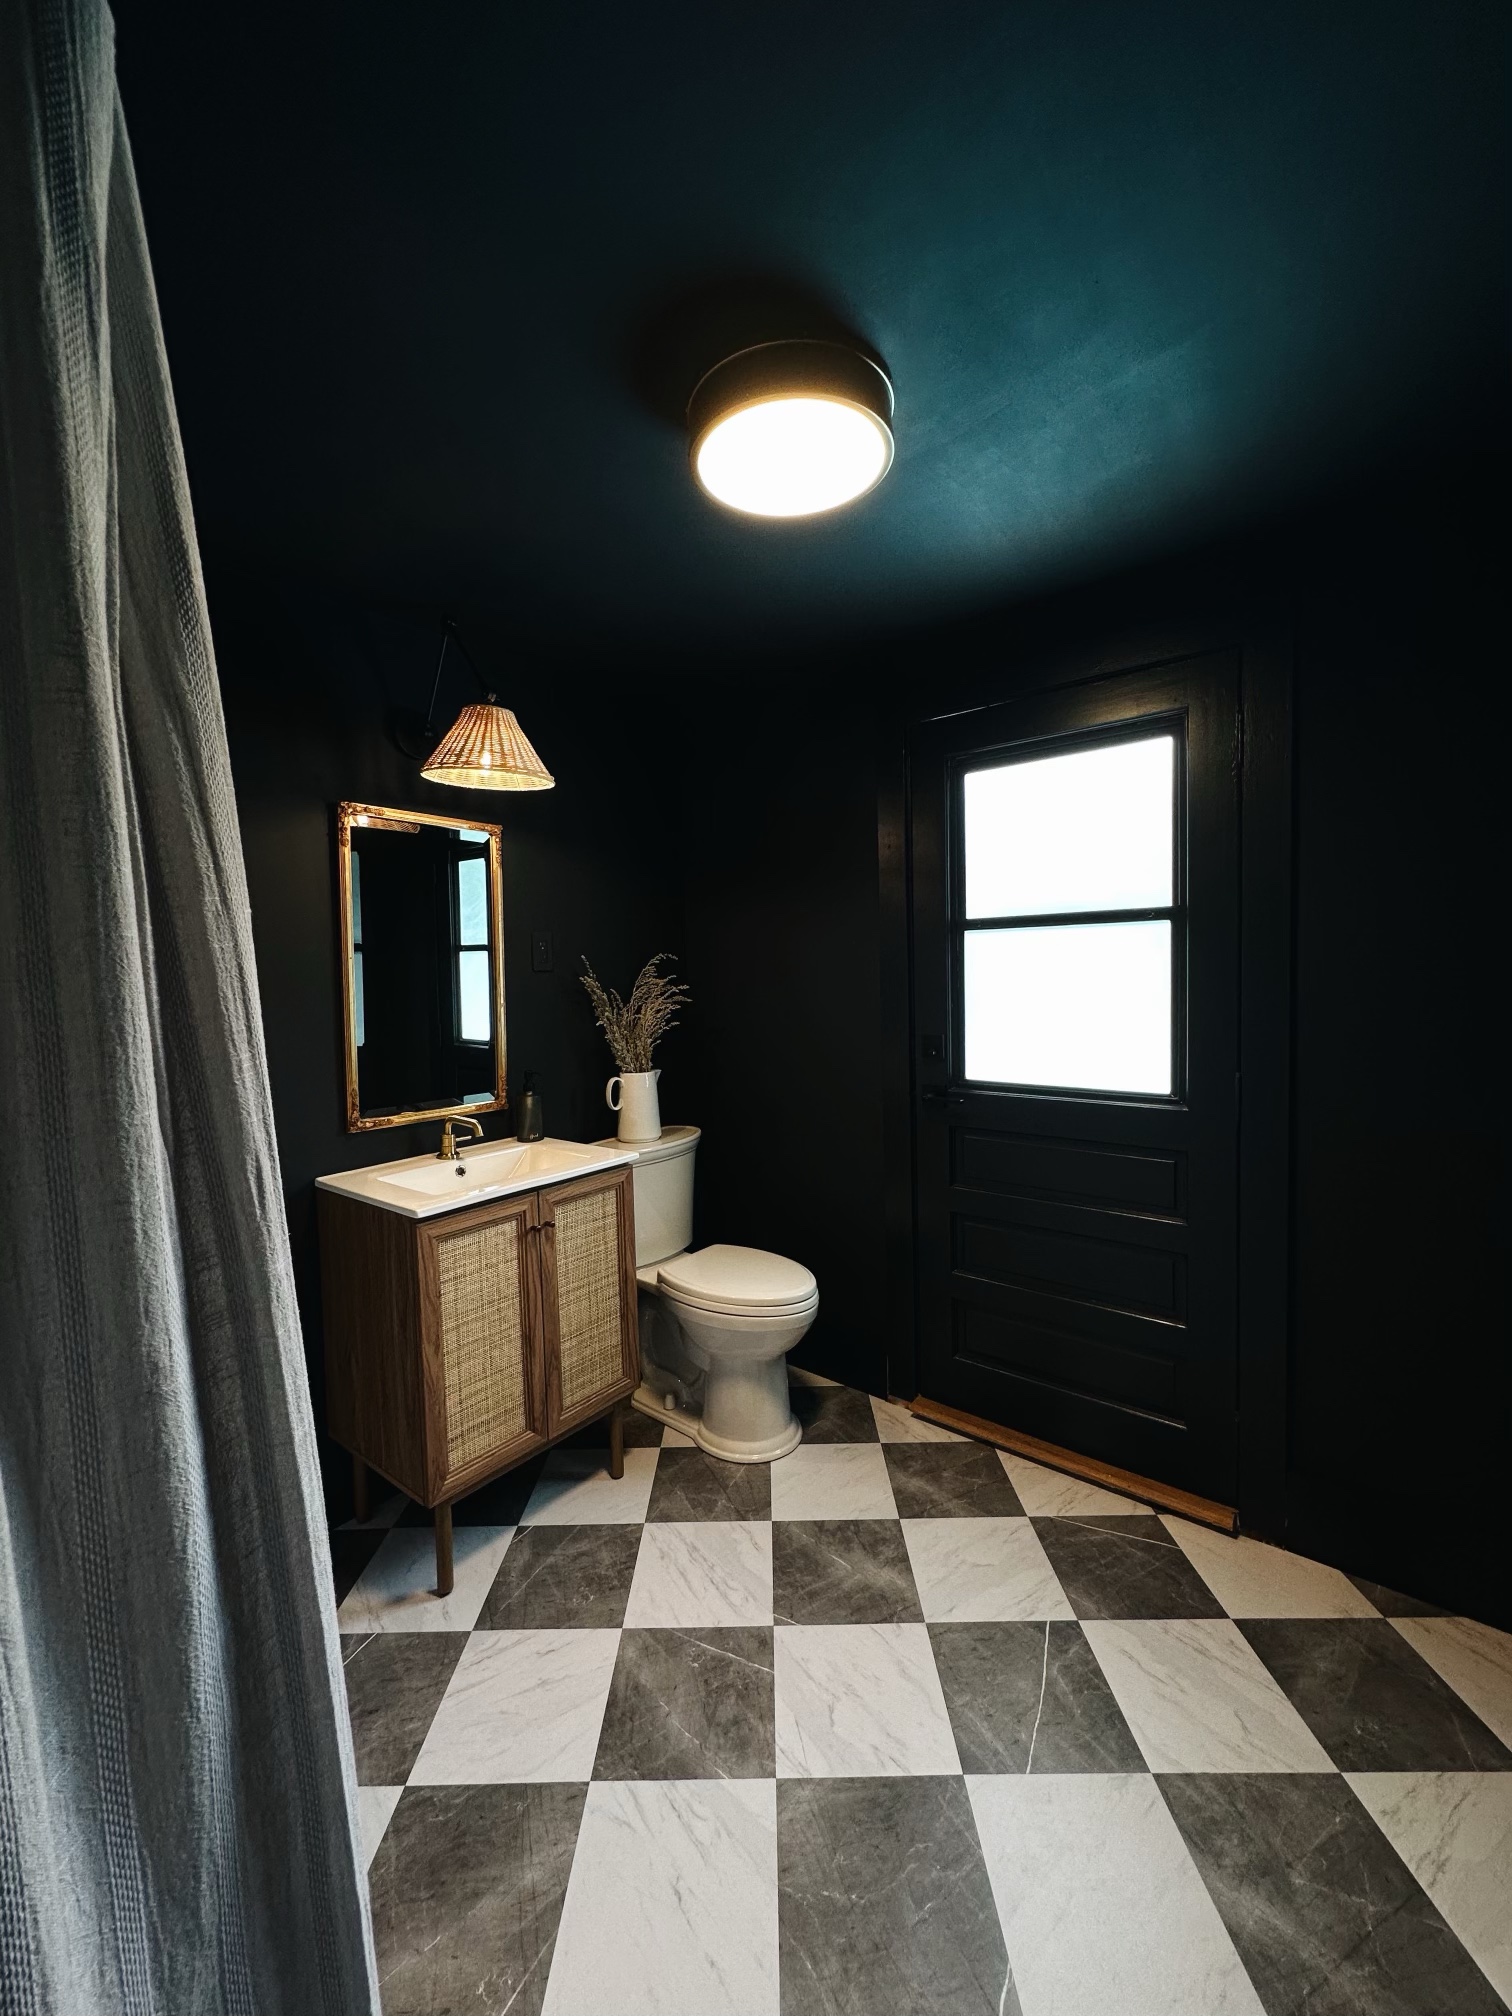
Then, we removed the tile flooring and installed some peel & stick vinyl floor tiles. We also painted the whole room dark navy and I loved it. Again, this was just a temporary fix.
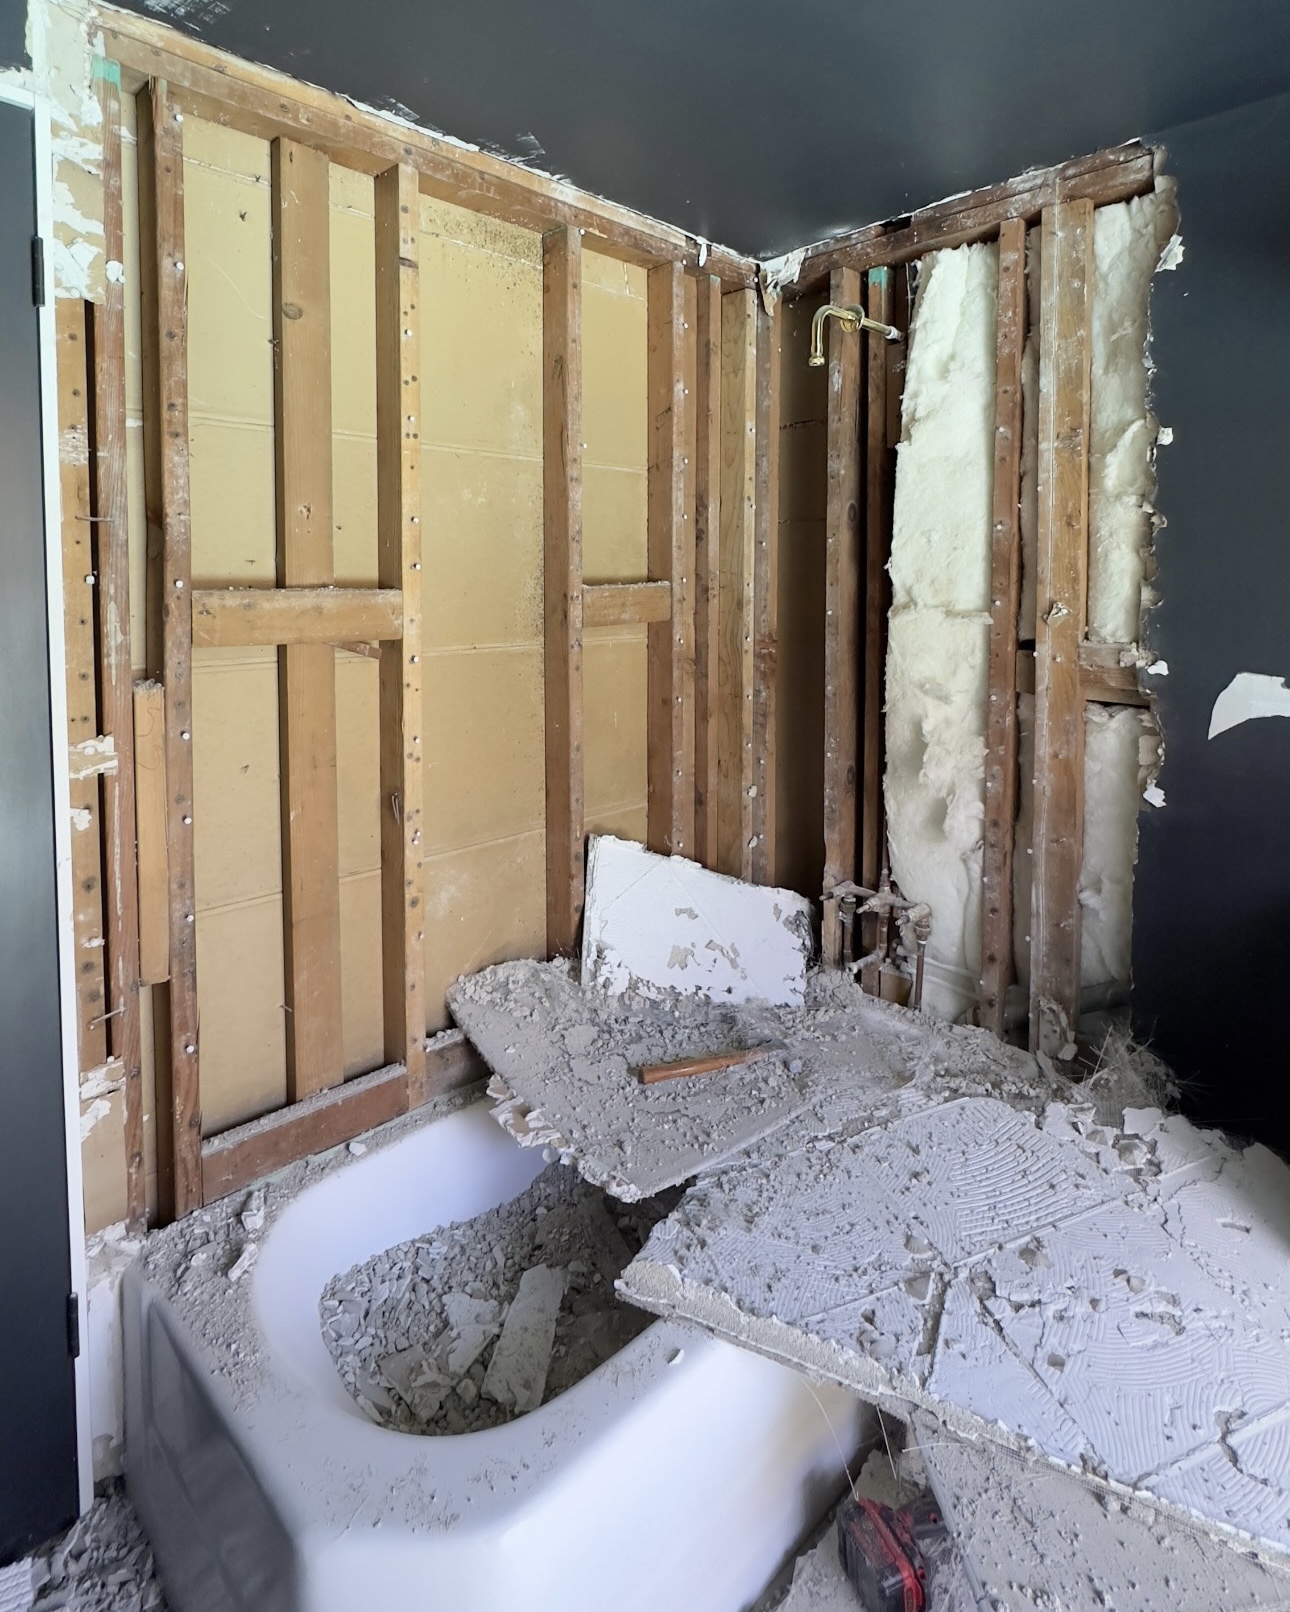
Now, it’s time to really gut this thing and make it the way we want it! The shower tile is very obviously from the early 2000’s and that’s not really my style. I couldn’t wait to gut the shower and the tub. Demo time!
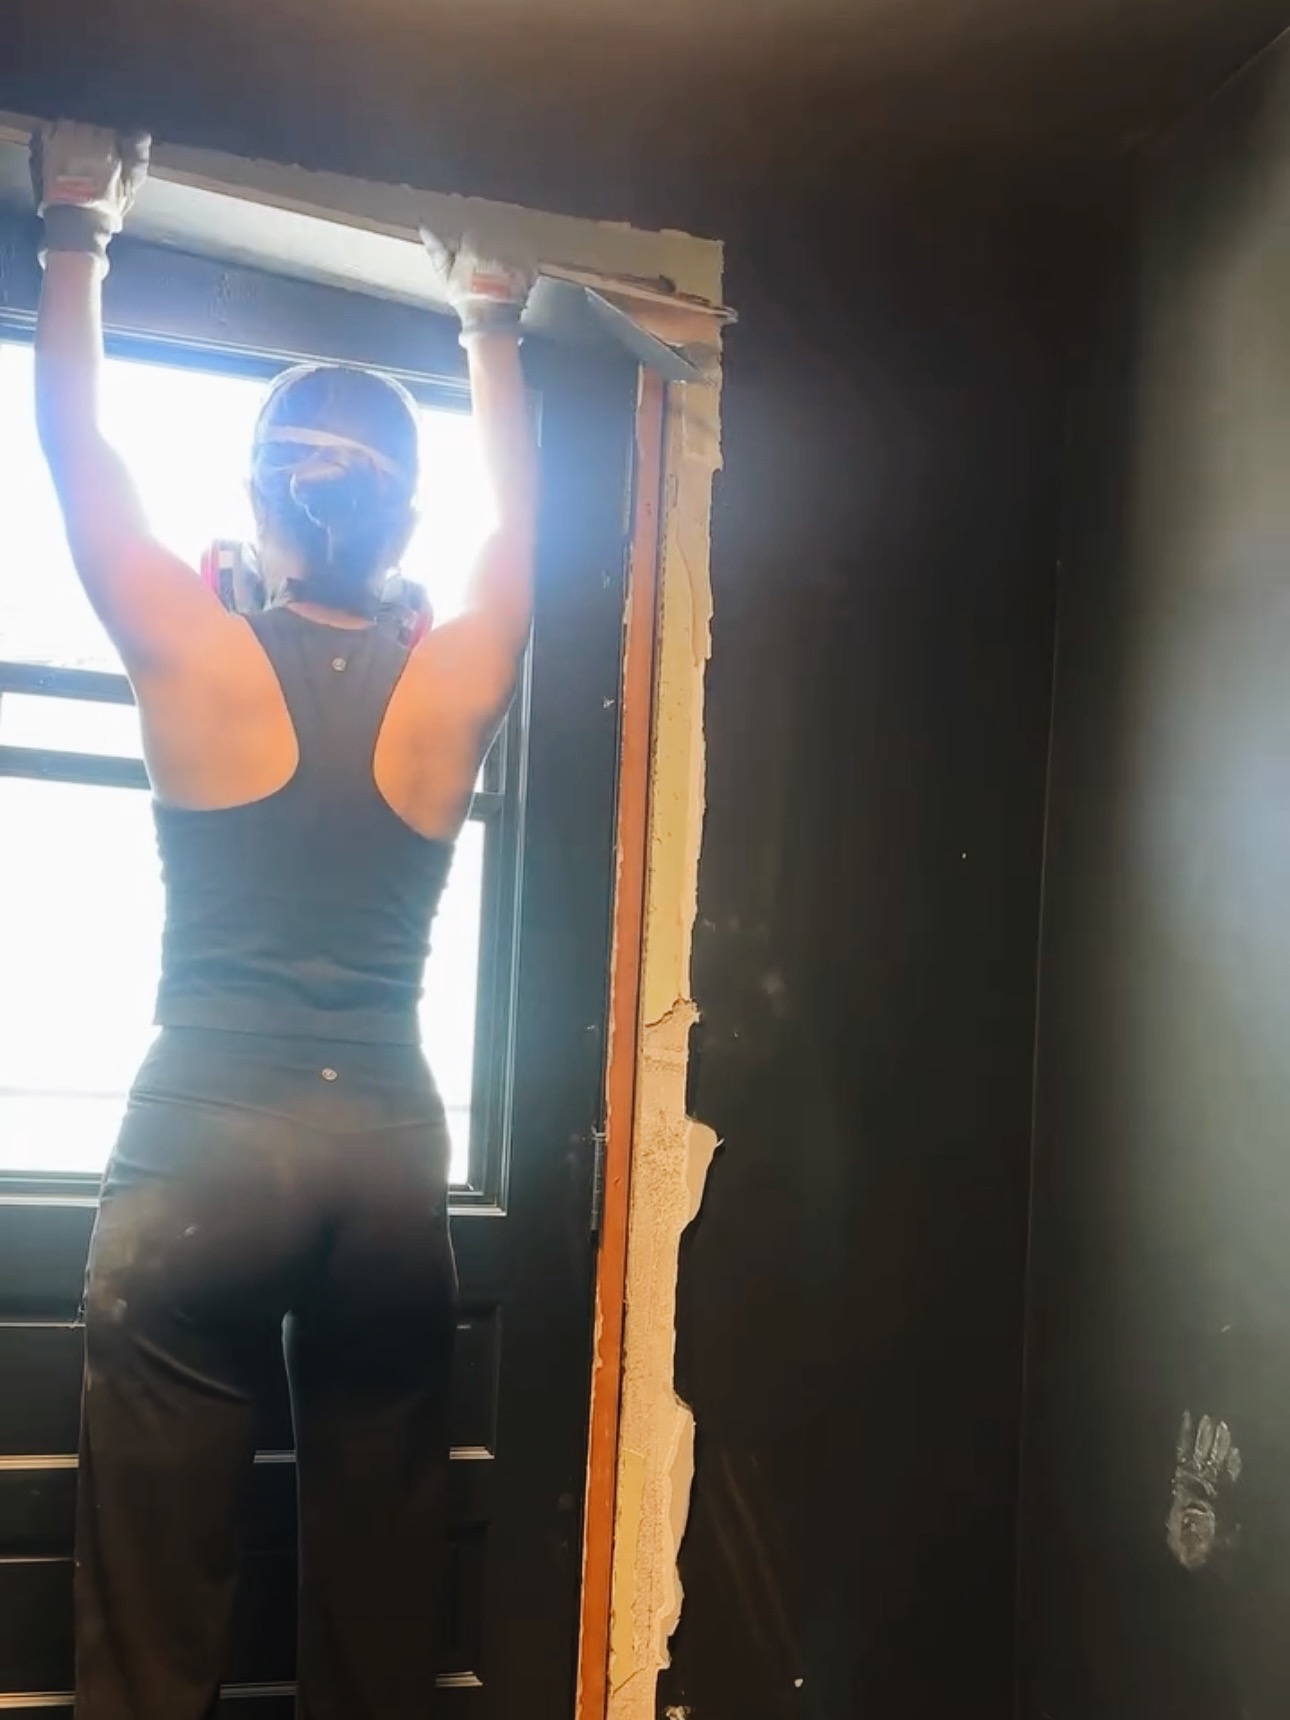
Demo
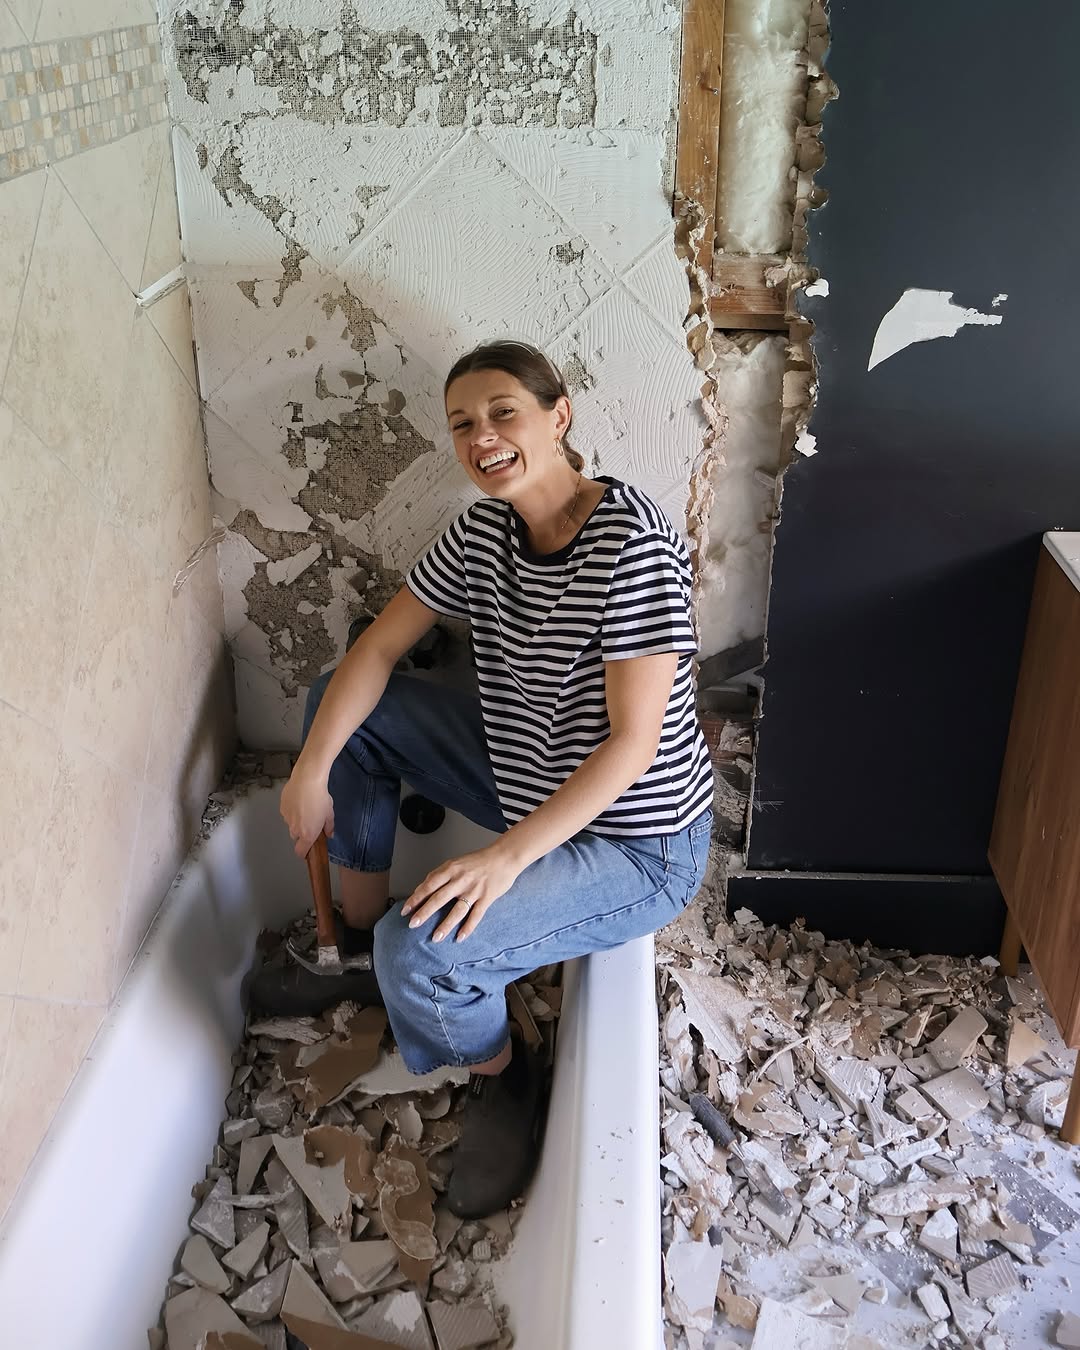
I started chipping away at the drywall around the tile with my hammer. Then I just went to town with my hammer and a chisel! This is nothing like taking out drywall. It’s way worse. So messy and so crumbly! I found that cutting with a saw first and then pried the cement board off with a hammer. Then I turned off the water underneath the vanity and removed it along with the lighting and mirror above it.
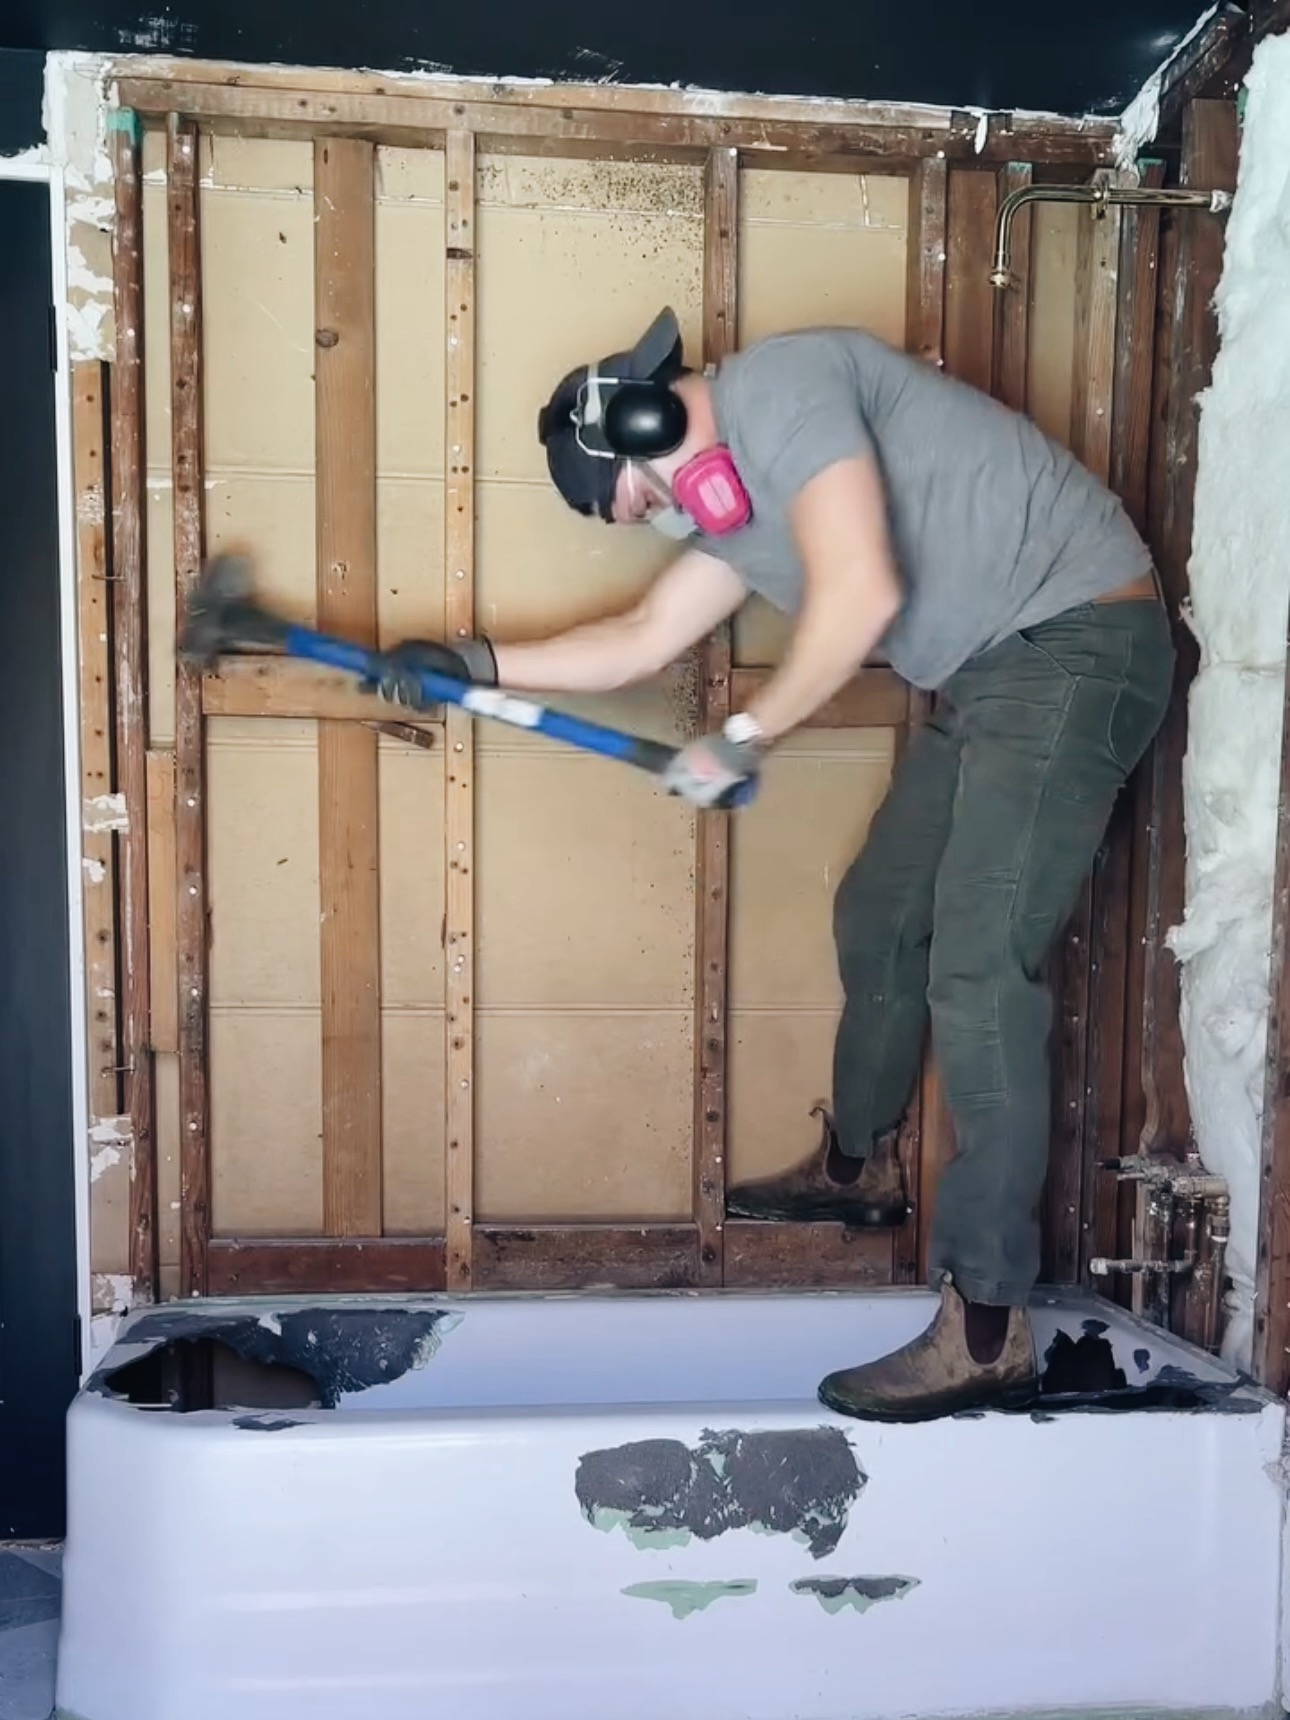
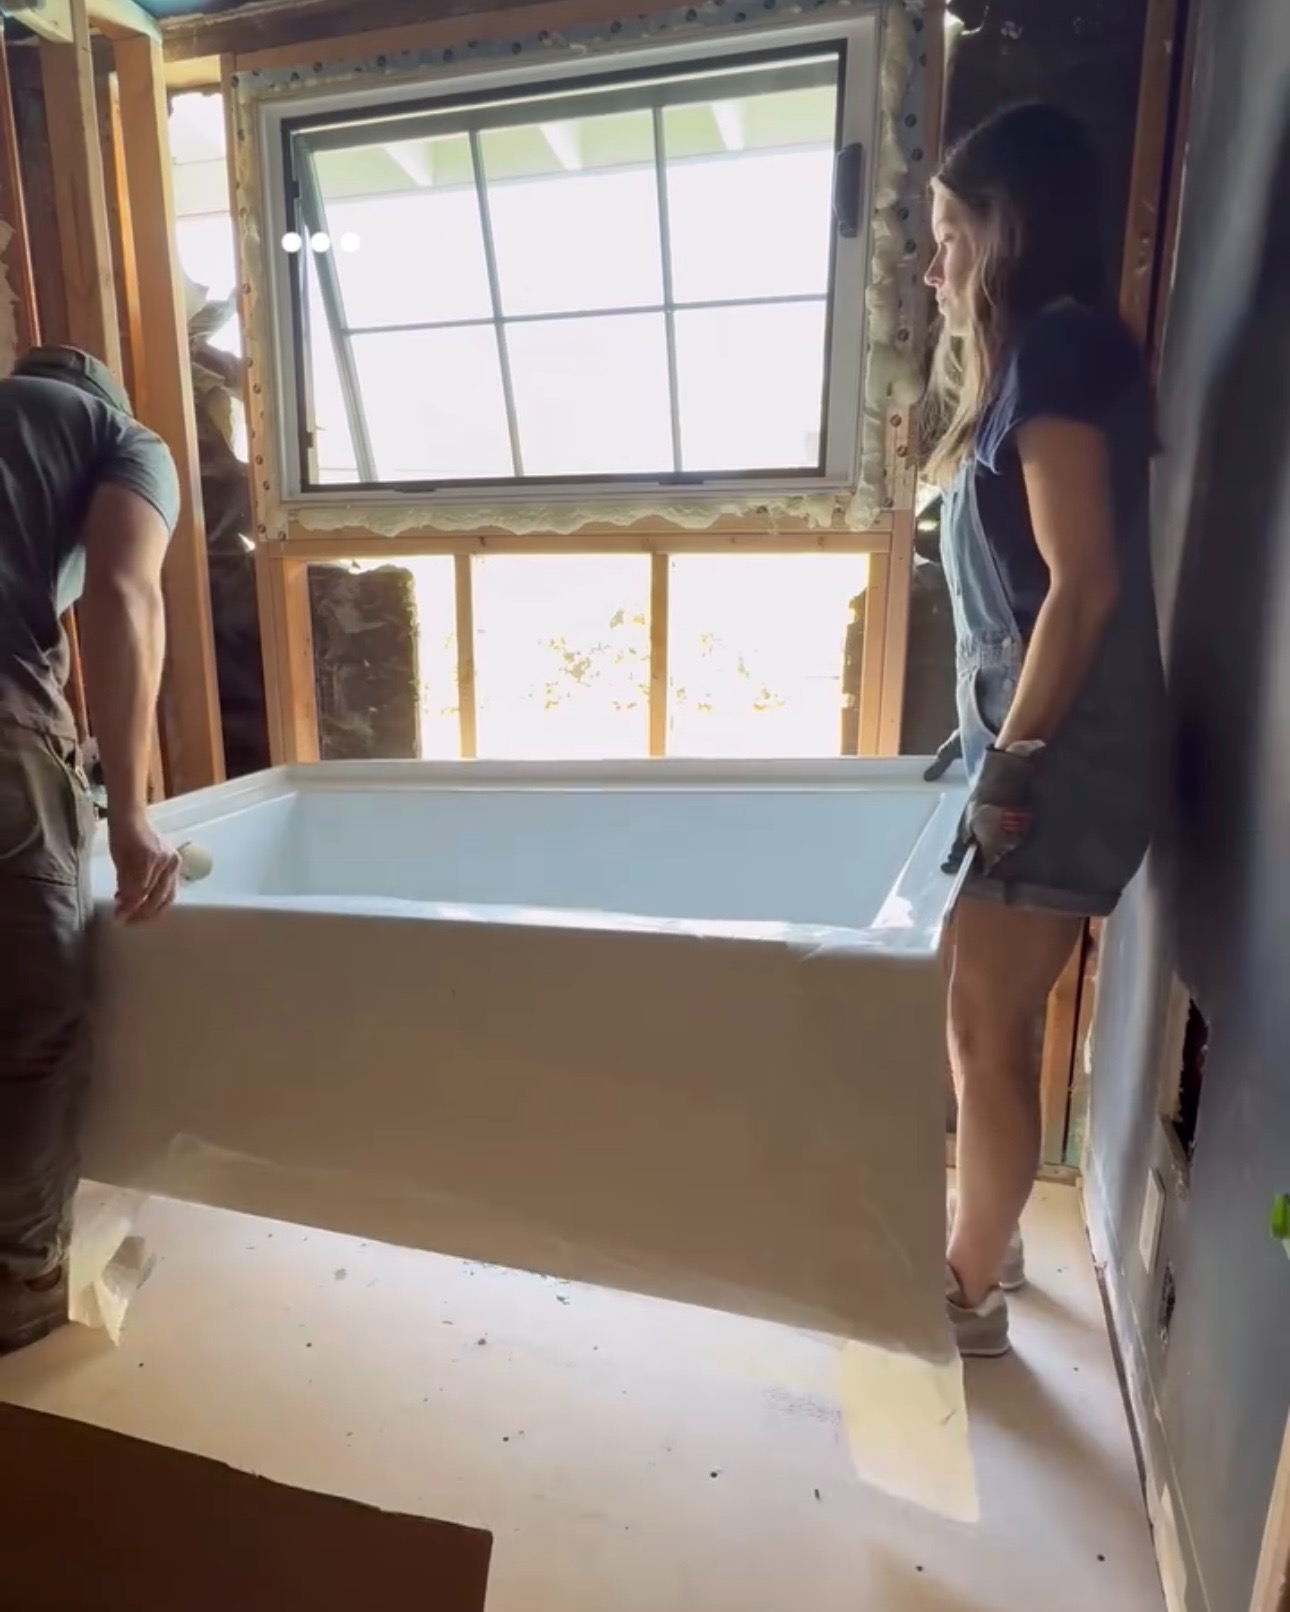
The next part I wasn’t too sure about. The tub in here was over 60 years old and was cast iron. I took a mallet to it and it reminded me a bit of a yucca stump. Many of you watching suggested hitting it from the middle rather than the sides. That definitely made it easier! It was so hard to get a good angle/stance because our ceiling was too low for a full swing. Jake took over the next day.
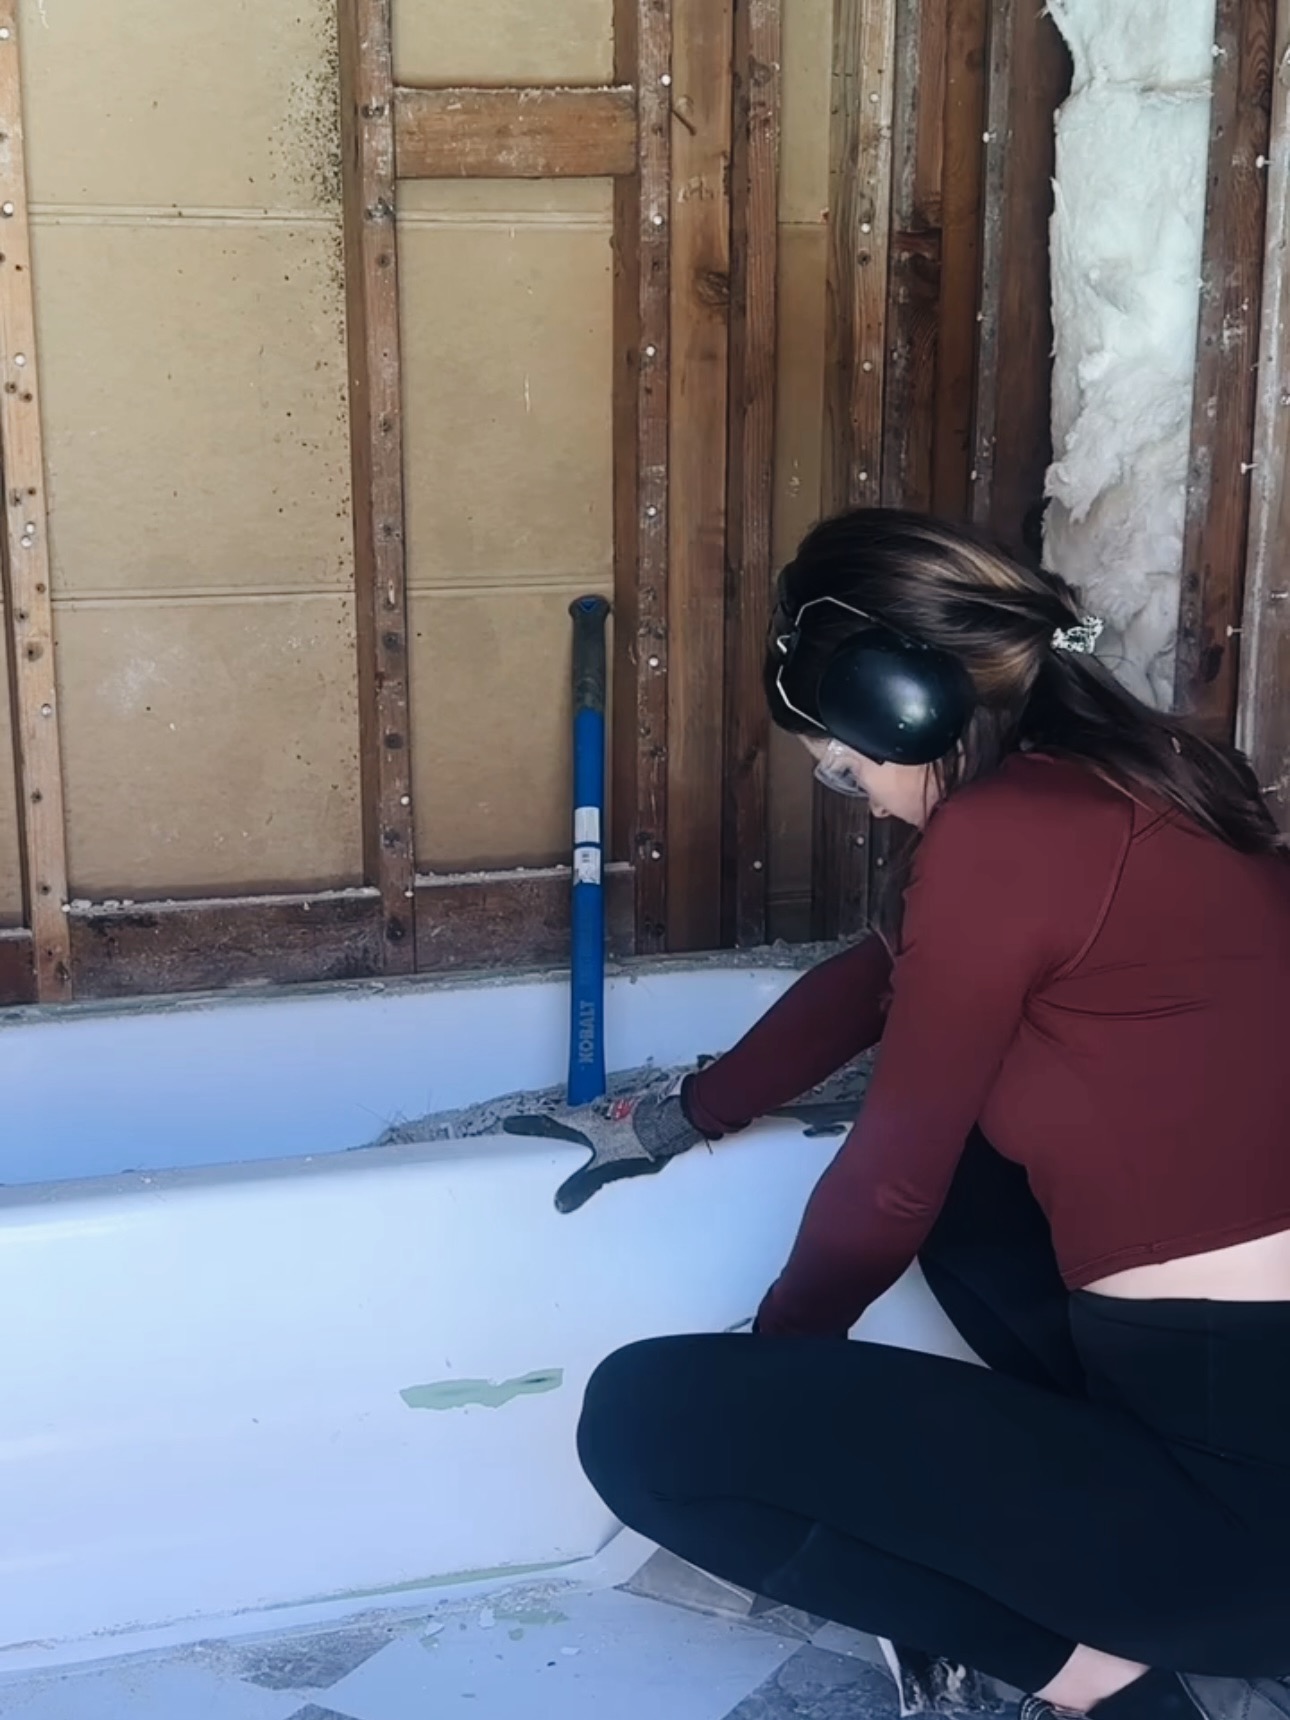
Everyone was asking if I found mold underneath everything. Honestly, I was expecting it. No mold. BUT I did find petrified 🥰 rats 🥰. I can’t believe when I was sitting in this tub having a relaxing night or bathing Charlie…there were rats underneath us. Awesome. Getting this tub out took way longer than we thought…but that’s how it goes! It felt so good to get it out.
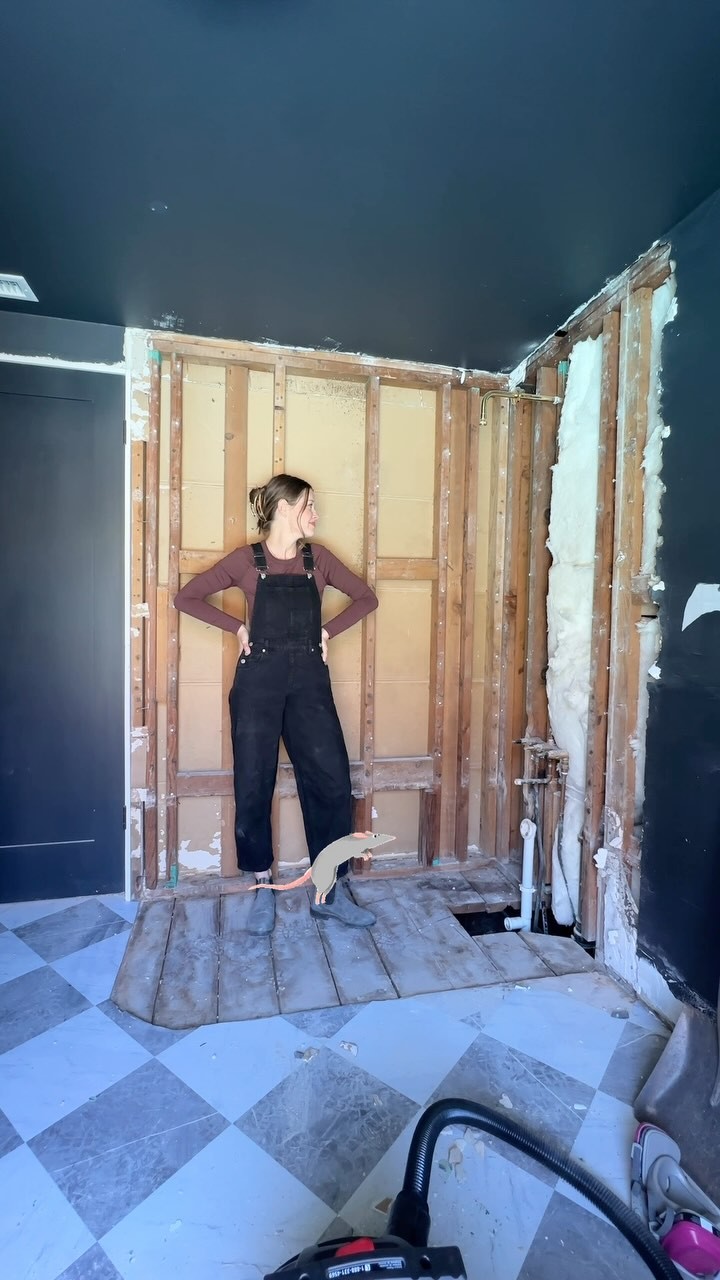
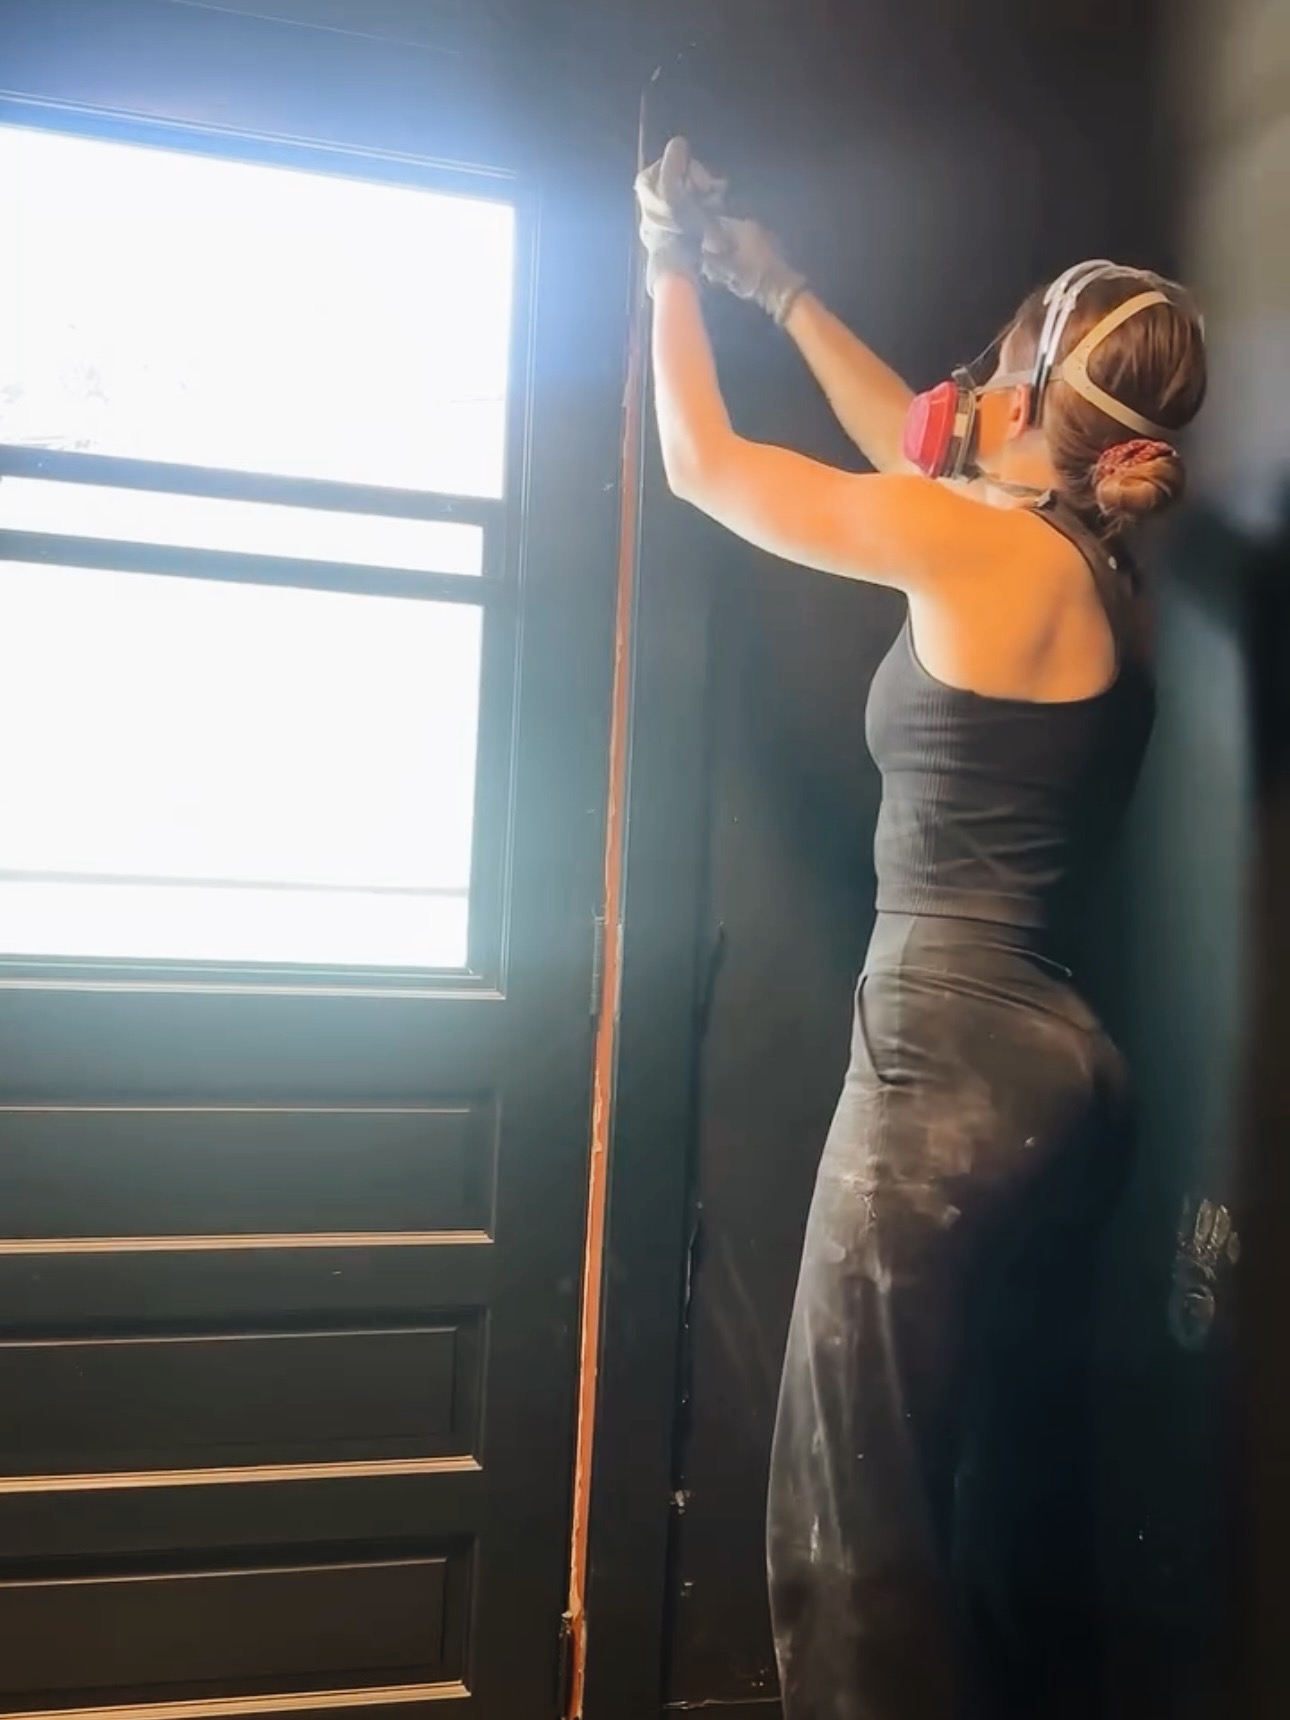
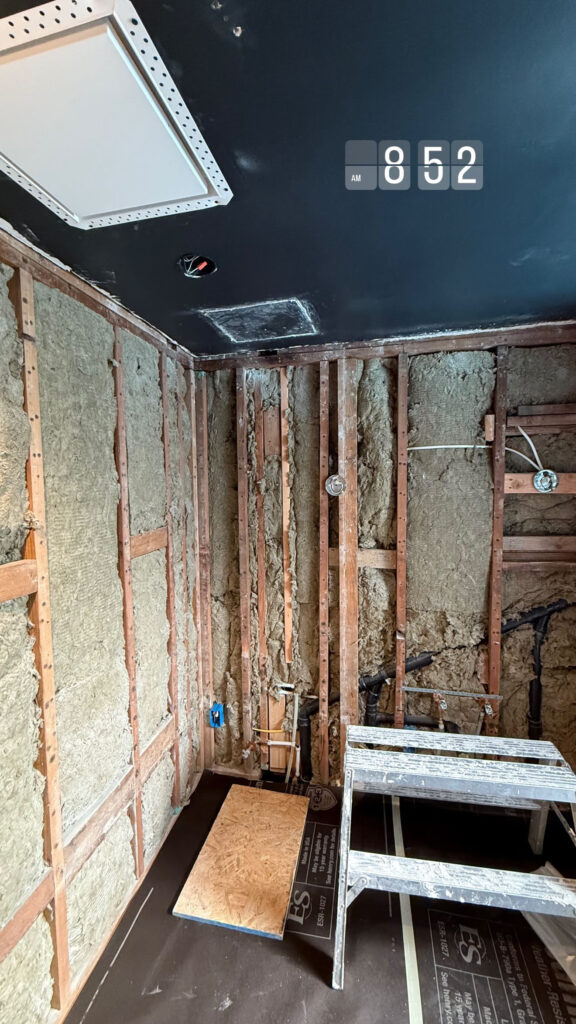
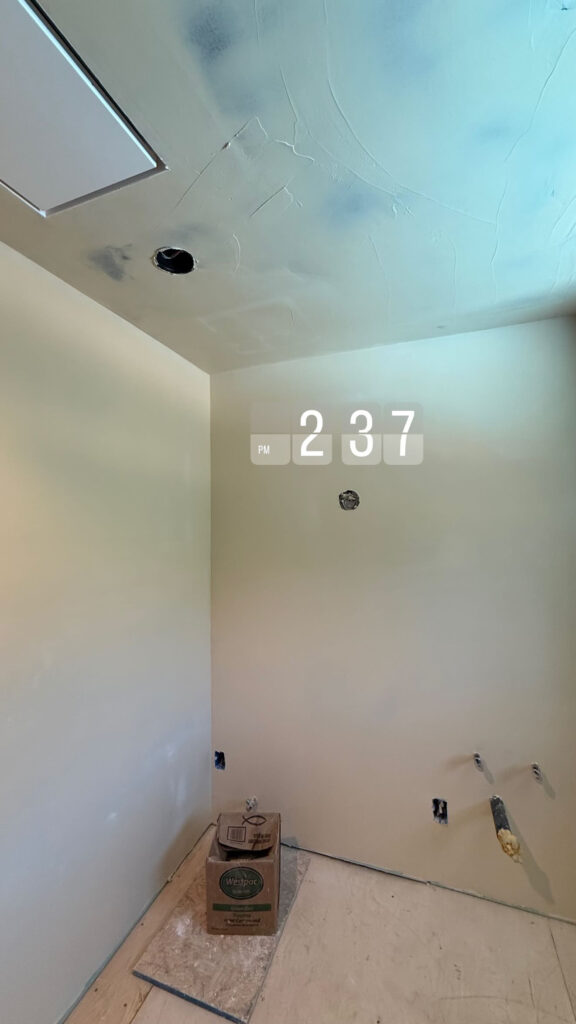
I had to remove an entire wall of drywall since we would be moving the shower. Every single nail/screw needed to be out of here before we could install anything new. This demo was no joke!
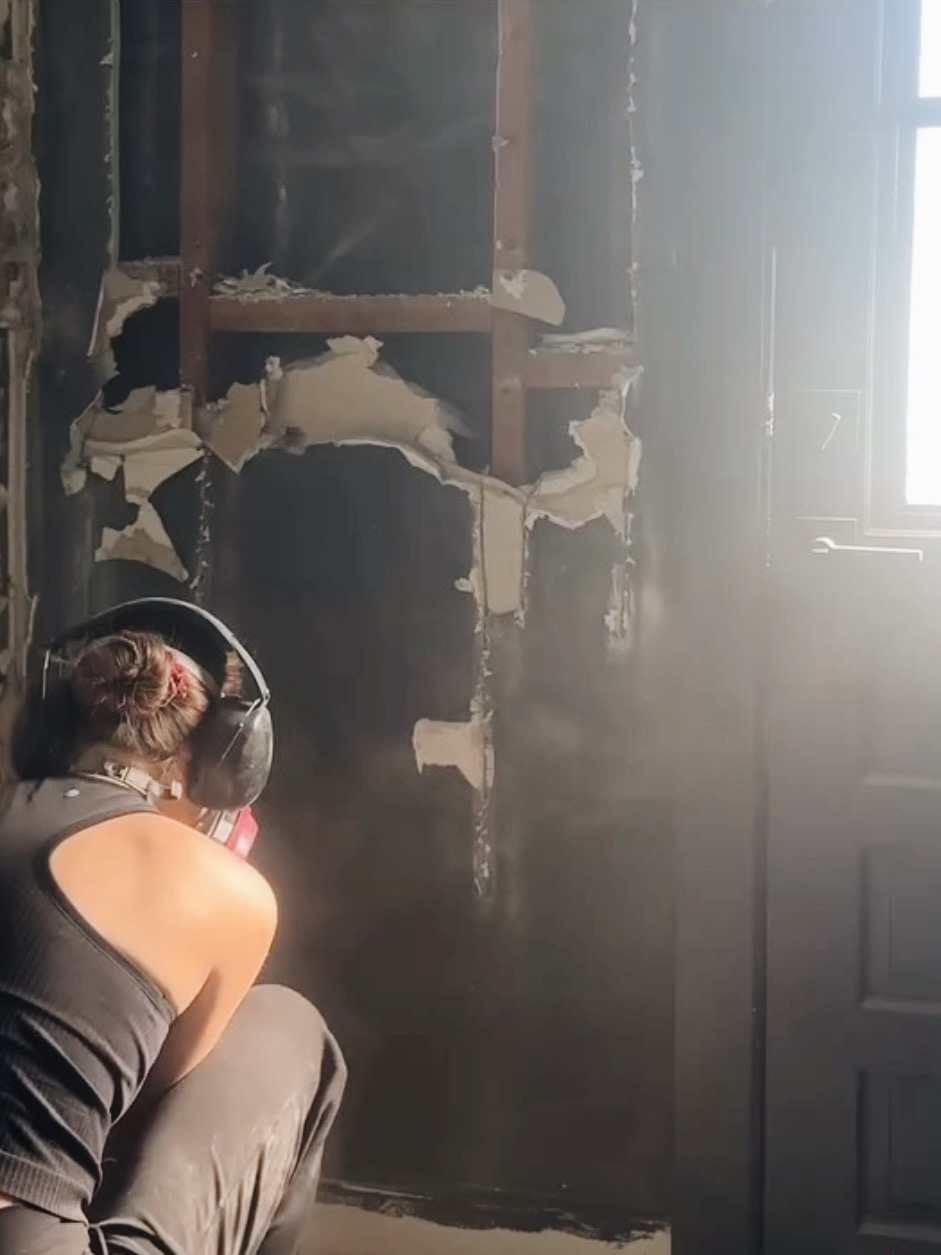
We also had to remove the floor. Jake wanted the plywood completely gone. After about 30 minutes of trying to remove it, I decided that if Jake wanted the subfloor gone, Jake could make the subfloor gone. So I handed the reins to him. We did find some water damage underneath the subfloor so it was a good call to remove the plywood.
Plumbing
We got a few quotes for plumbing in here. One was for about $4,000, another for $7,500, and another for $2,100. After we chose our plumber and had all the work done, we installed our new tub and toilet. The layout flowed so much better already after just that swap. There was a main line leak that set us back a few weeks. We had the toilet and tub swapped & the layout flowed so much better already!
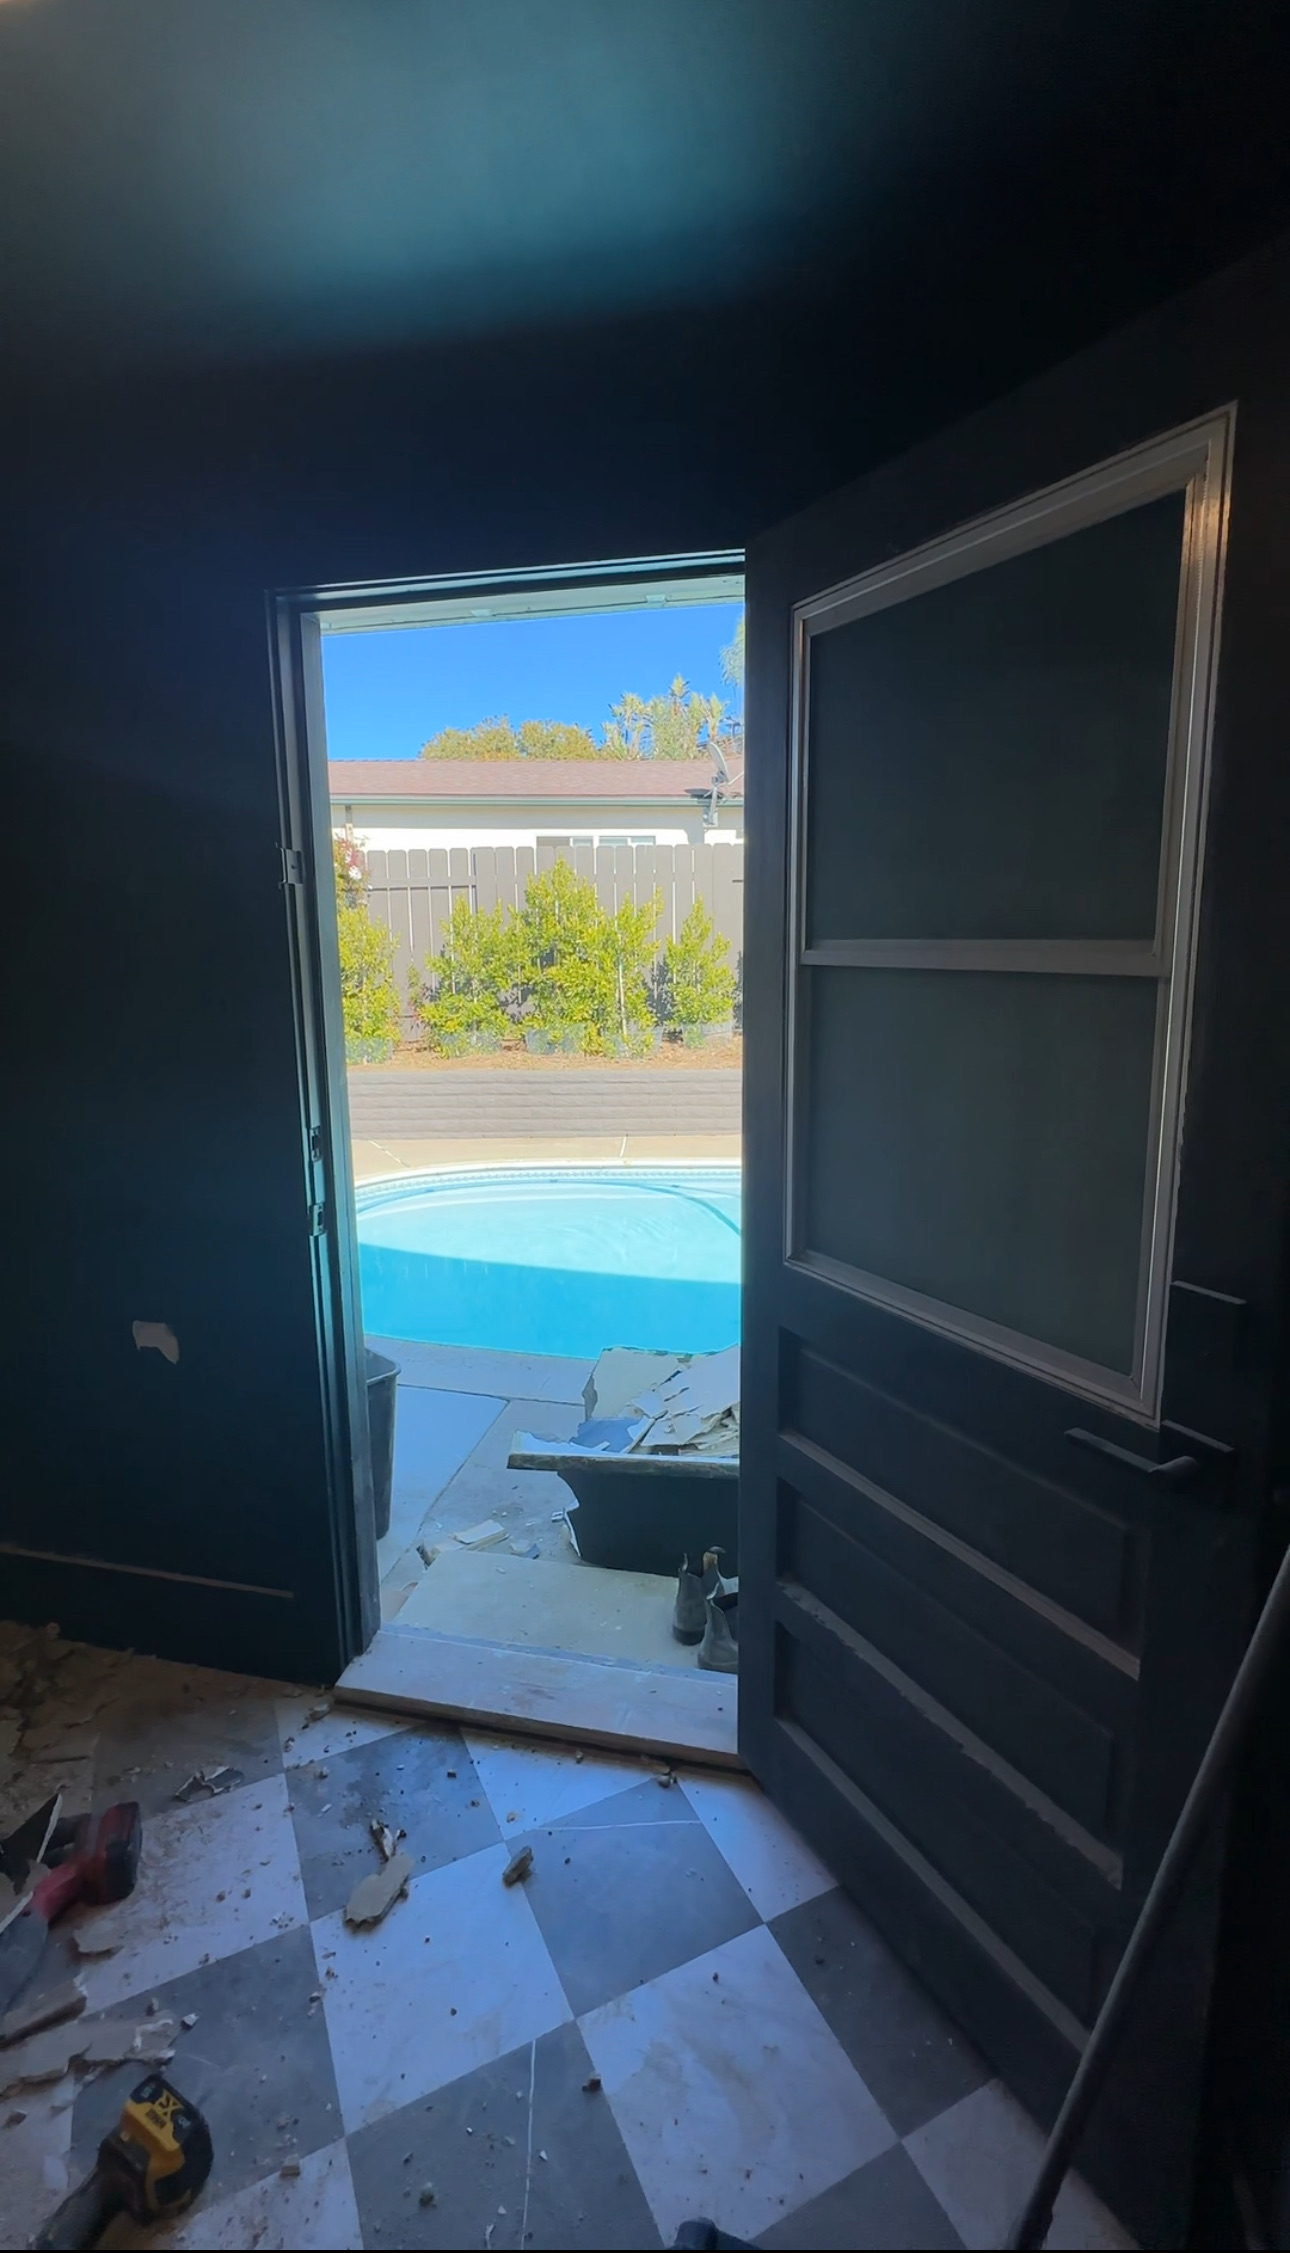
Exterior Door
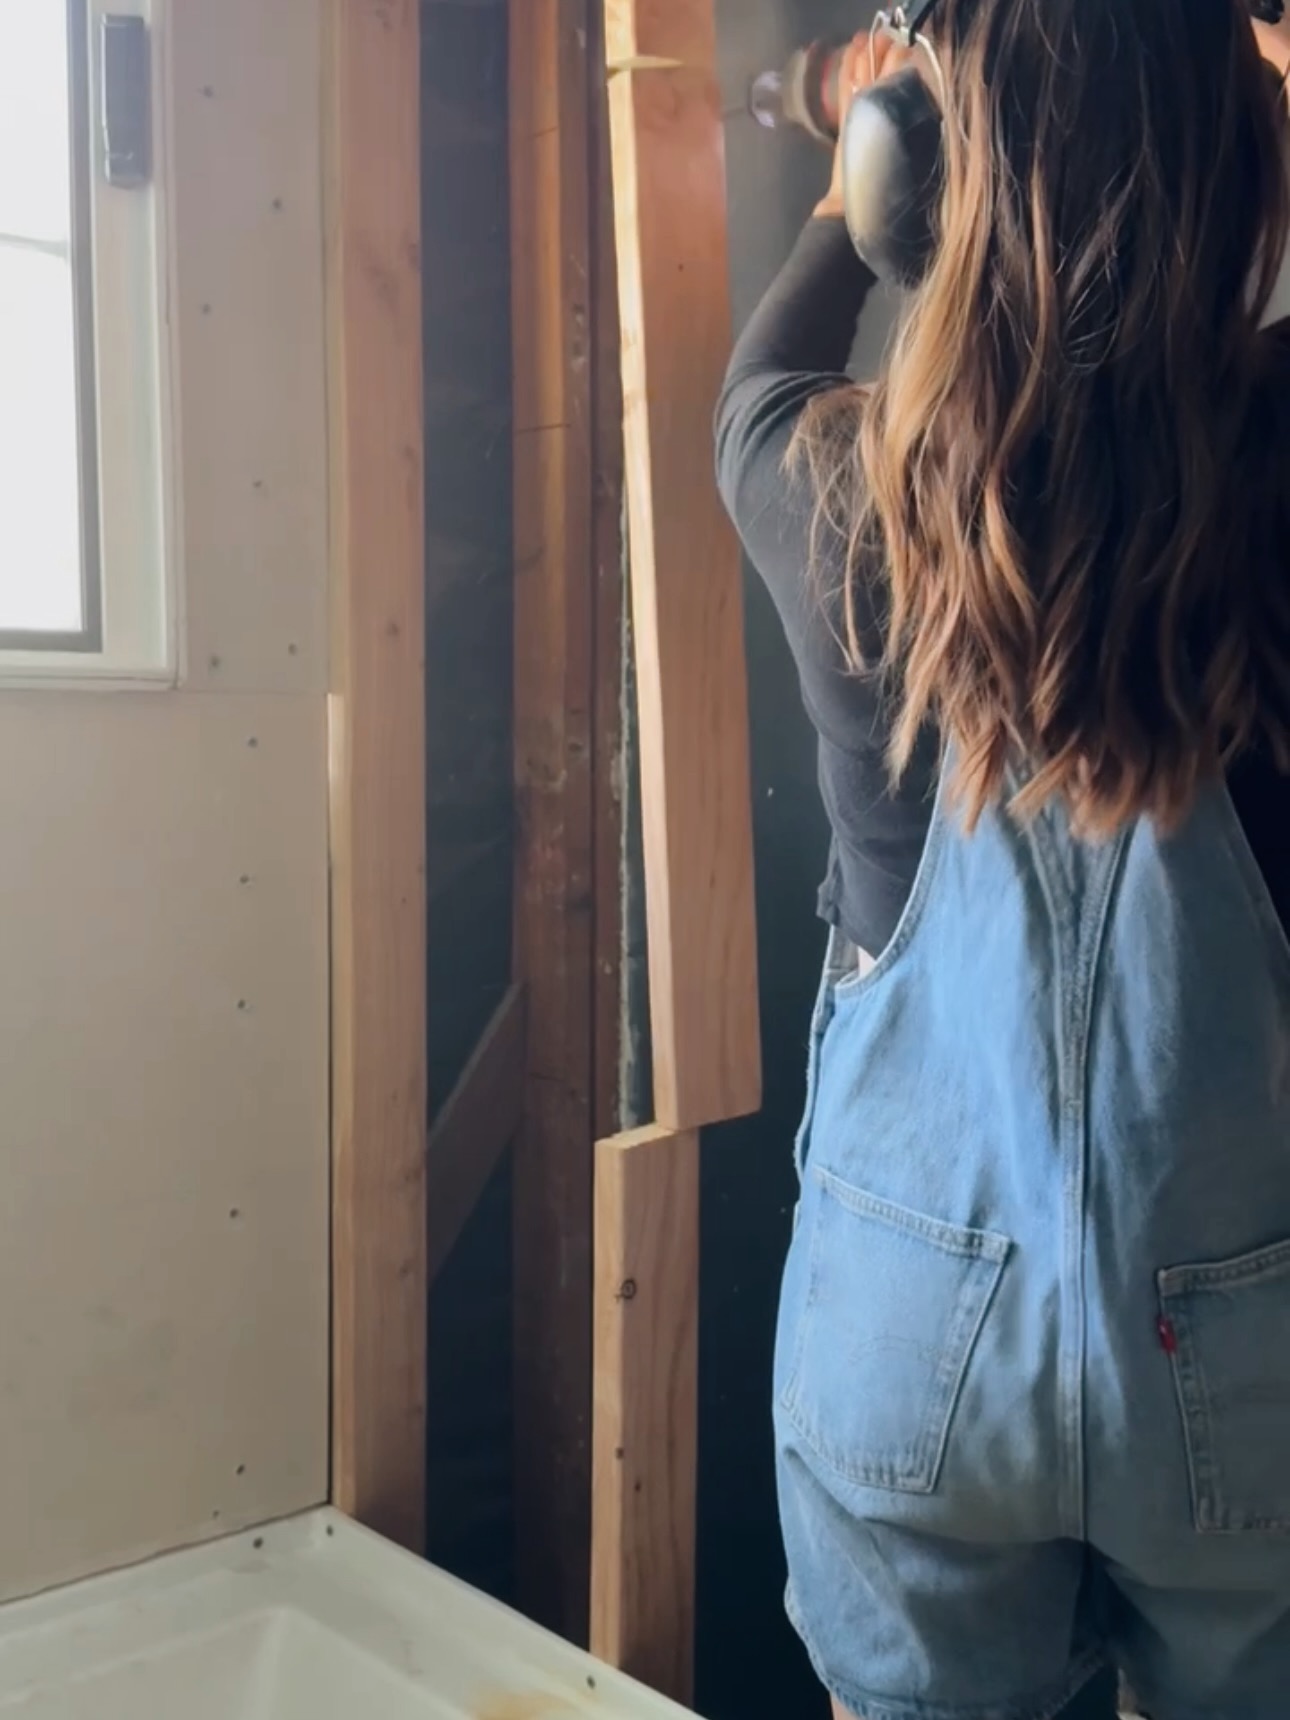
Next, we had to close up the exterior door and add a nice little shower window. The door lead straight to the pool and with a toddler, I don’t want anyone having access to the pool without supervision! The shower would go here instead.
I went to a warehouse FULL of vintage windows and doors. It was an absolute dream! Lucky me, I found EXACTLY what I wanted and exactly the size I need! It would be the first “new” window our home had seen in 65 years!
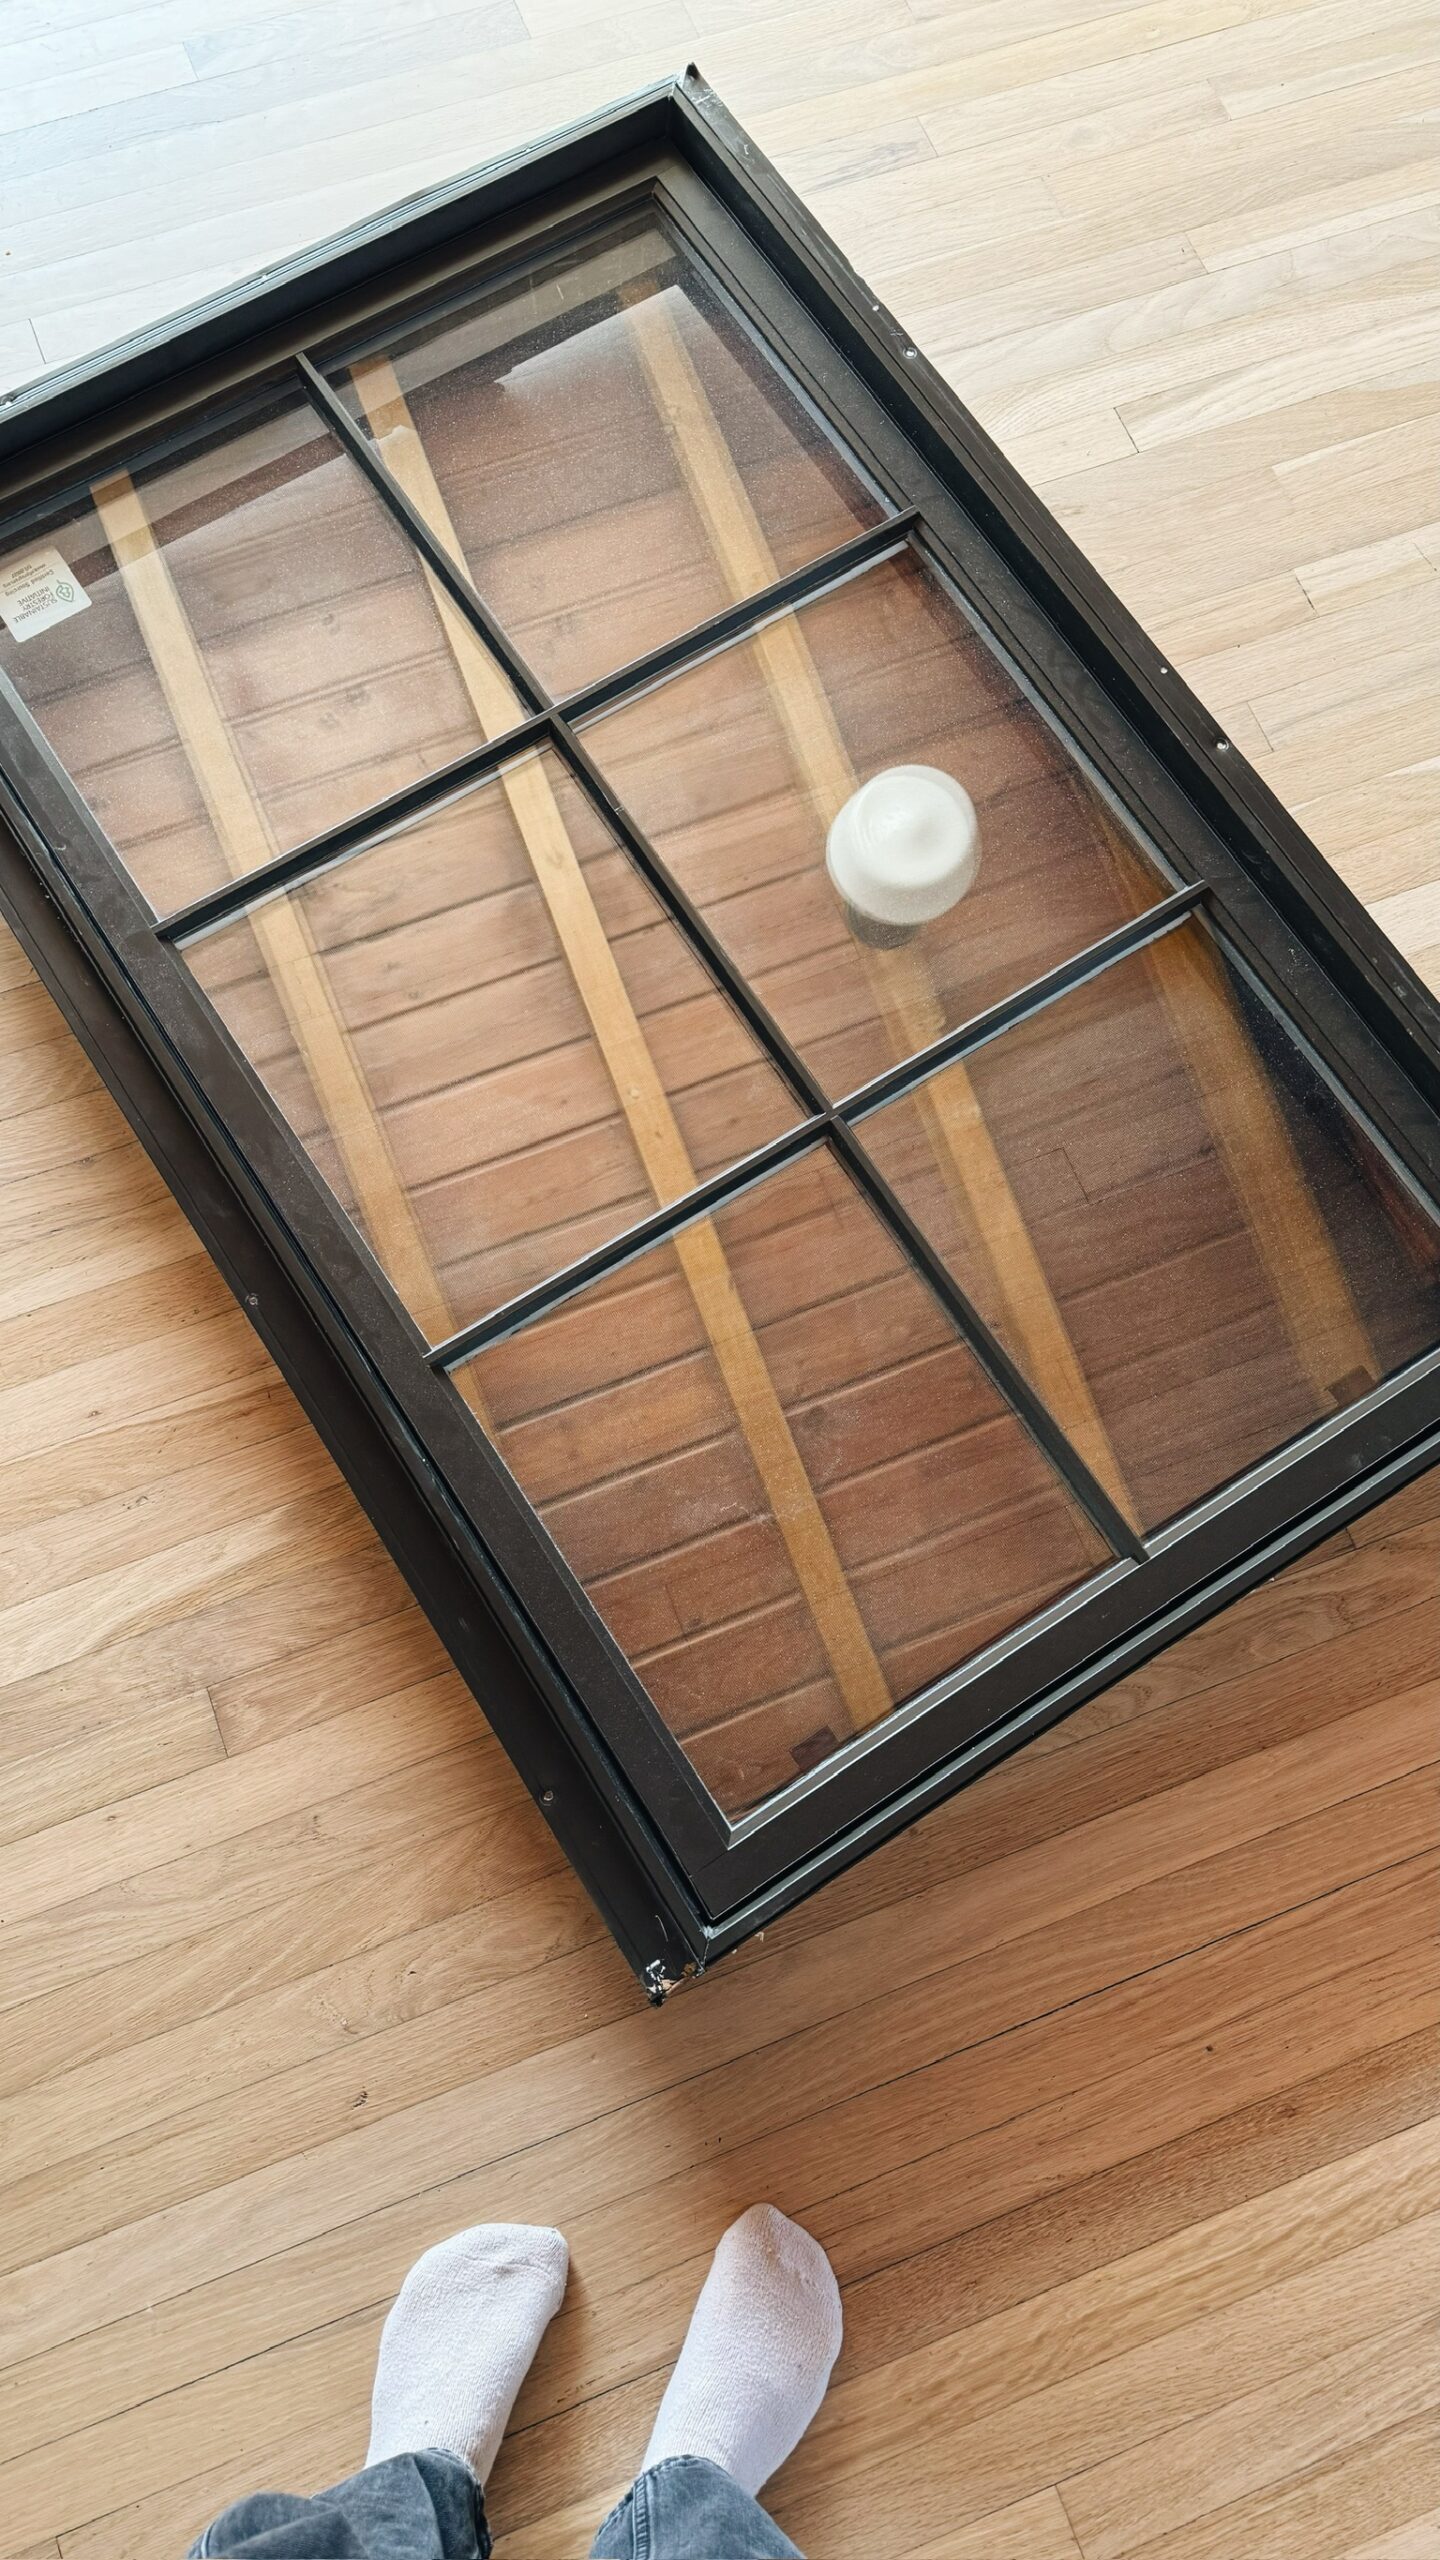
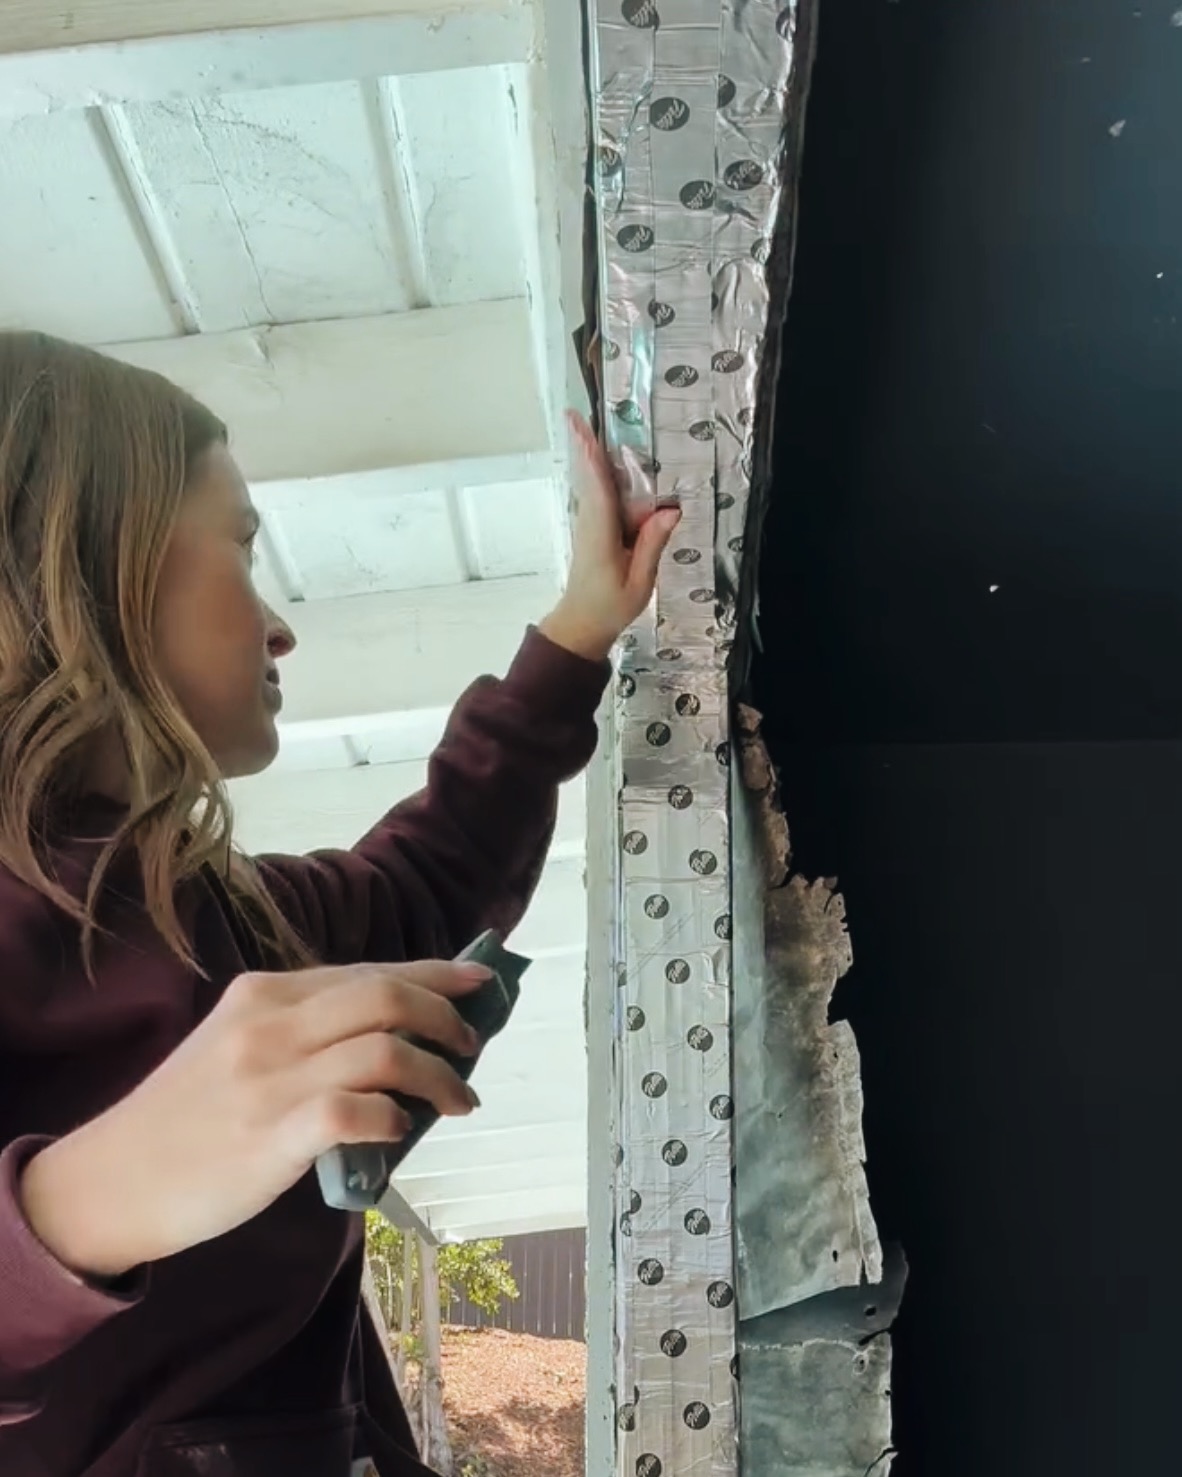
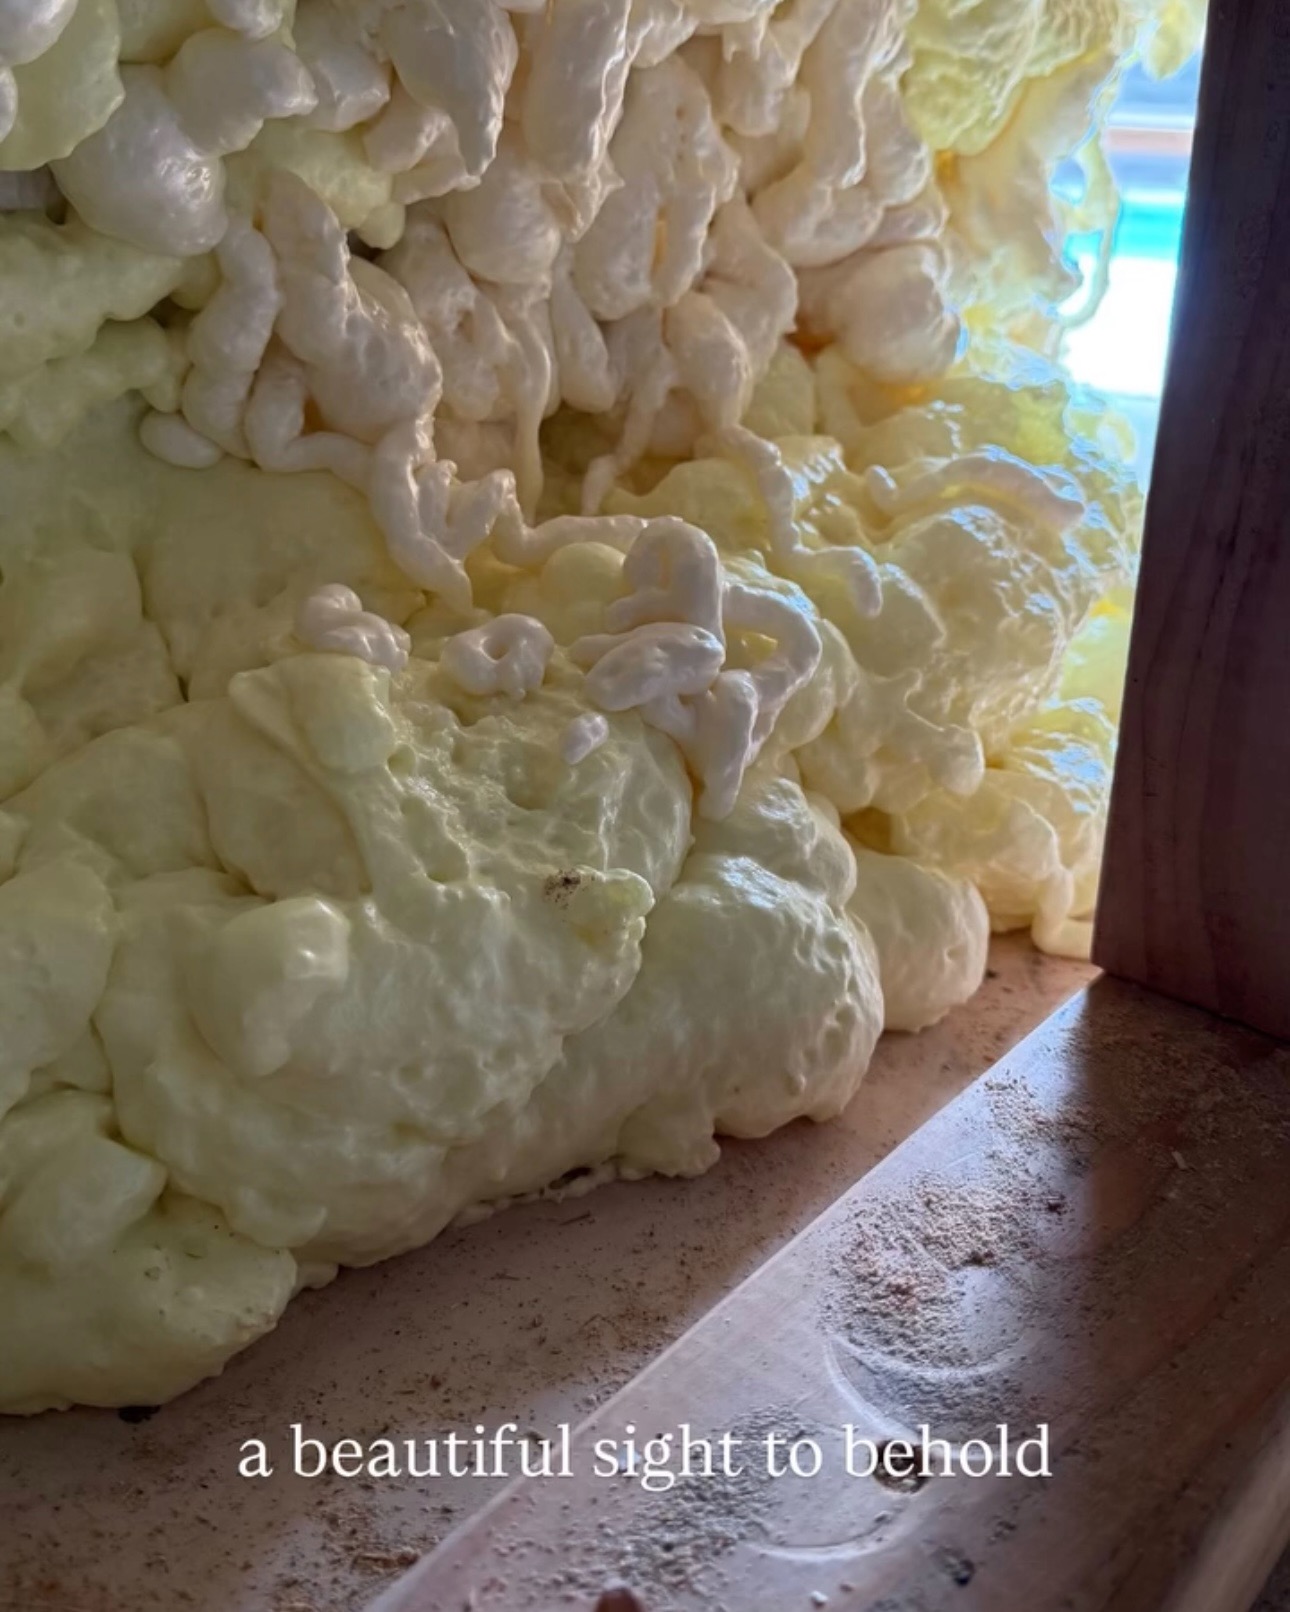
We first had to remove the door and all the stucco on the exterior wall. Then, we built a frame for the window out of 2×4’s. Then, I waterproofed the 2×4’s. I went a bit overboard, but I’d rather be safe than sorry.

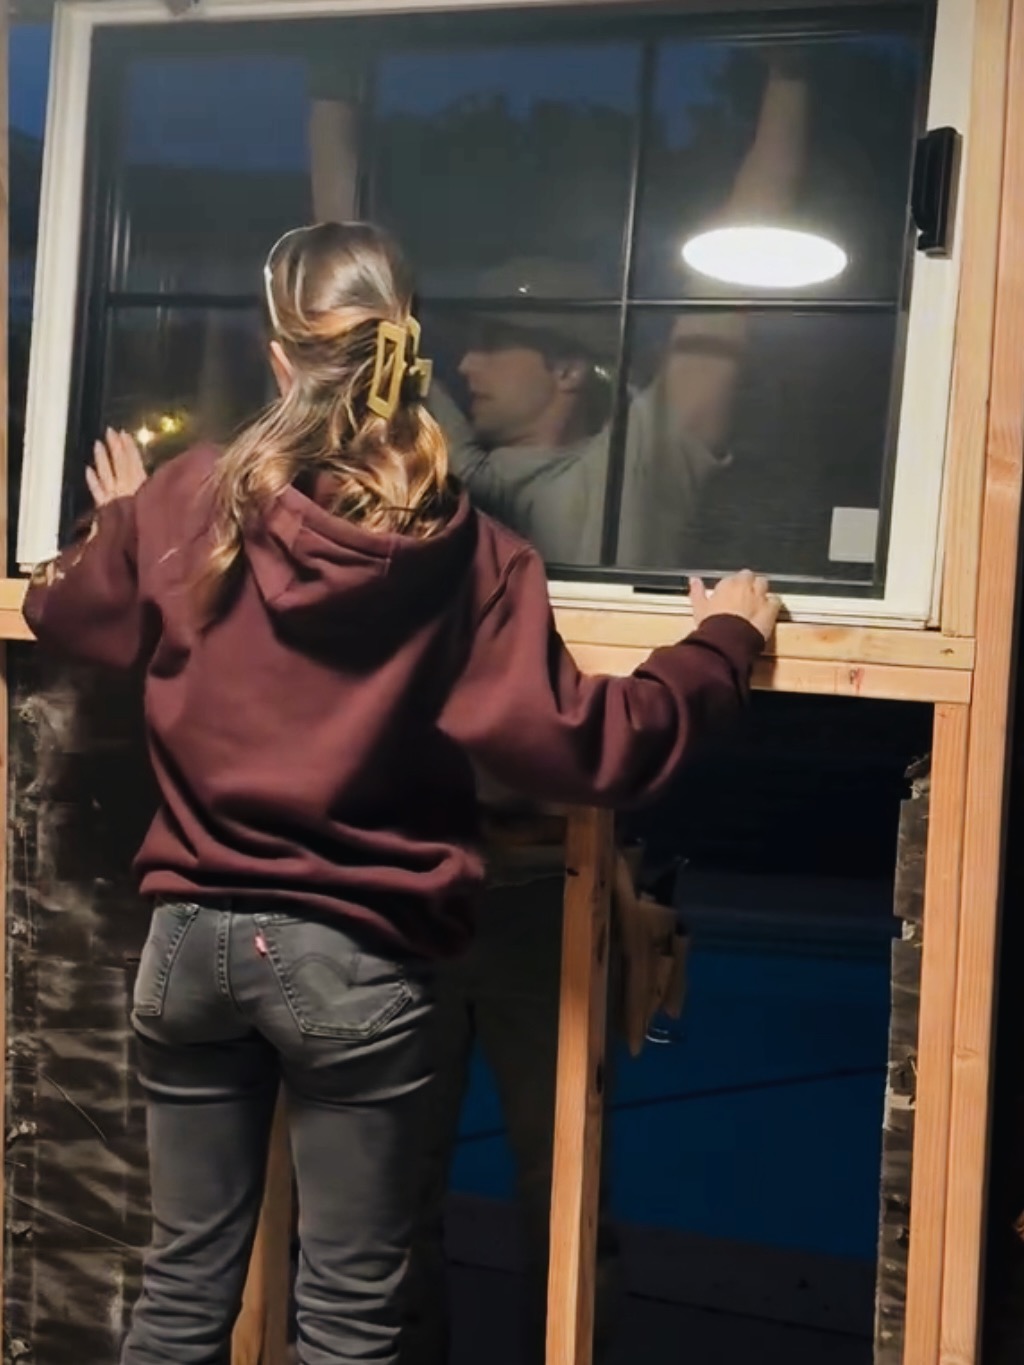
We hit a little bump in the road and somehow measured completely wrong? We had to move the window over 3 inches which took a long time and was frustrating but so worth it.
Bathtub & Shower
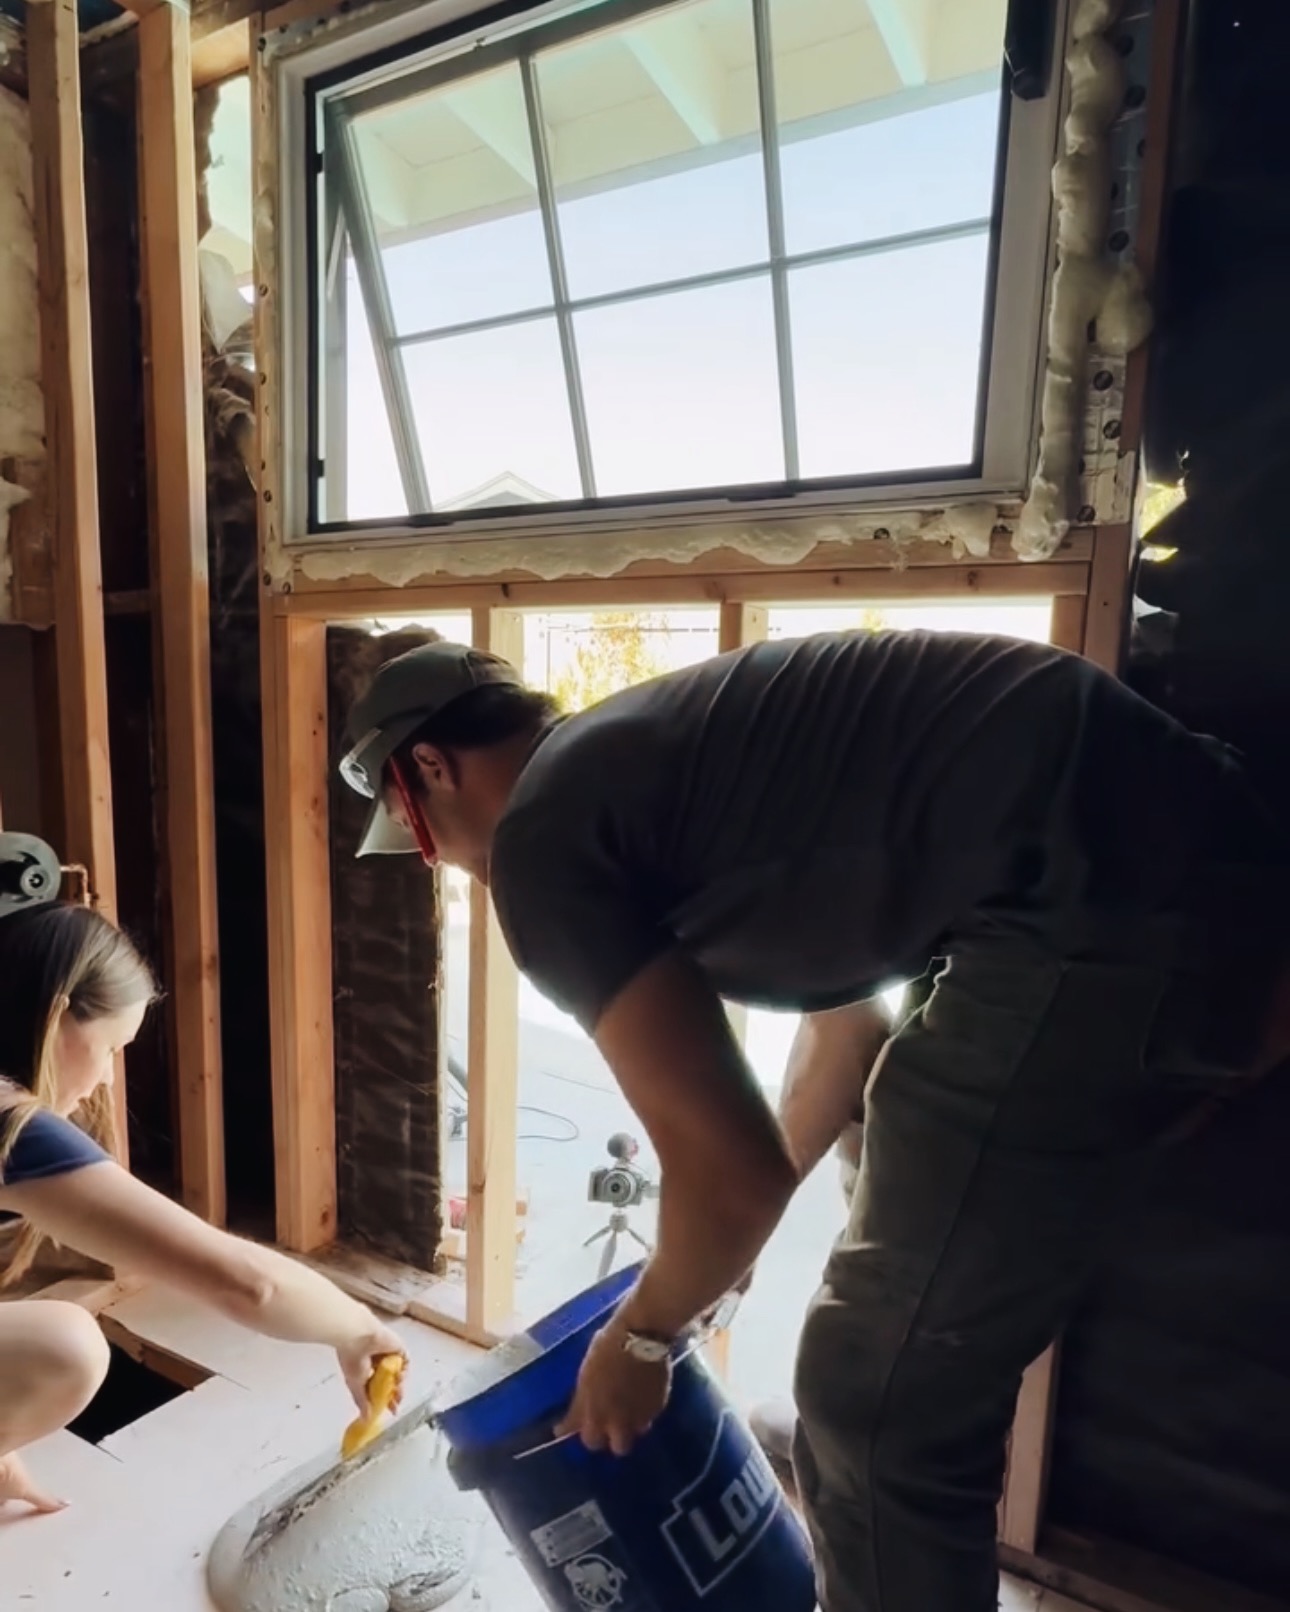
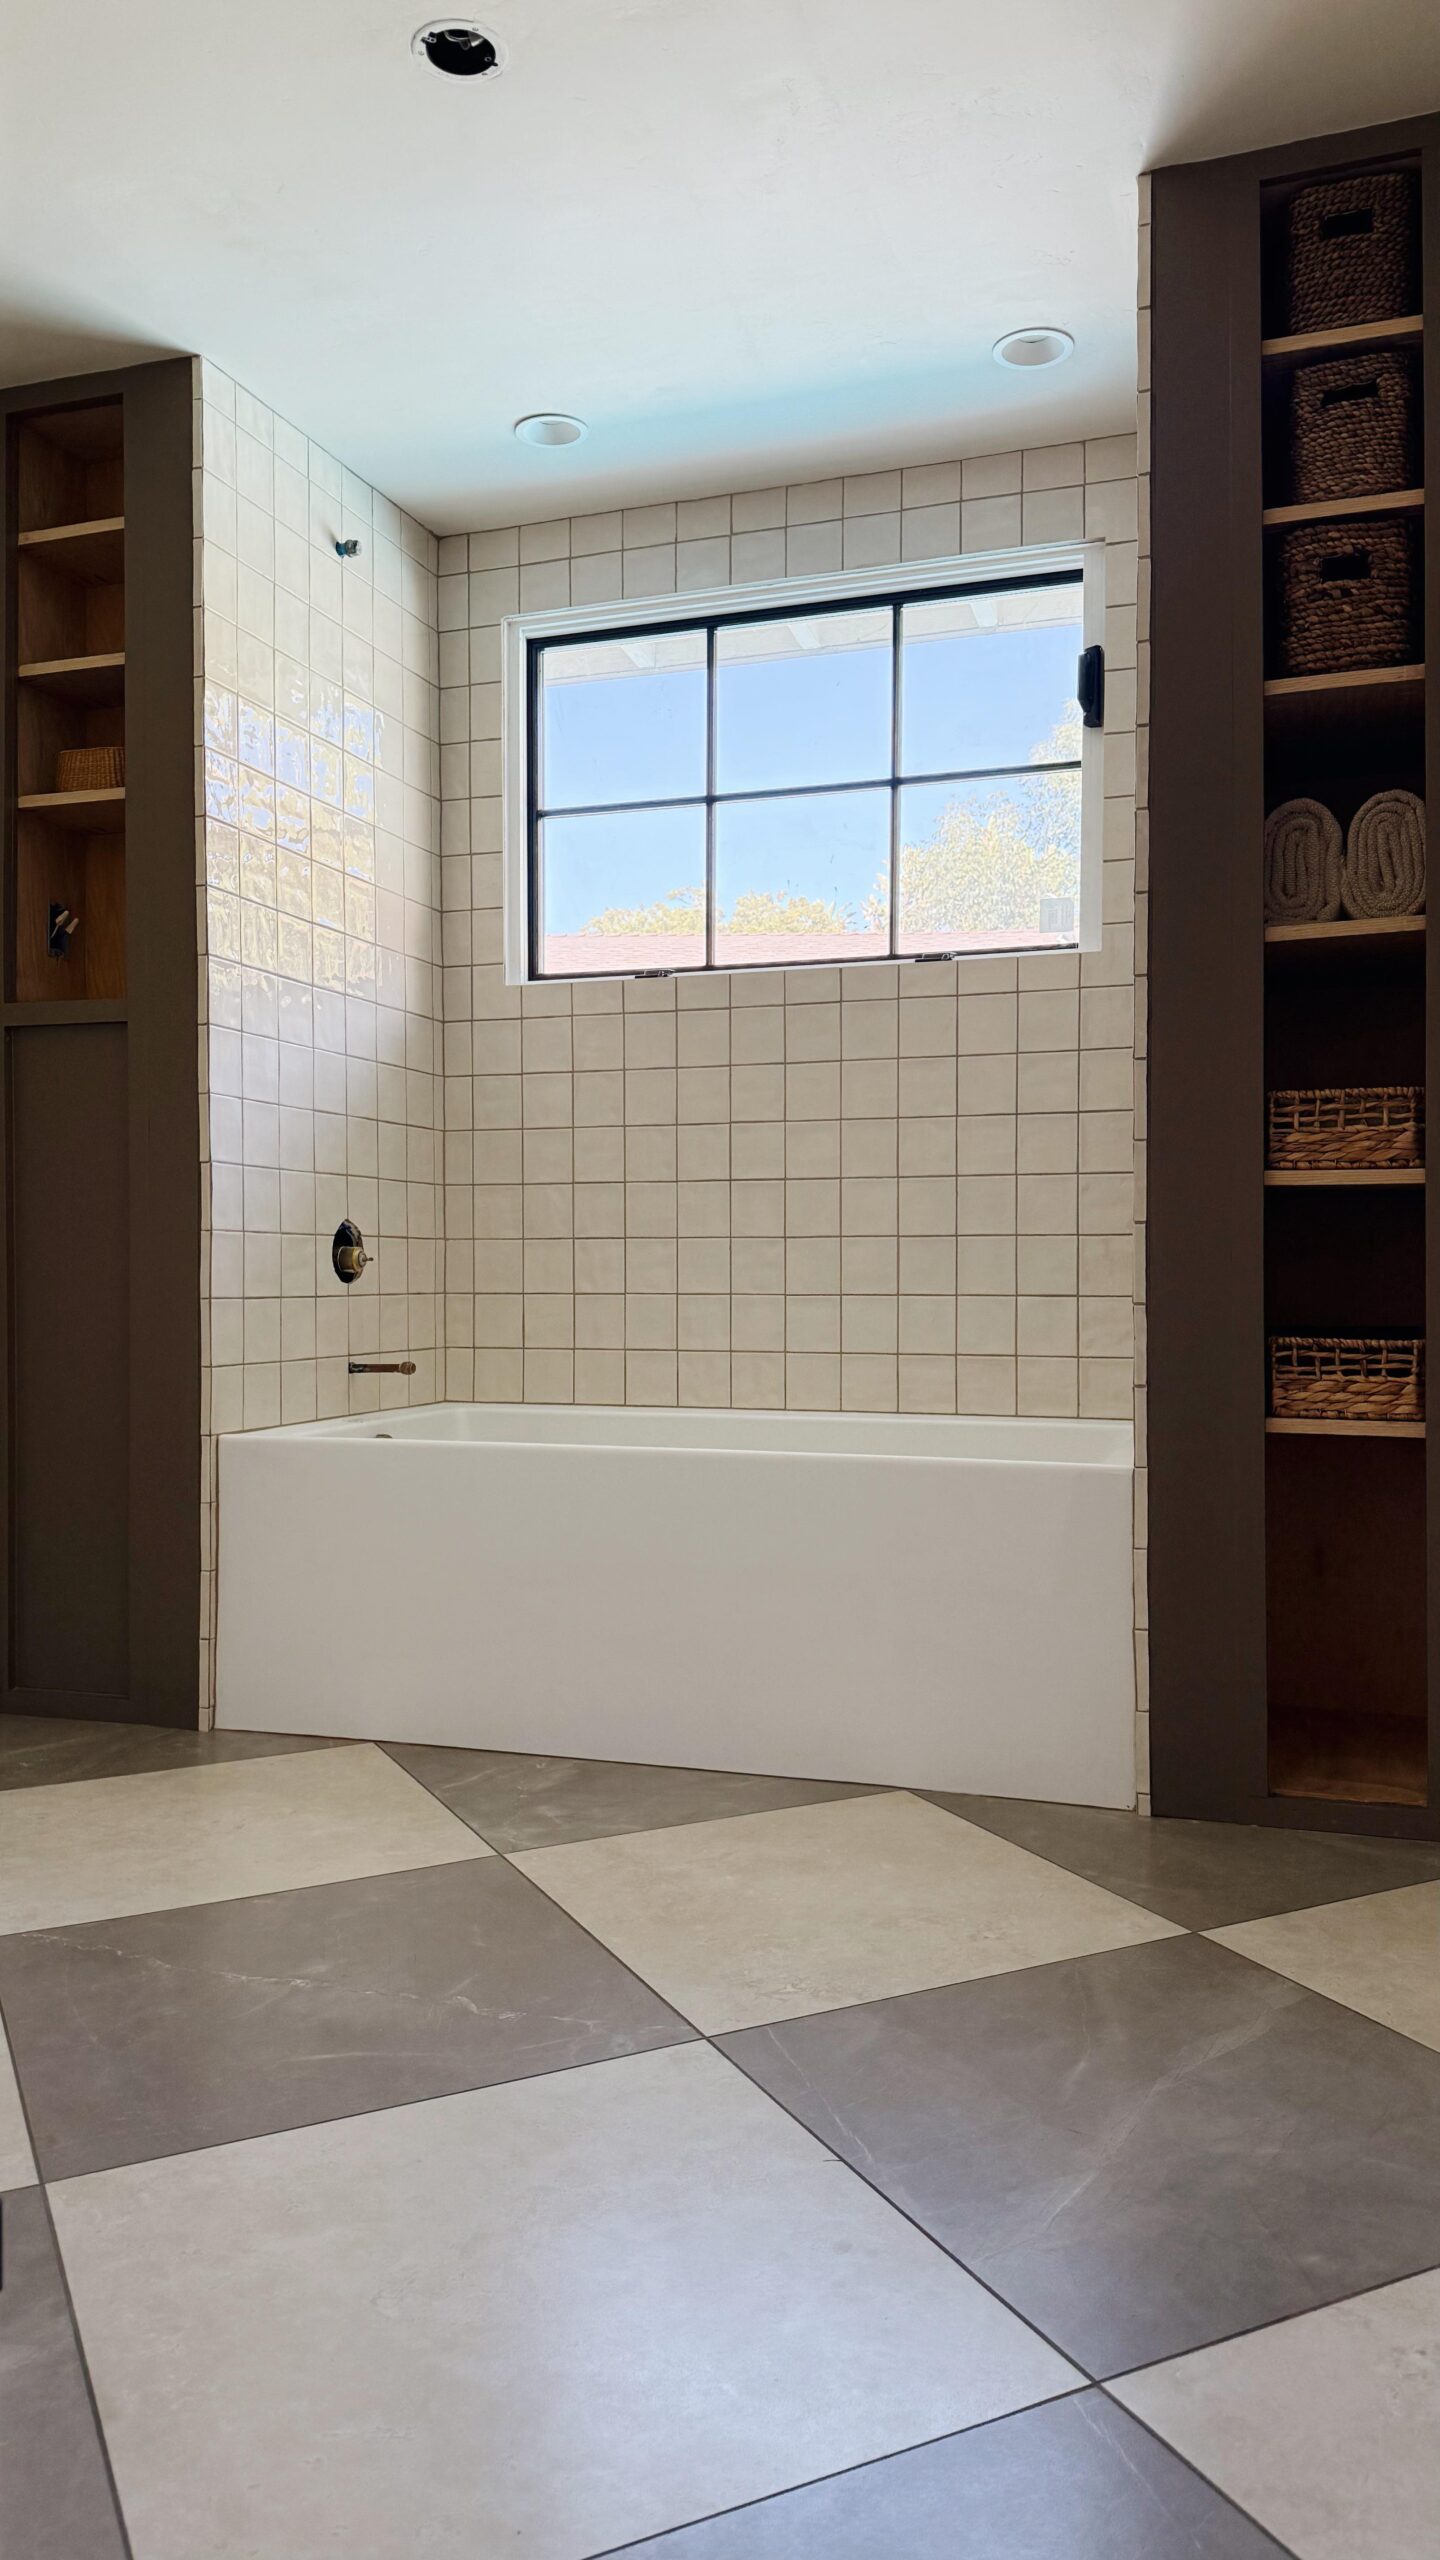
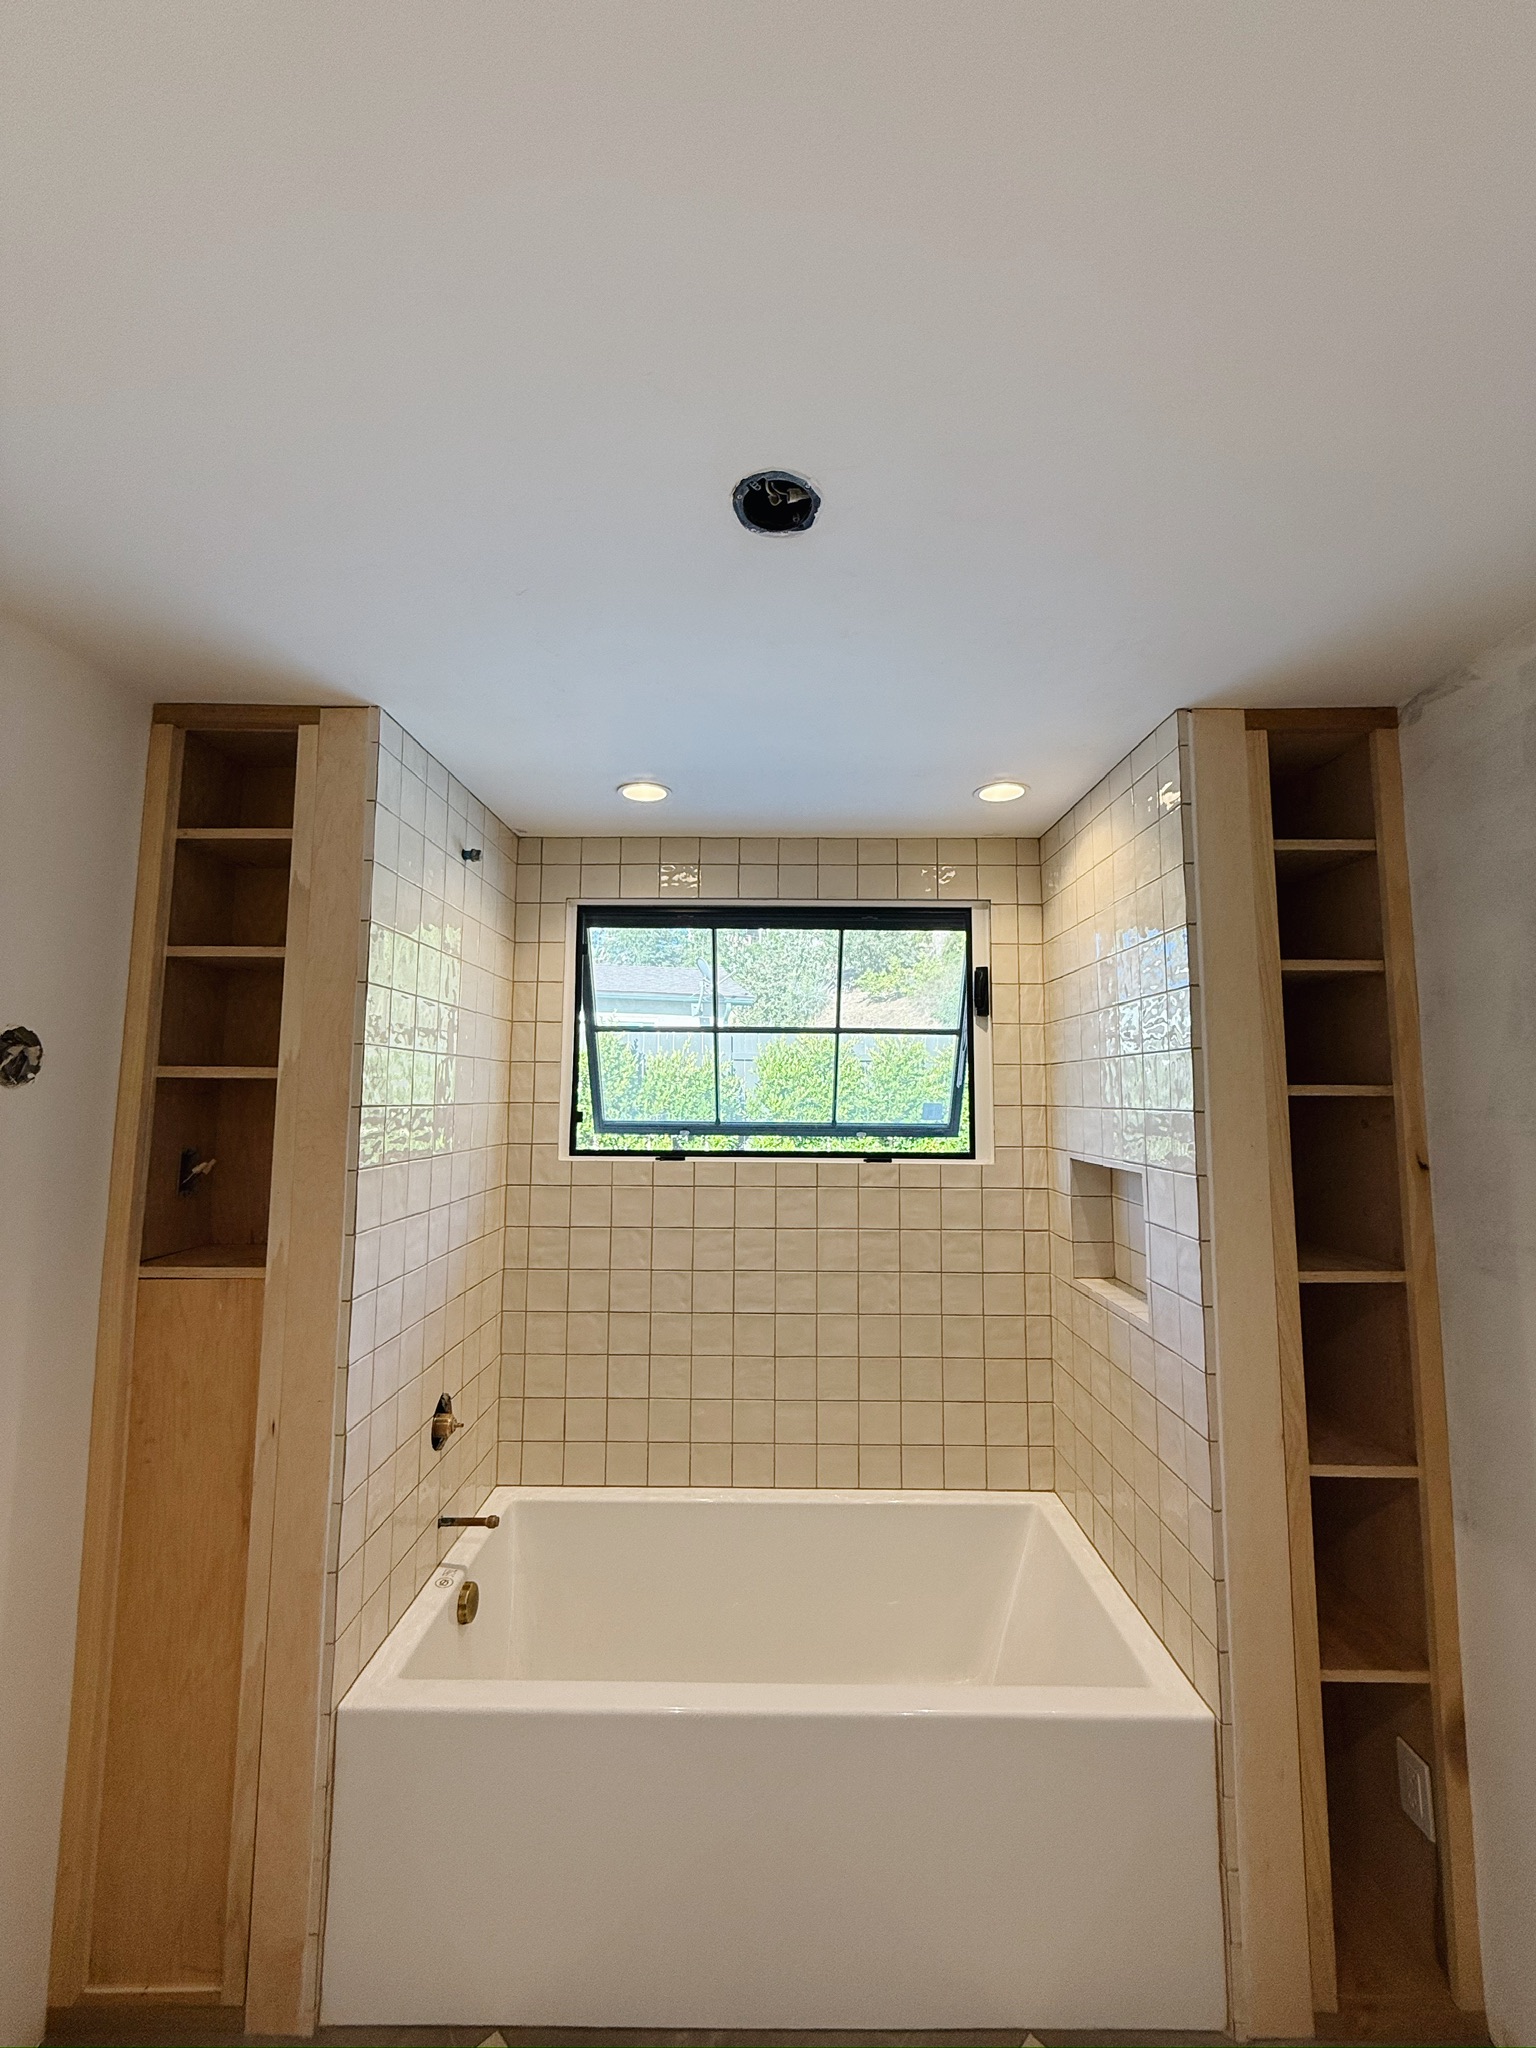
For bathtub installation we set it in a 2″ thick bed of mortar and then screwed it into the walls. We went with the Sitka Acrylic Alcove tub from Signature Hardware. Then we installed some wall frames I made out of 2×4’s so that the tub would look inset. Later we realized we were supposed to set the bathtub in a frame. It felt important and thorough to not skip this step even though we were going out of order. We also used a foam gun to insulate the tub!
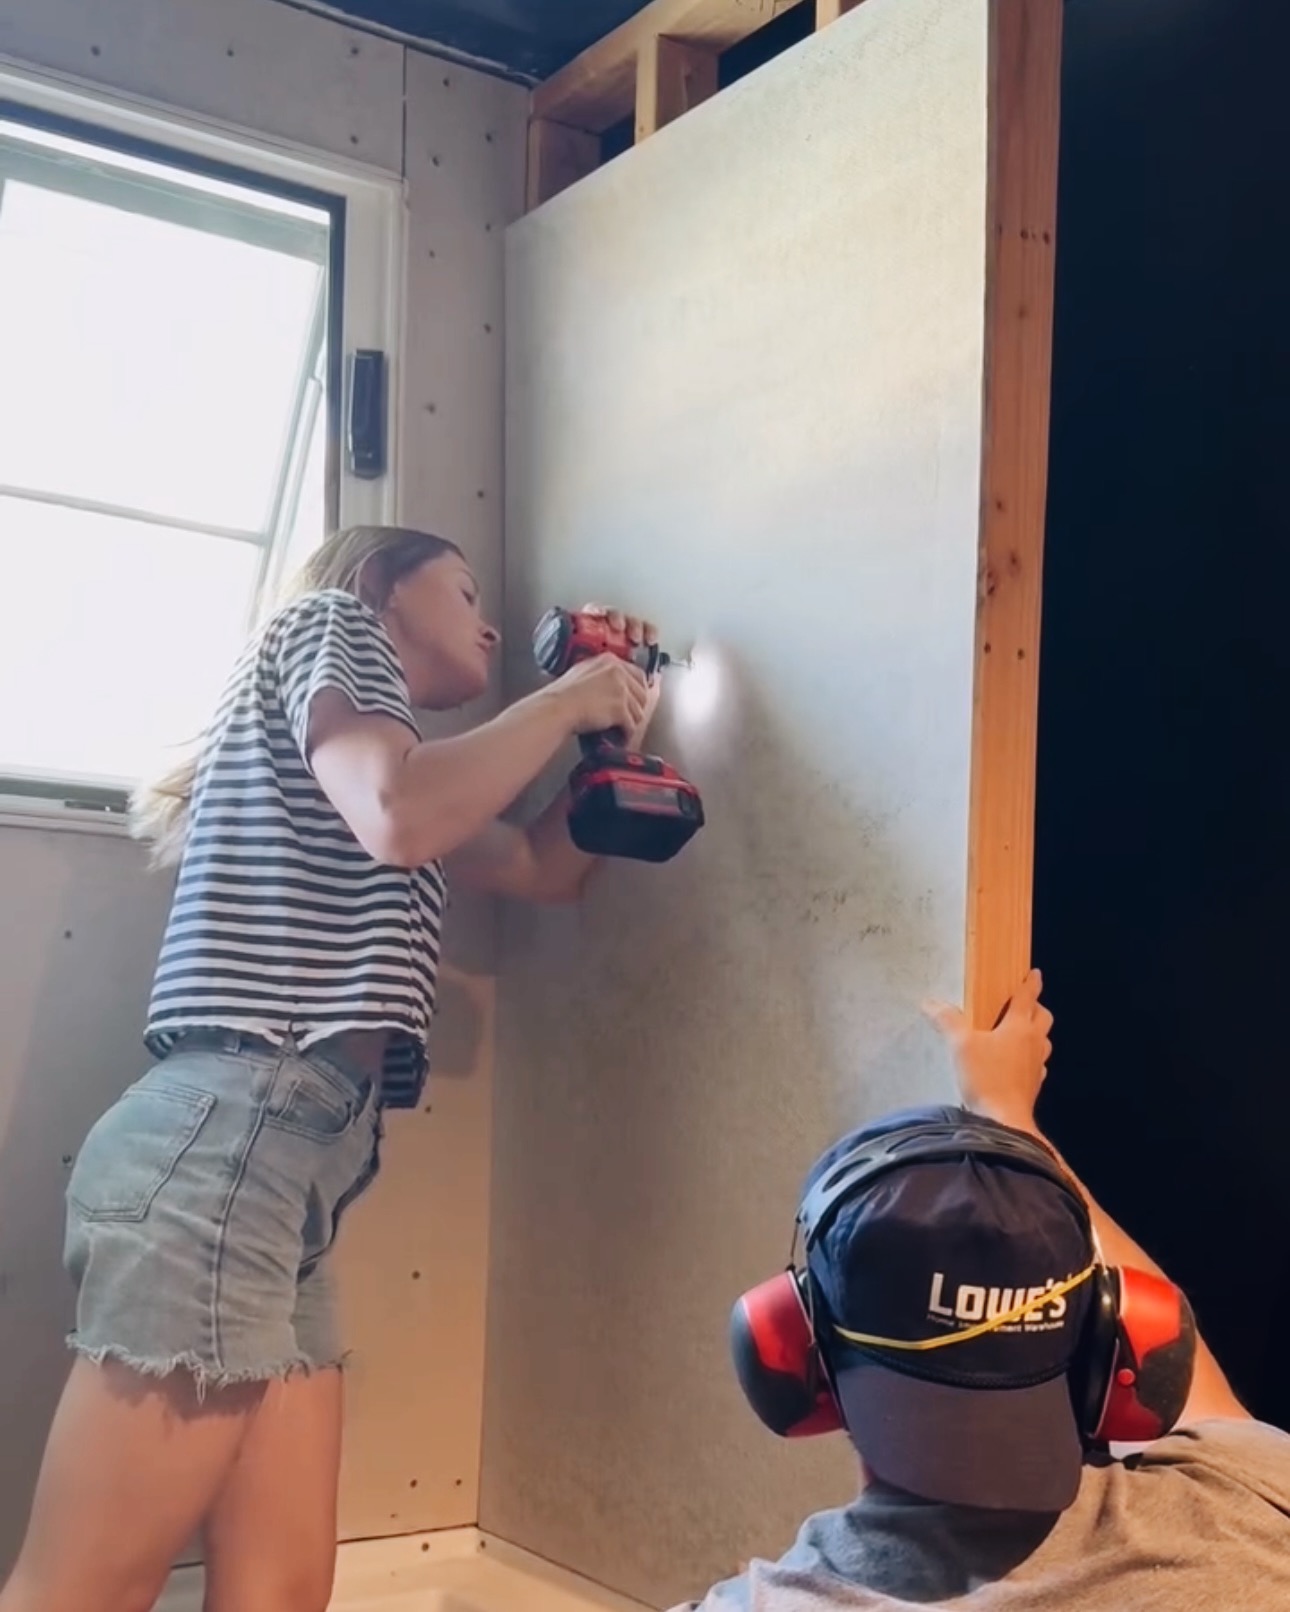
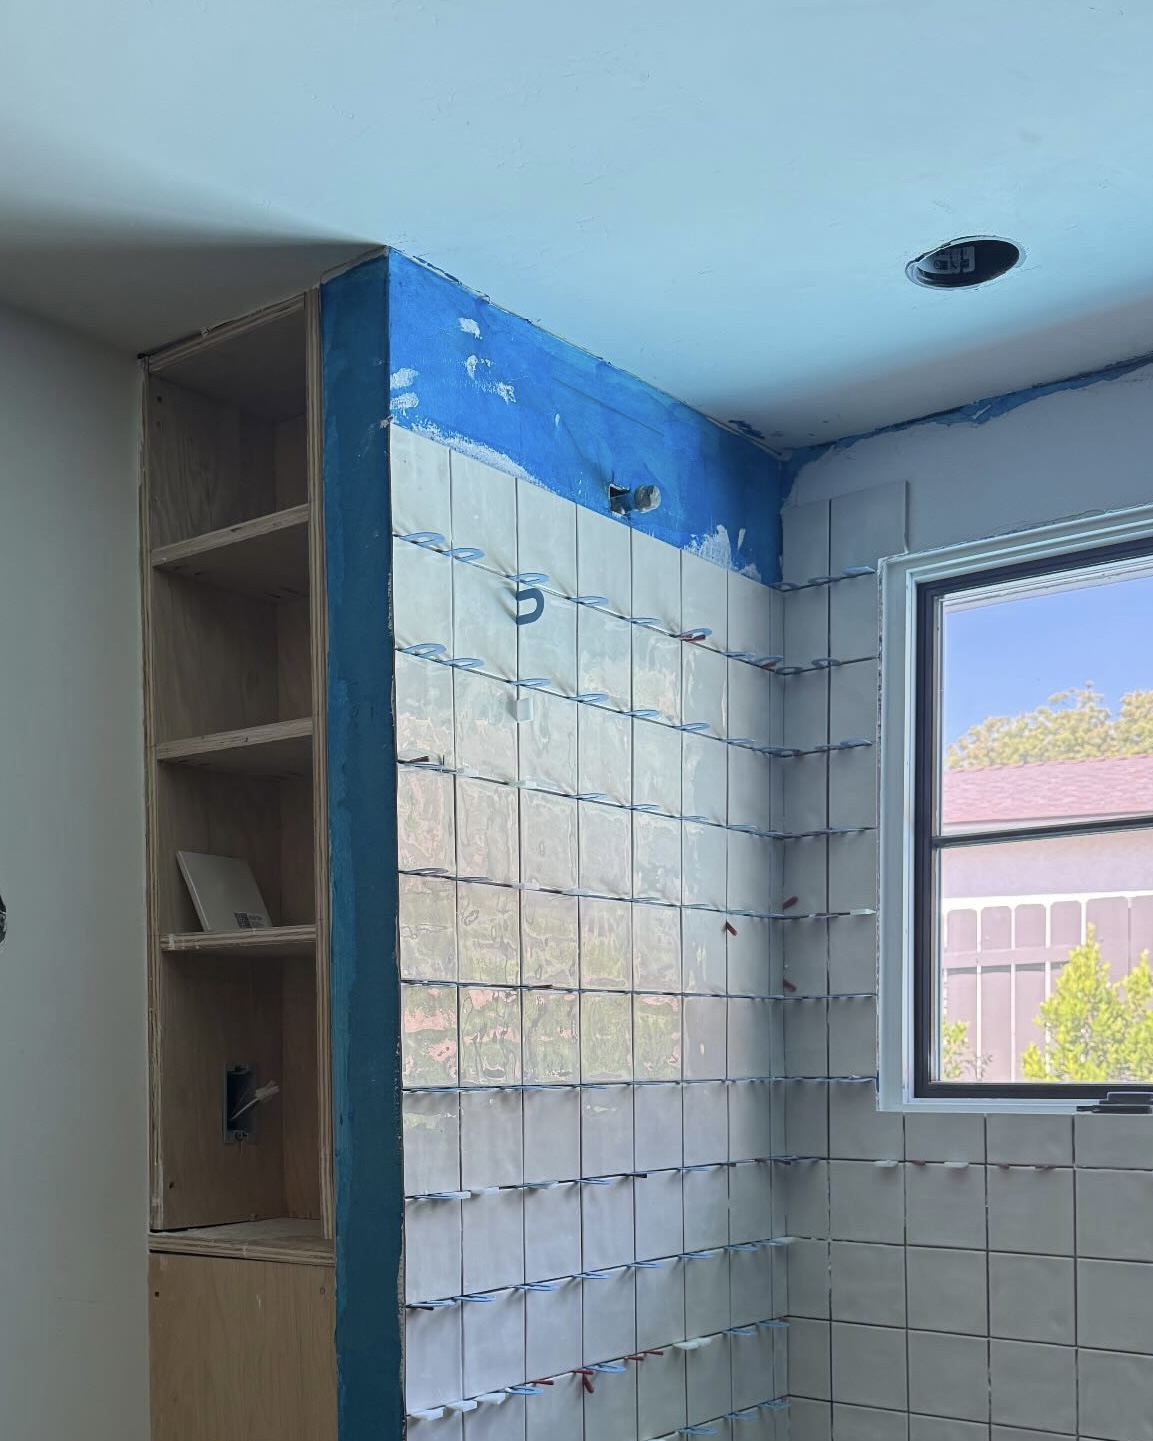
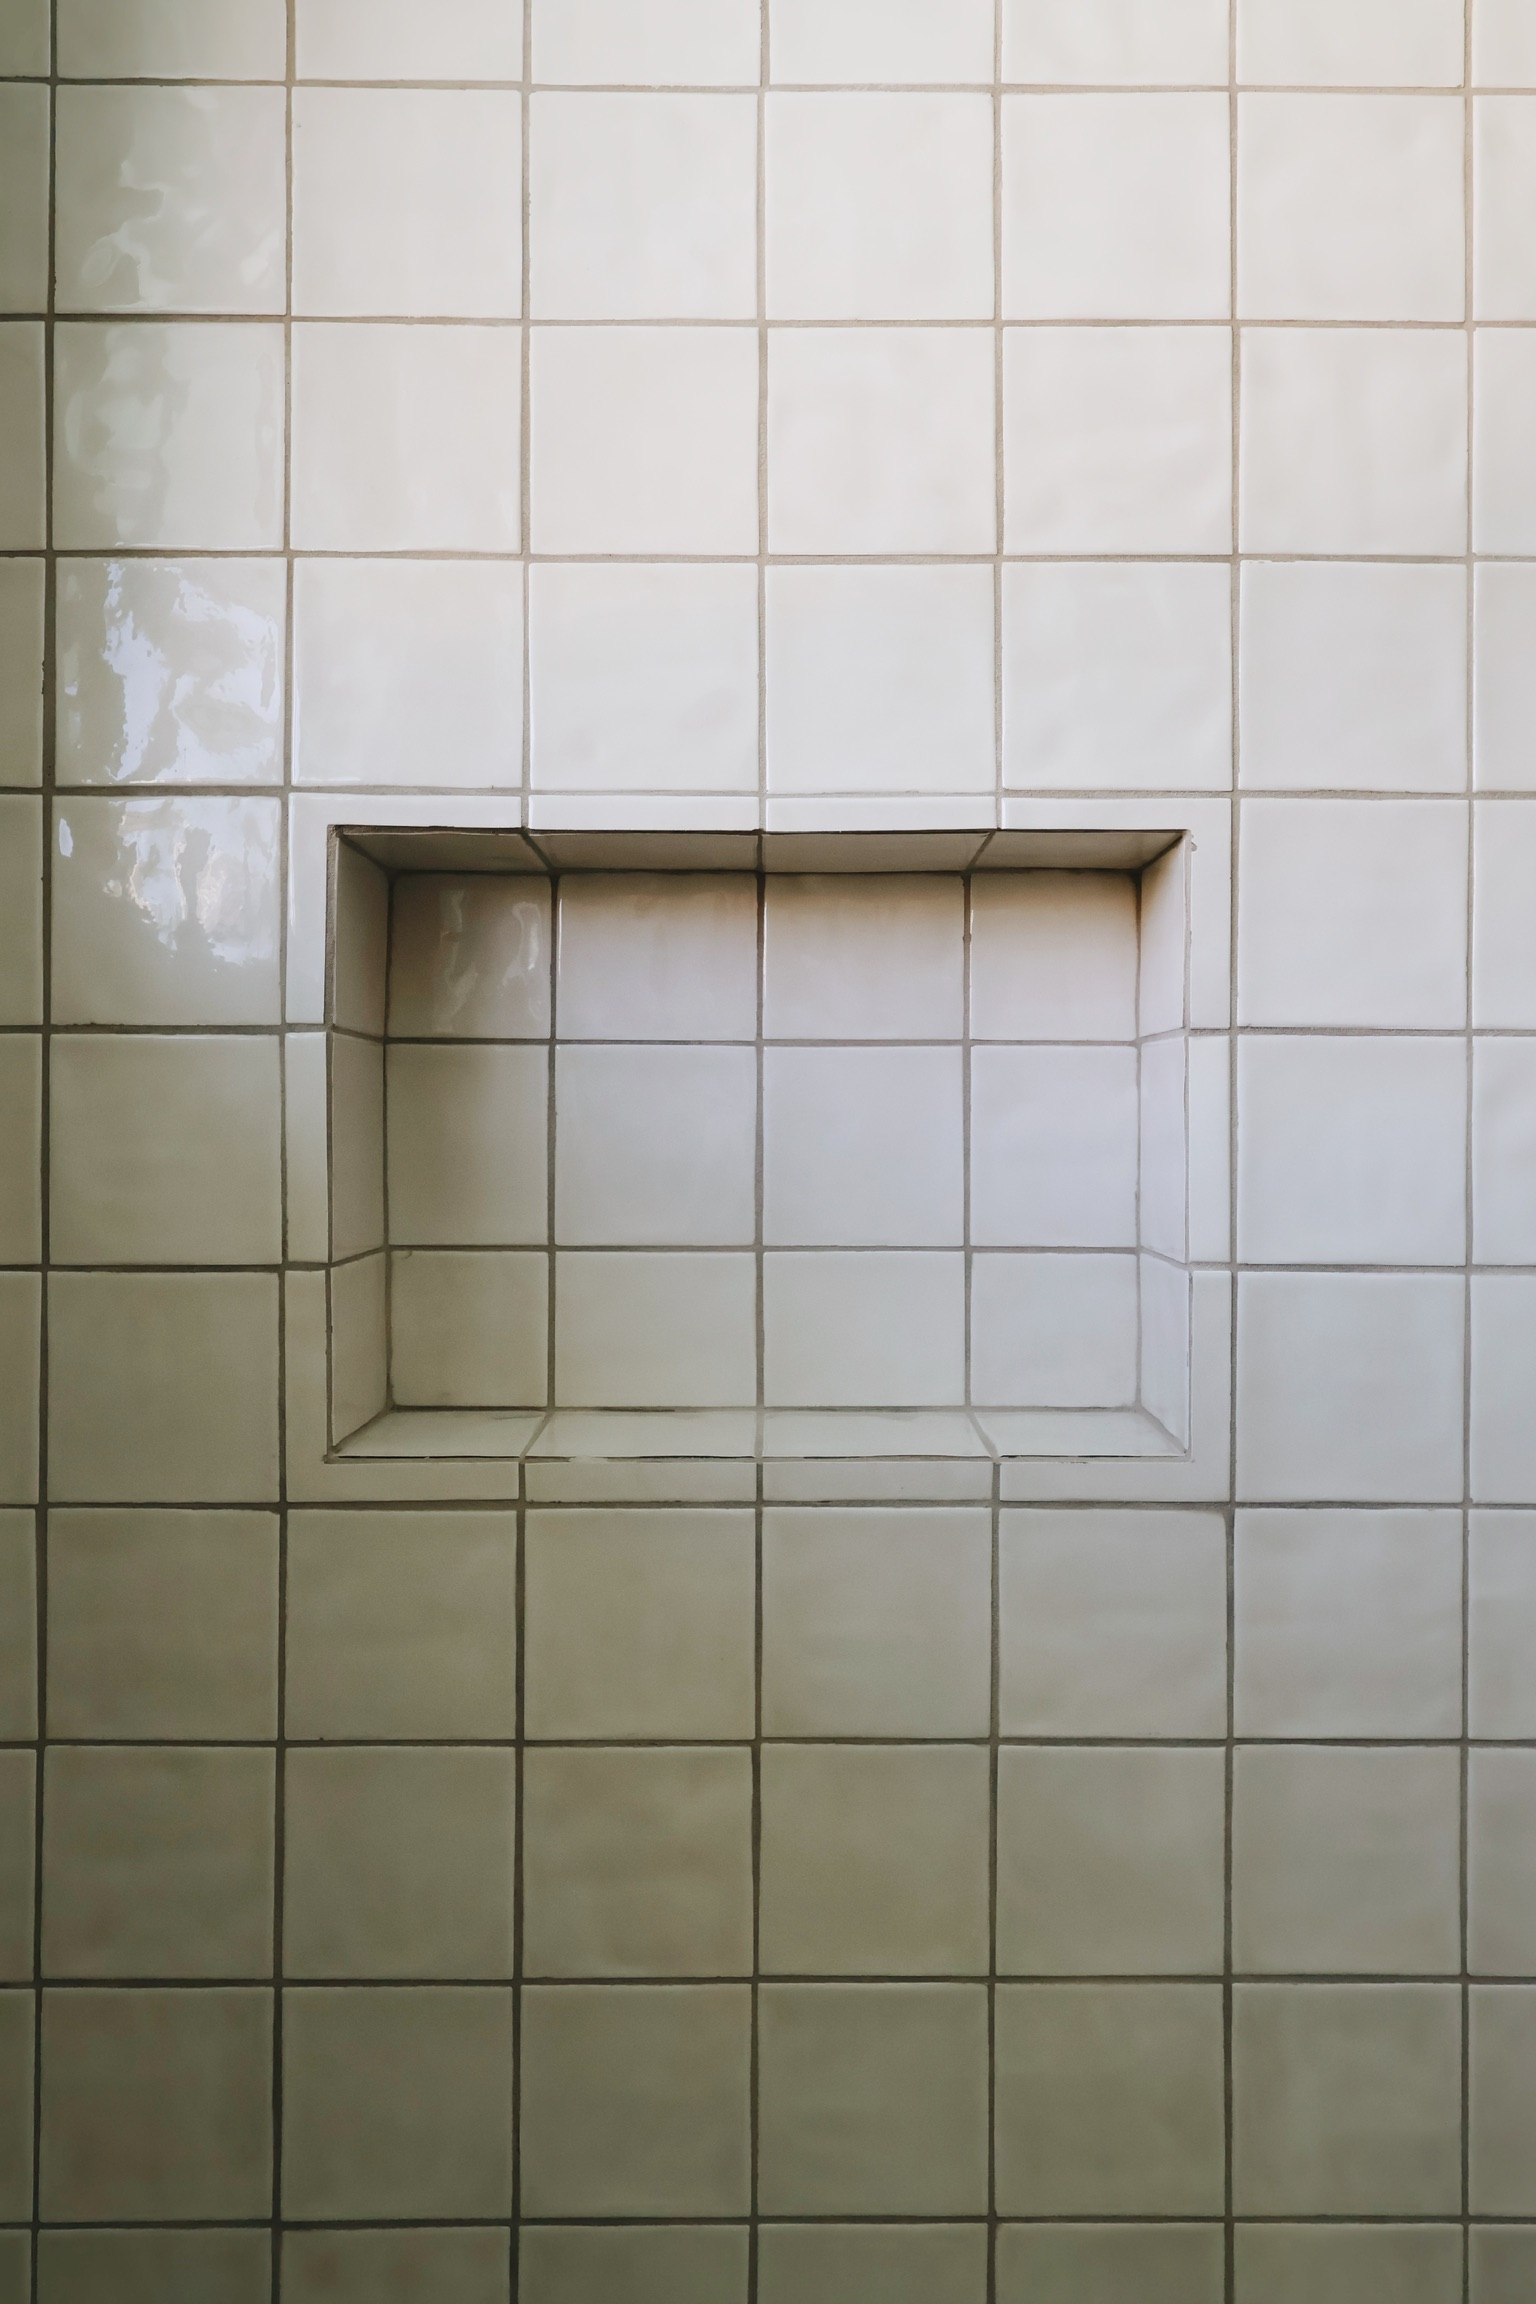
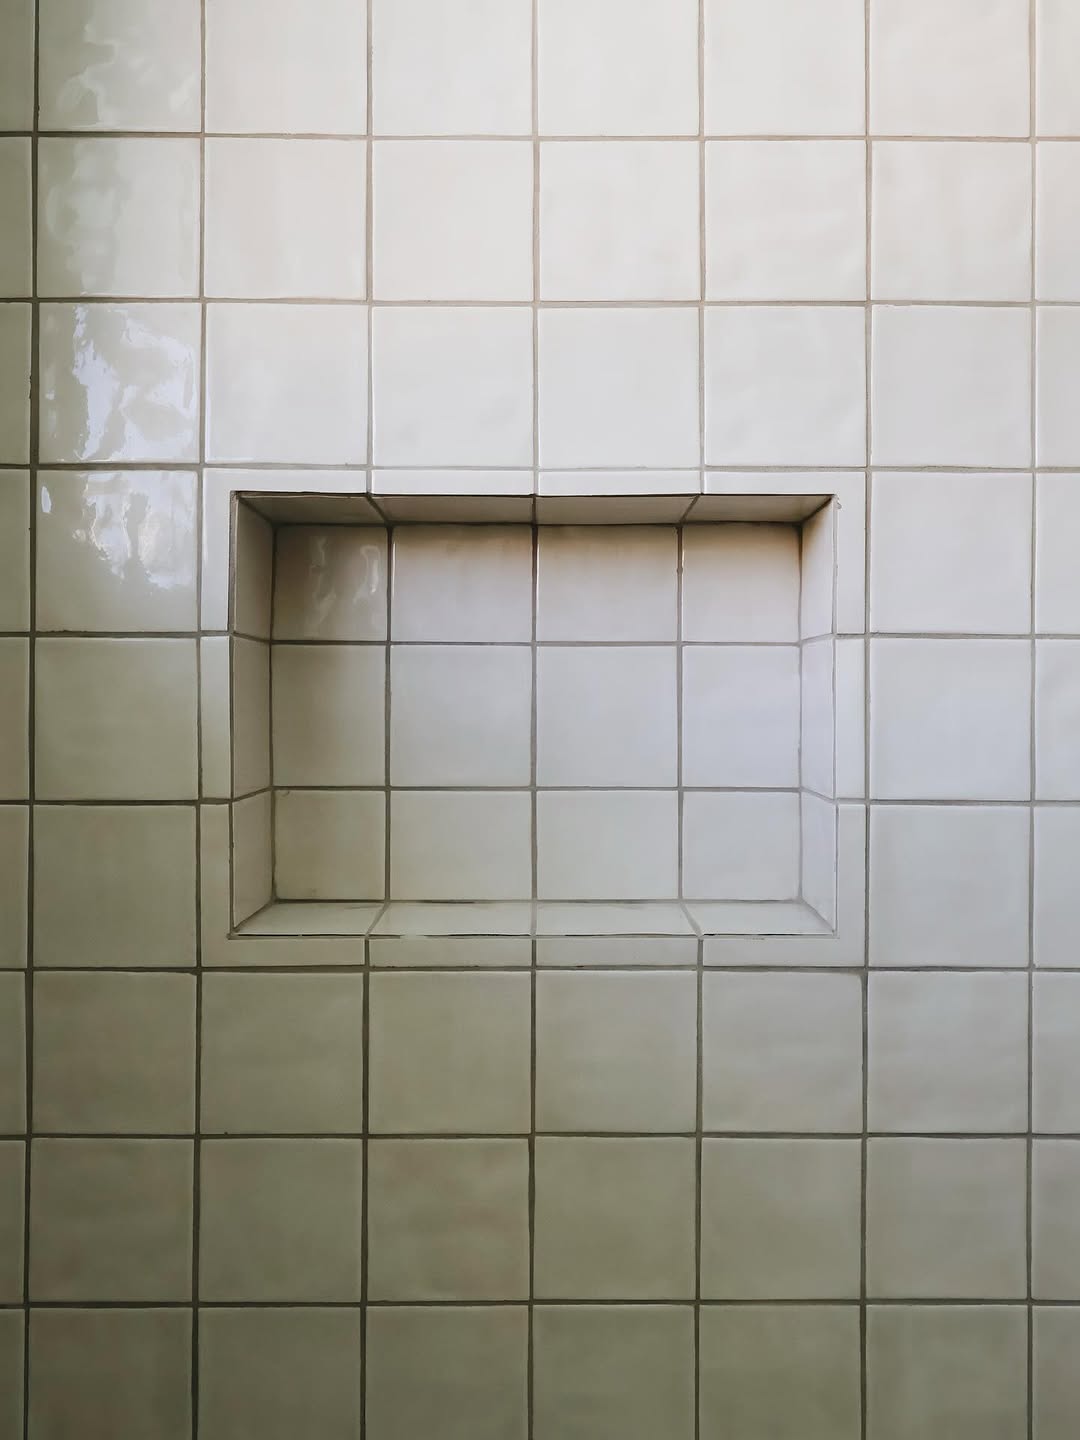
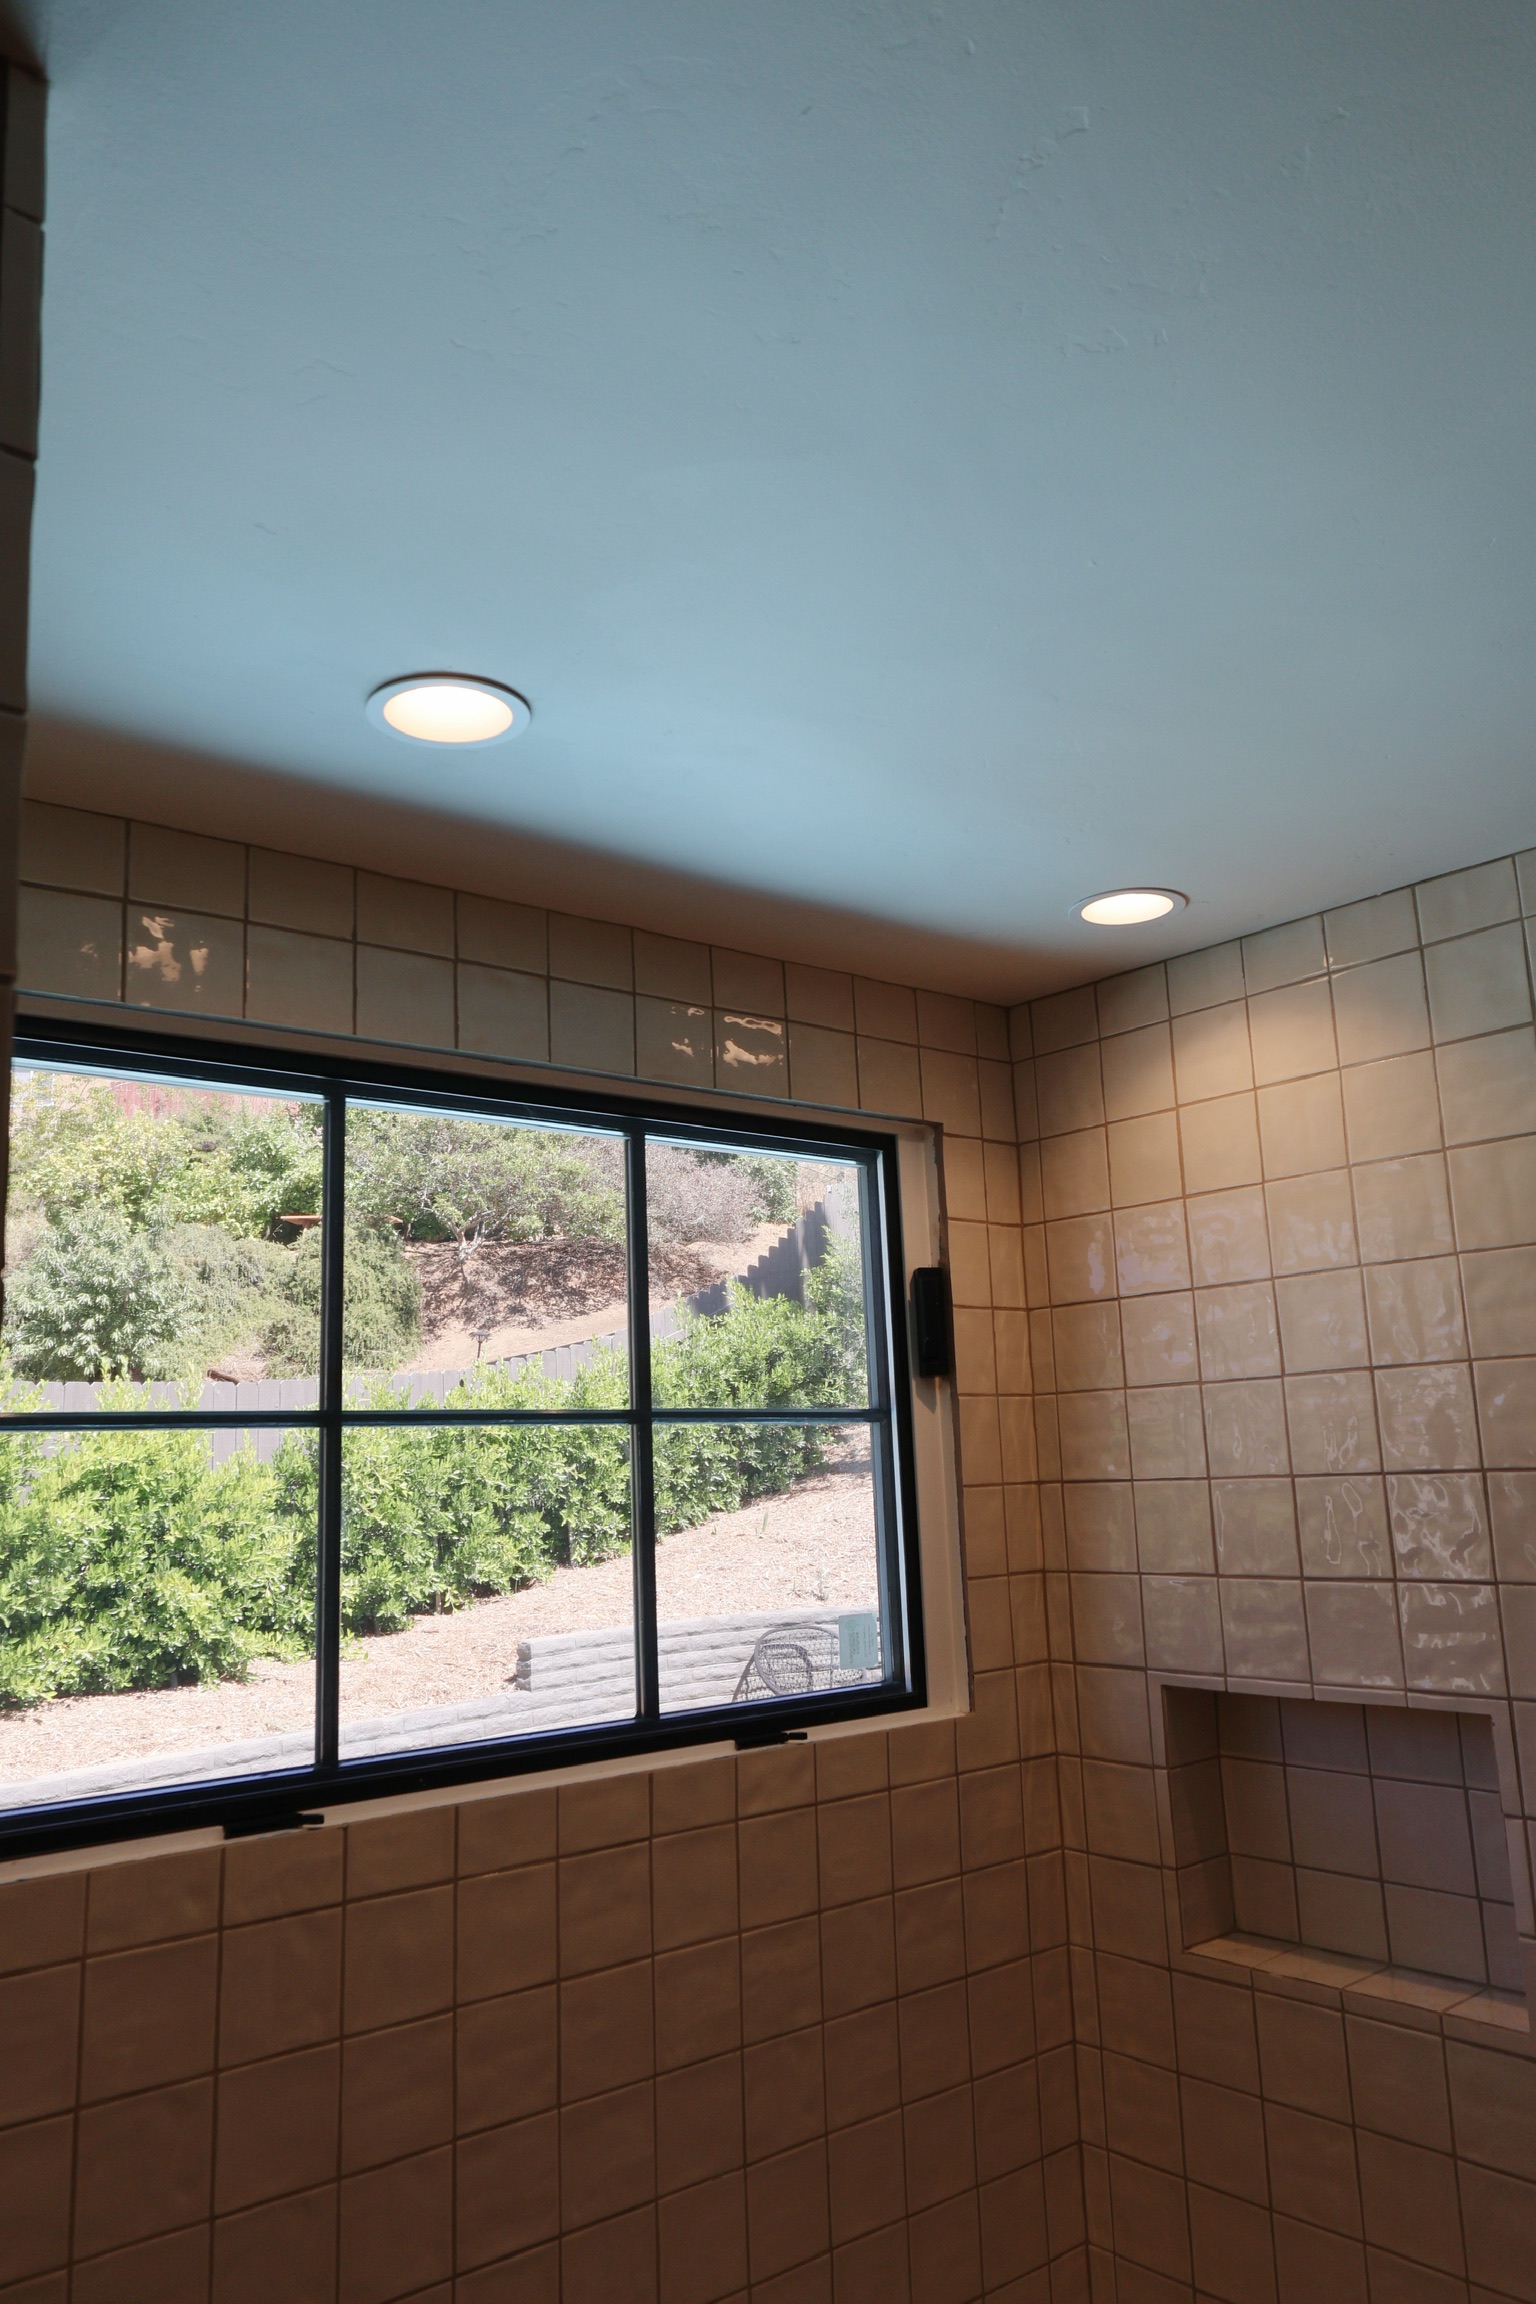
I decided to build a shower niche and spent way too much time on math! I used scrap 2×4’s for this. The top piece was slightly too small, but it wouldn’t matter in the end! I secured the frame in the frame we made for the walls surrounding the tub.

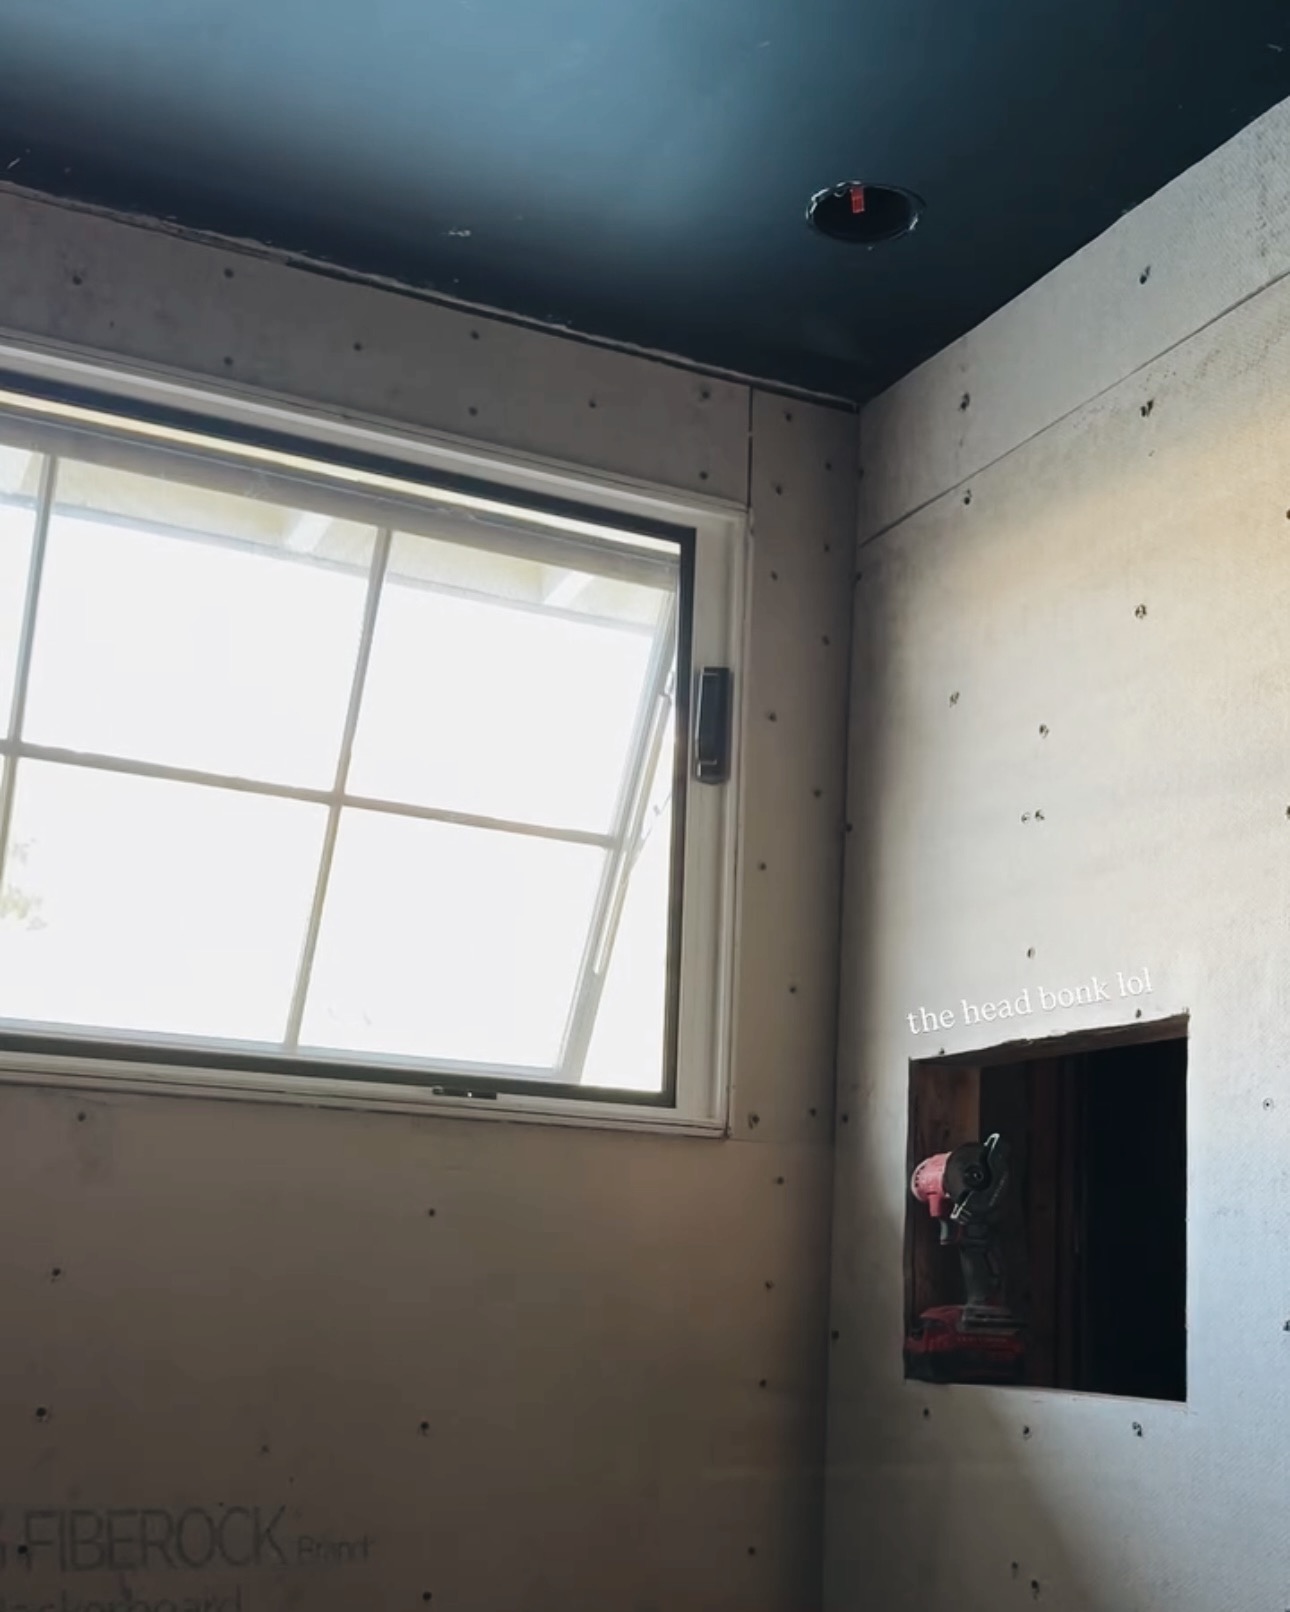
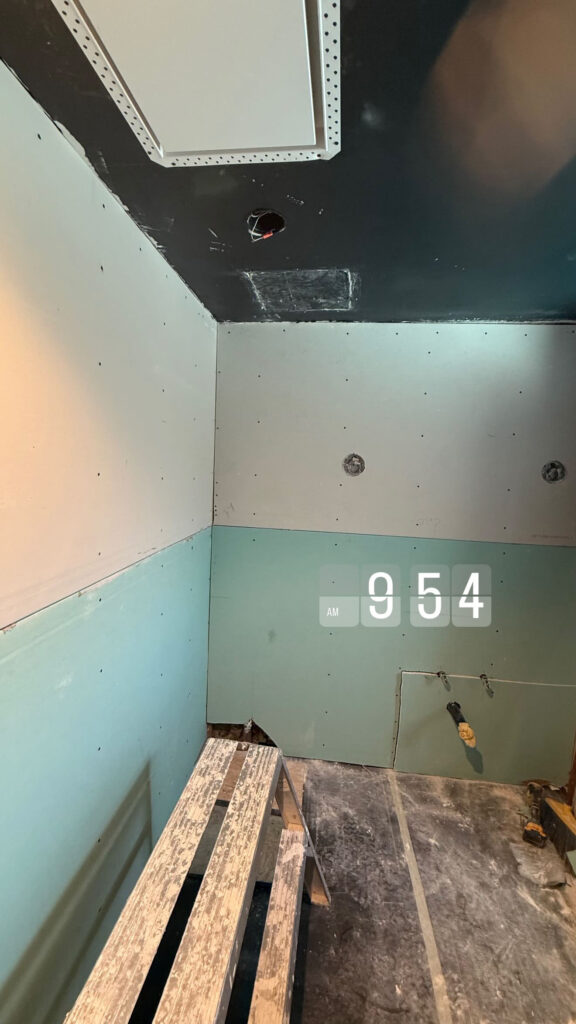
Next we installed the drywall on our frames. We cut out a little section for the shower niche and installed drywall along those surfaces as well. I had to do so much math, I was dying. But when I installed the last piece of drywall in the niche, I felt like a champion.
Then it was time to move onto waterproofing! I used a caulk gun and Blue Max along all the seams. Then, I used a roller for the flat surfaces. It was so satisfying! I ended up doing 4 coats just for good measure.
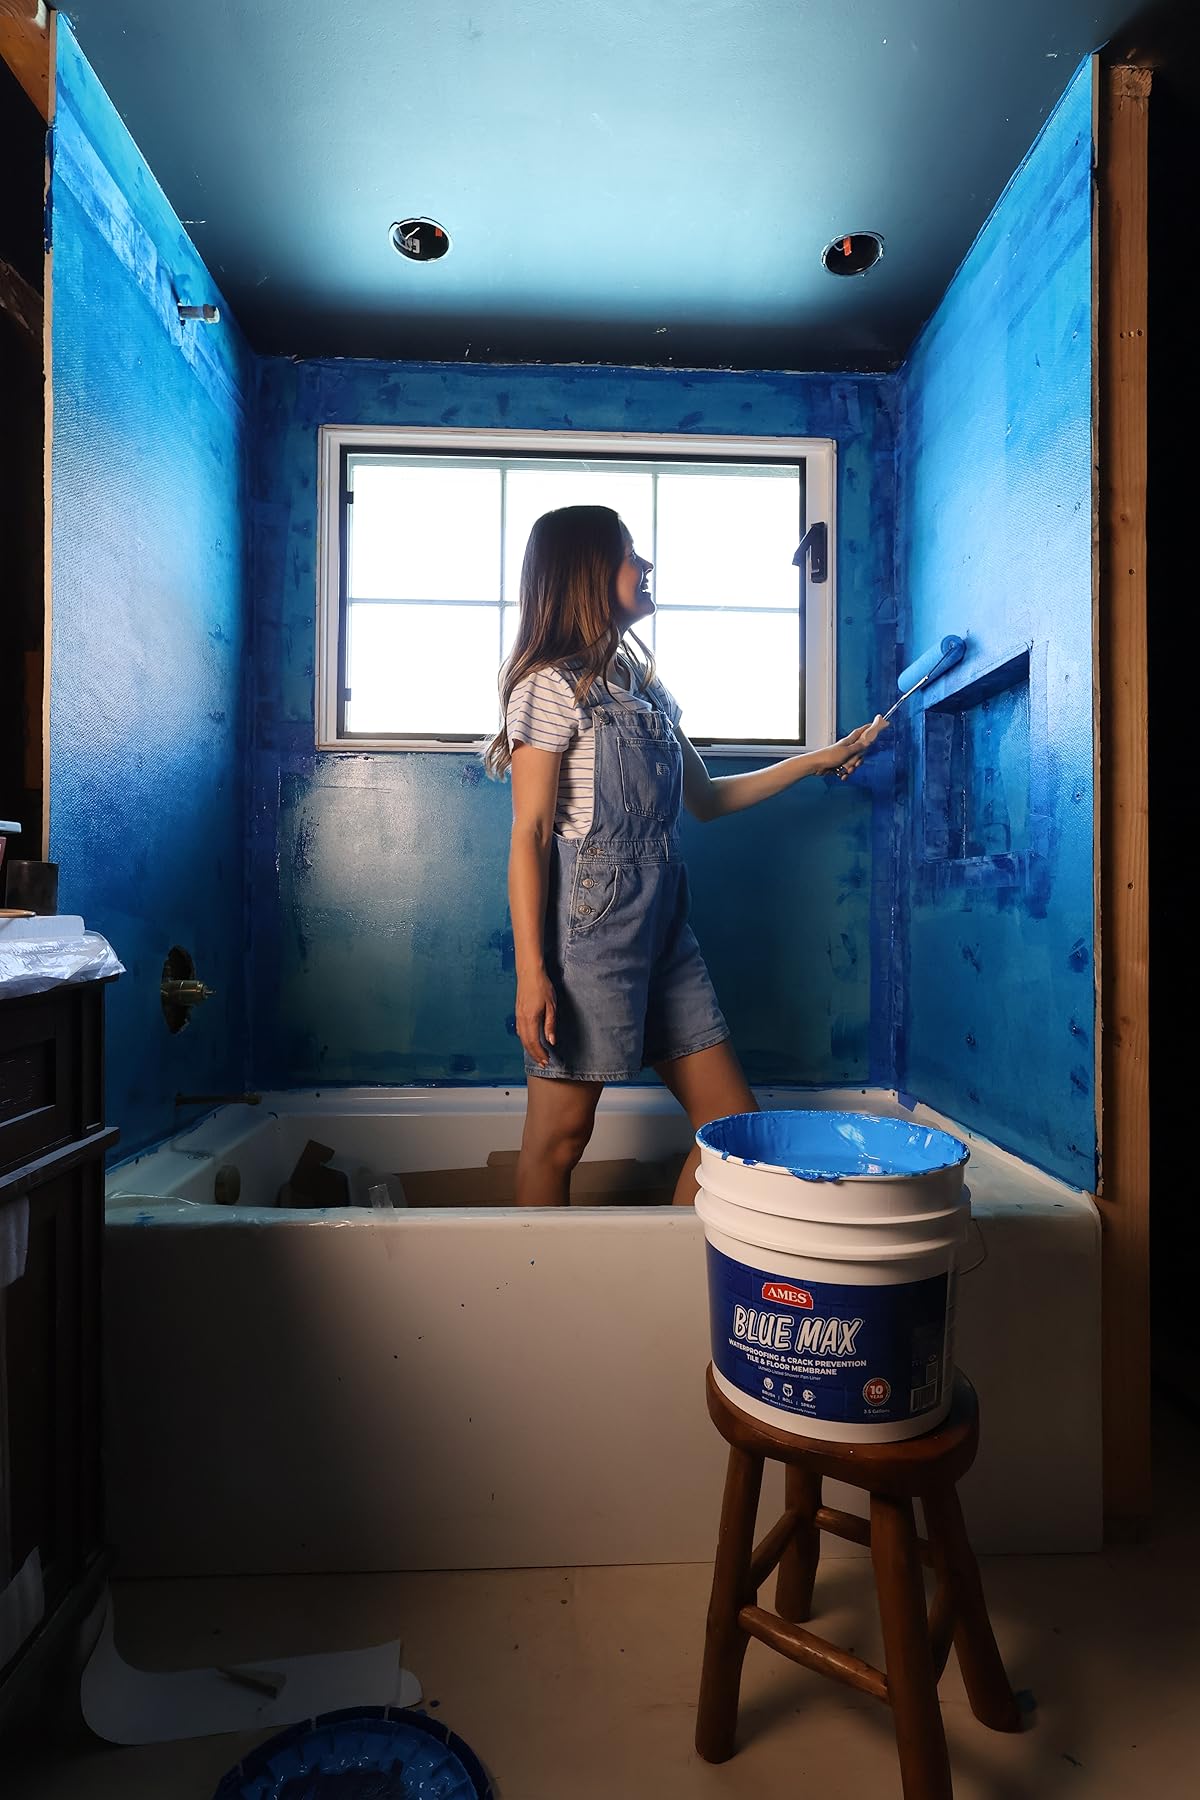
Here’s everything I used to waterproof the shower:
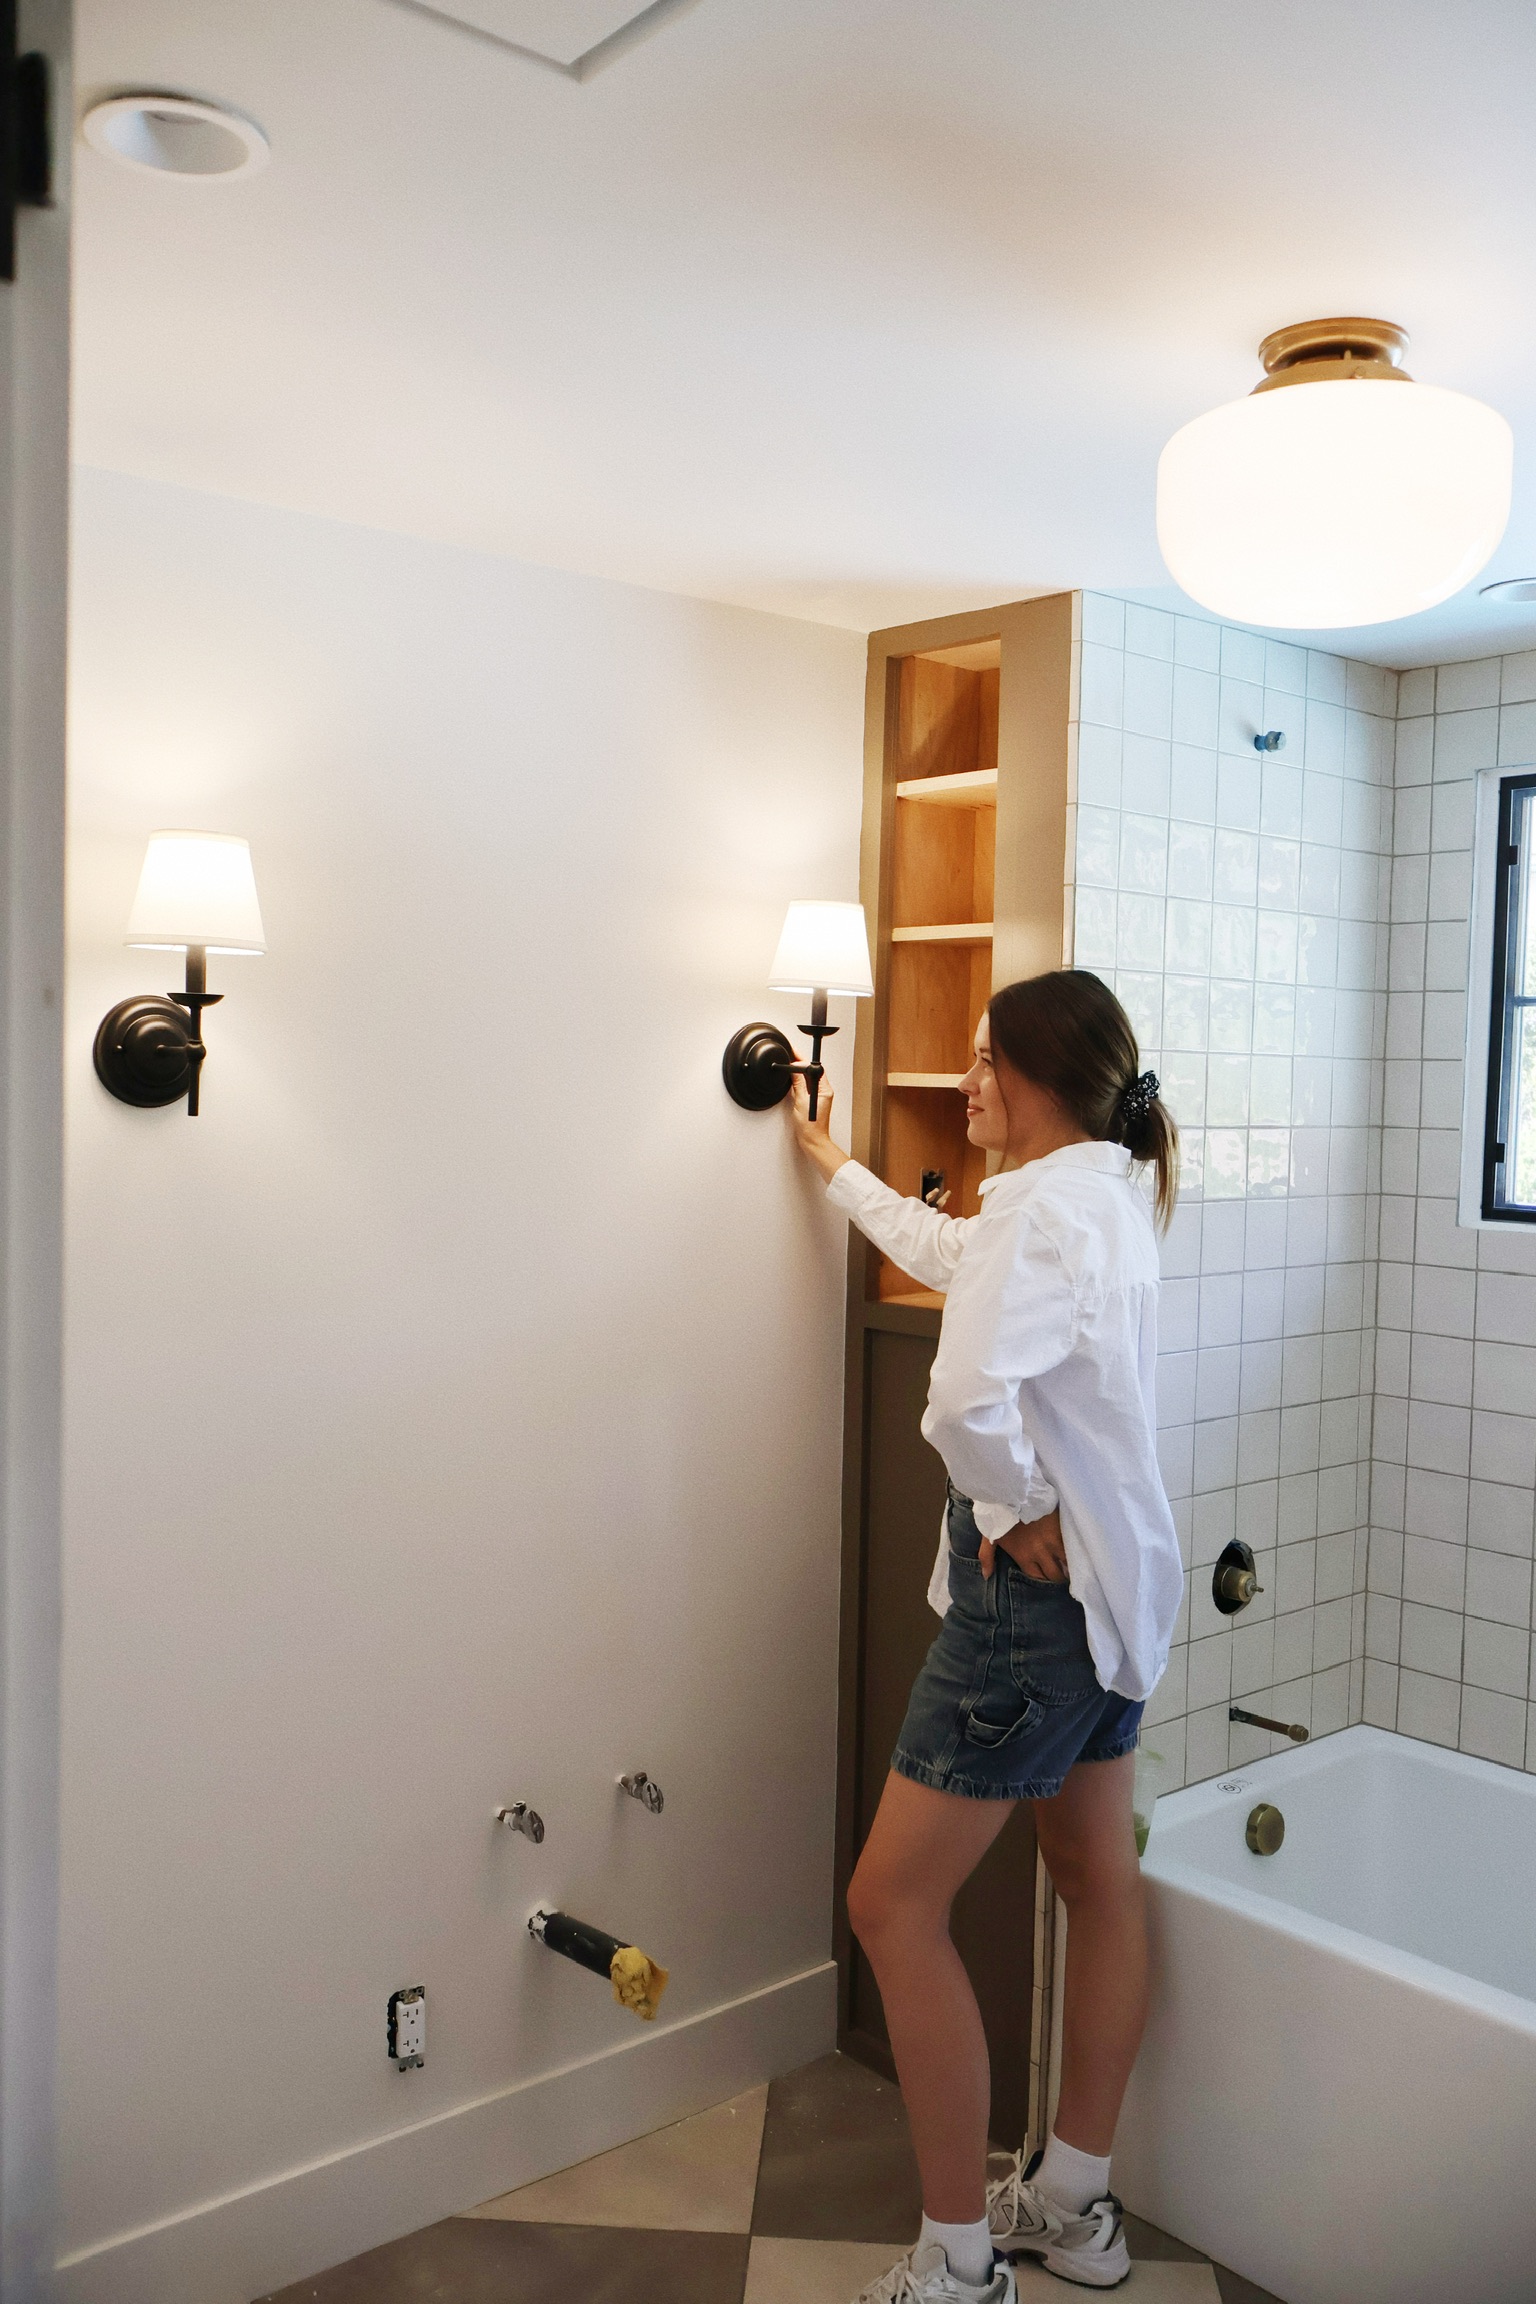
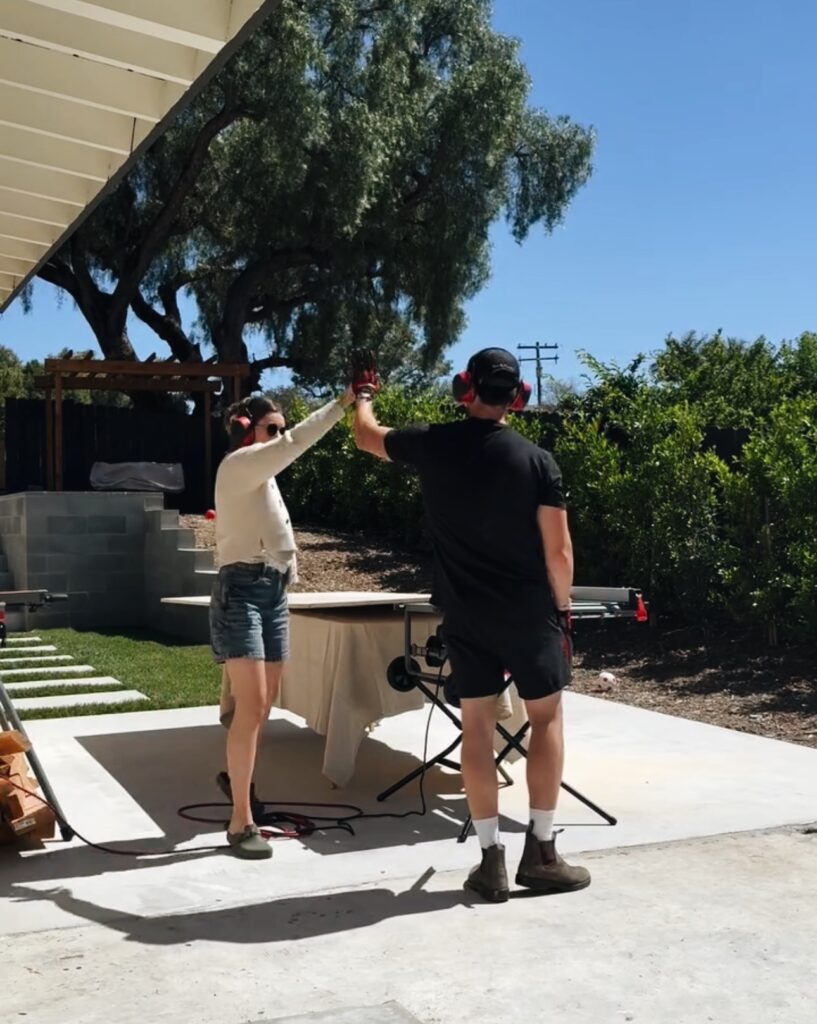
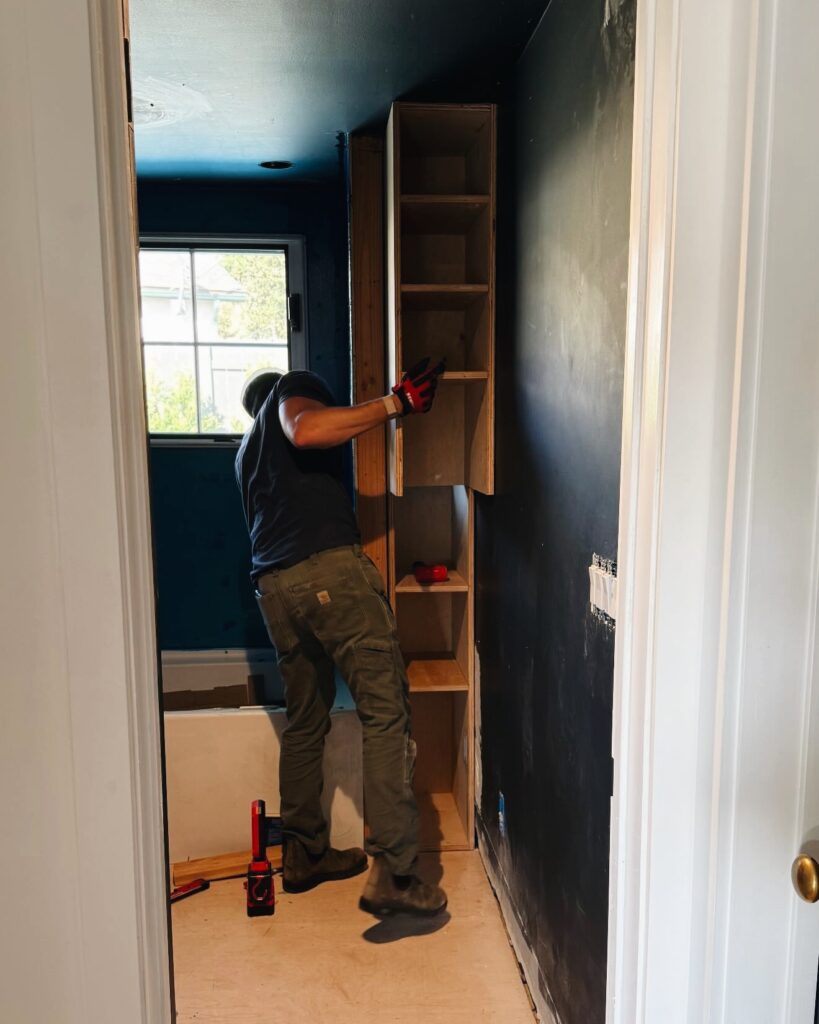
See that little space to the right of the tub install? I simply *cannot* give up a storage opportunity. So we decided to build a very long, very narrow cabinet. It fit perfectly in the space but was too big to wedge in. We ended up cutting it in half (don’t worry, you won’t be able to tell once it’s installed) where a shelf would hide the seam. It took us two solid days of work to get it in the space, but we did it! We ended up building cabinets for either side of the tub/shower.
Drywall
After we drywalled in here, it was like a different space. We actually hired out for this part of the project to make sure it was perfect. Look at this transformation!
Floor & Shower Tile
This was the part I was really excited for! We got these 4×4 Gloss Ceramic Tiles in Latte from Riad Tile. They are incredible!
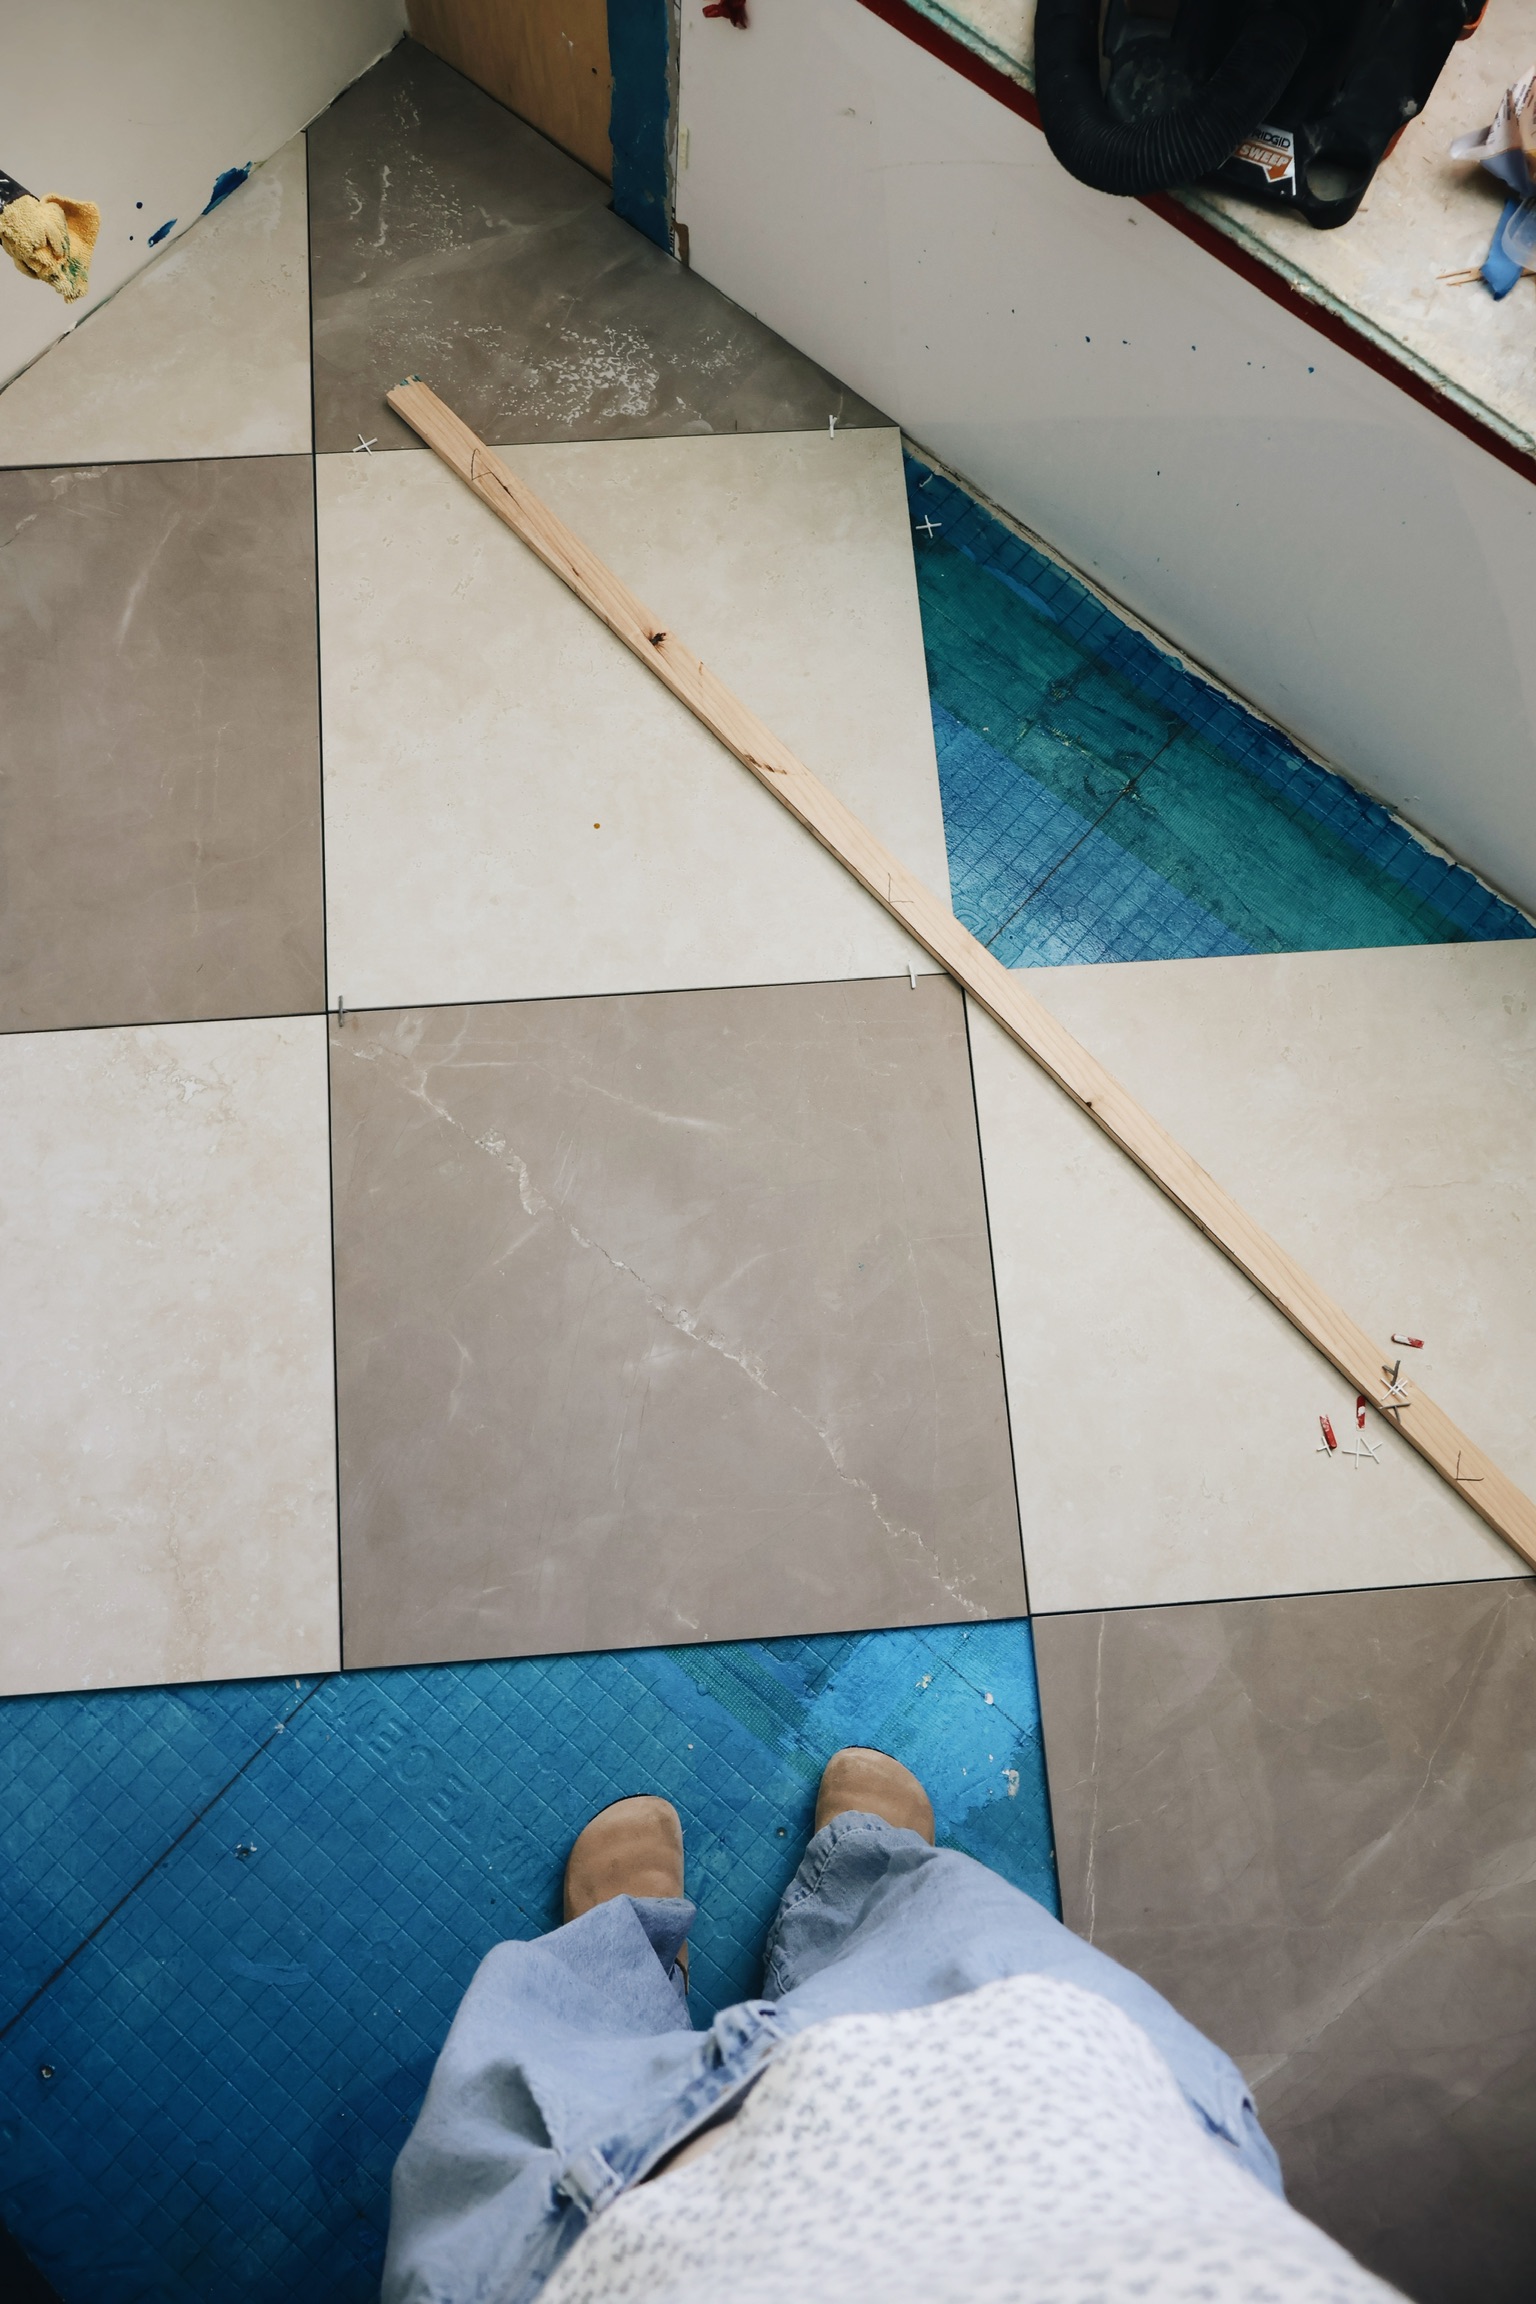
Then, floor tile! We did a checkerboard pattern with tiles from Edward Martin. We did a dryfit and had to make a lot of design decisions. With the center tile perfectly center, we had a pretty awkward line of two inch triangles around the bathtub. We ended up bumping the center tile up two inches toward the tub. So, we lost perfect symmetry (my perfectionist heart is still healing, be gentle). However, when you open the door to the bathroom, it looks much more balanced and intentional. I was super thankful to be working with a tiler who cared so much about the details and checked in with me often!
I installed some trim around the sides of the shower and wow wow wow did it look nice! Imagine this with fixtures and everything!
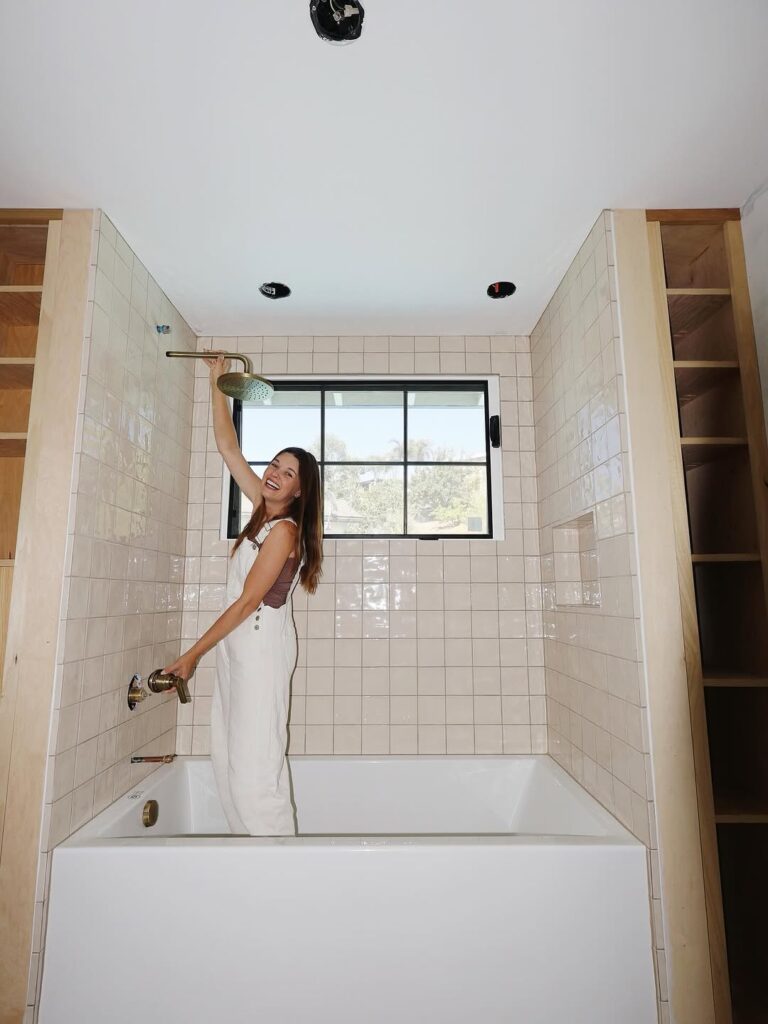
We installed recessed lighting from Lusa and it was the perfect solution. You can choose the brightness for these (which I love). It only took me 10 minutes to install 7 lights!
Paint
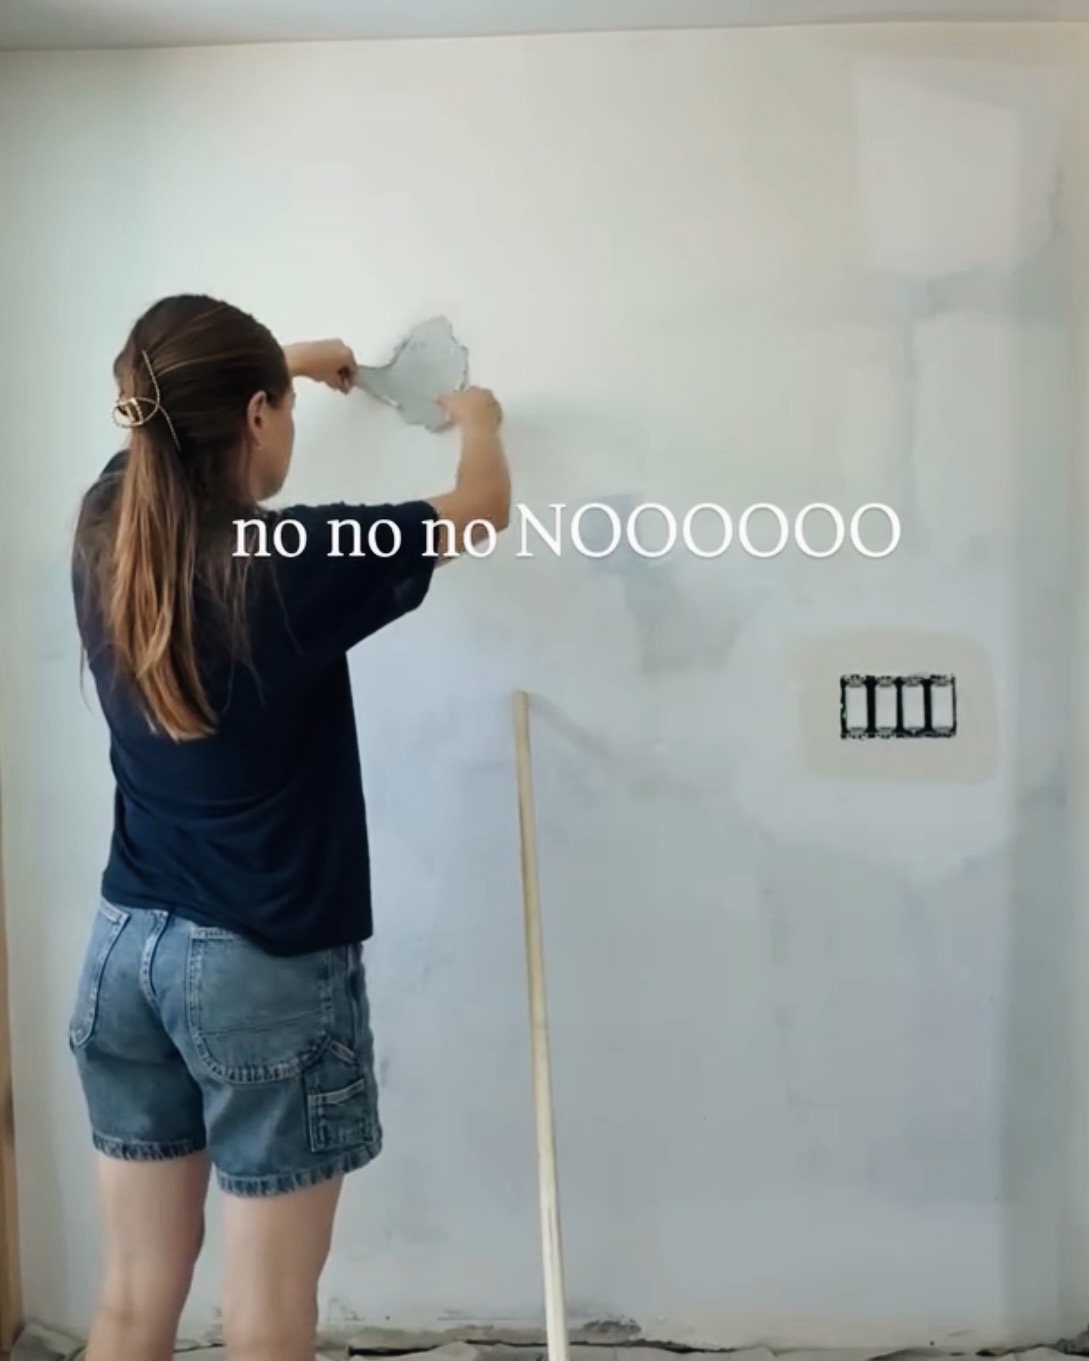
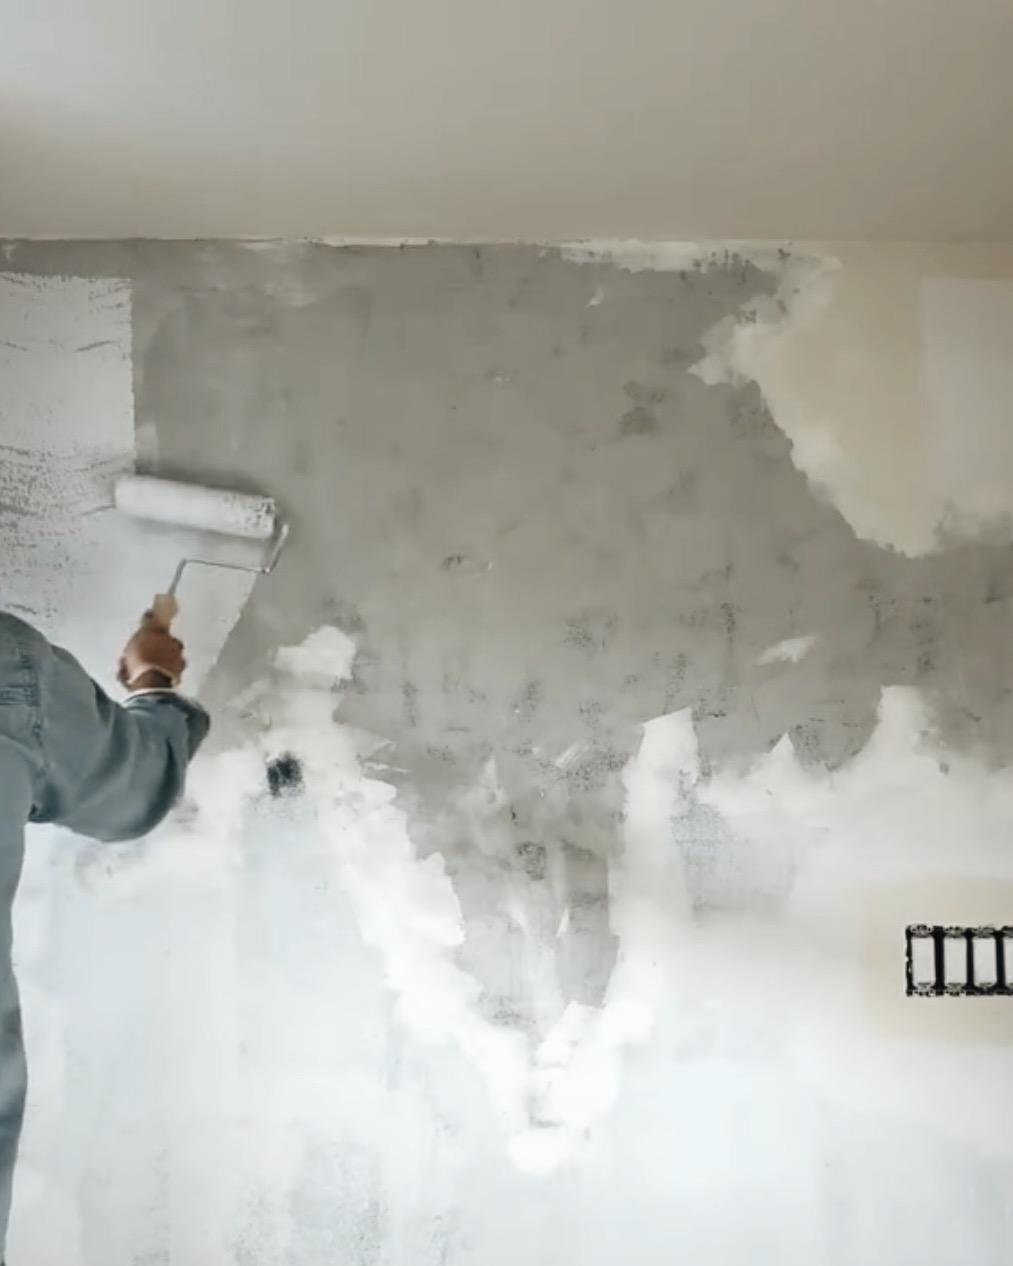
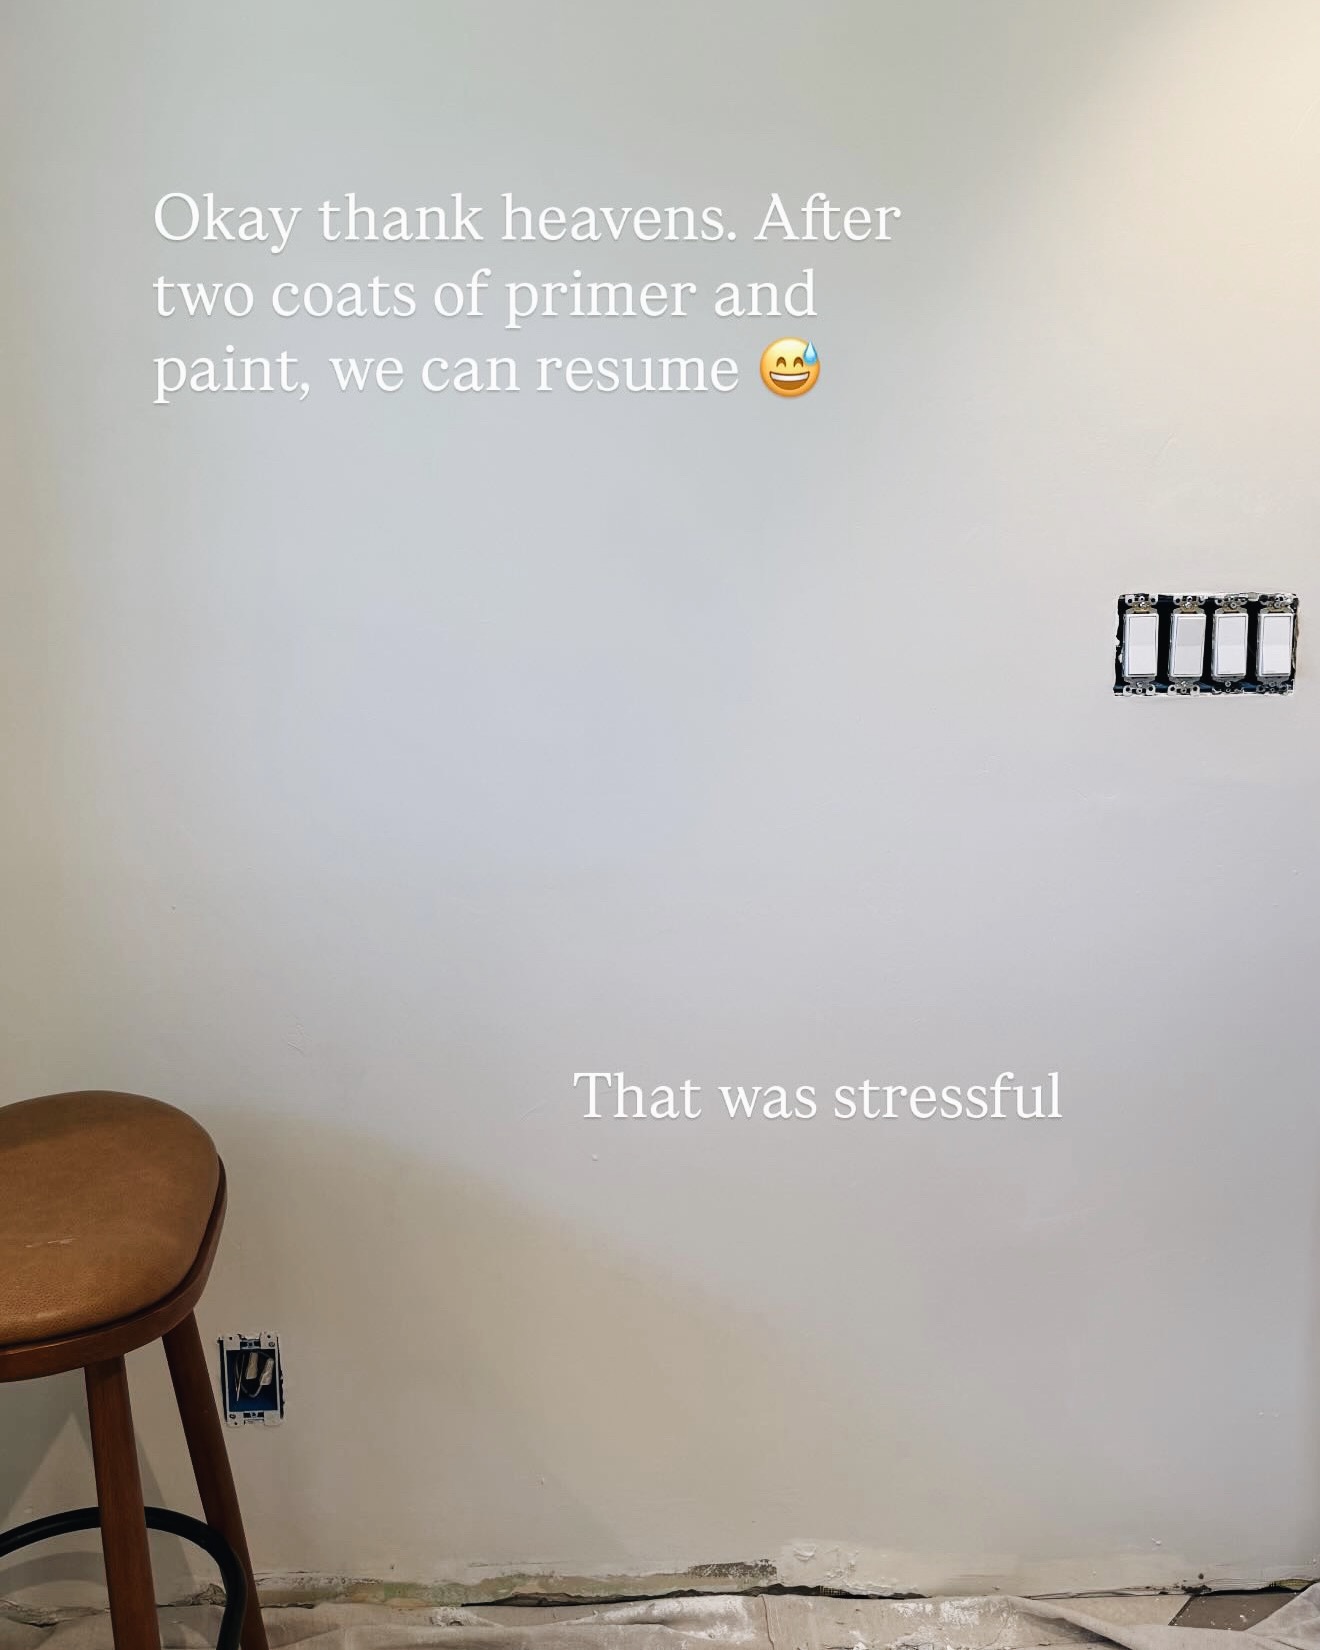
Next we had to decide on paint! I ultimately ended up going with Shoji White. I primed and got painting…but I had to STOP. The paint started literally peeling right off. I didn’t prime before painting the wall navy right over roman clay years ago. A responsible DIYer would have primed on top of the Roman Clay and then painted the navy. So the navy paint never properly bonded to the wall. So I had to peel it allllll off, spackle, put one 2 coats of primer, and send up a little prayer.

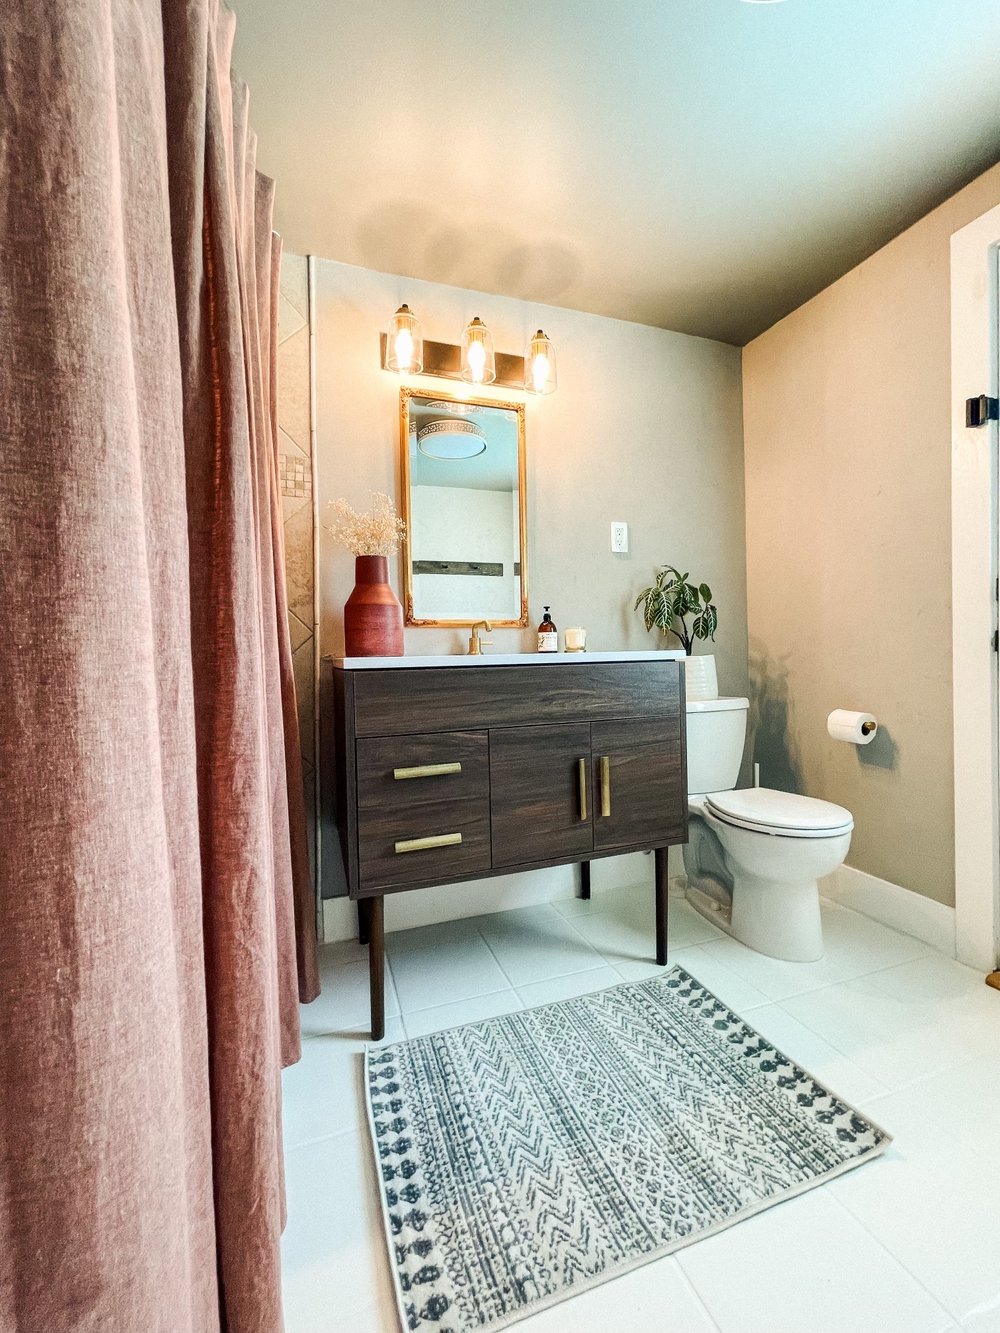
Then I painted the built-ins the color Foothills and it went perfectly with the floor tile!
Lighting
We installed new lighting in here from LUSA and wow what an upgrade…and it only took me 10 minutes! We went from just 2 lights in here to 7. I used the 4 inch remodel kit for this project. I love how you can flip a switch inside the lights to adjust the brightness. They are *chefs kiss 🤌

For the pendant light in the middle of the room, we went with this Schoolhouse Ceiling Light from Shades of Light. Then on either side of where the vanity would go, we installed these Watkins Bath Sconce’s from Shades of Light!
Hardware
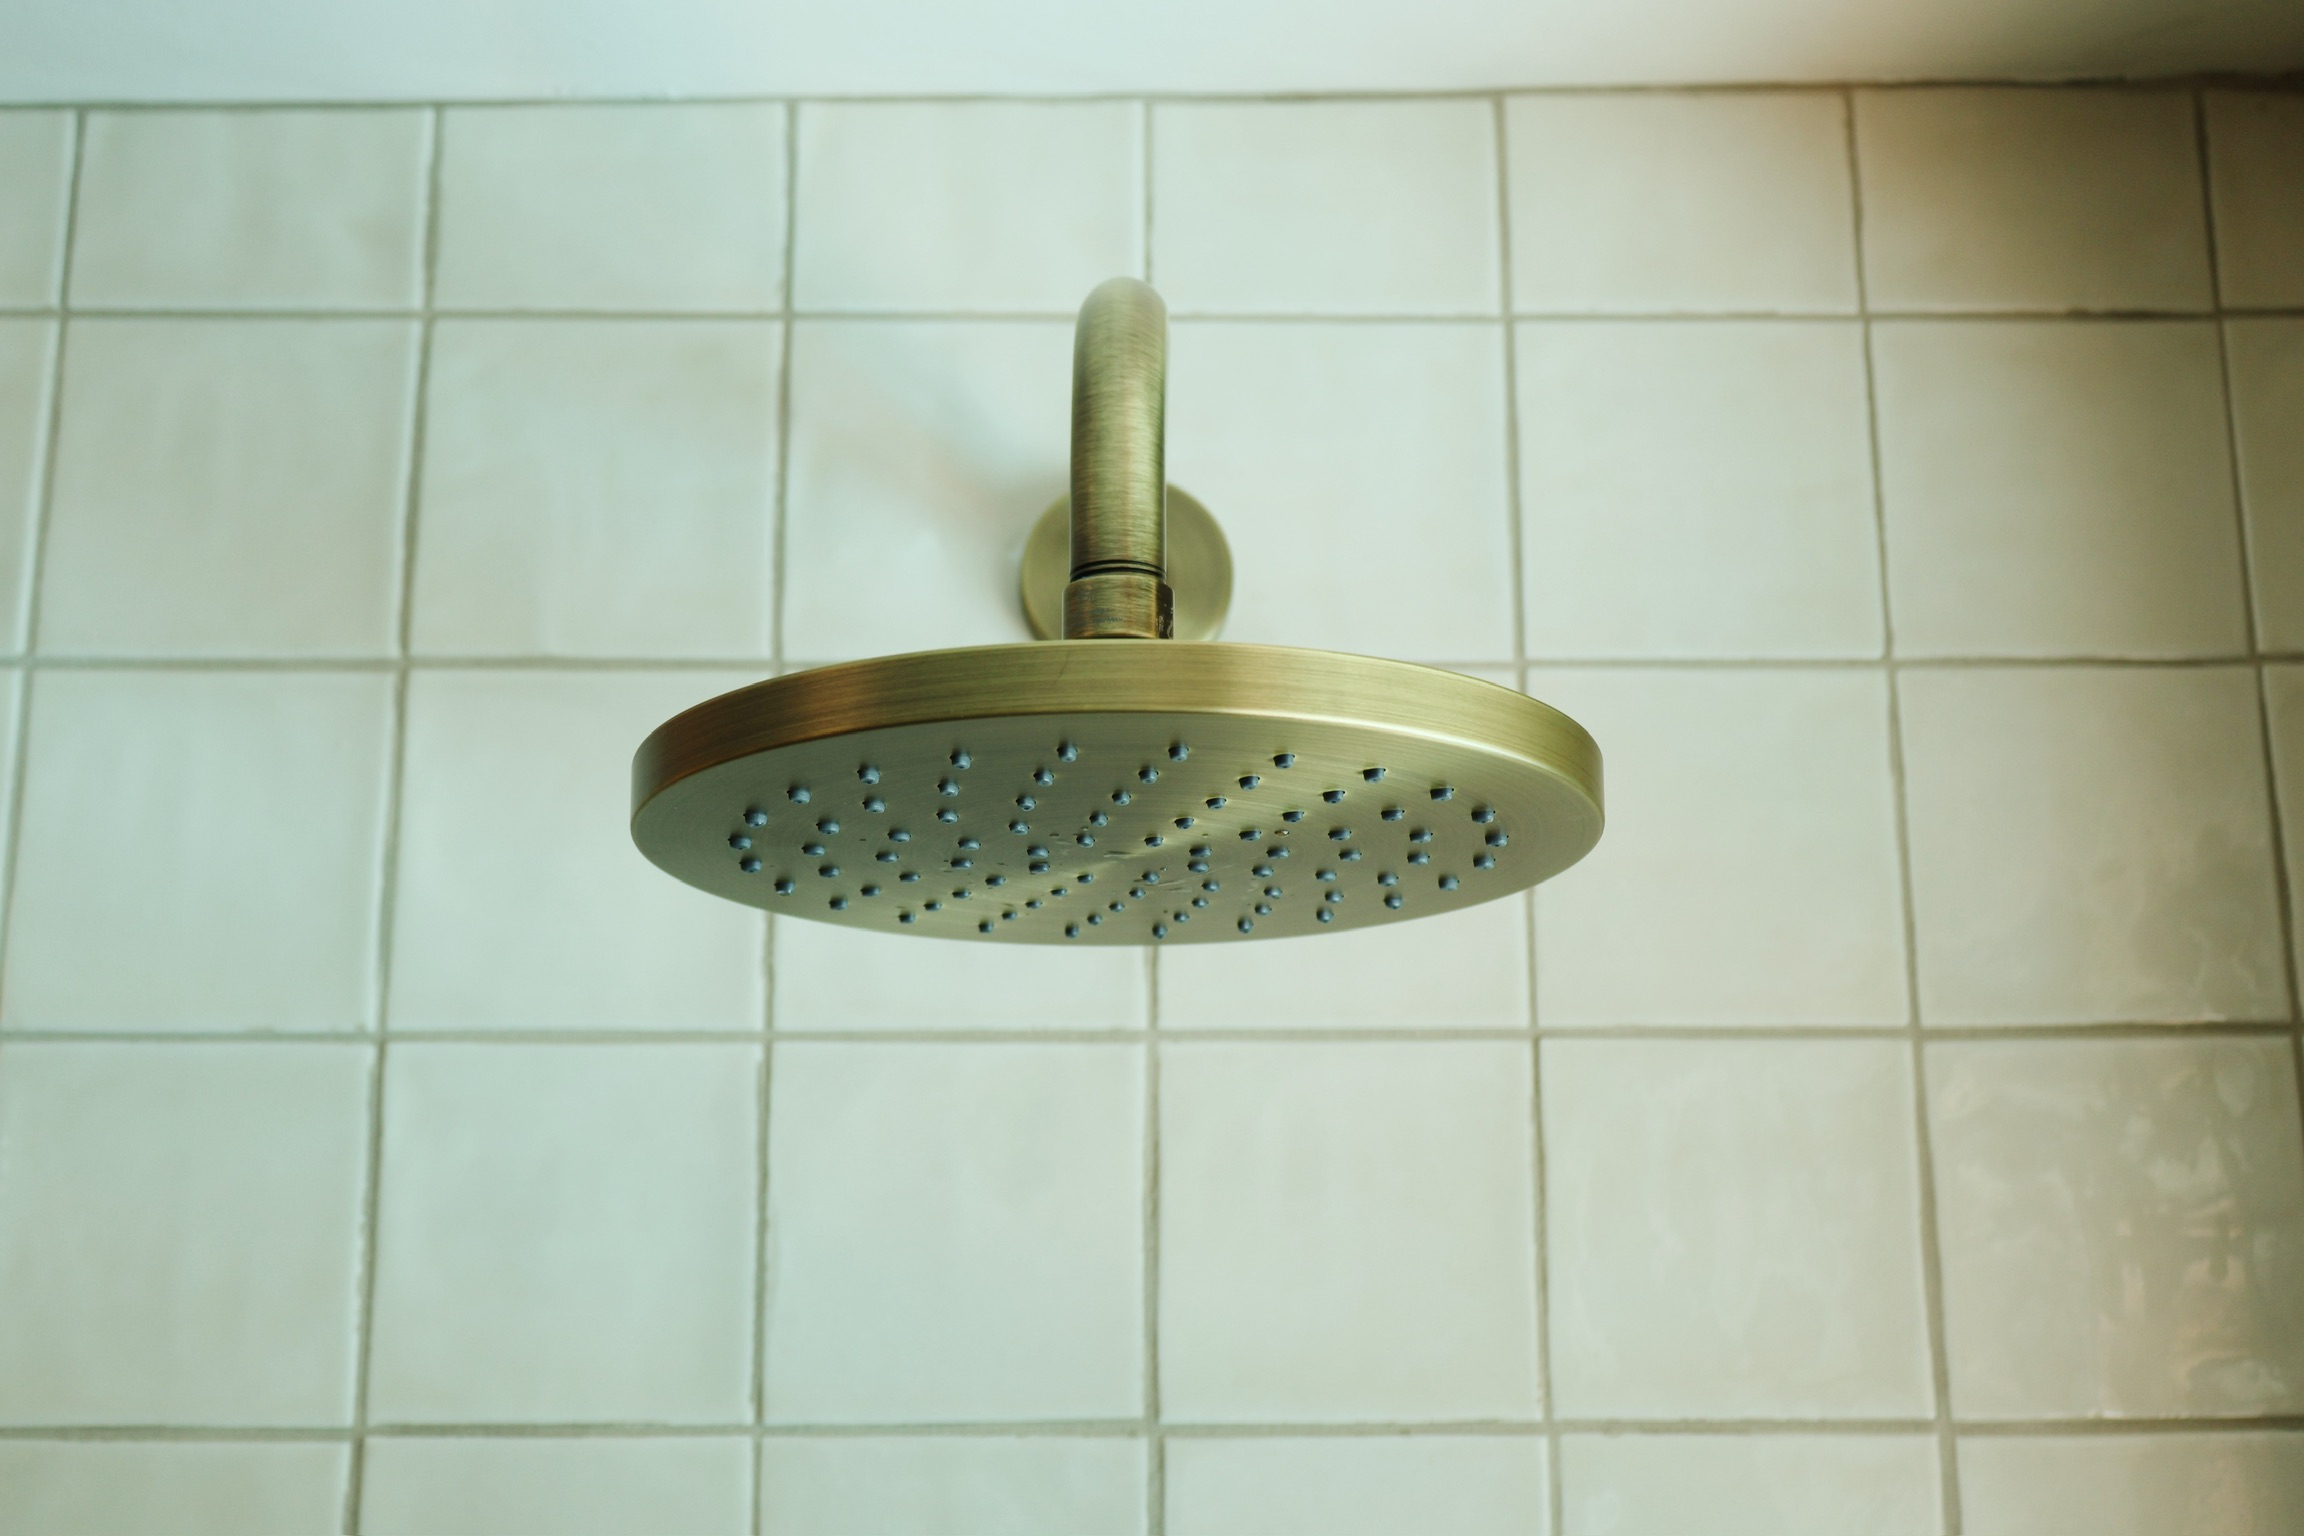
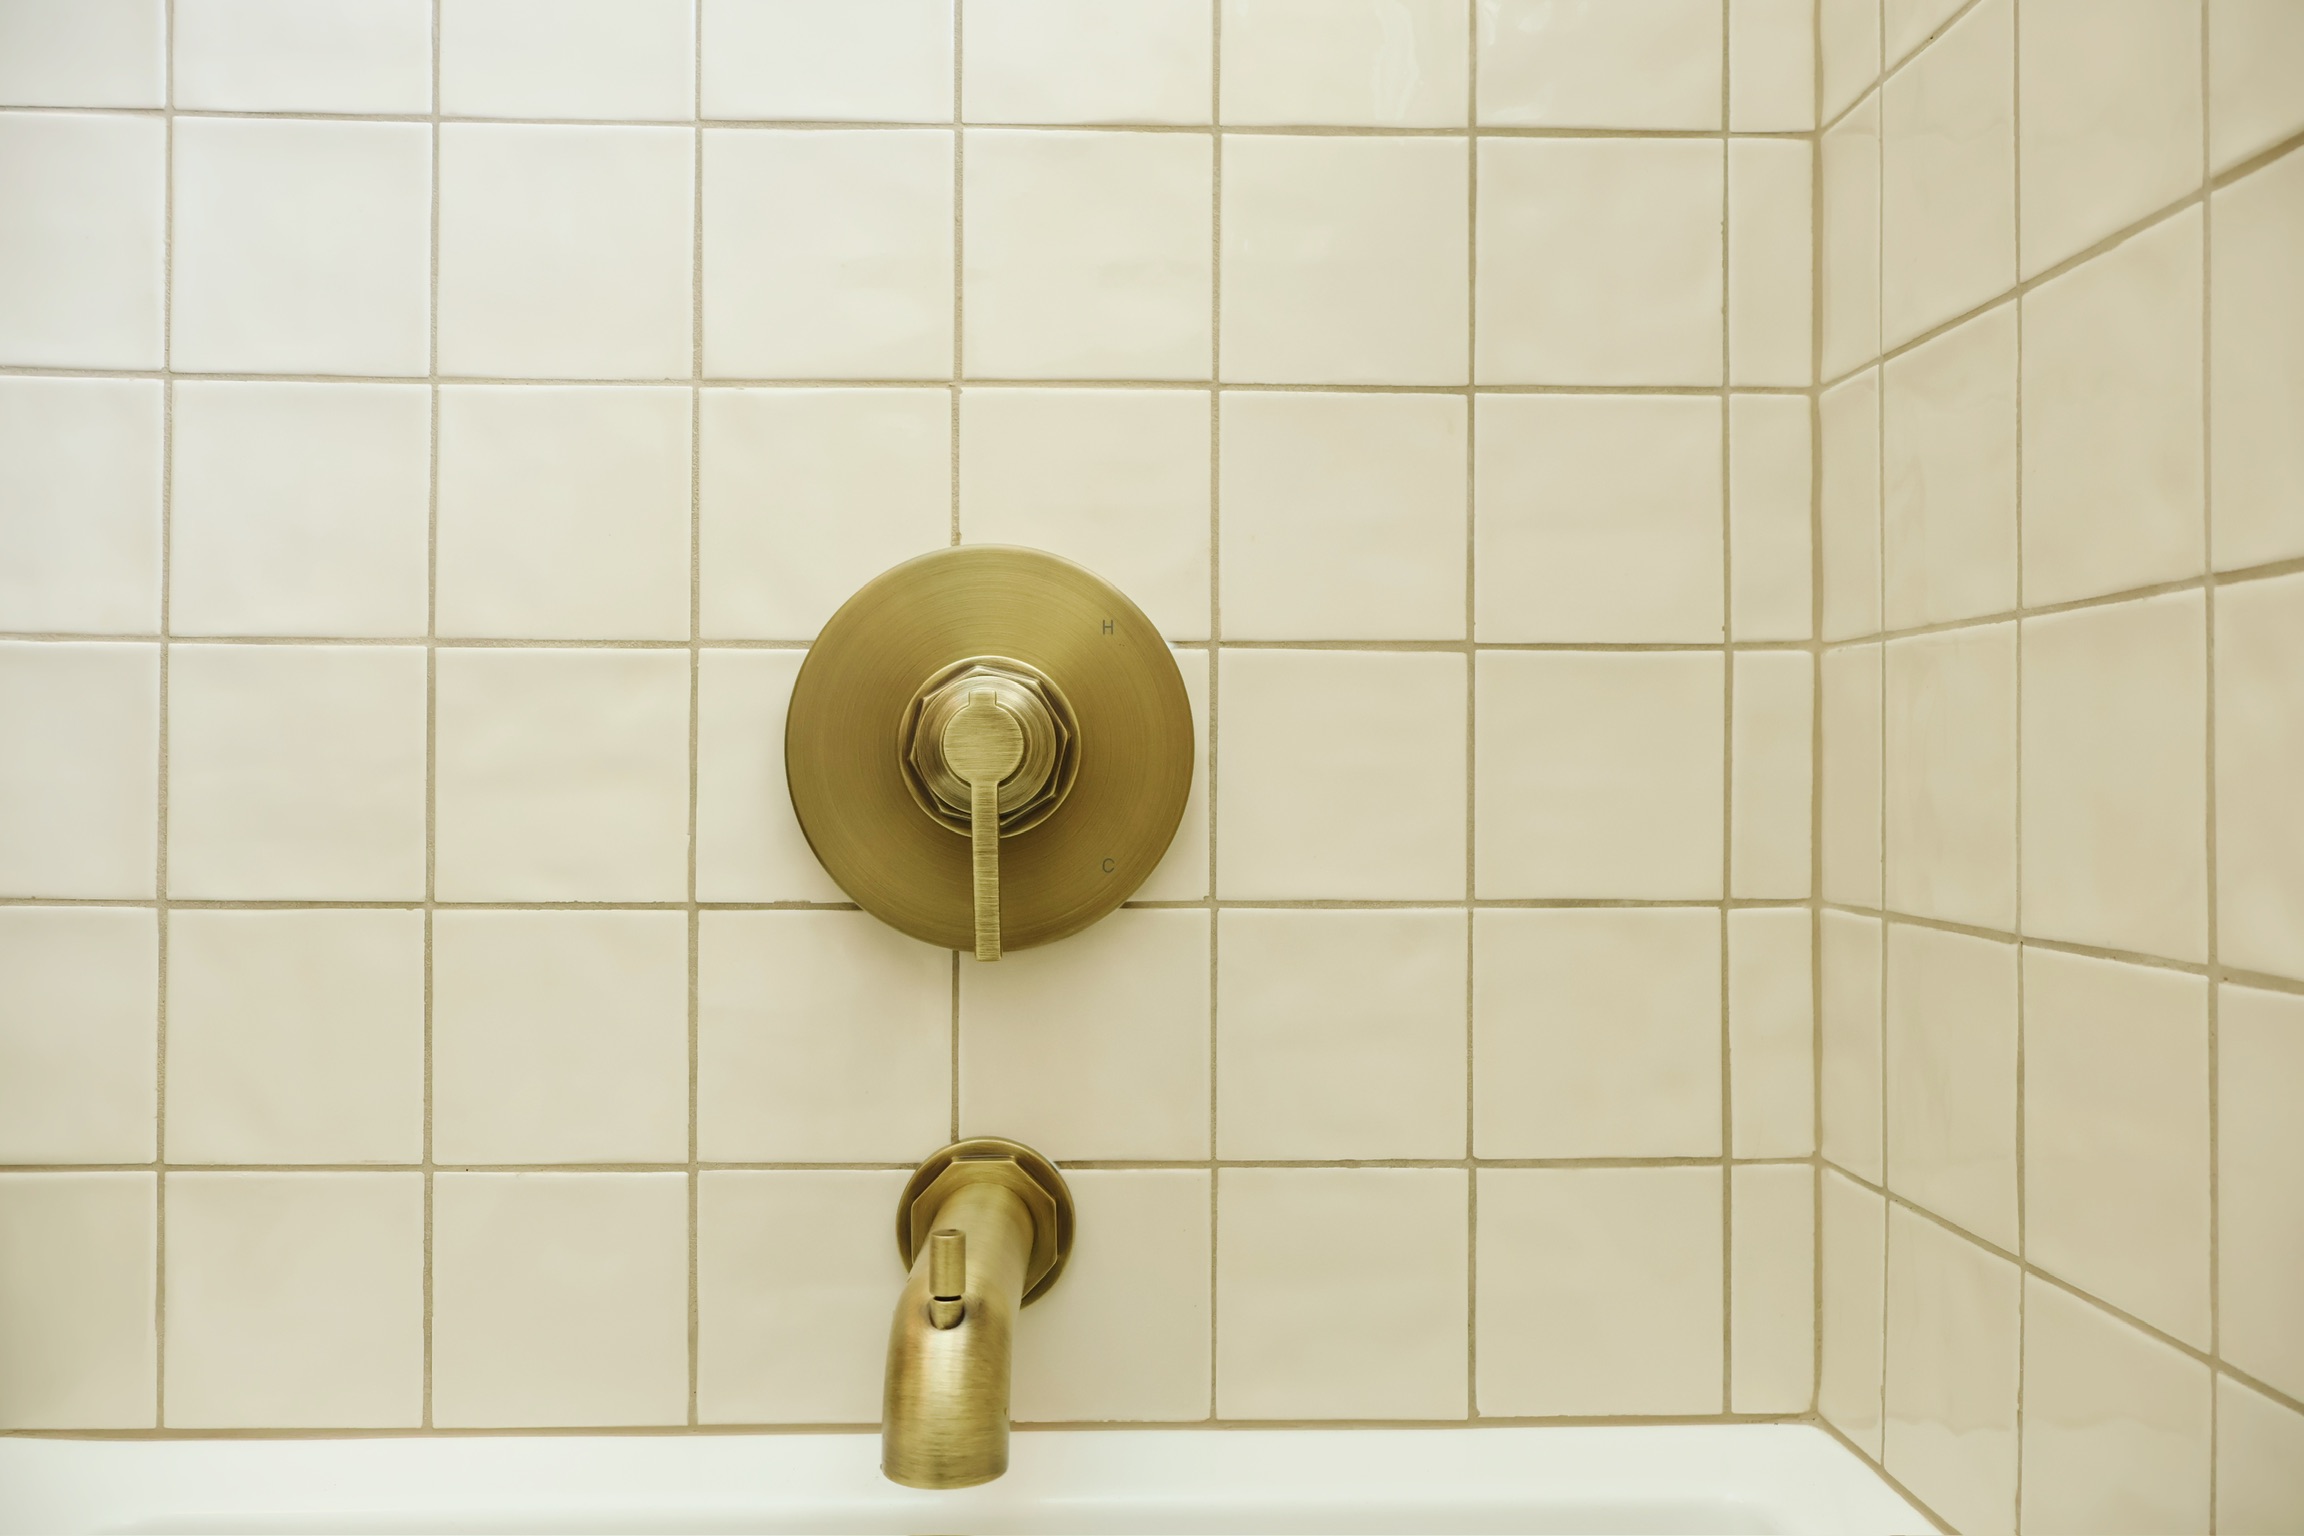
We got all the hardware for our bathroom from Signature Hardware. It’s so classy and sleek and I just love it!
Stay tuned for our new vanity, mirror, toilet, and decor…we’re almost there!
Comments