
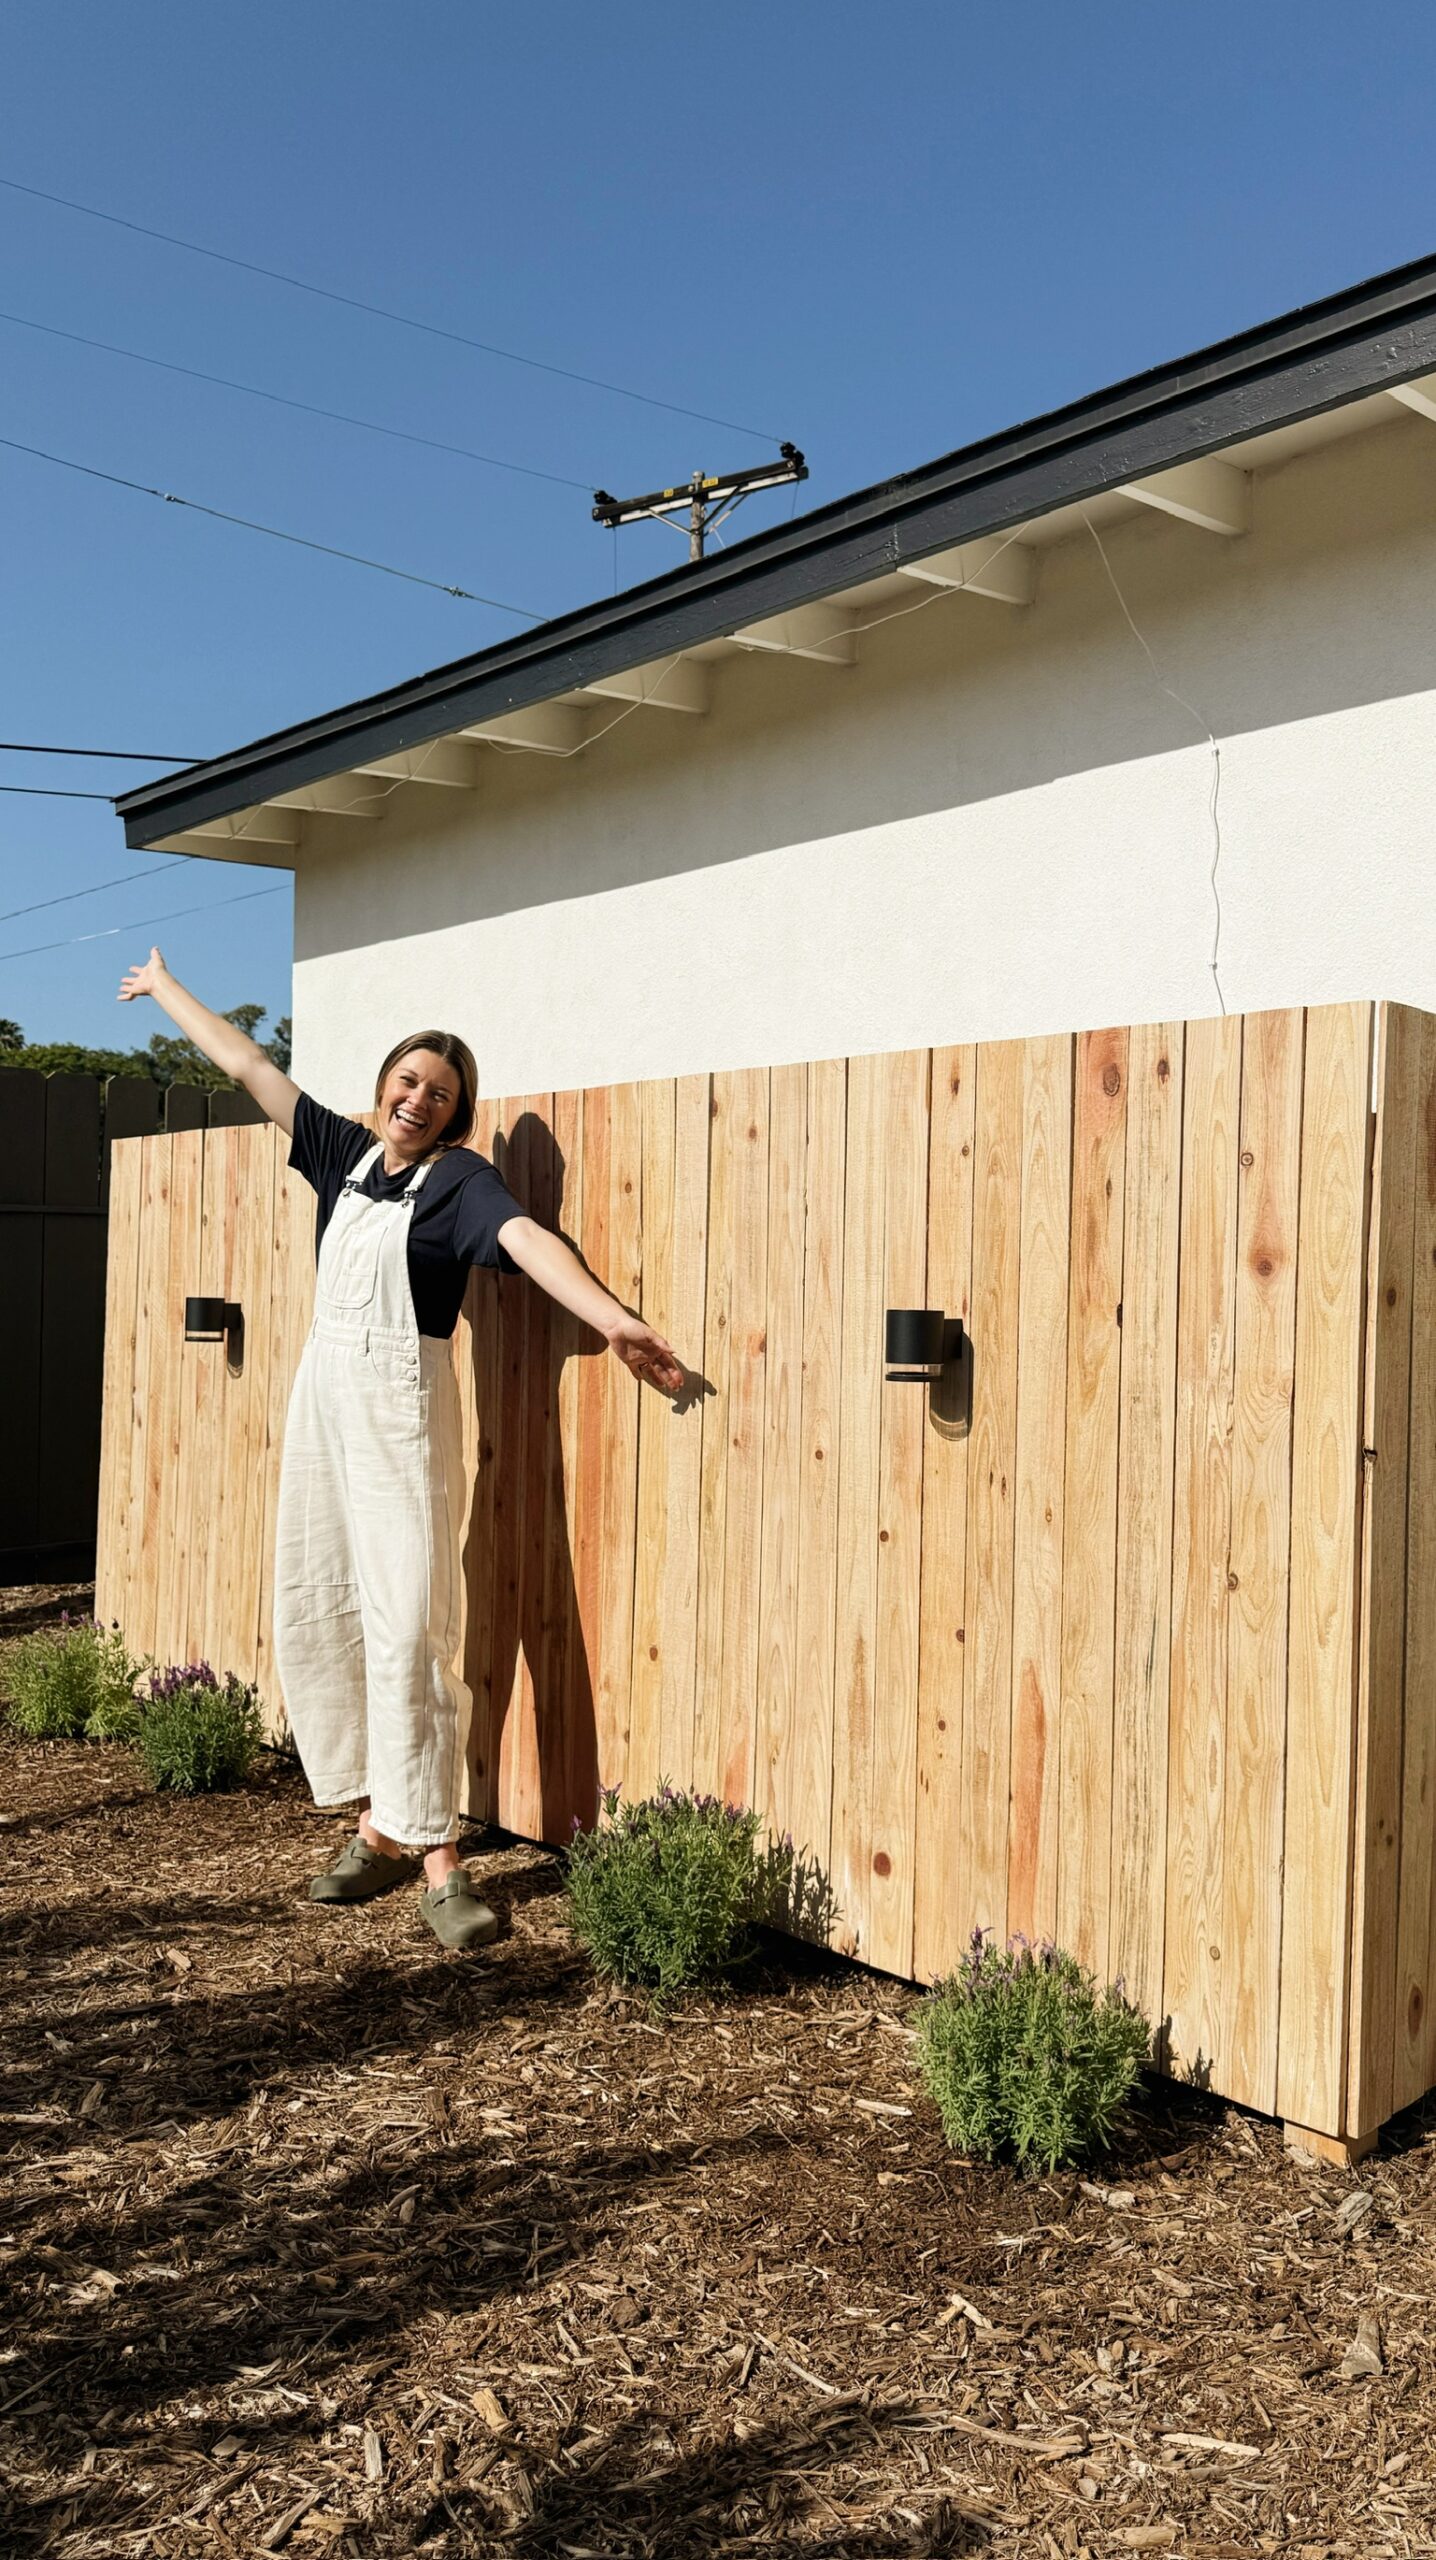
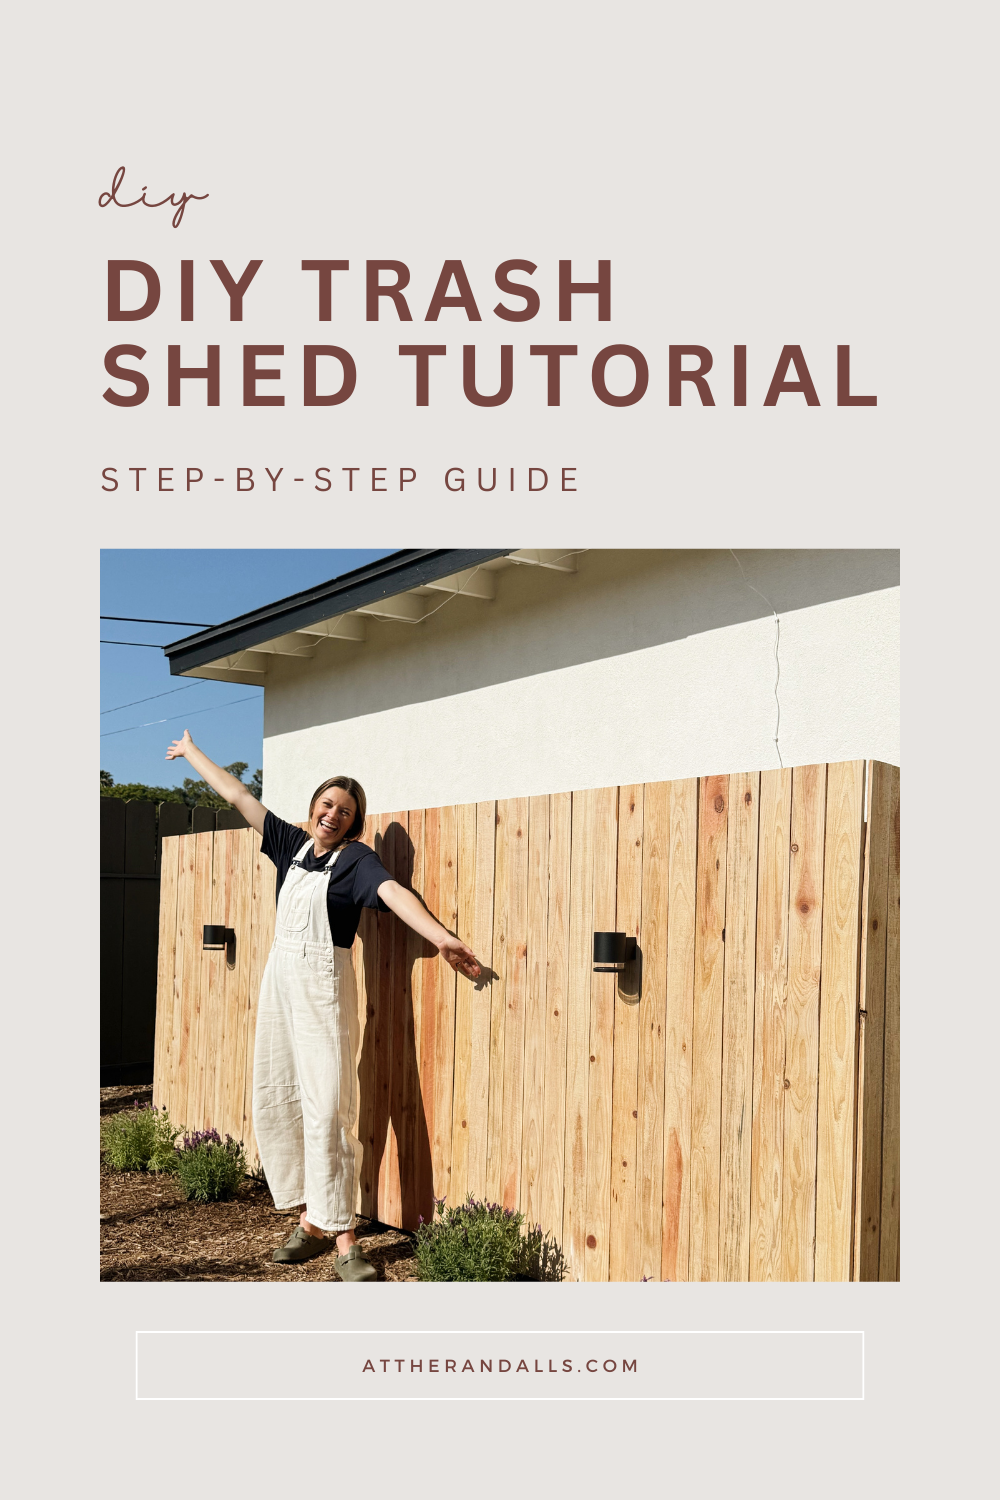
Welcome to operation “hide the trash!” I can’t be the only one who thinks that the big bulky trash cans the city gives us are a bit of an eyesore. So, I decided to hide them and turn them into something pretty instead! Here’s how we built our DIY trash shed!
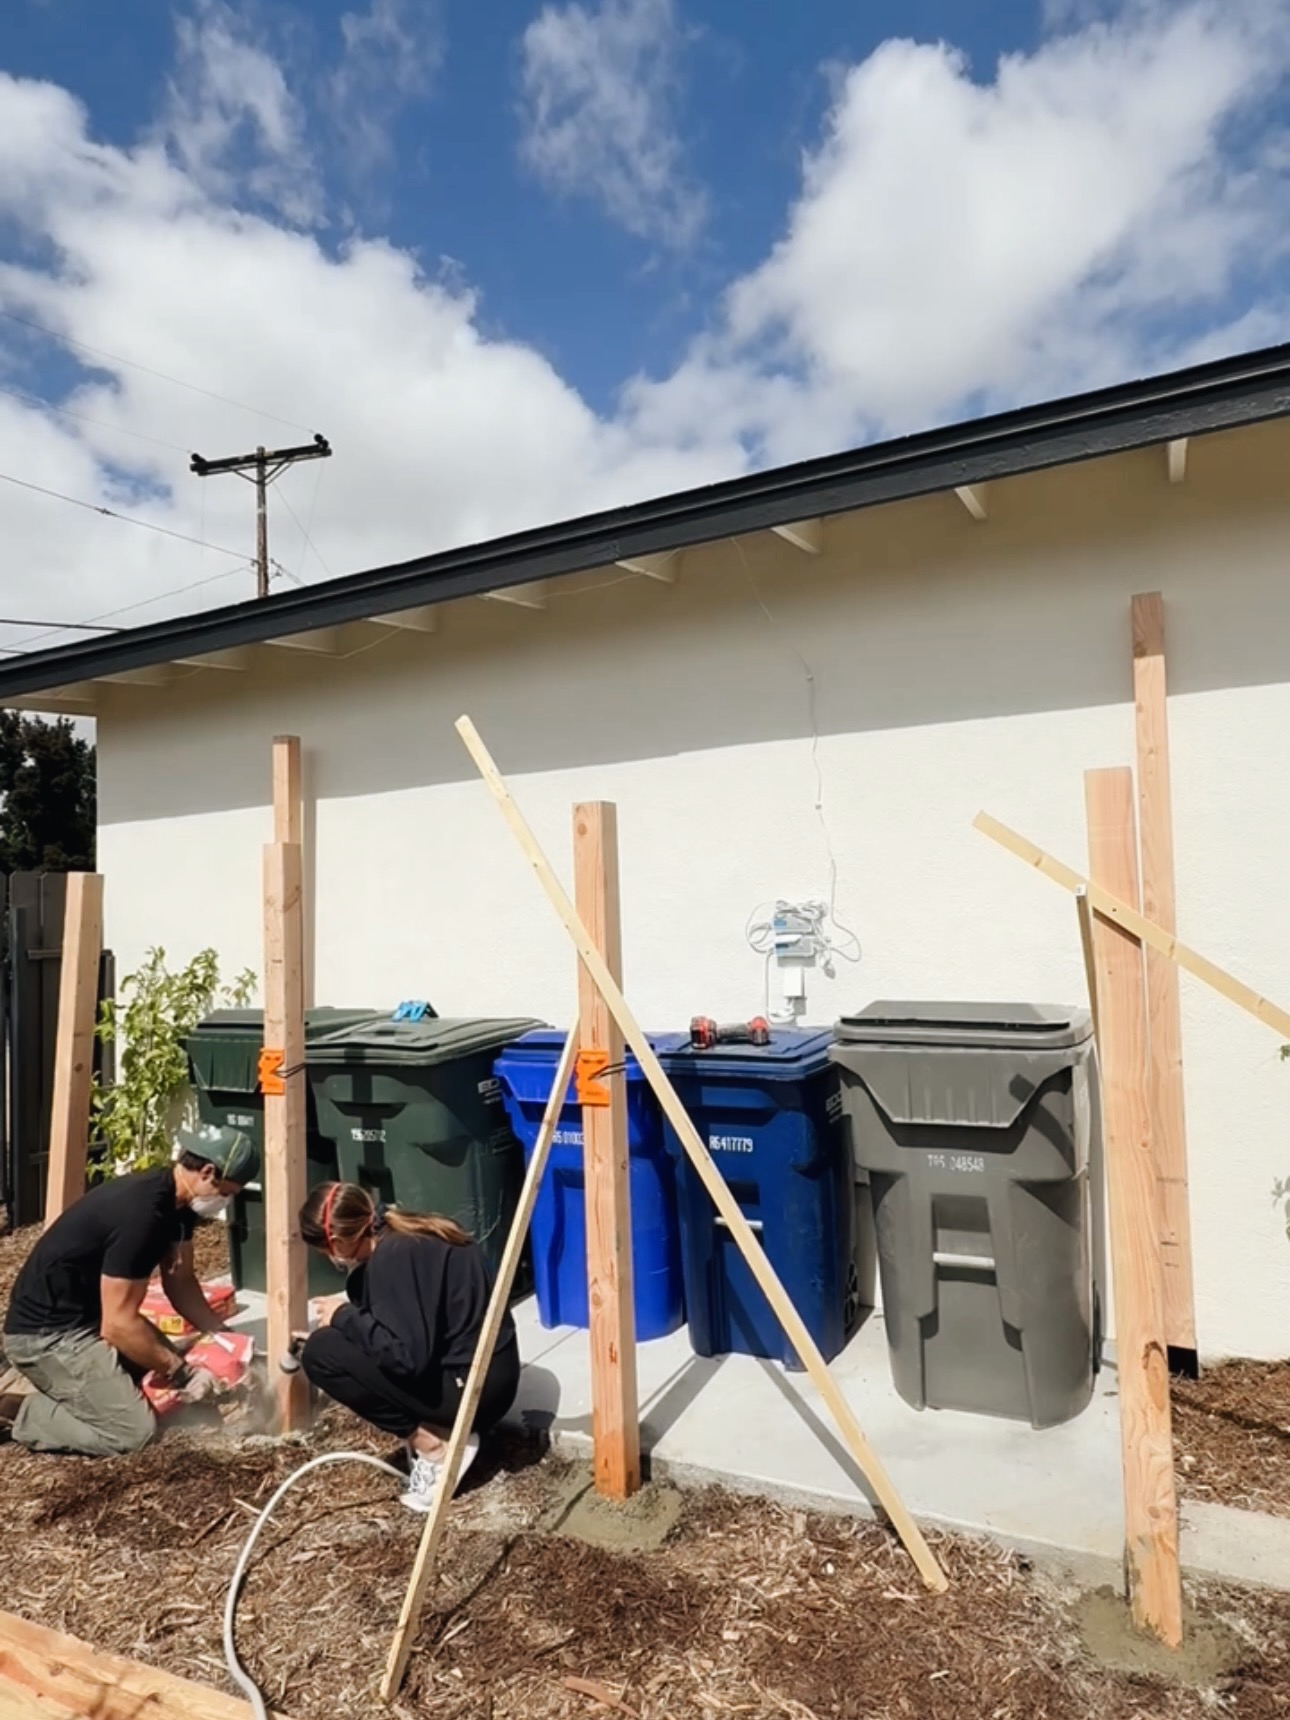
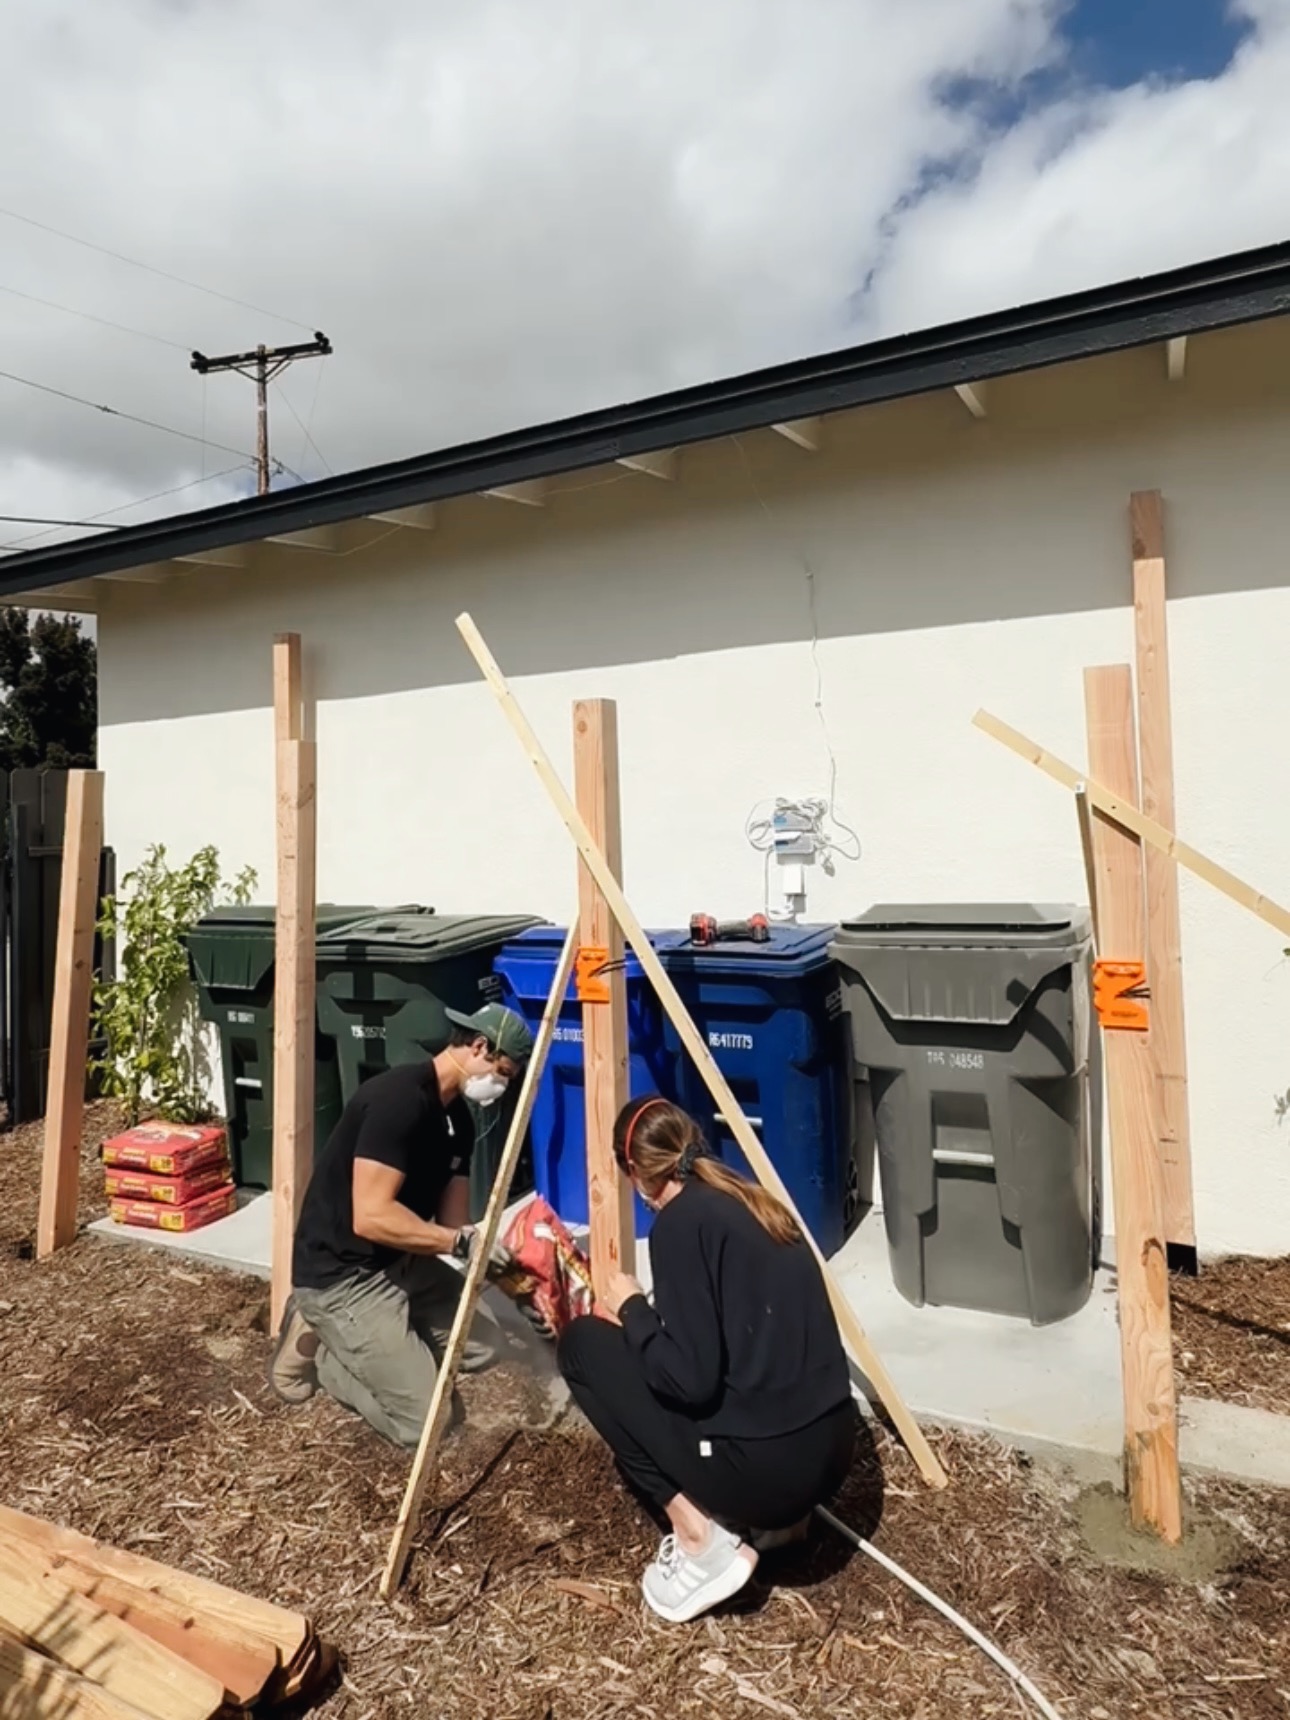
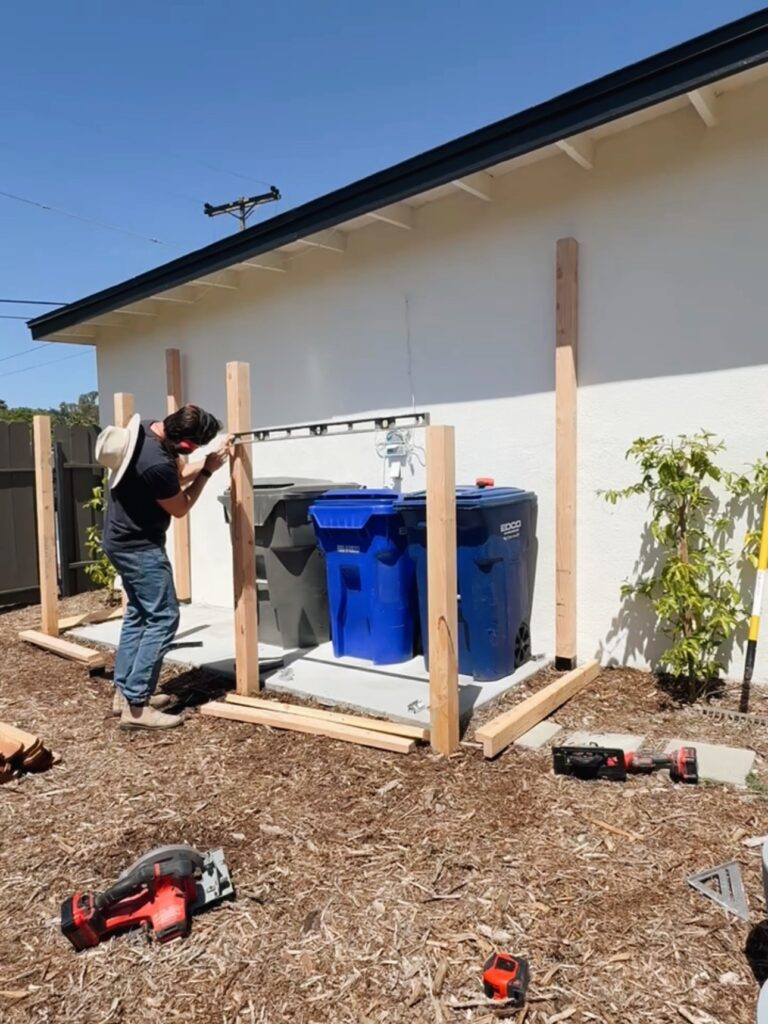
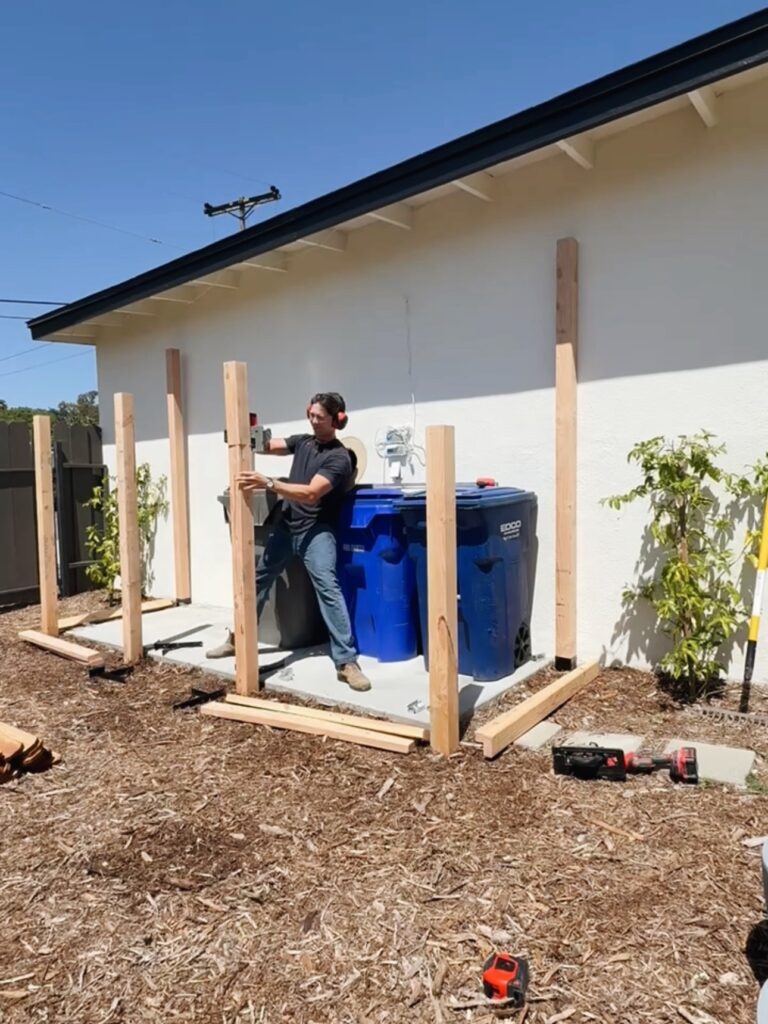
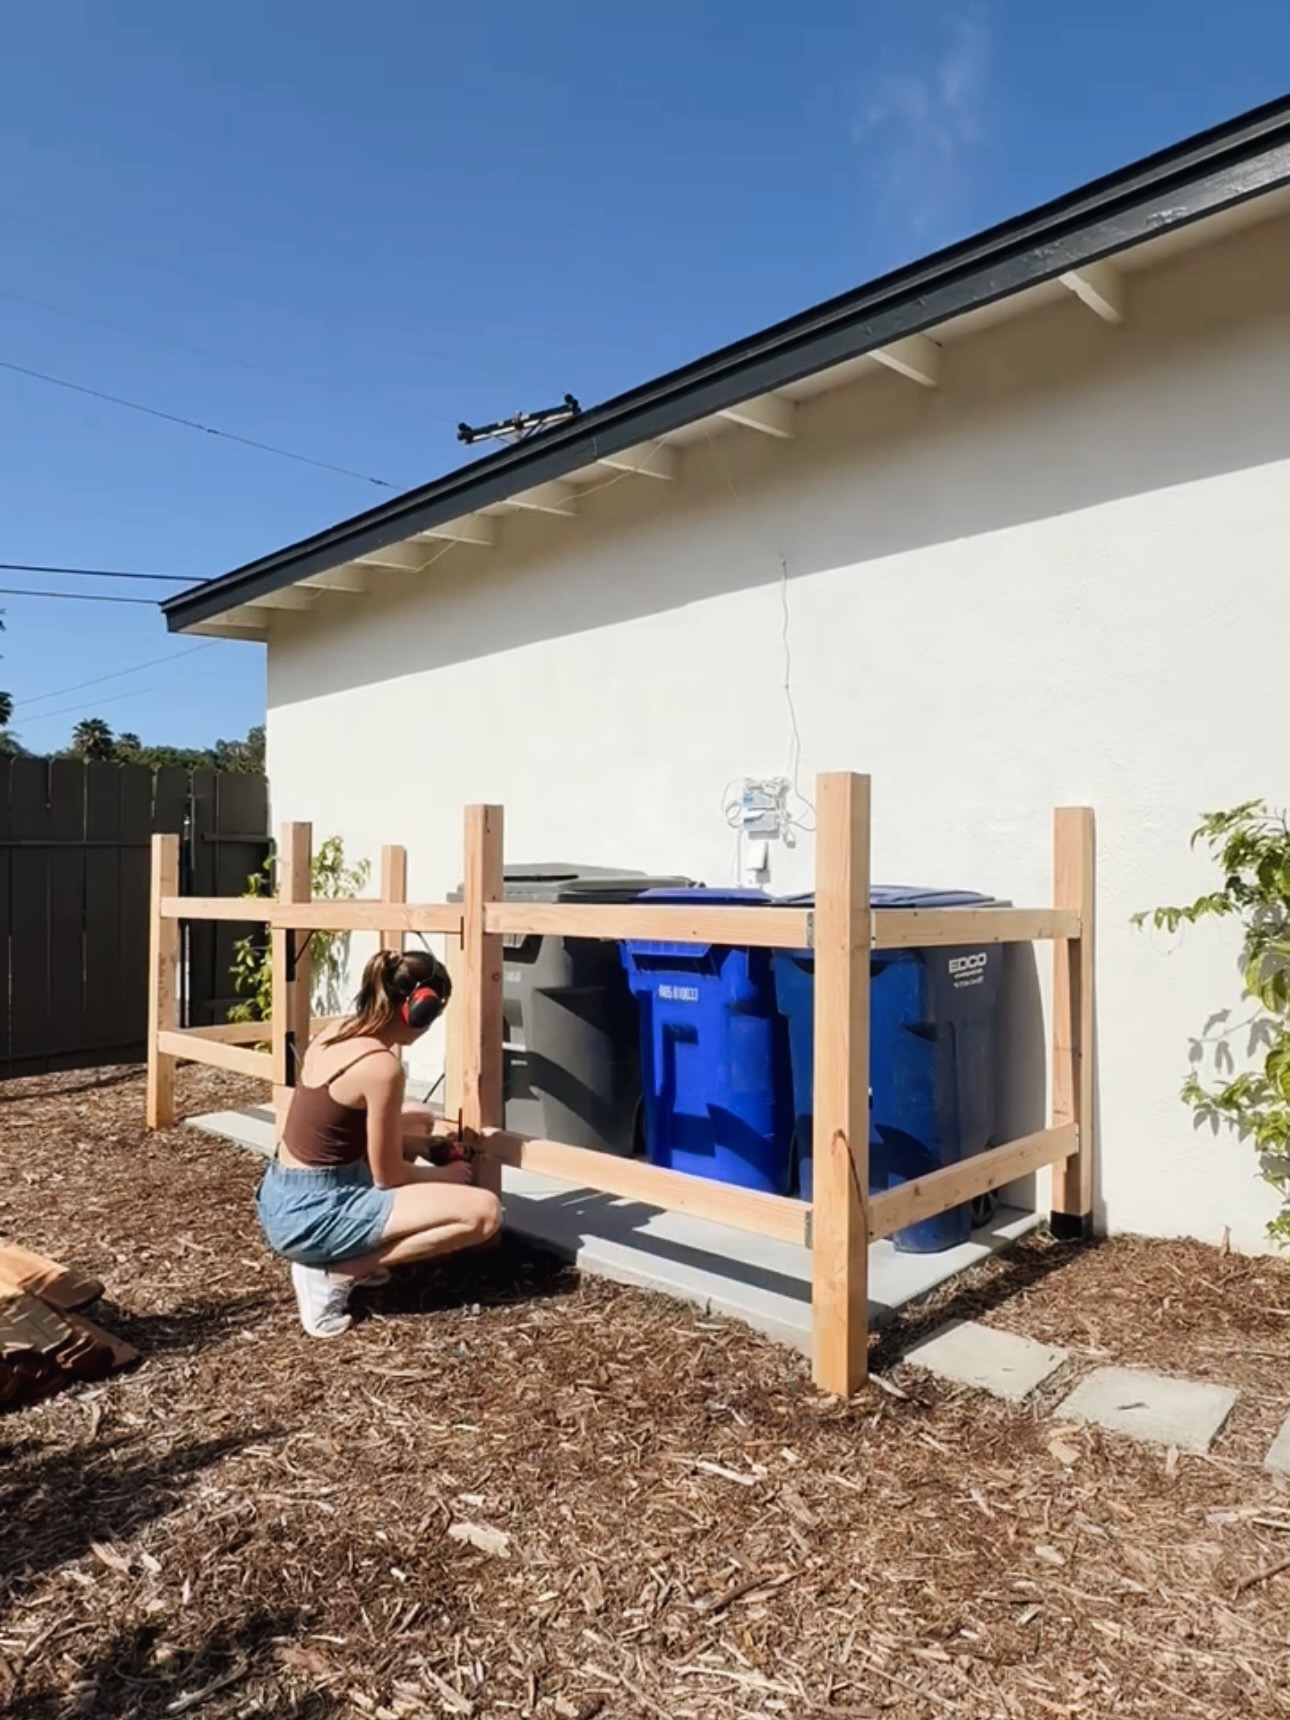
We first laid out where we wanted our 4×4 posts. Then, we dug holes for the posts to go in. We decided to use brackets for the posts in the back because our foundation comes out about a foot and a half from our home. When we dug, we hit concrete. So, we used concrete anchors for the back two post!
We filled the holes (with the posts in them) with concrete and let them set overnight, propped up so they’d set straight.
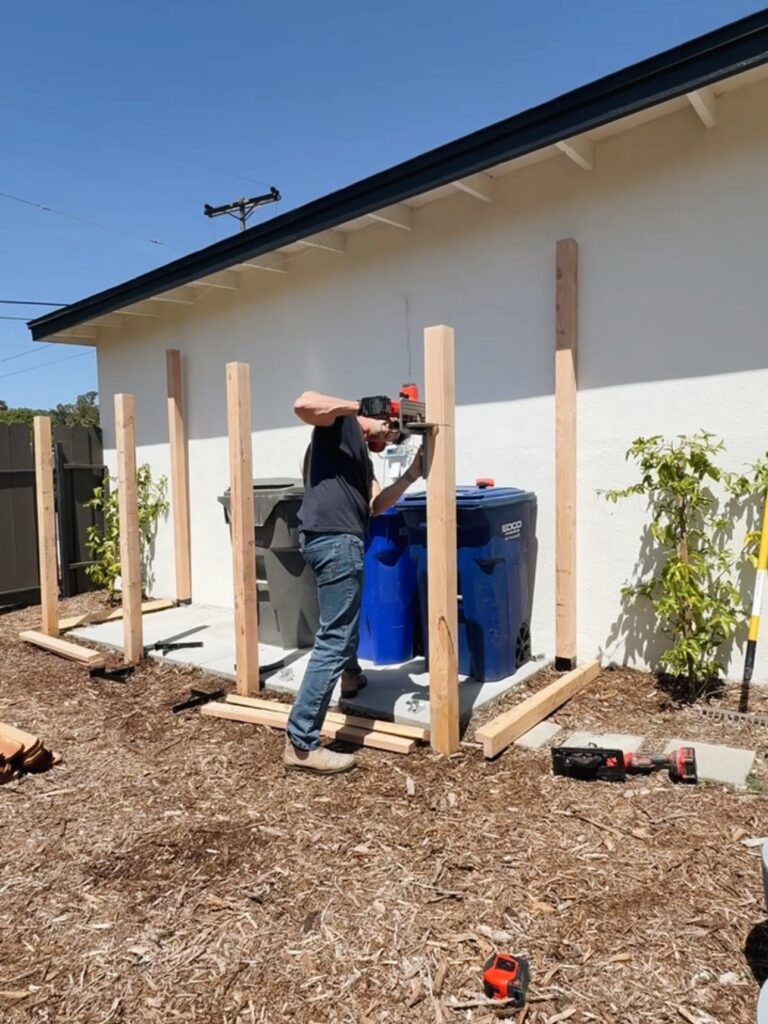
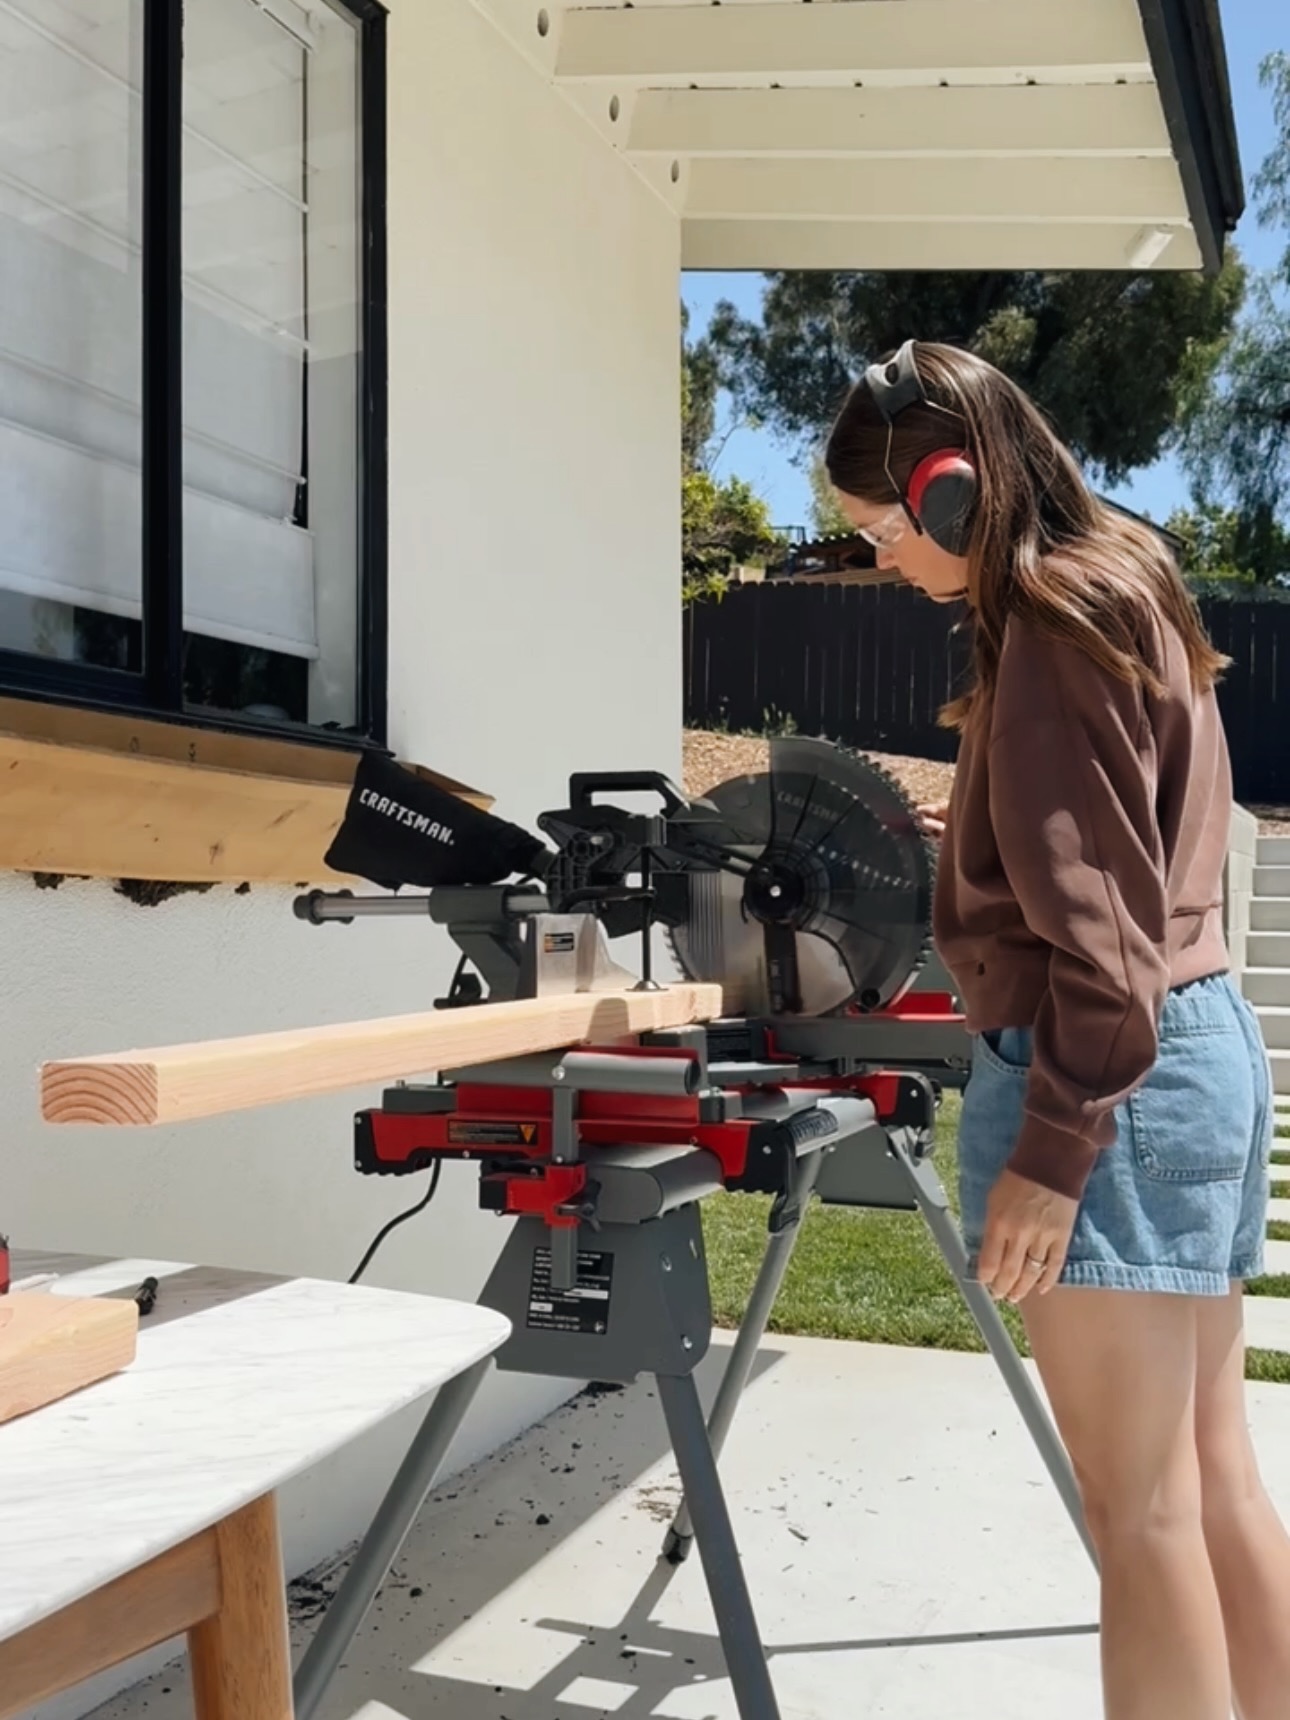
The shed would be about 5 feet tall. So, Jake used a circular saw and a speed square as a guide to cut the posts down to the correct height while I hopped over on our miter saw and cut all the rails! For the rails, we used 2×4’s.
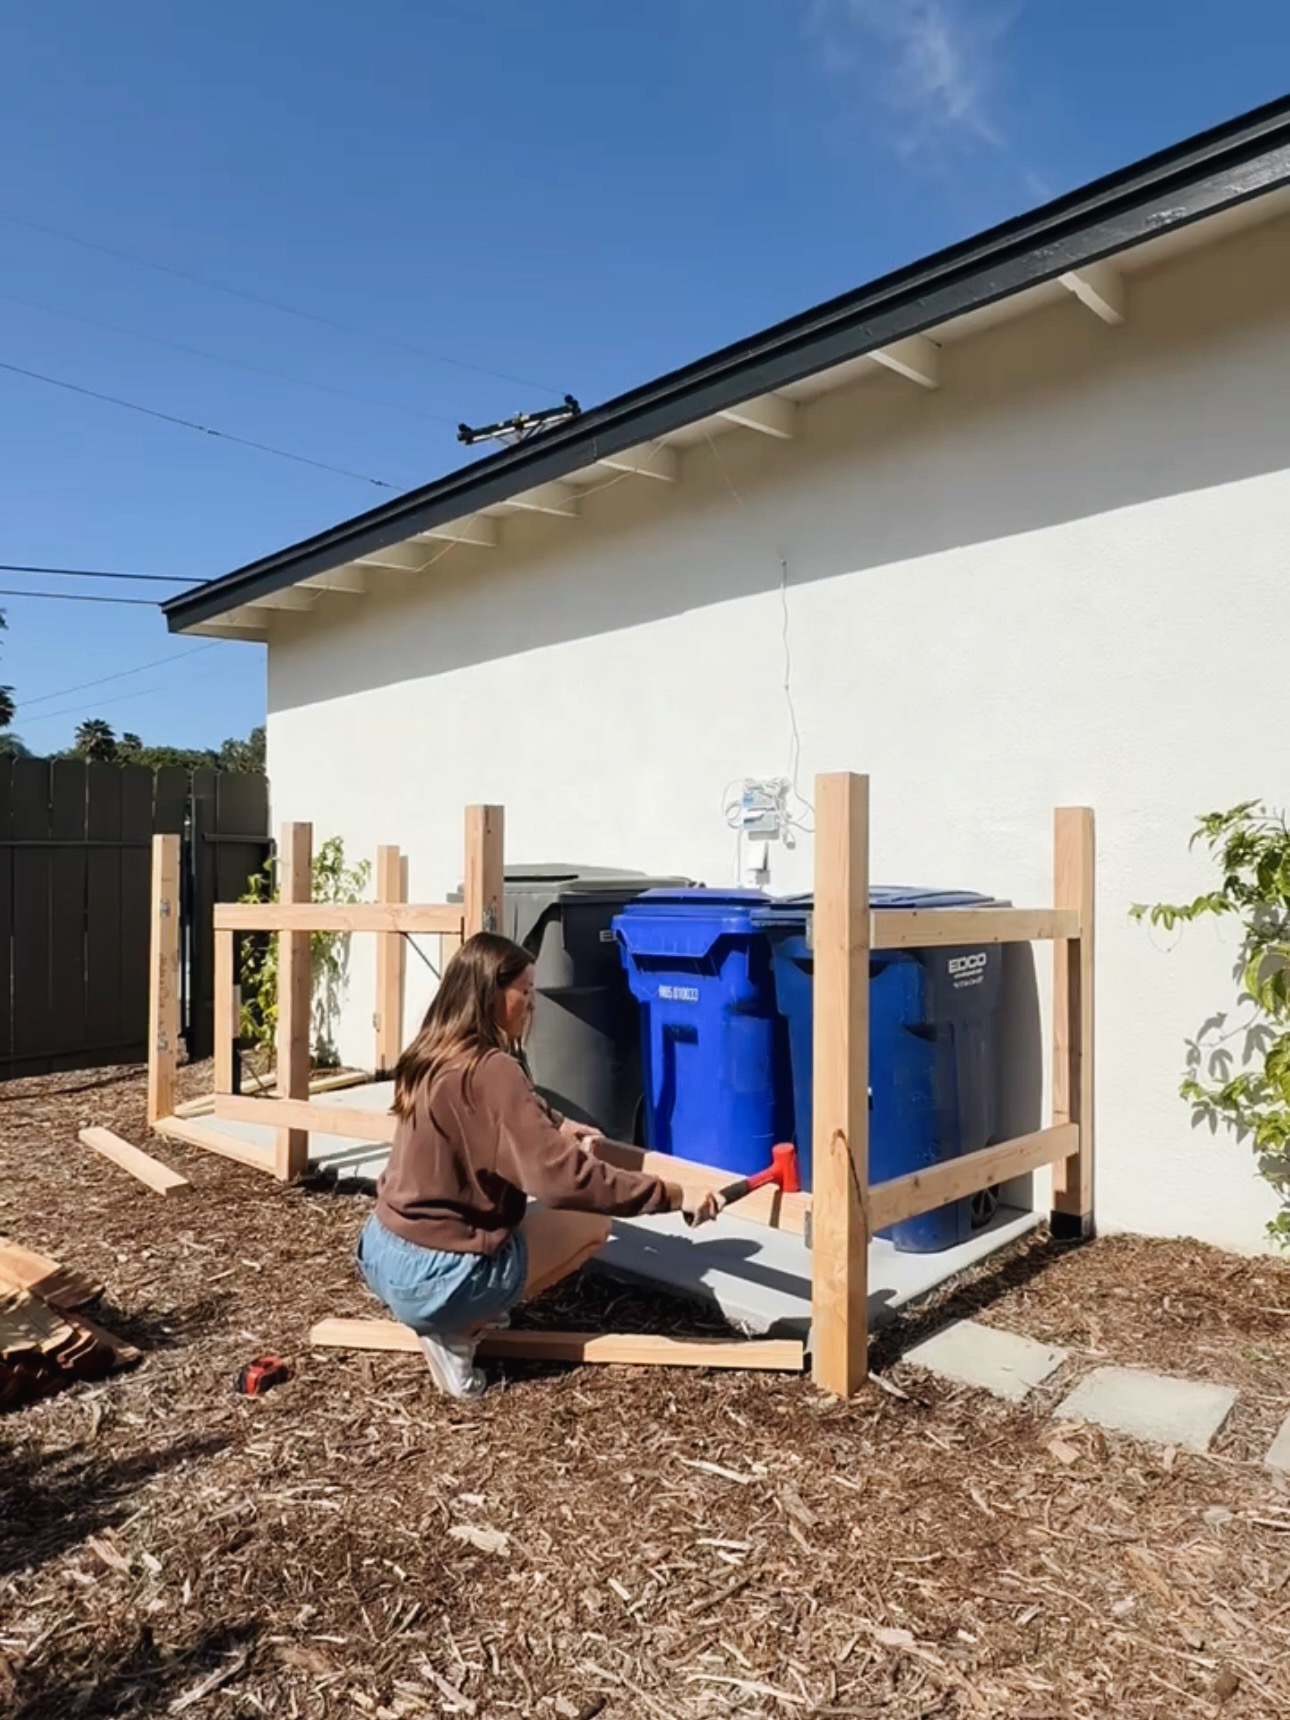
To install the rails, I attached brackets to the posts. I loosely placed them in and then used a mallet to hit them into place. Then I secured the frame pieces into the brackets with screws.
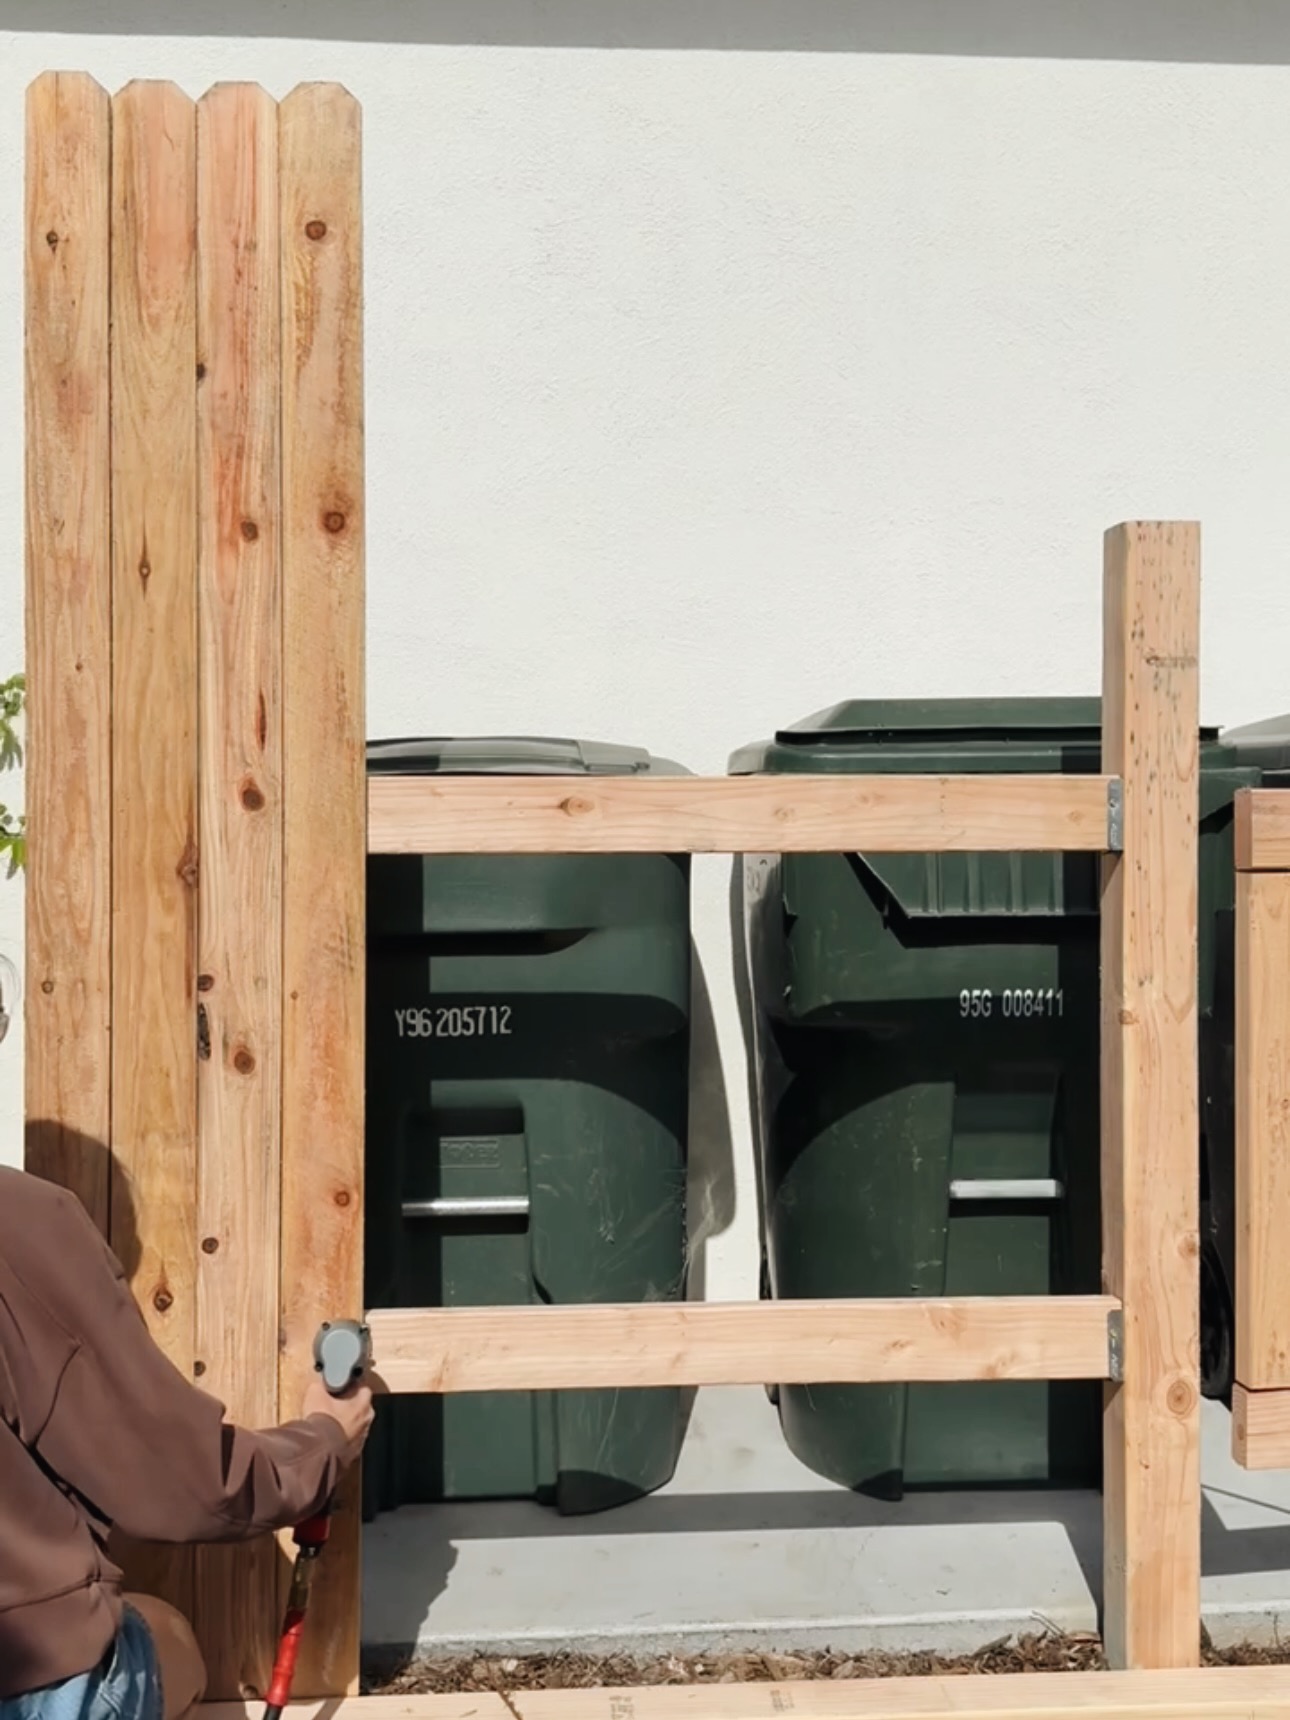
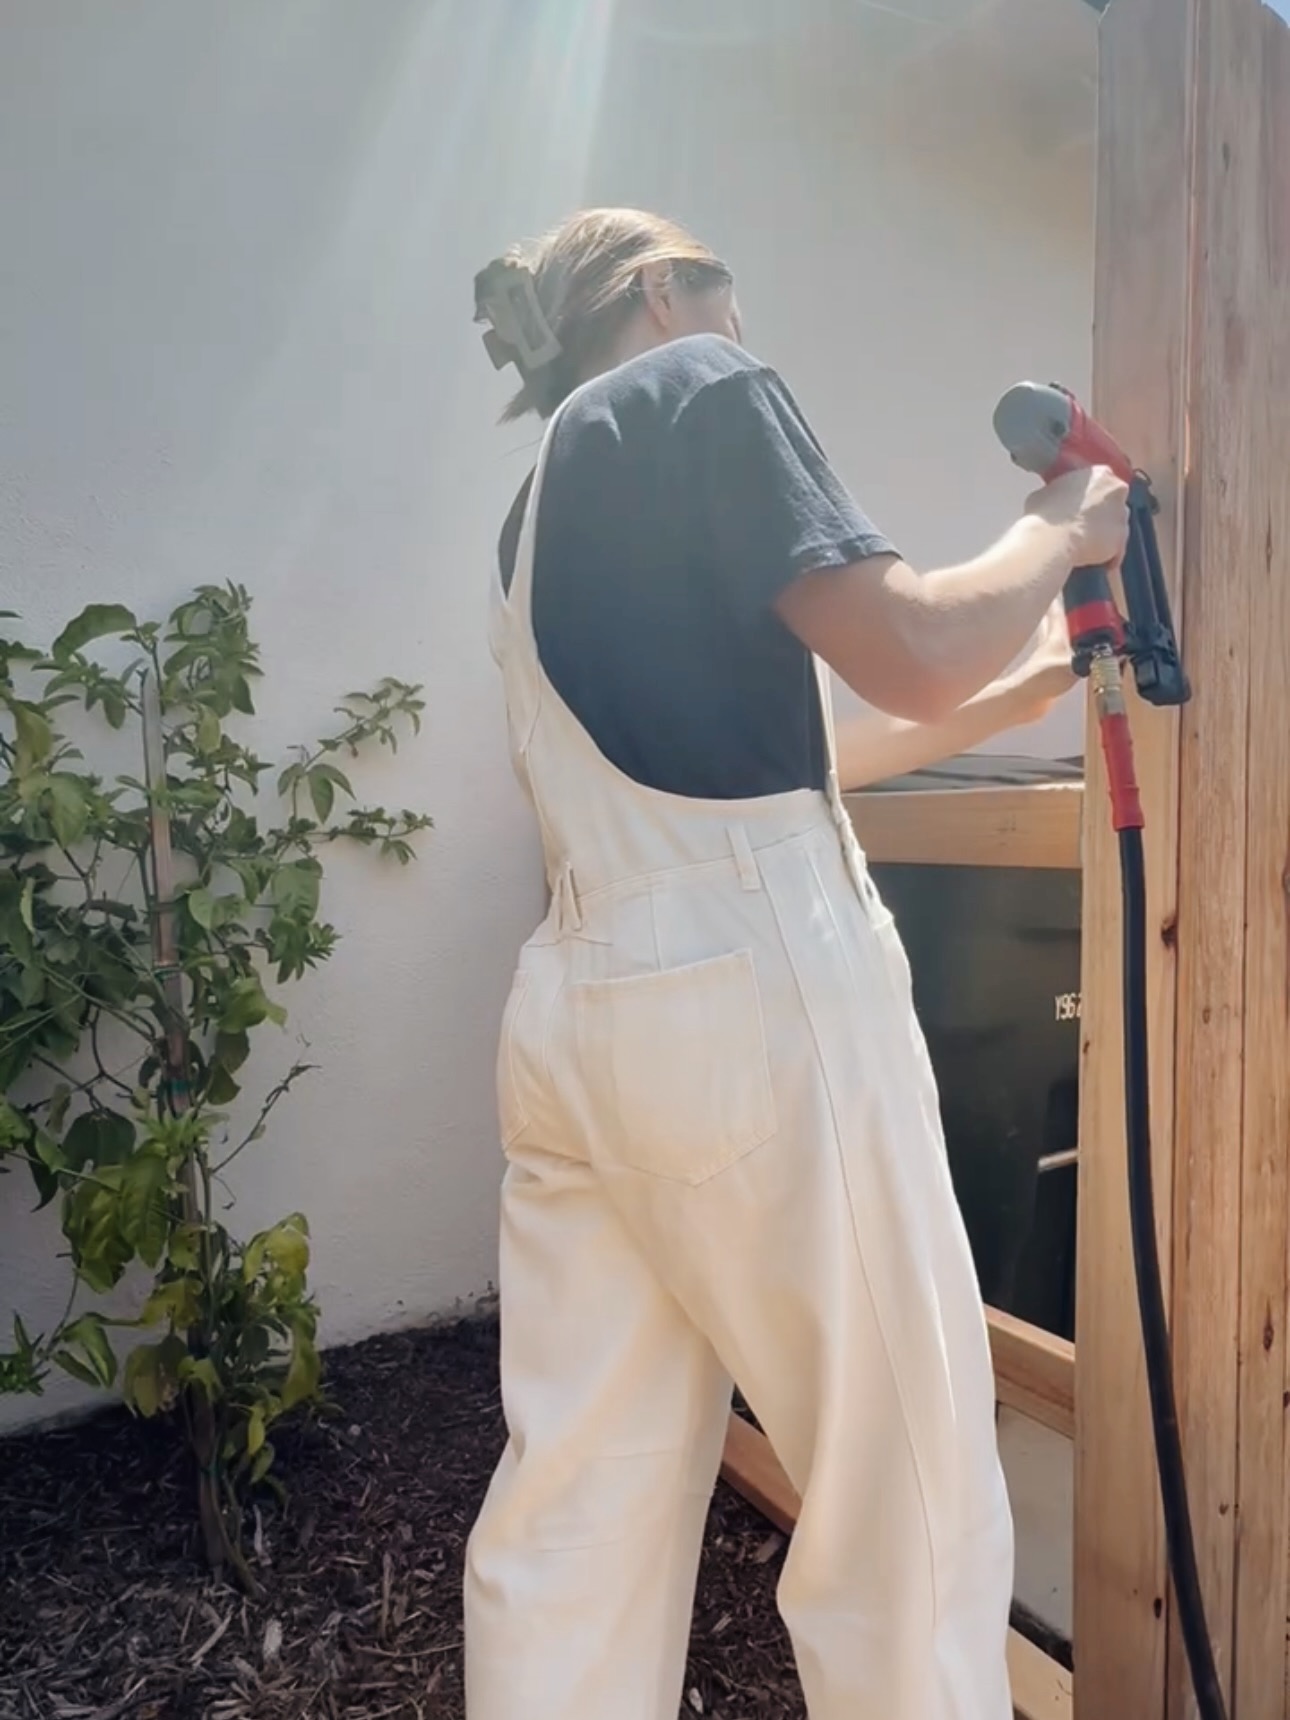
Next up, the pickets! We used our brad nailer to put all of the pickets in place. It was already looking so much better! Then we used the same circular saw + speed square set up to cut all the pickets to height.
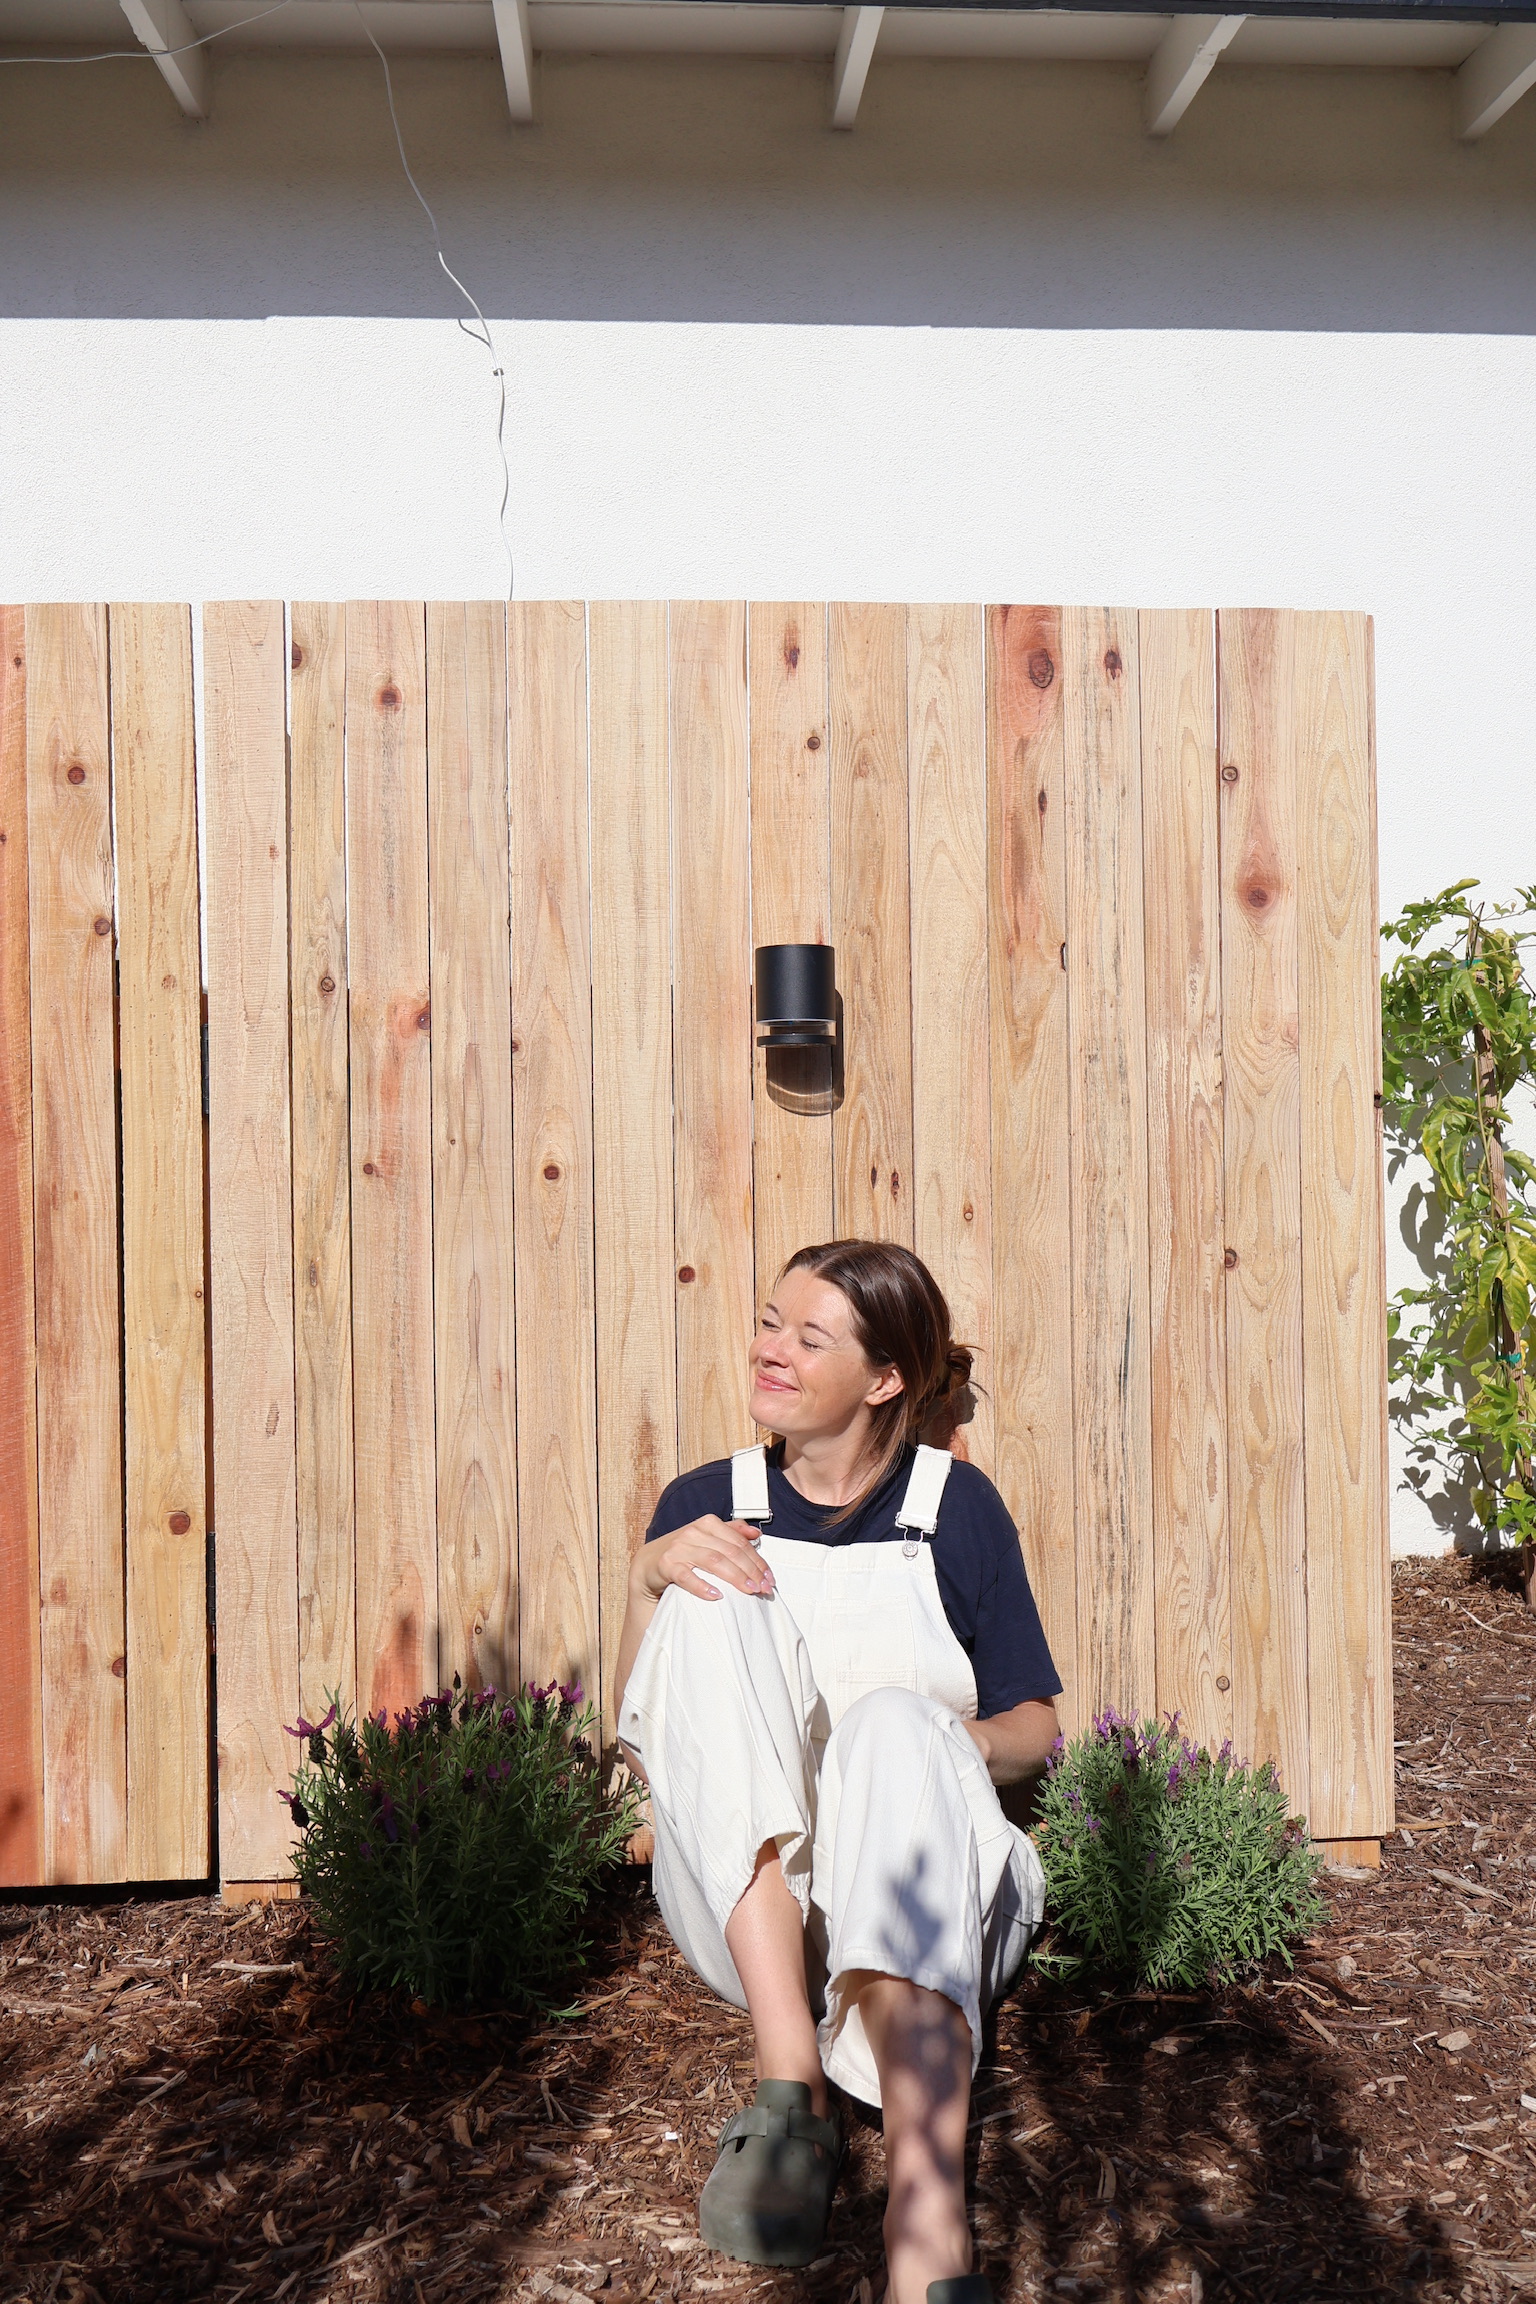
To finish the whole thing off, we installed some solar powered wall lights and they are just perfect! I cannot believe this is my house! I’d been dreaming of doing this project since we moved in.
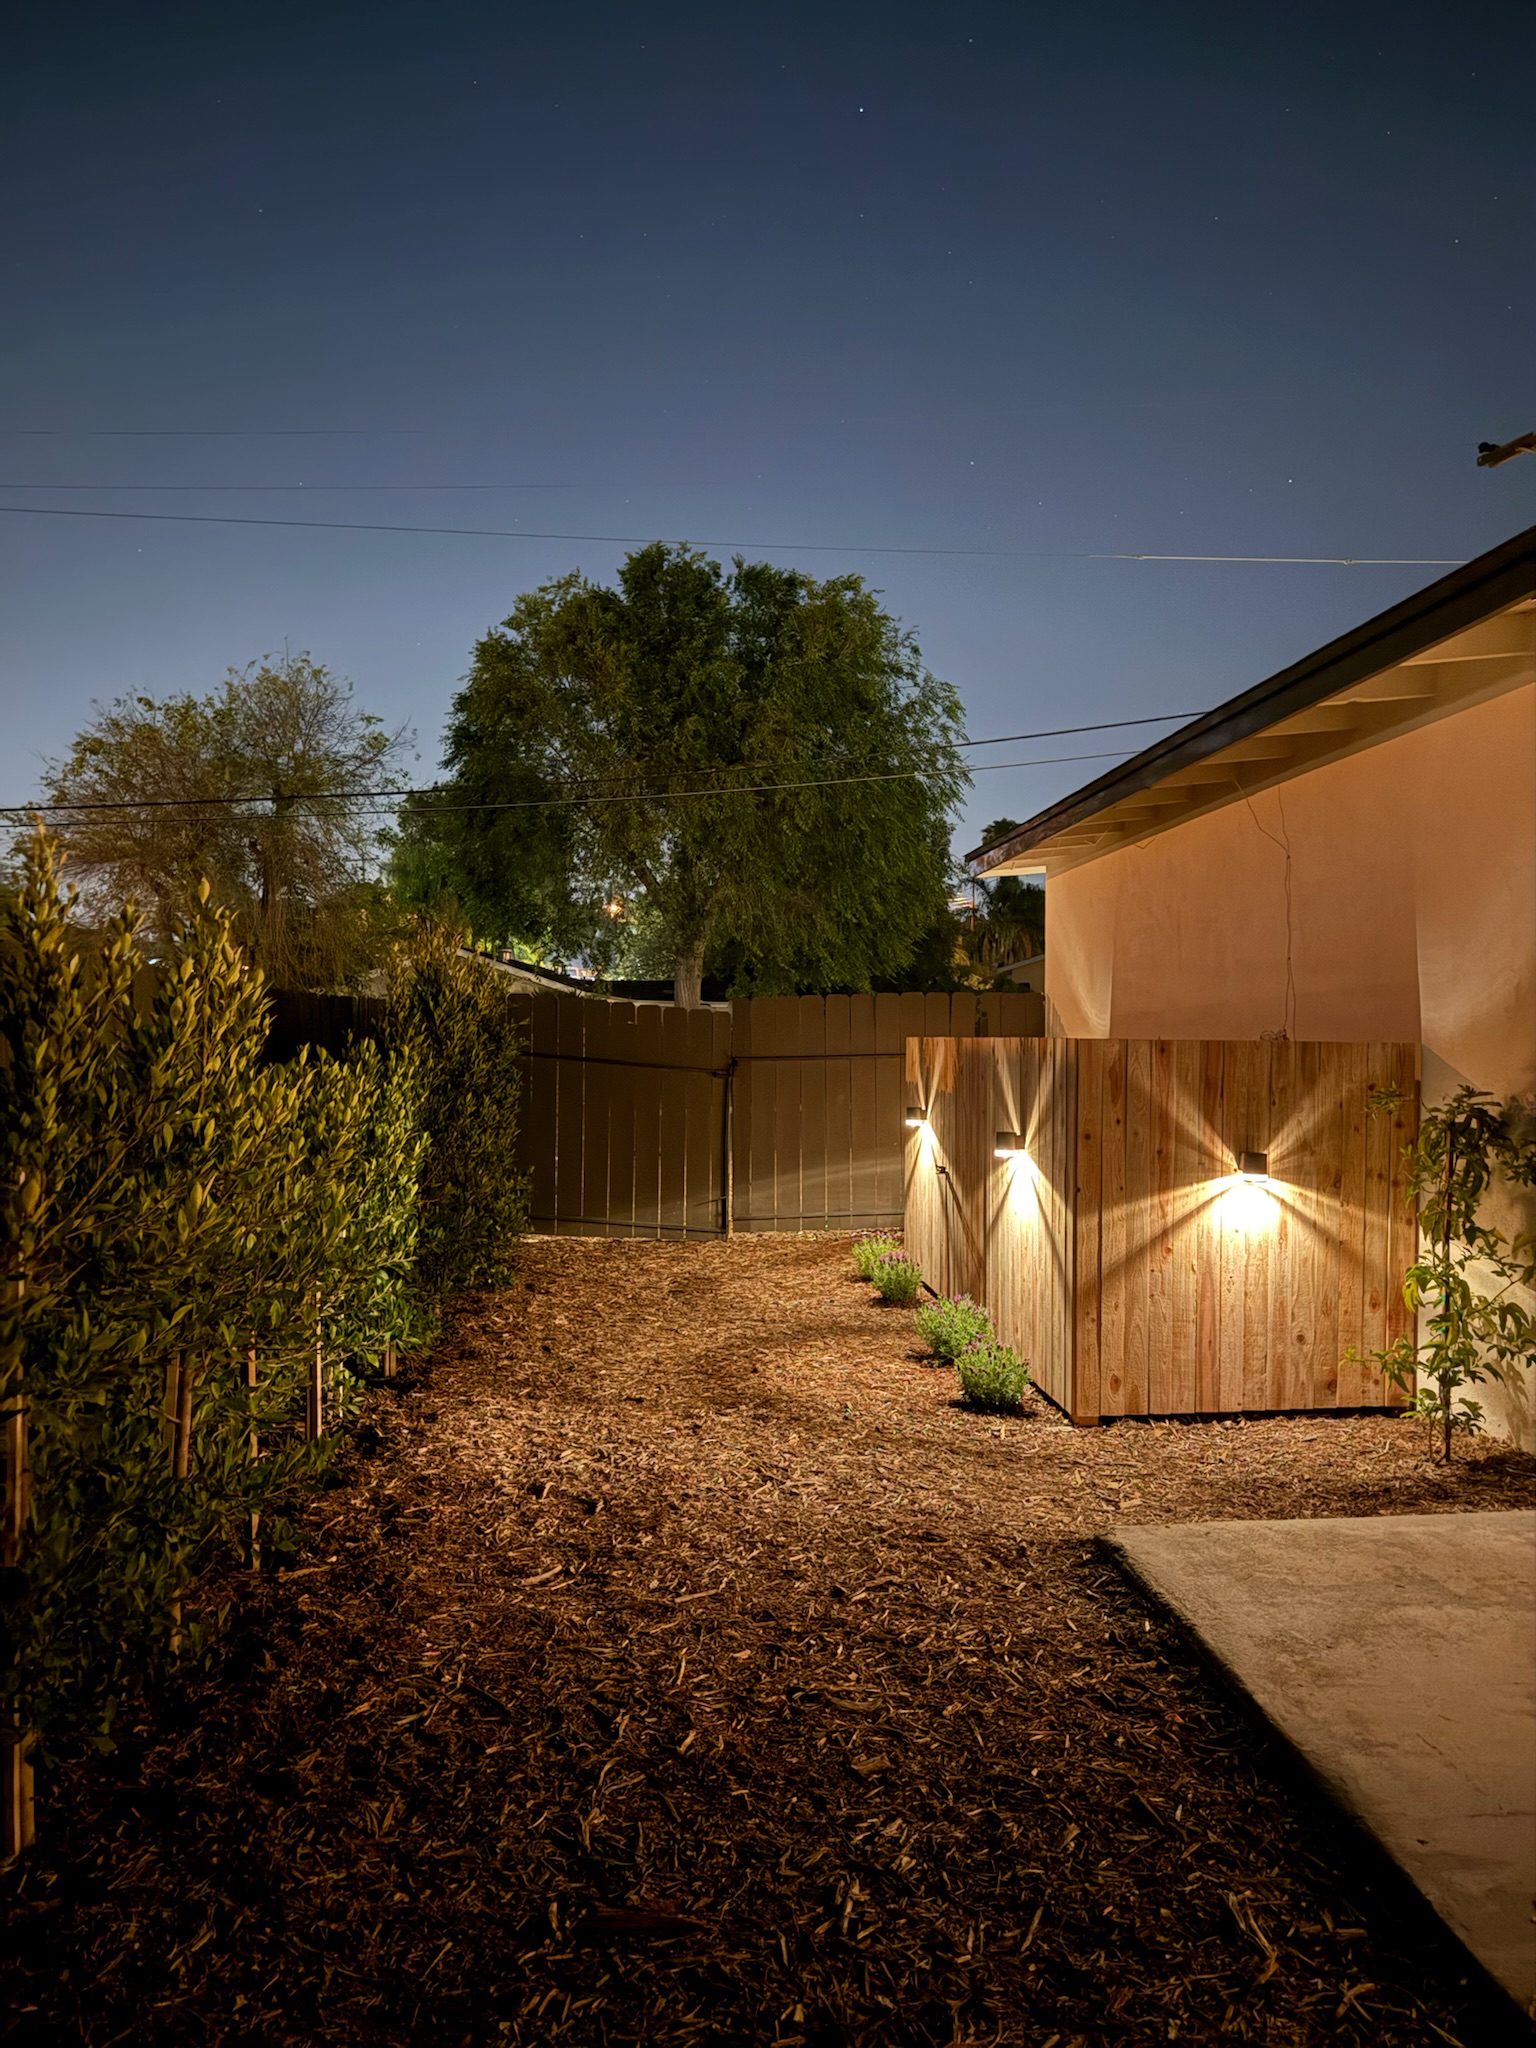
This project was actually part of our Yardzen Plans! It’s so cool to start to see our yard come to life! I seriously want to know if you try this project out in your own home!
Here’s everything we used for this project:
Comments