
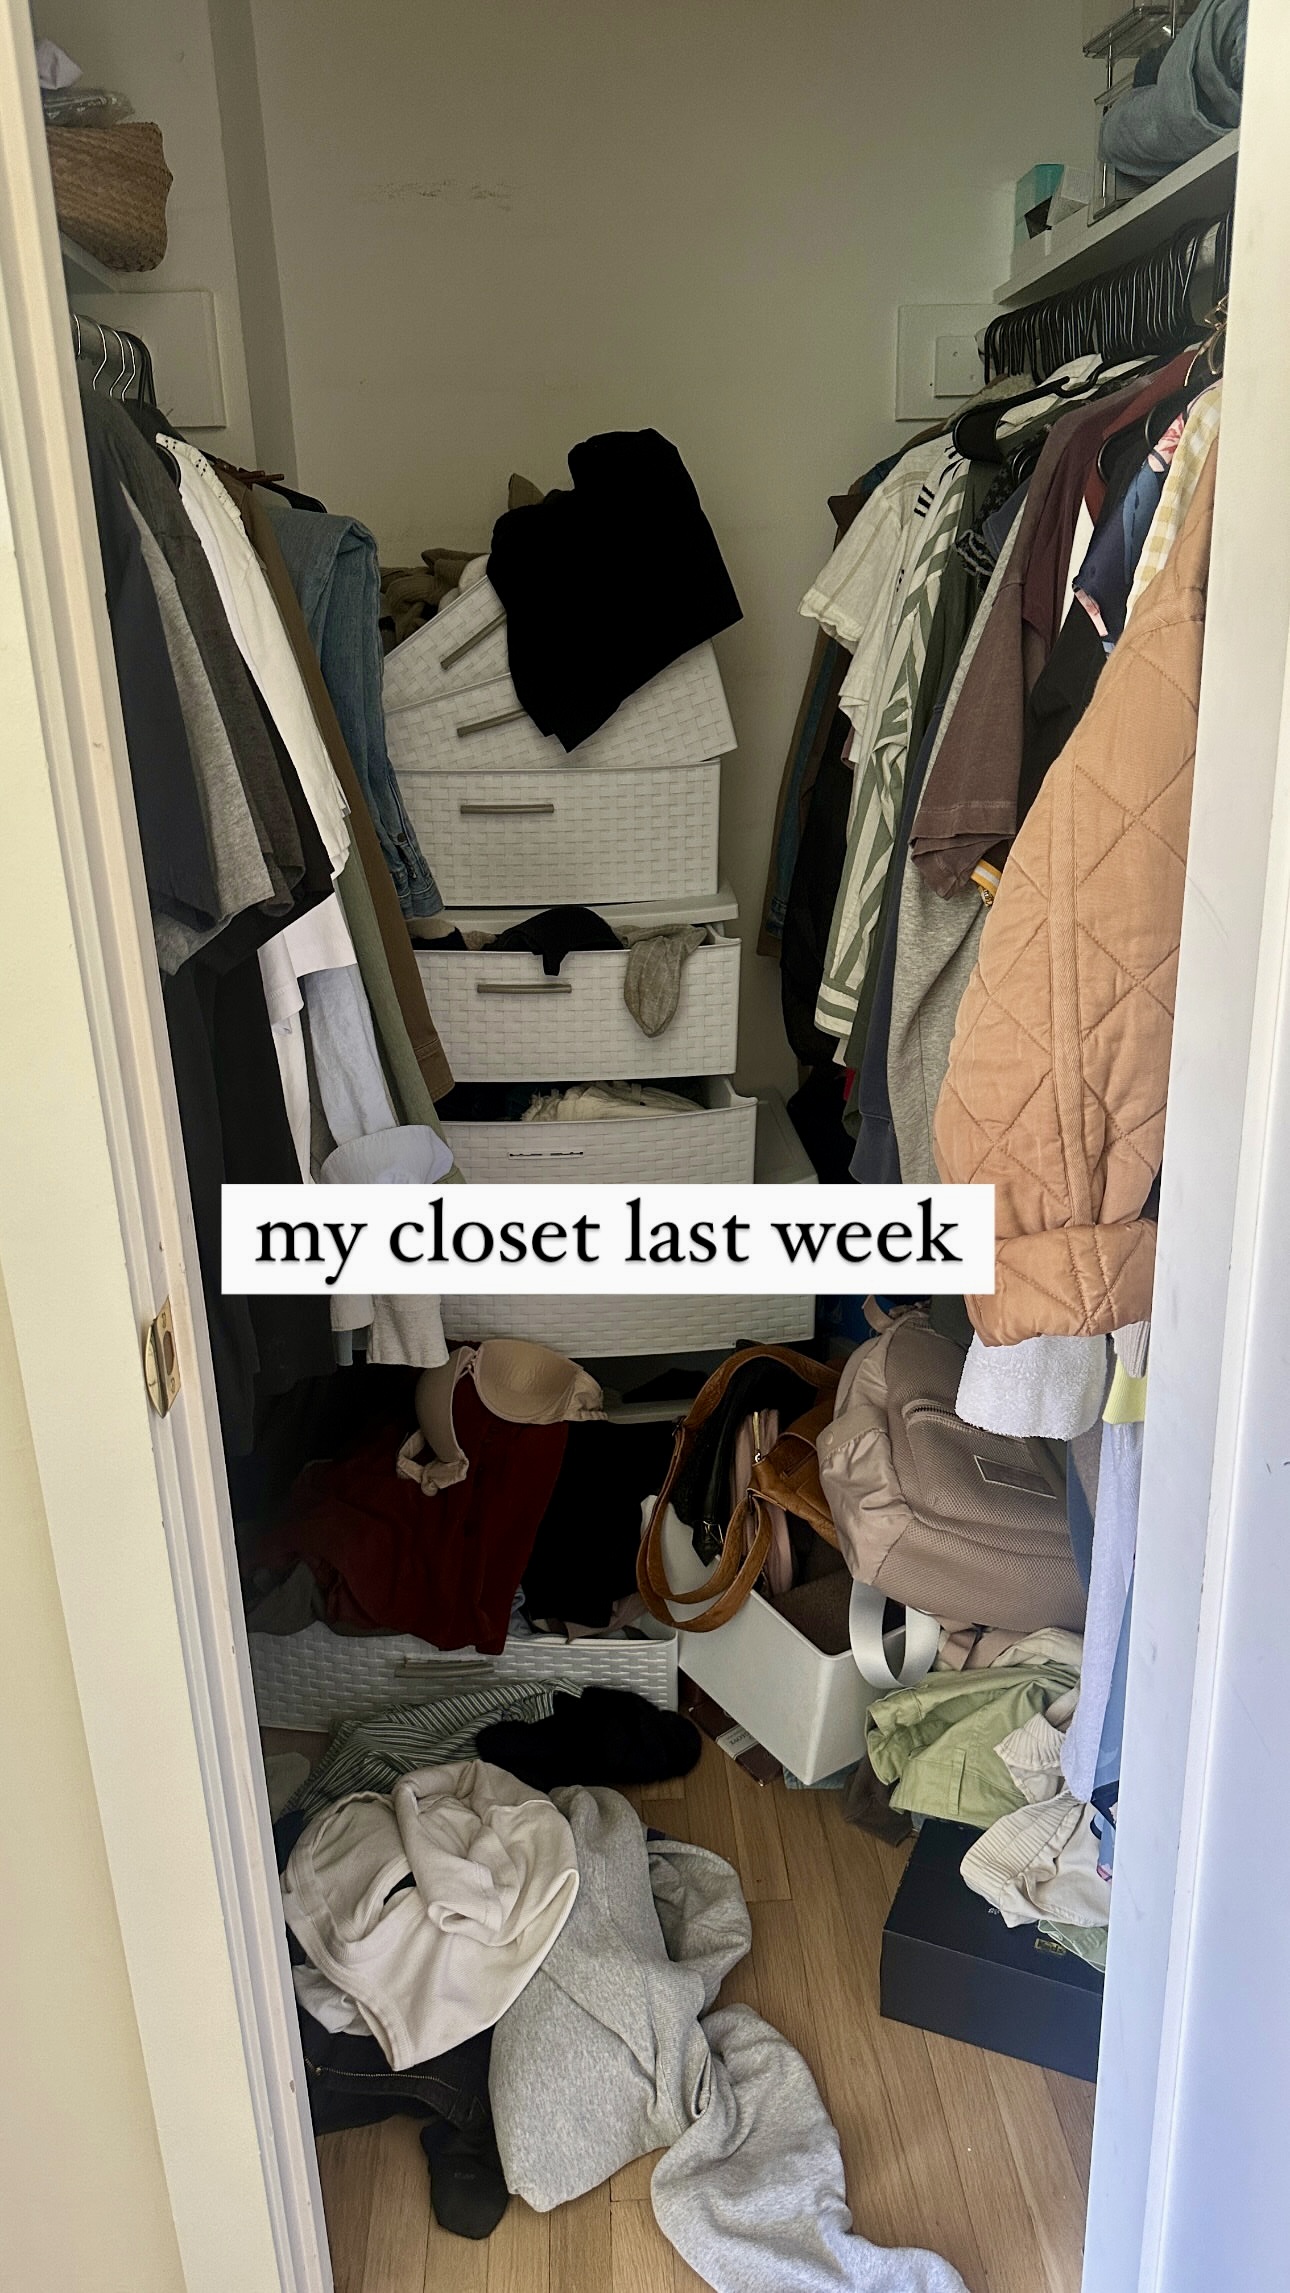
Our closet exploded. In the last two weeks, we’ve completely checked out and given up on keeping our closet clean because we knew a wardrobe makeover was in our future. Time to build some master closet wardrobes!

Here’s what the closet explosion looked like before we started:
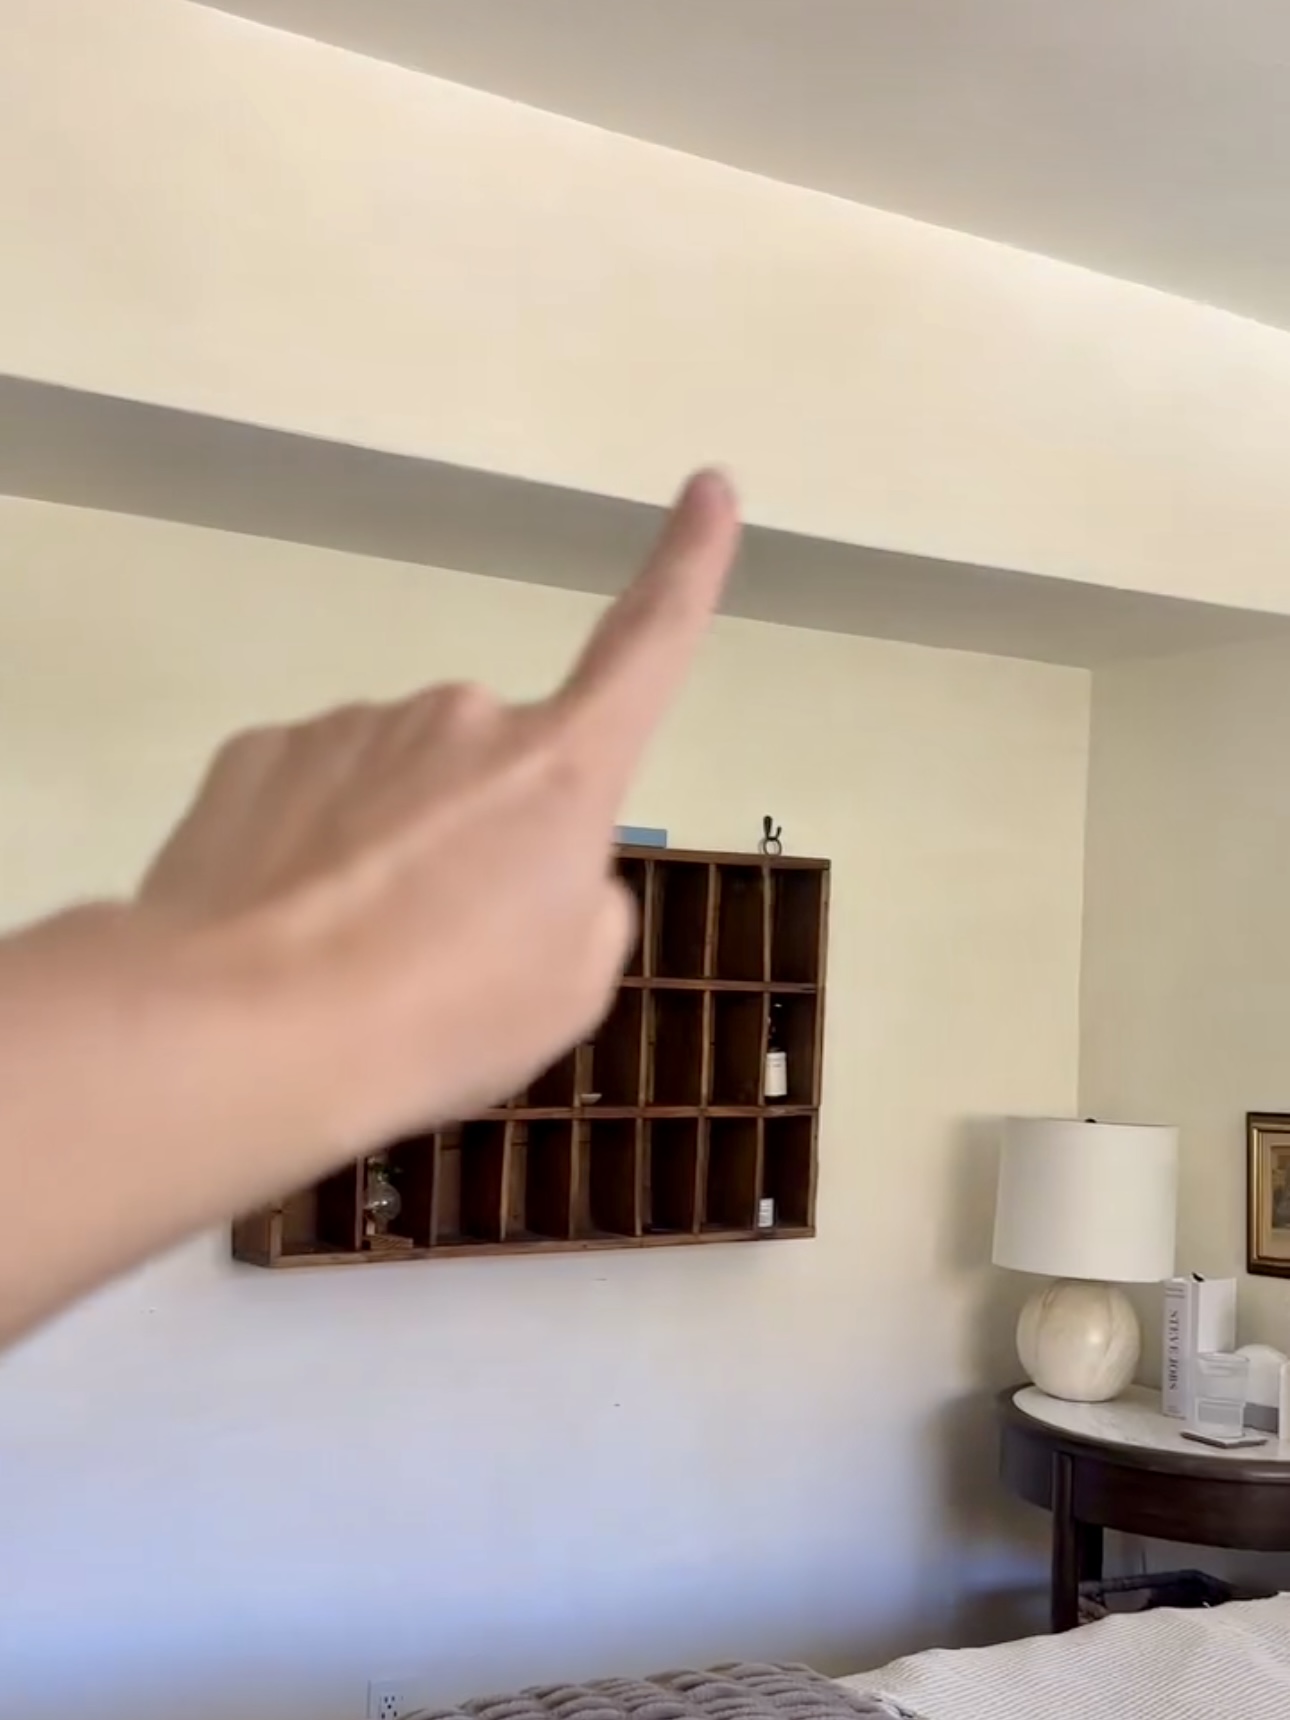
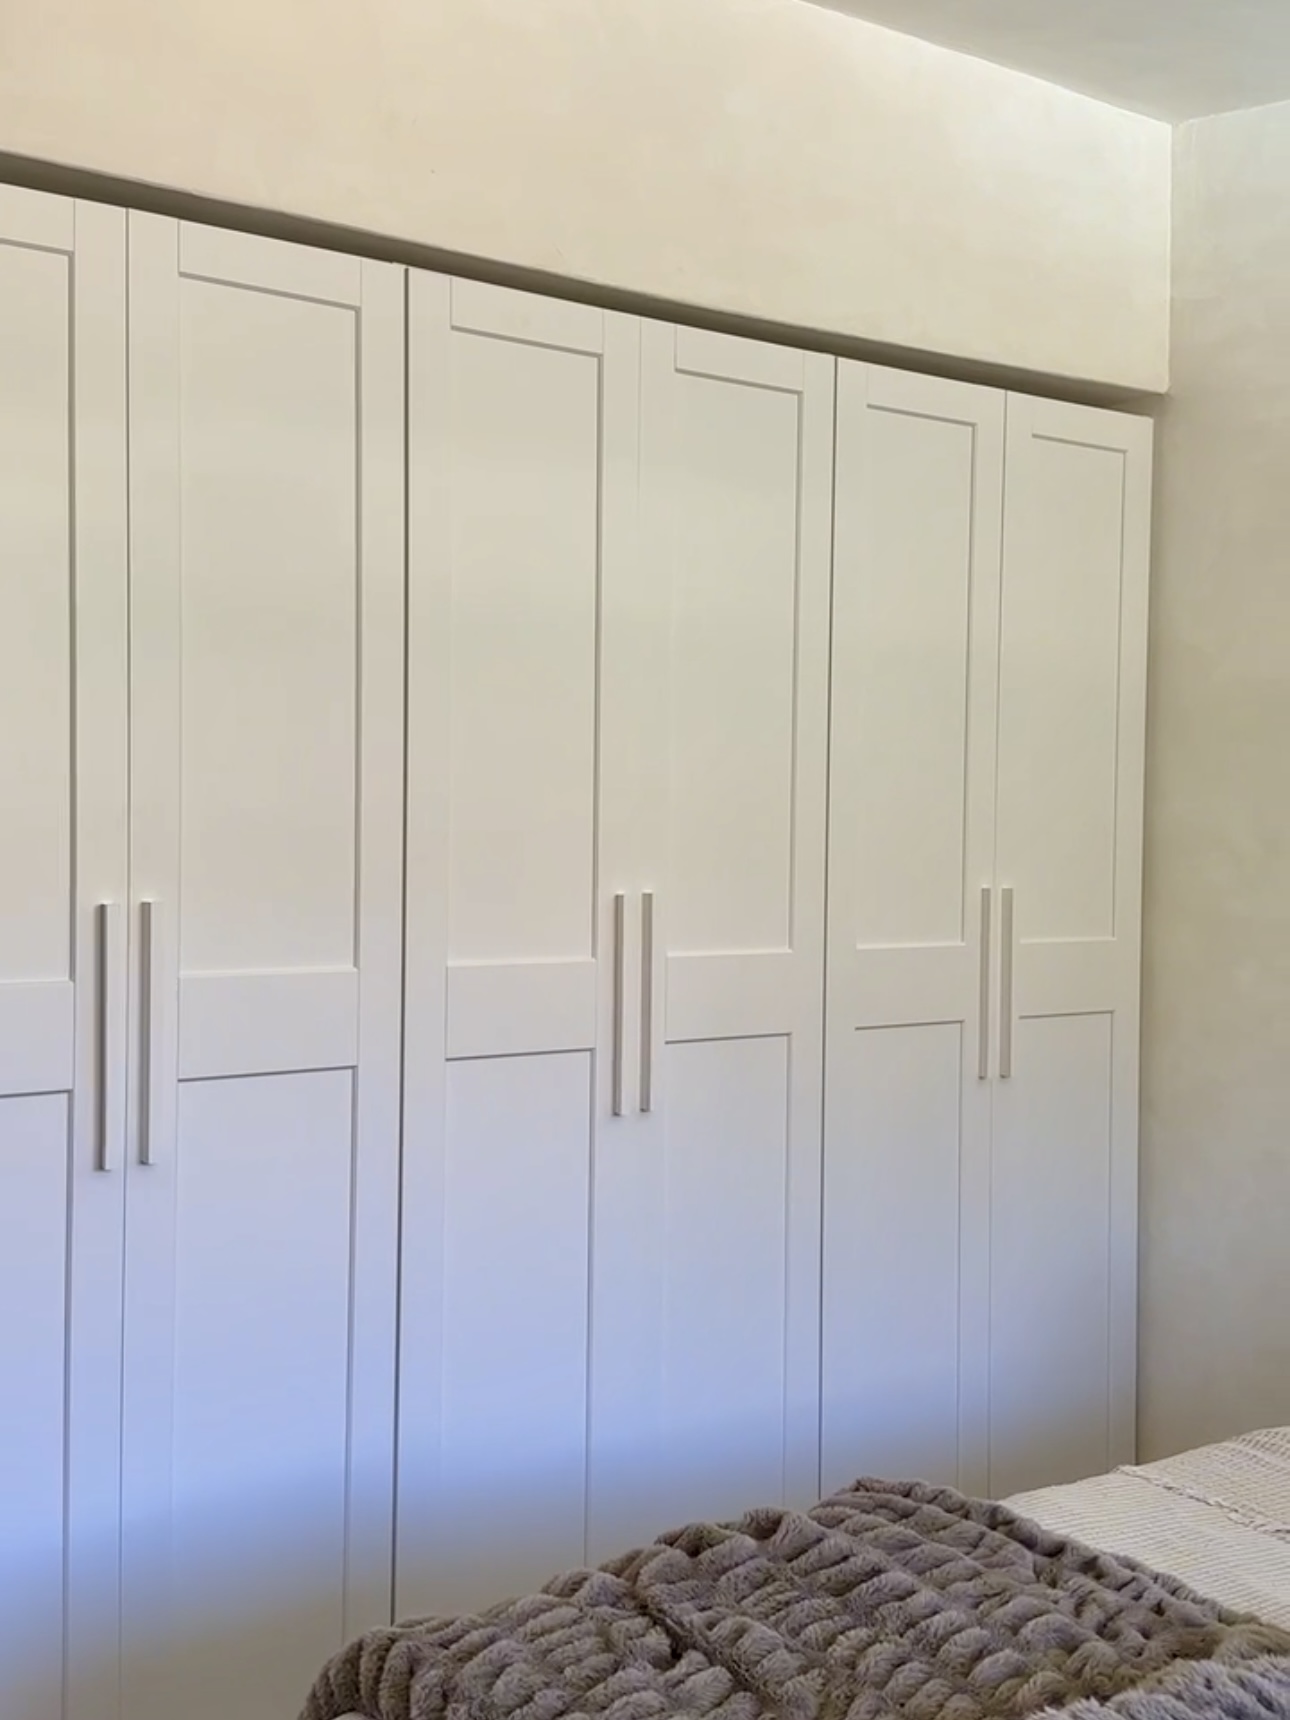
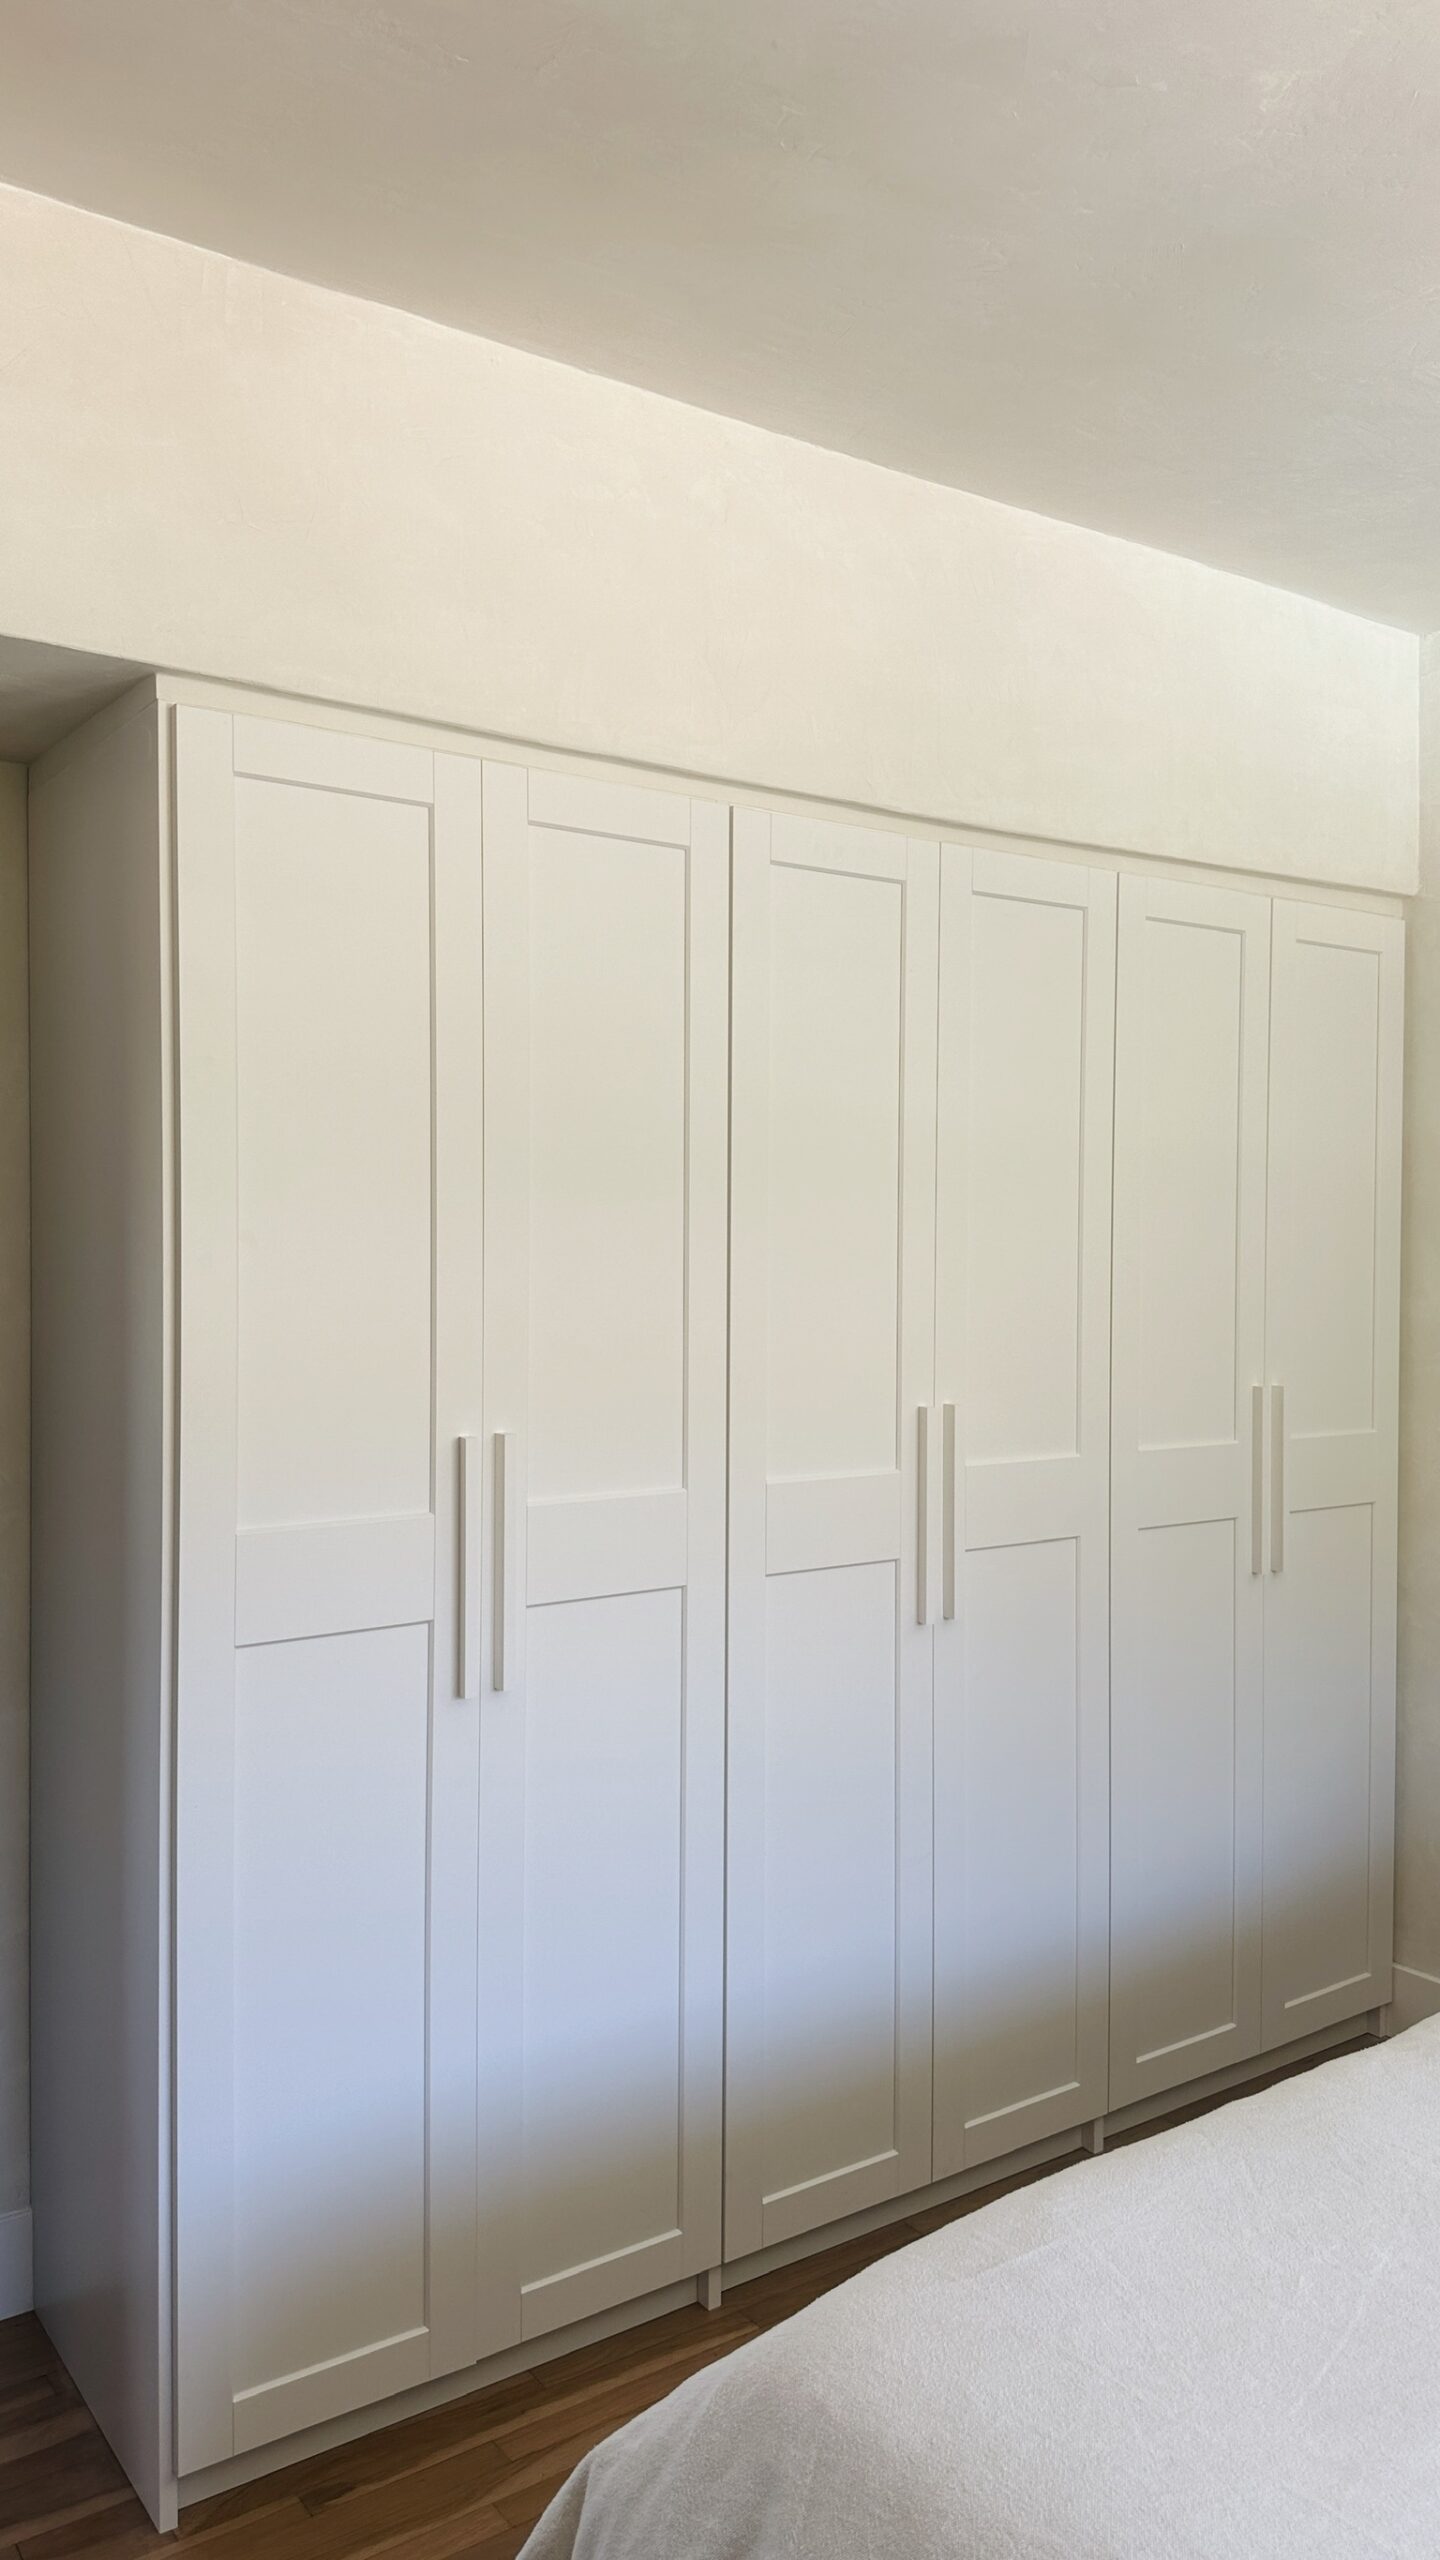
I’ve always felt like this section of our room has been begging for a wardrobe because of the soffit. It’s a little bit awkward and I’ve always thought it would look good with something to make it more flush. The wardrobes will cover this entire wall.
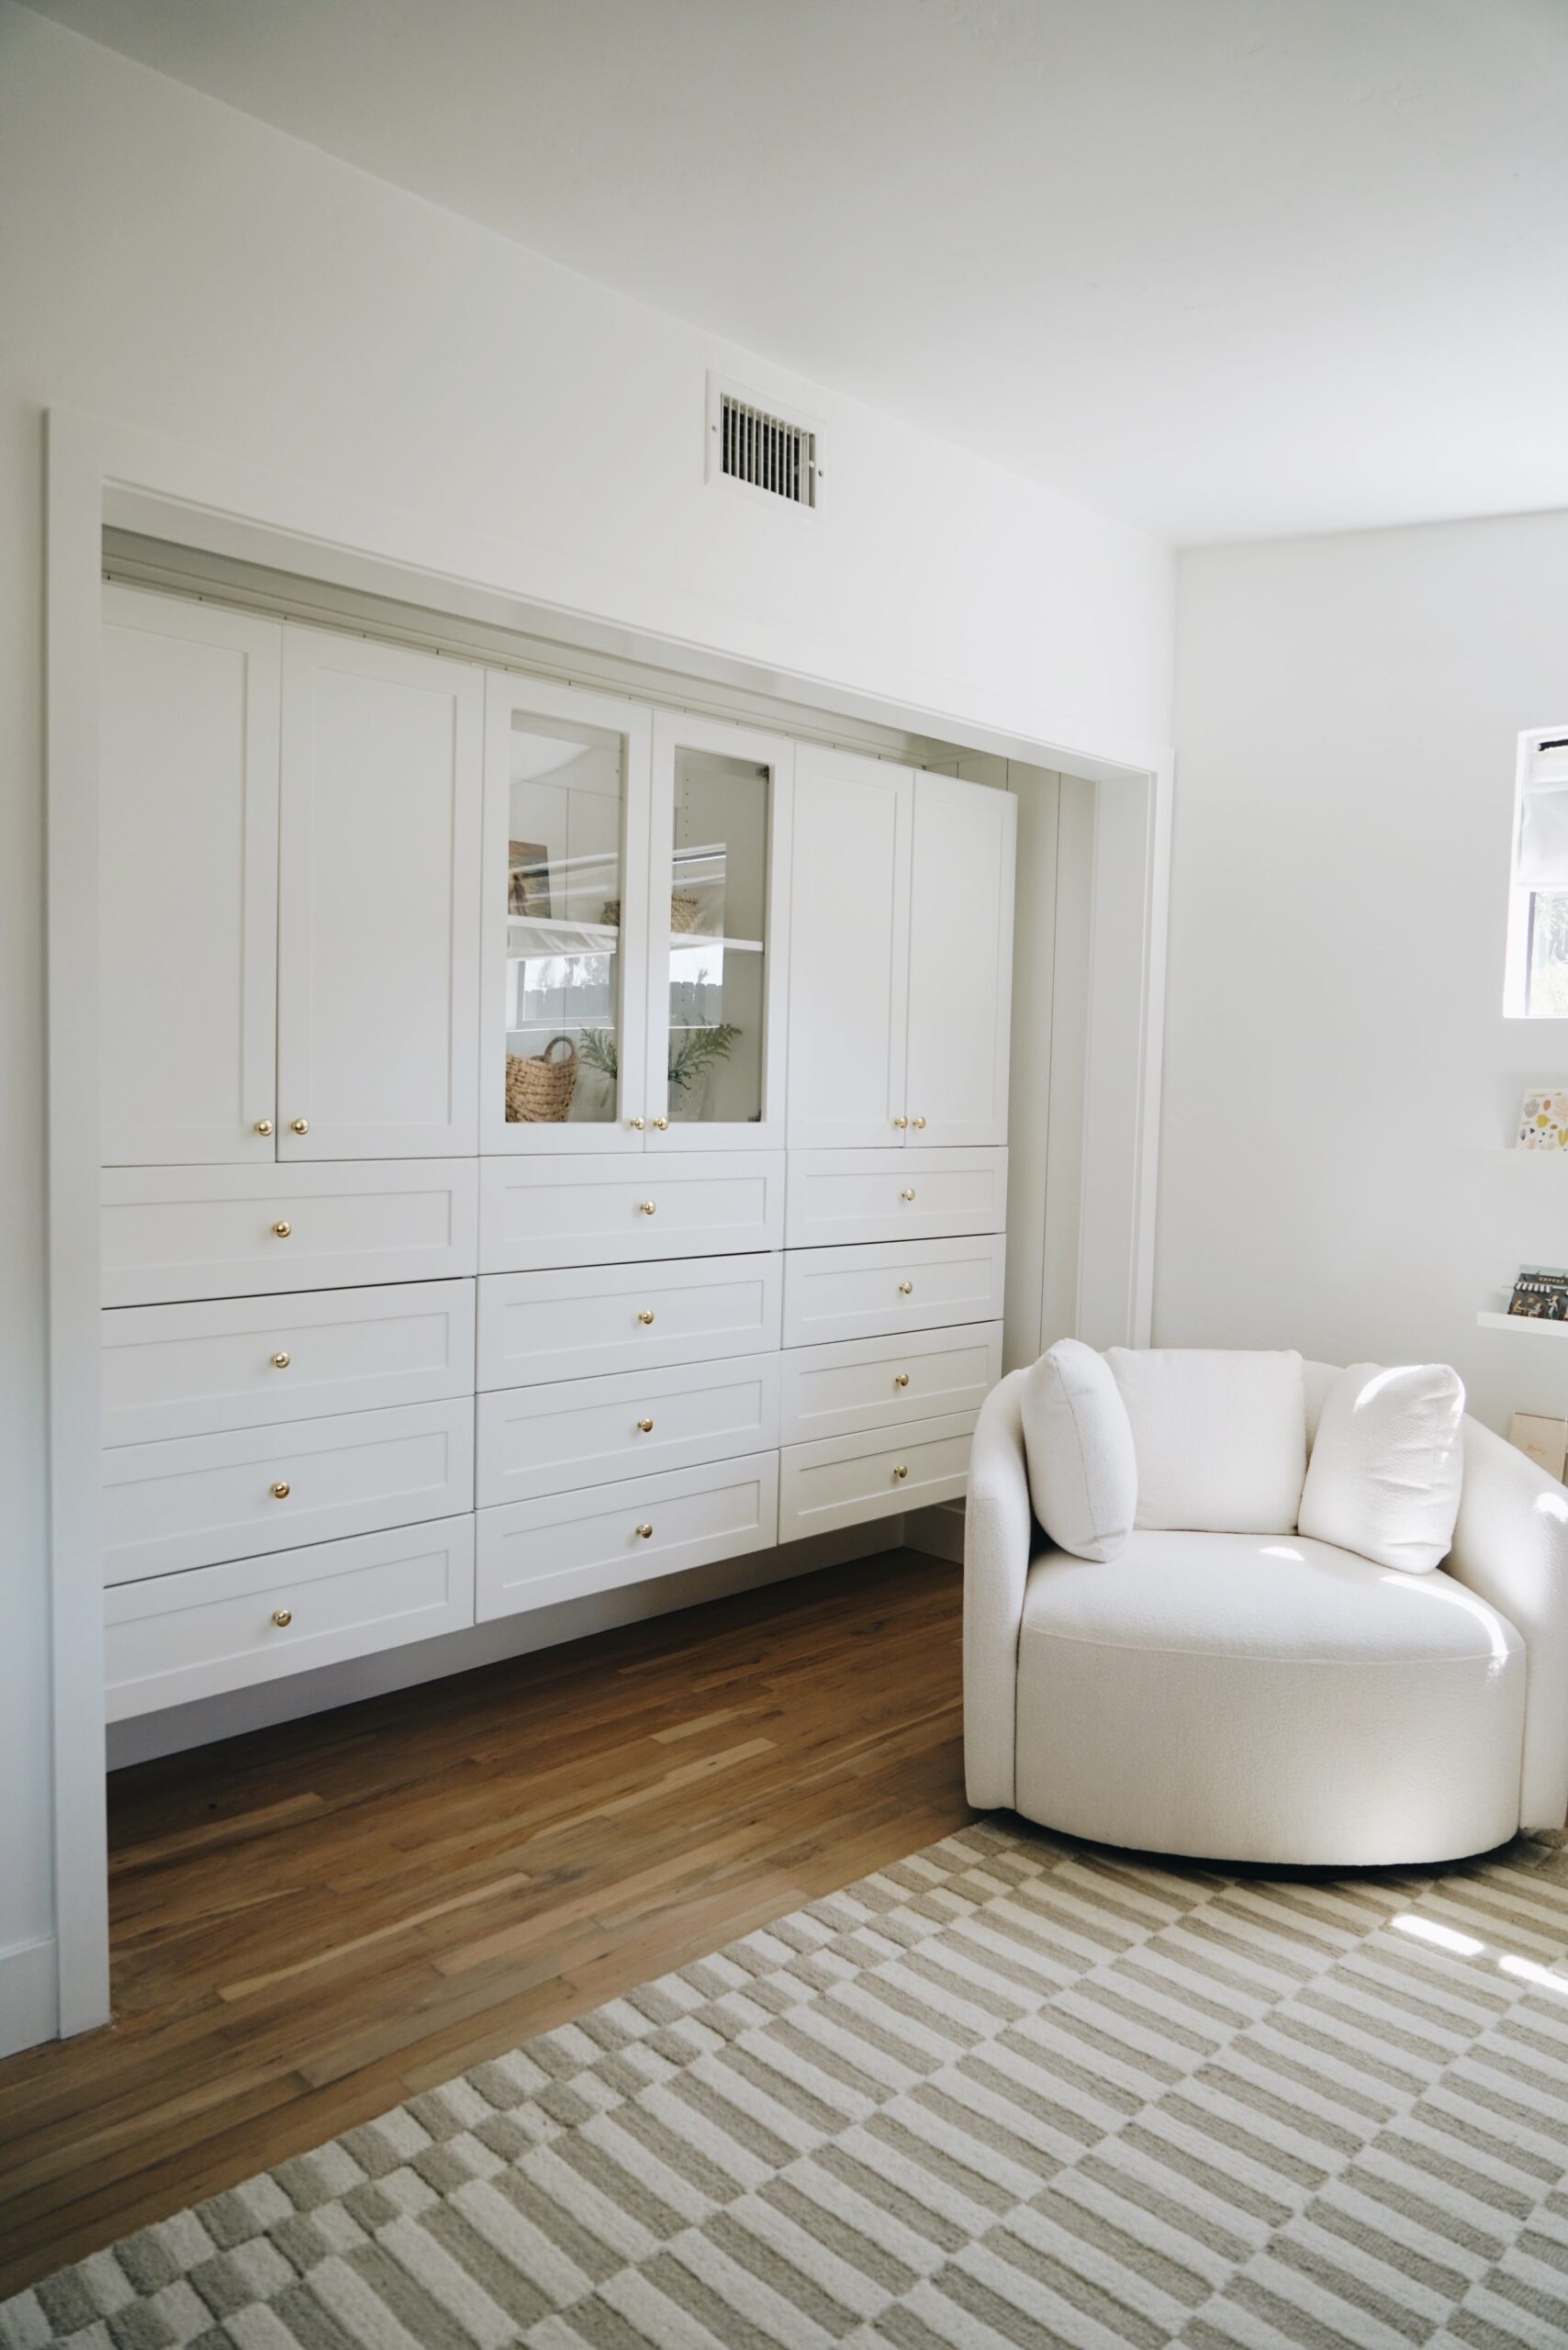
We got these wardrobes from Modular Closets. We used Modular Closets in our office for storage so we already knew we loved them. Here’s that makeover!
Prep
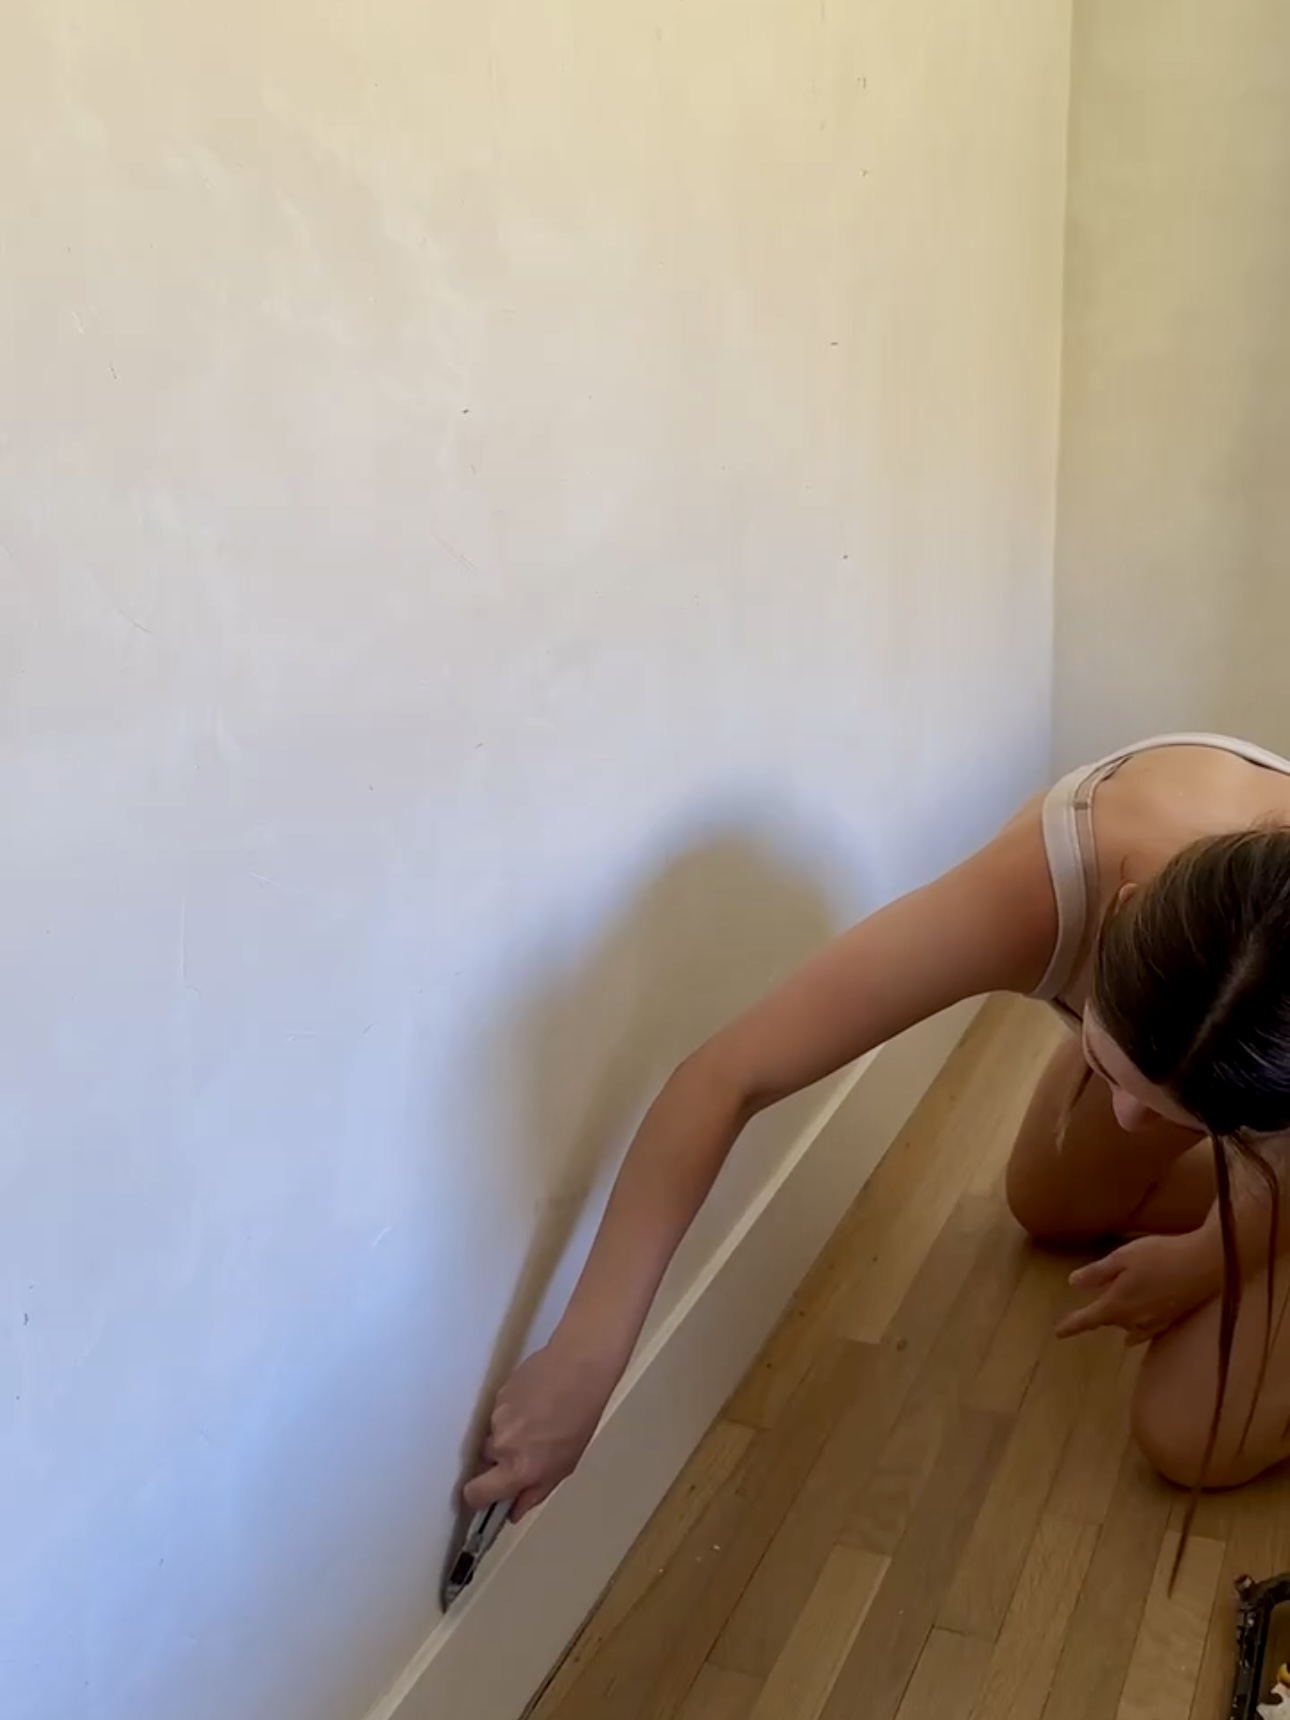
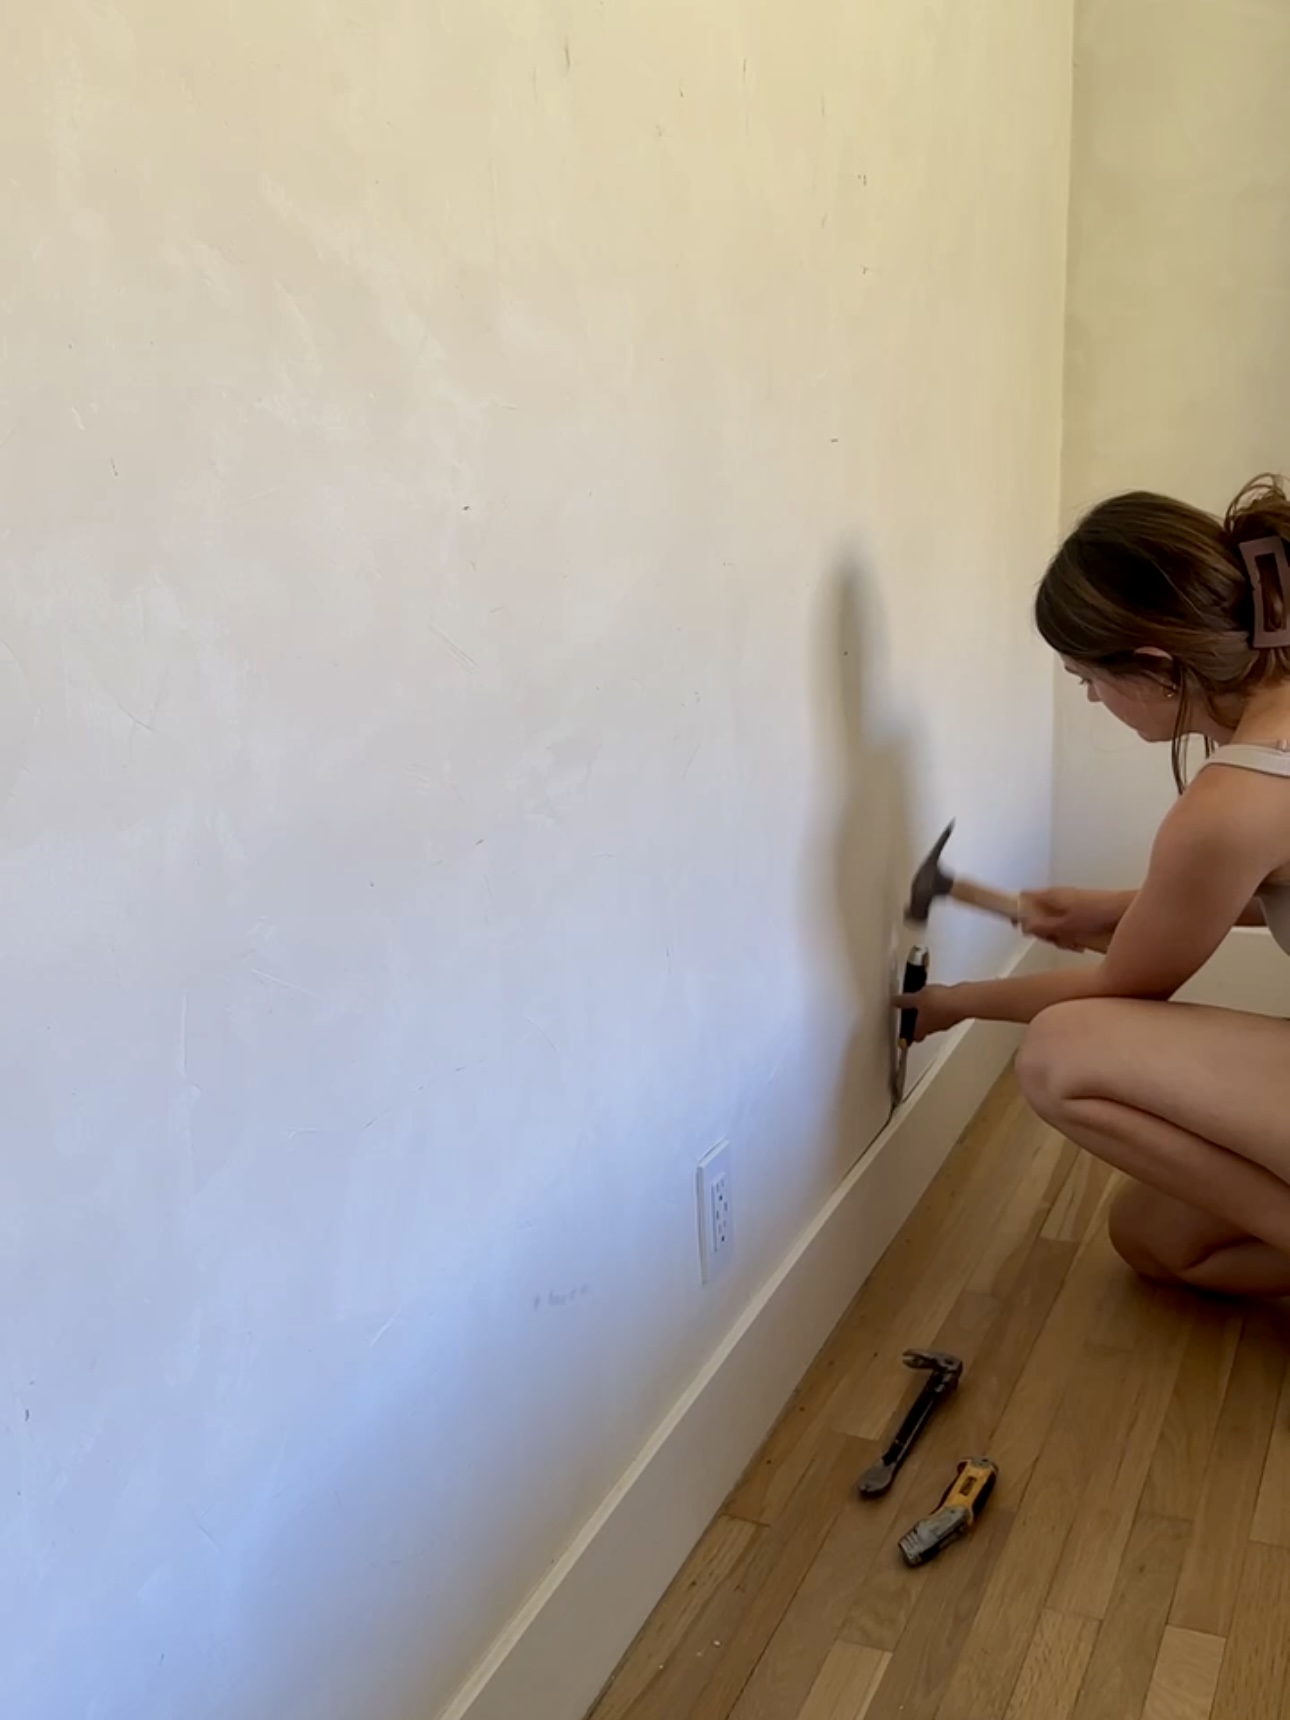
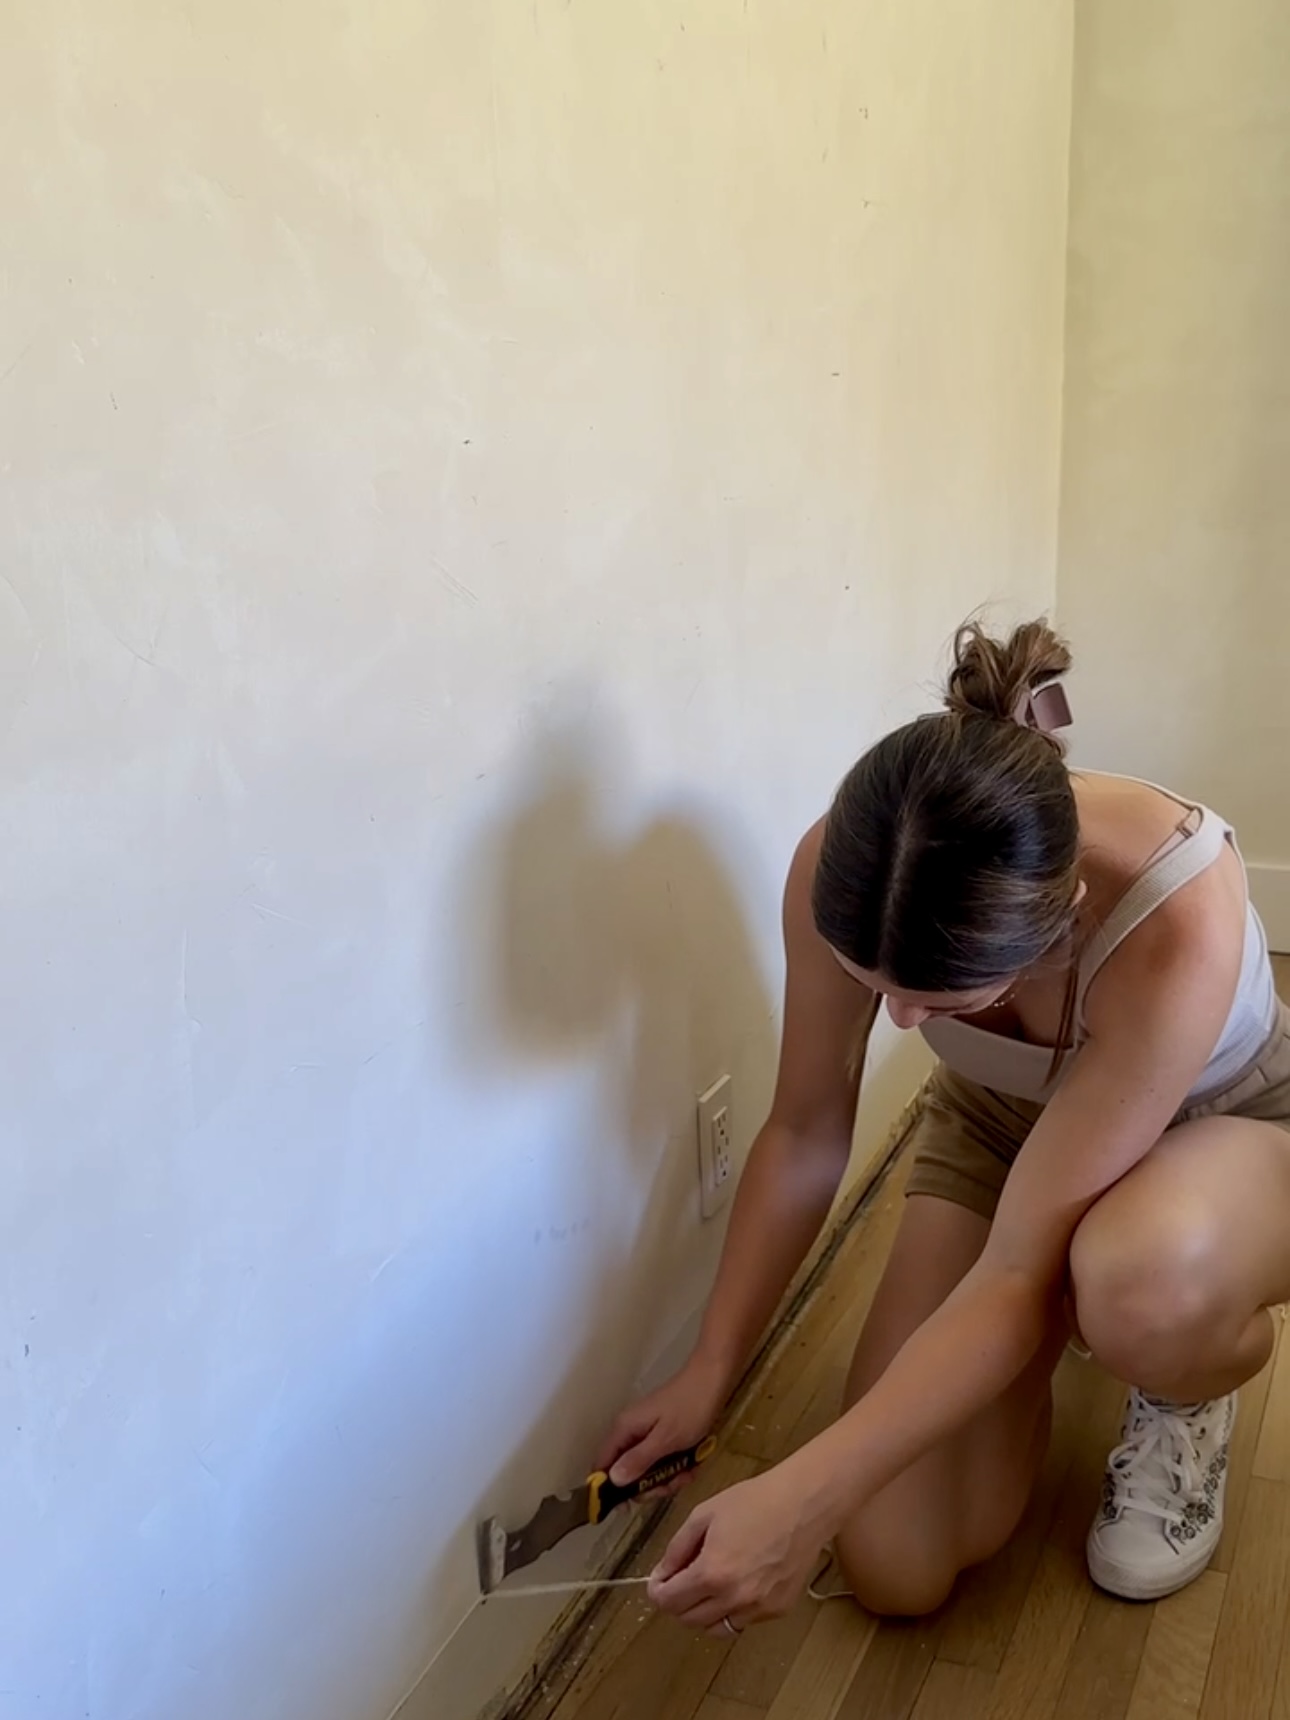
First thing we had to do was remove the baseboards. I used a utility knife to cut the caulking, then used a chisel and hammer to remove it!
Installation
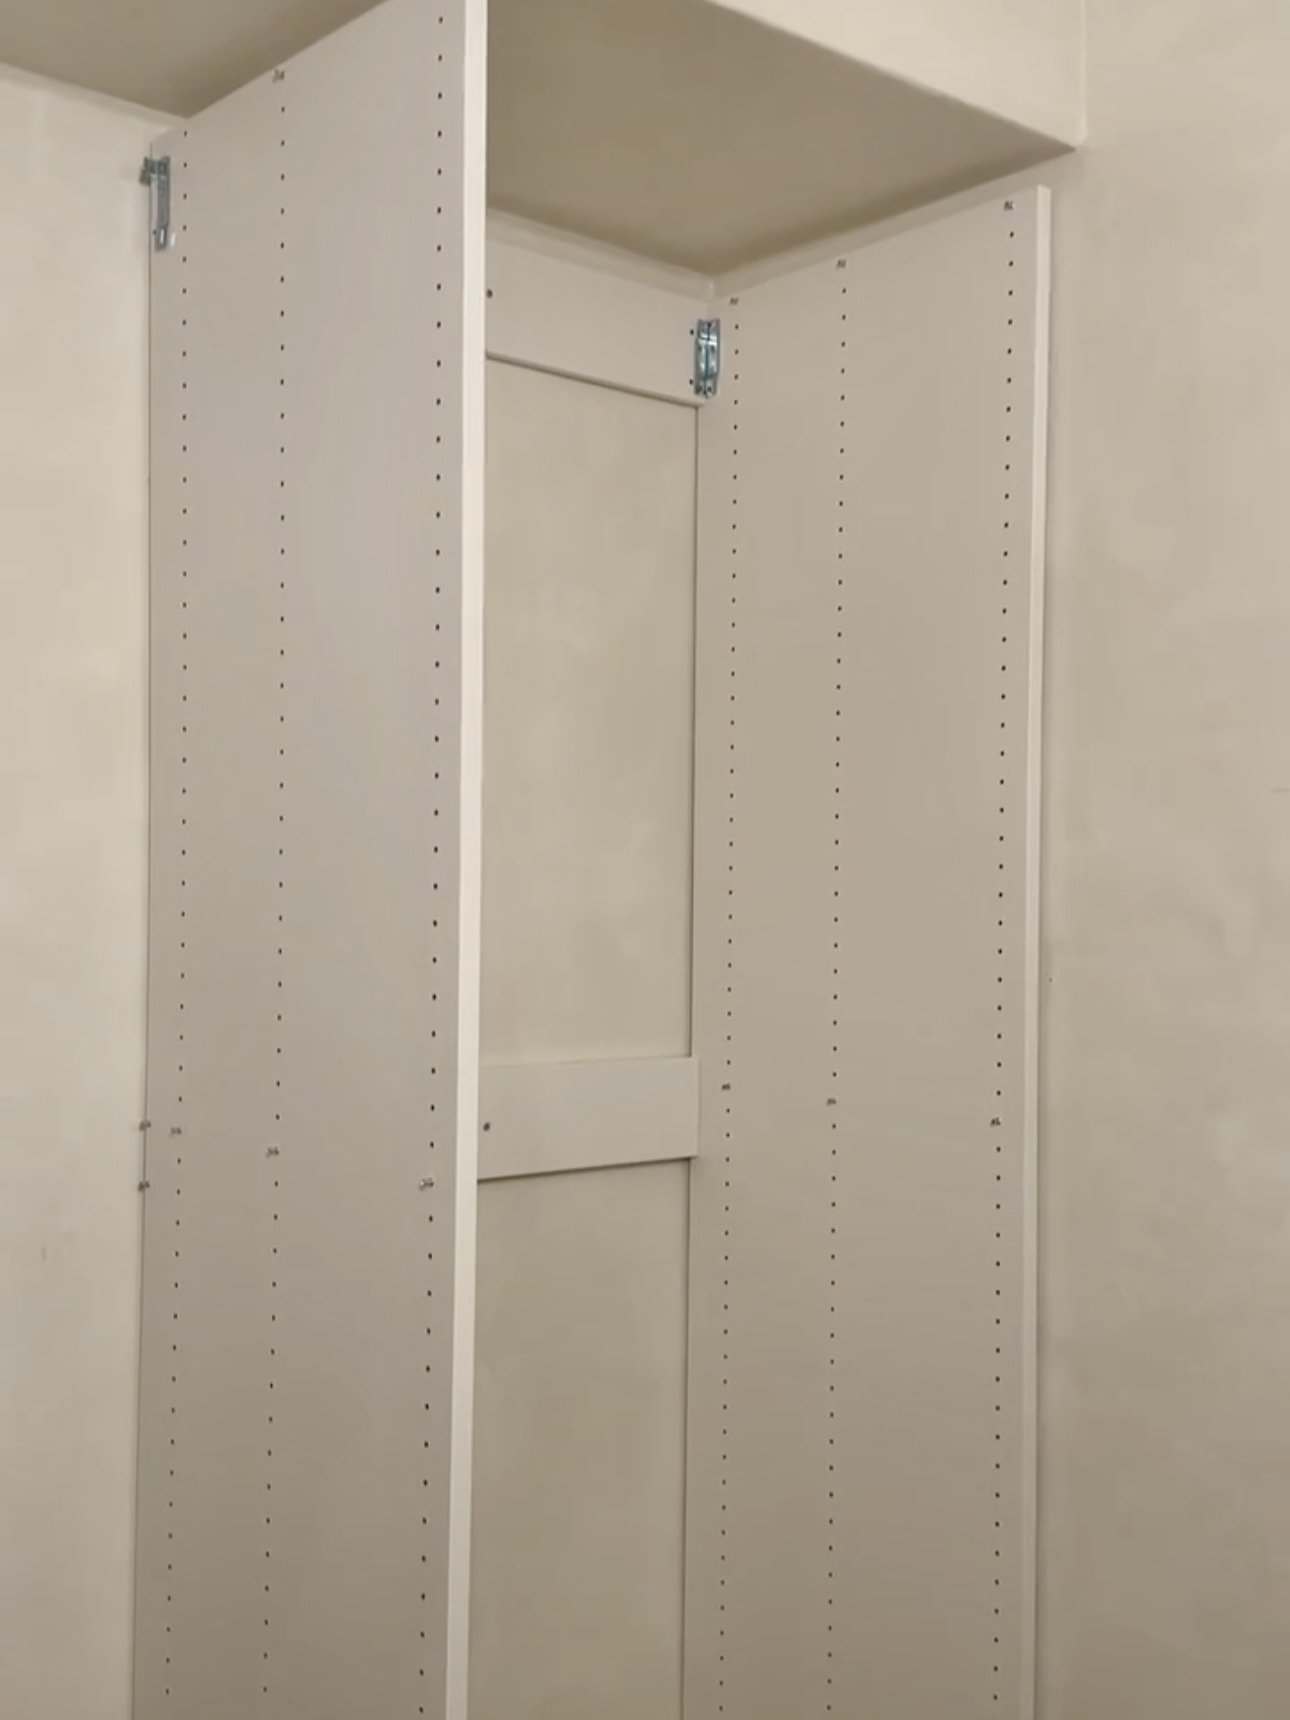
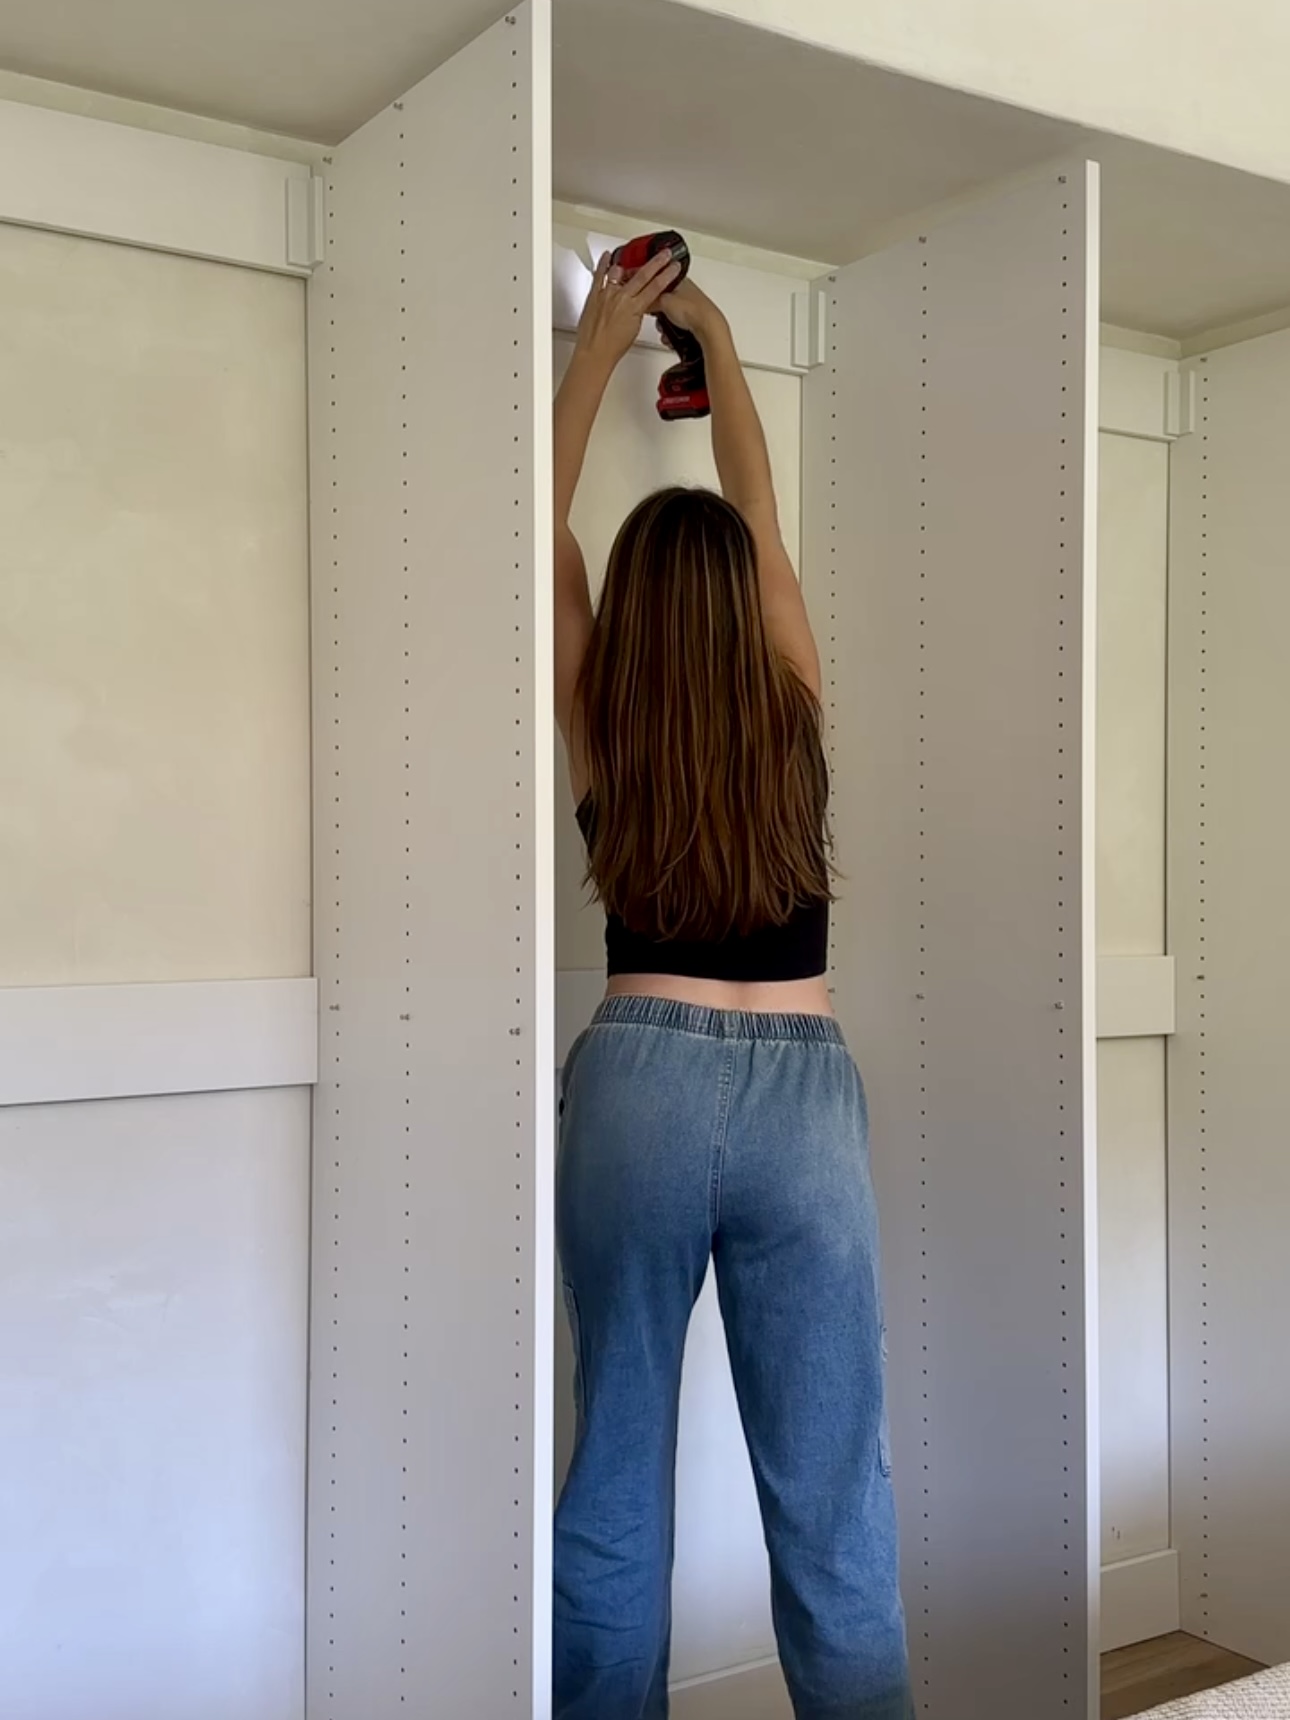
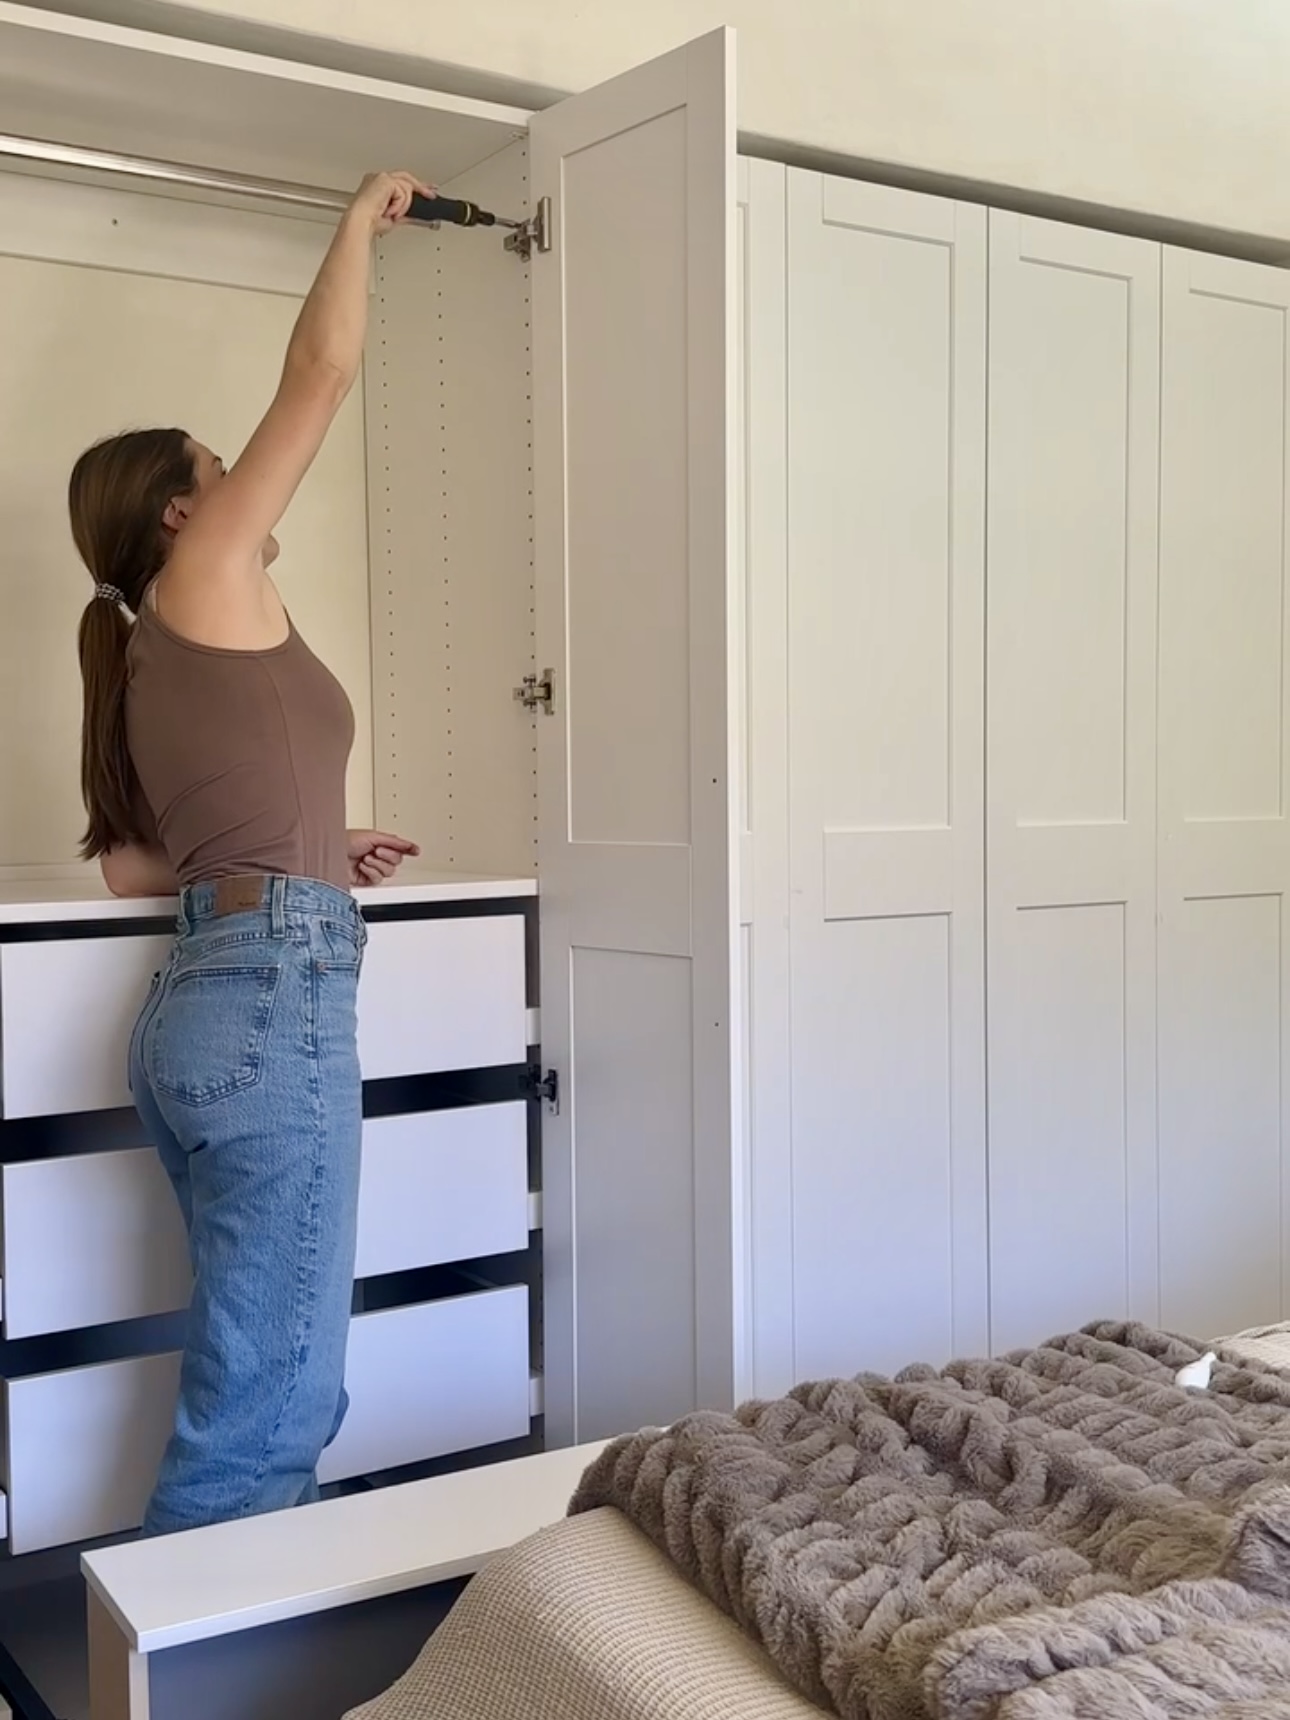
These systems come with super detailed instructions that are really simple to follow. So, installation was fairly simple!
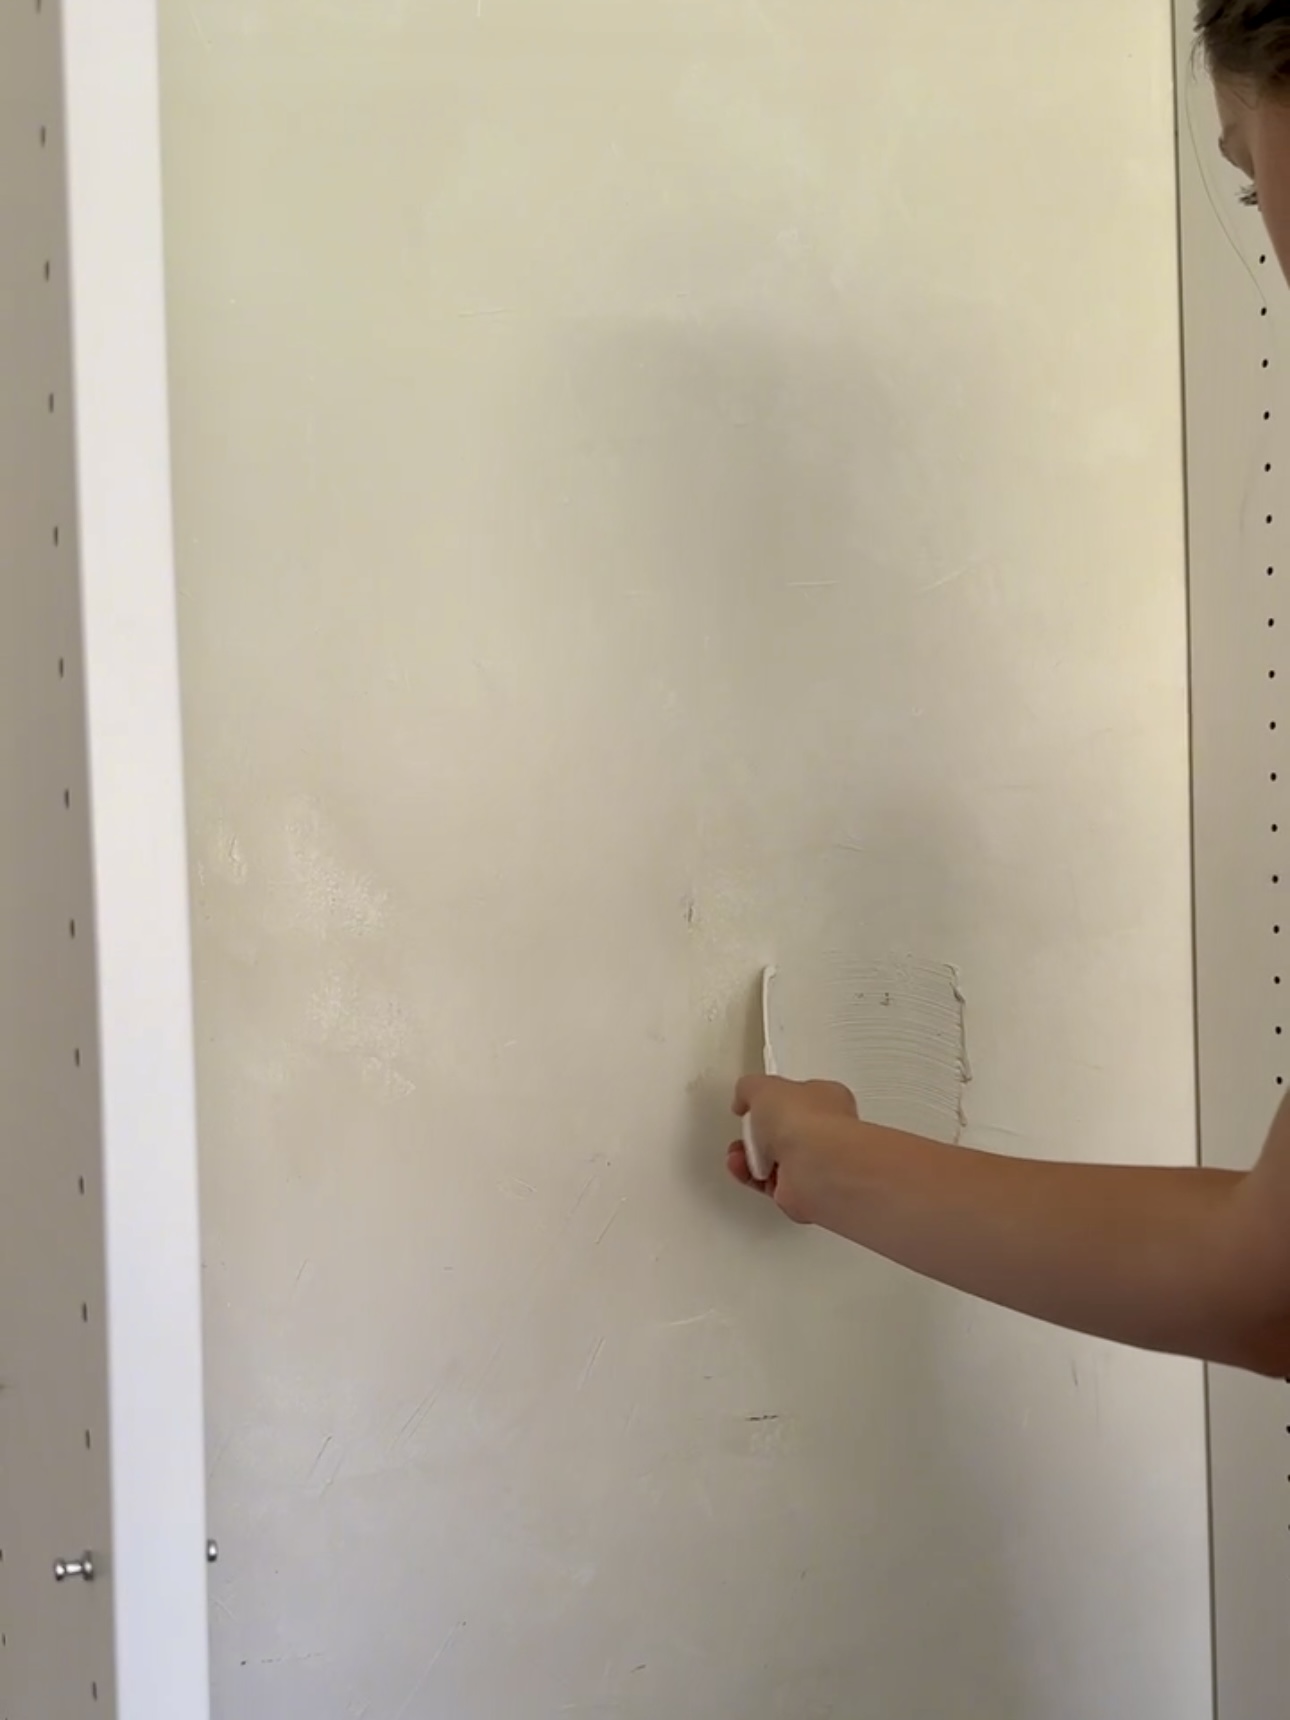
We added wall treatment to the wall behind these wardrobes since there won’t be plywood or anything over the bare wall. I used Roman Clay by Portola Paints in “Brooks.”

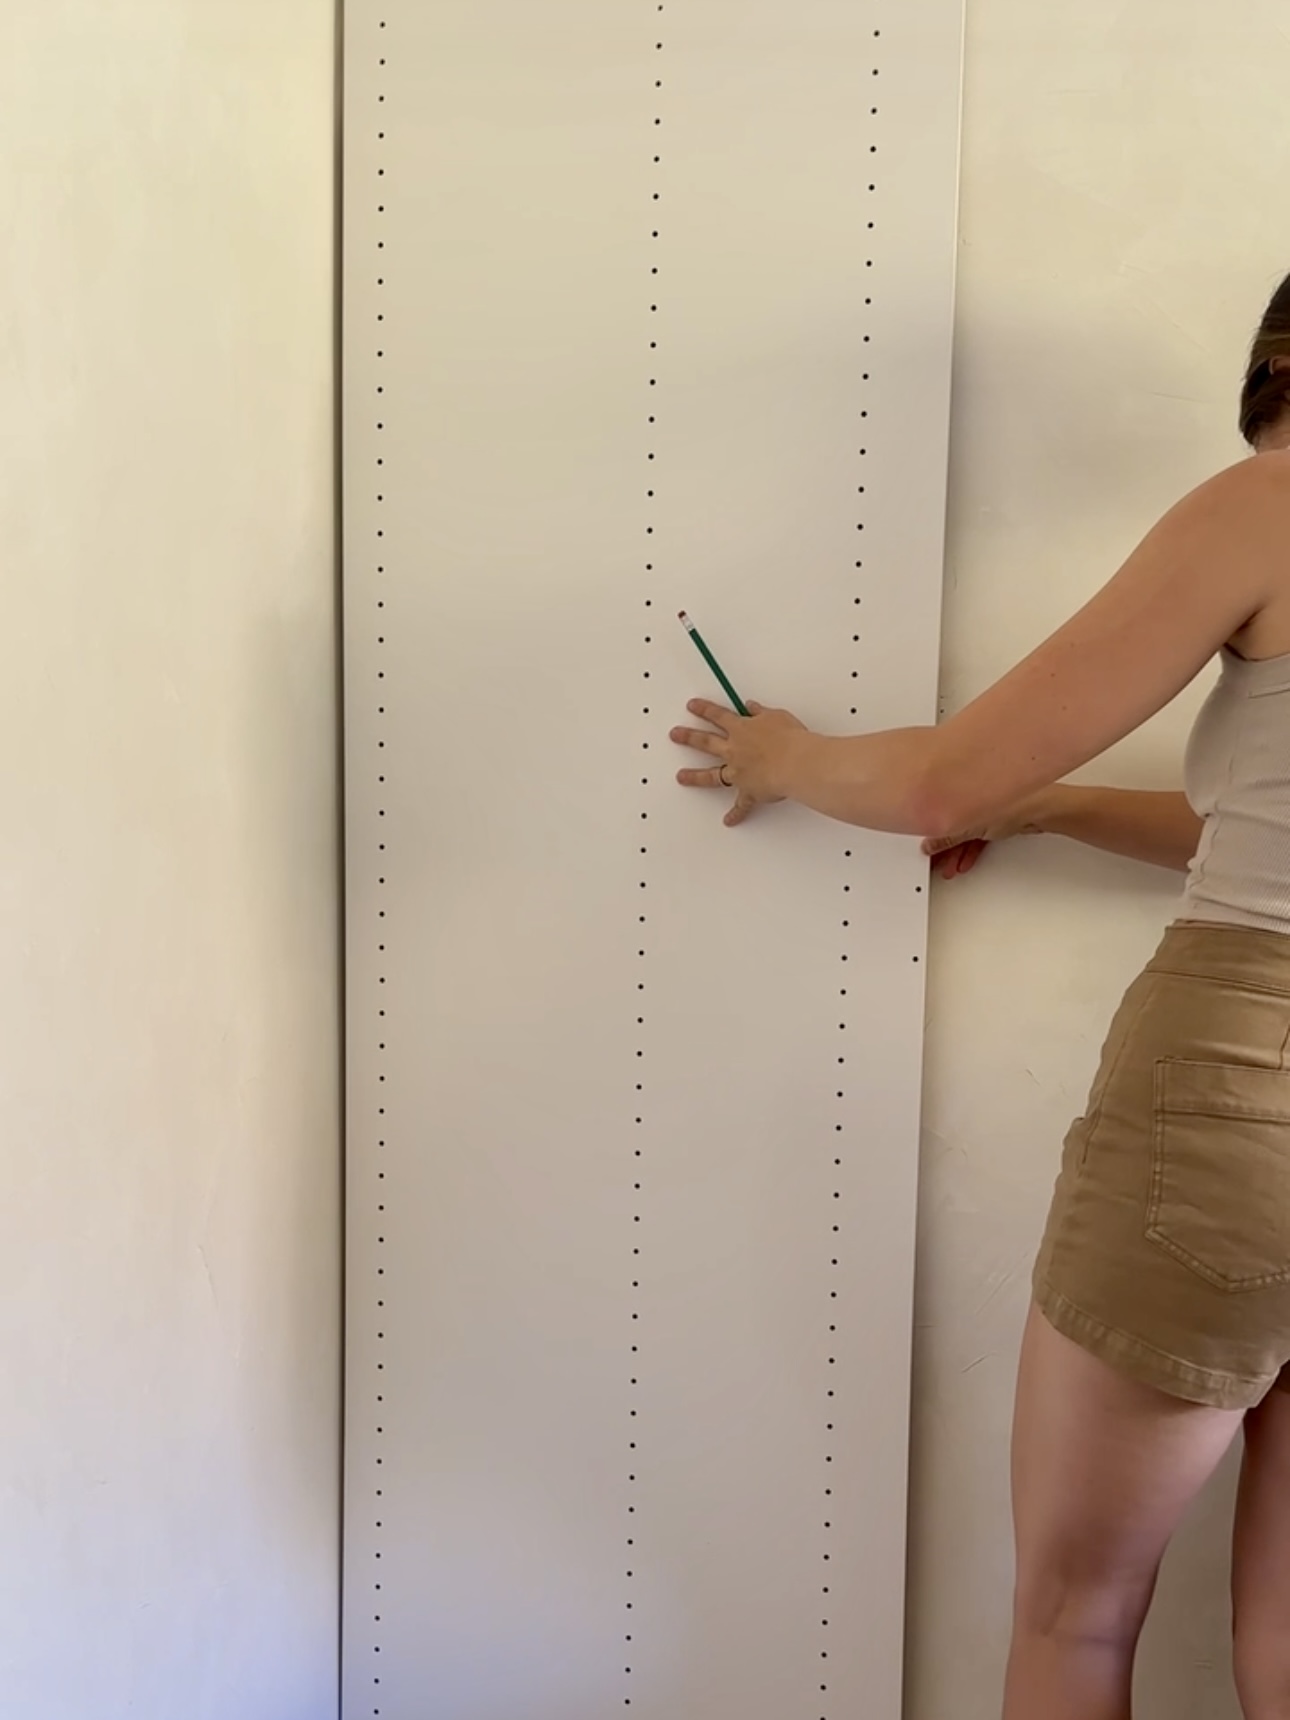
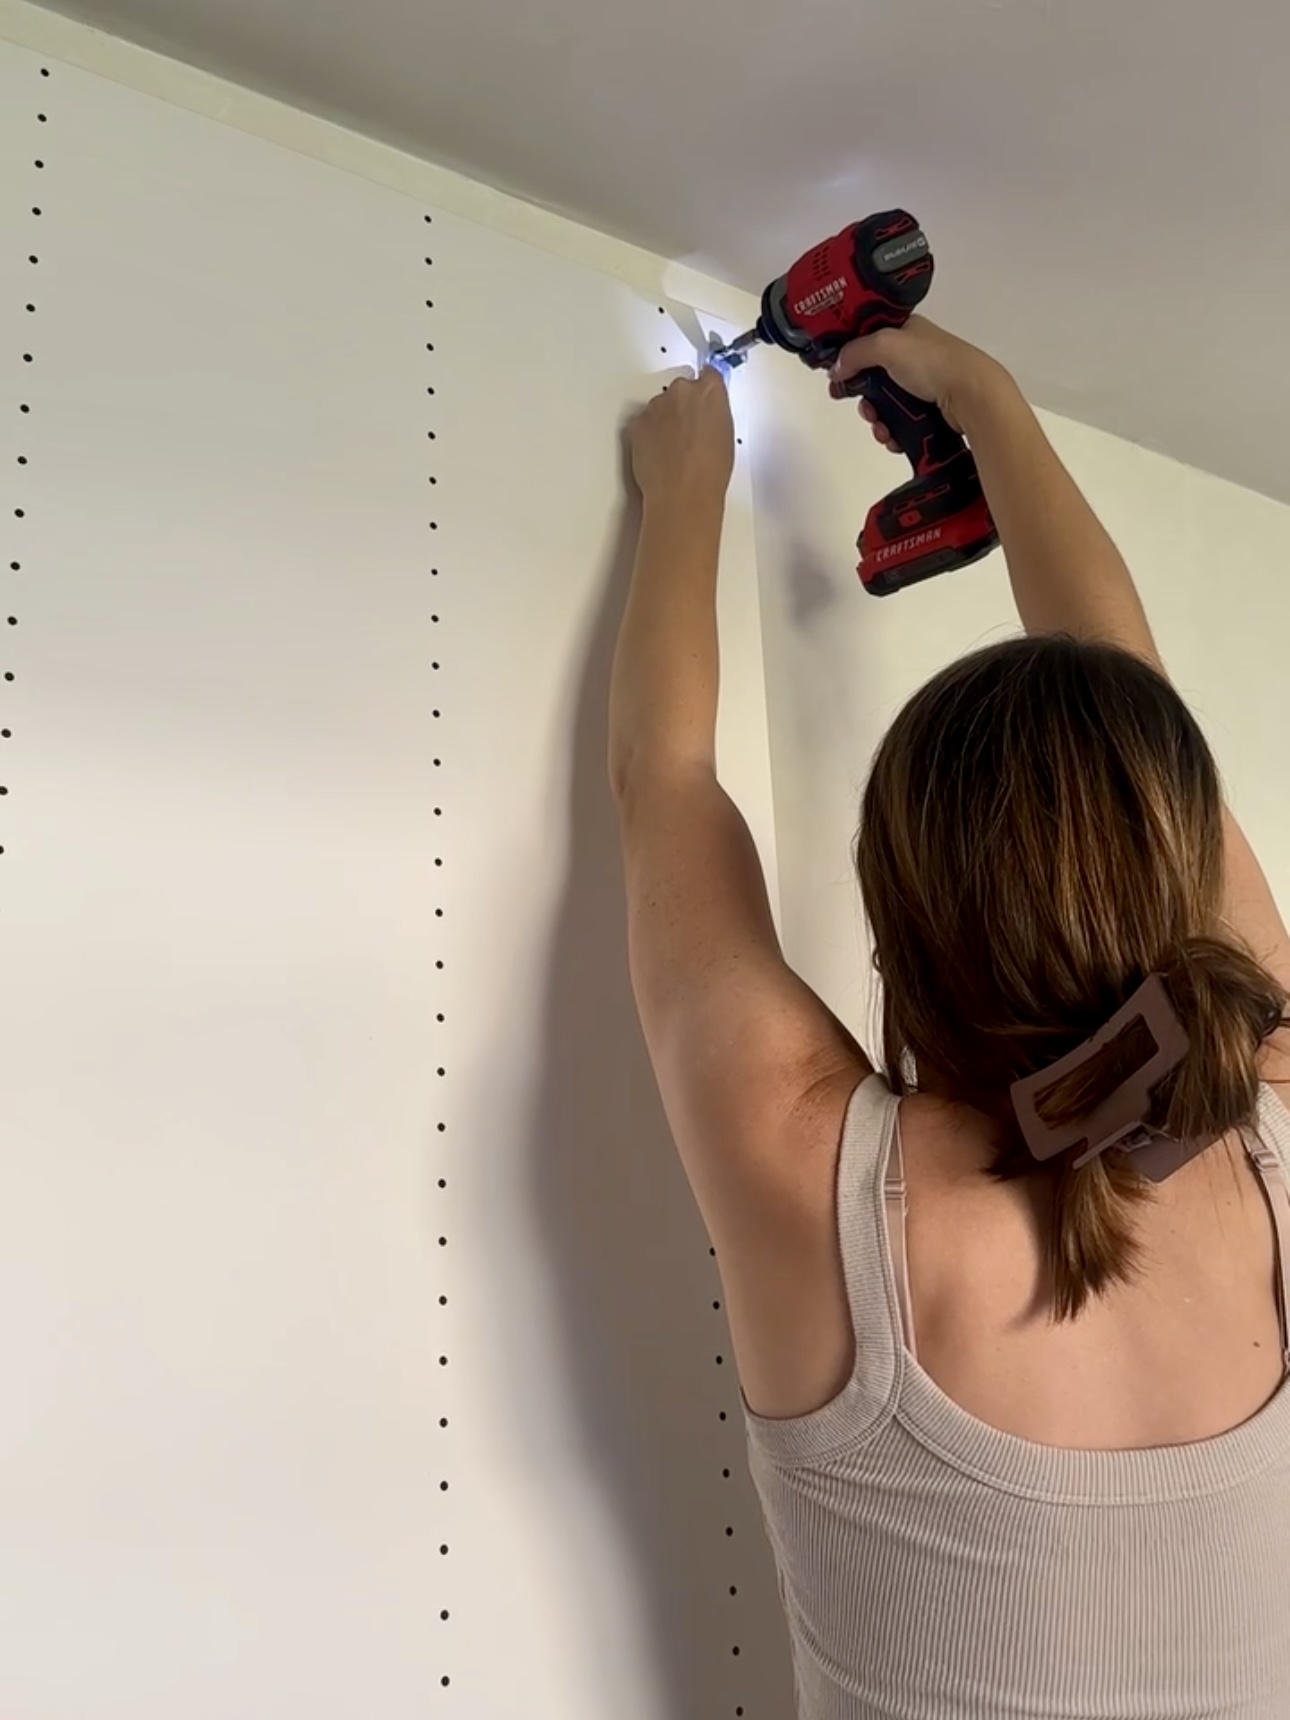
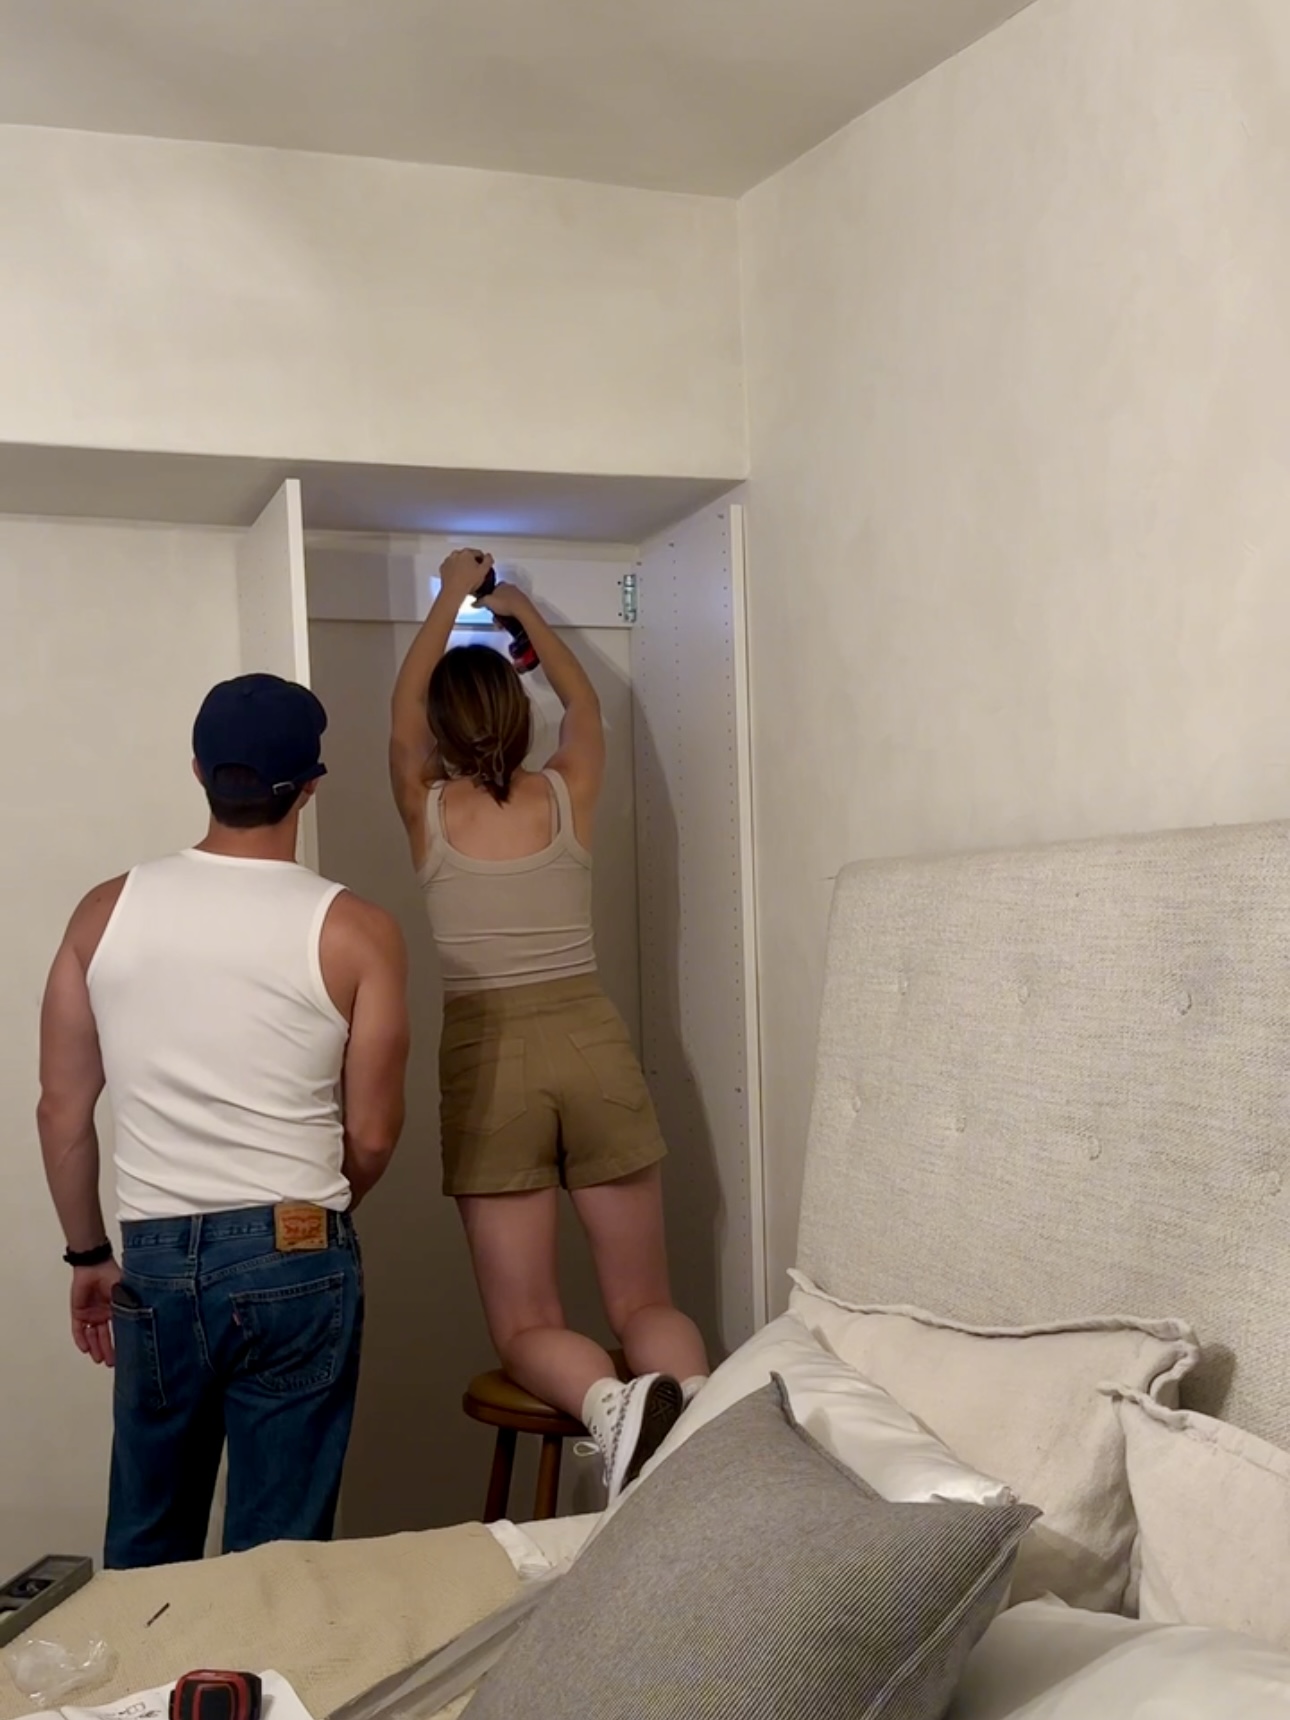
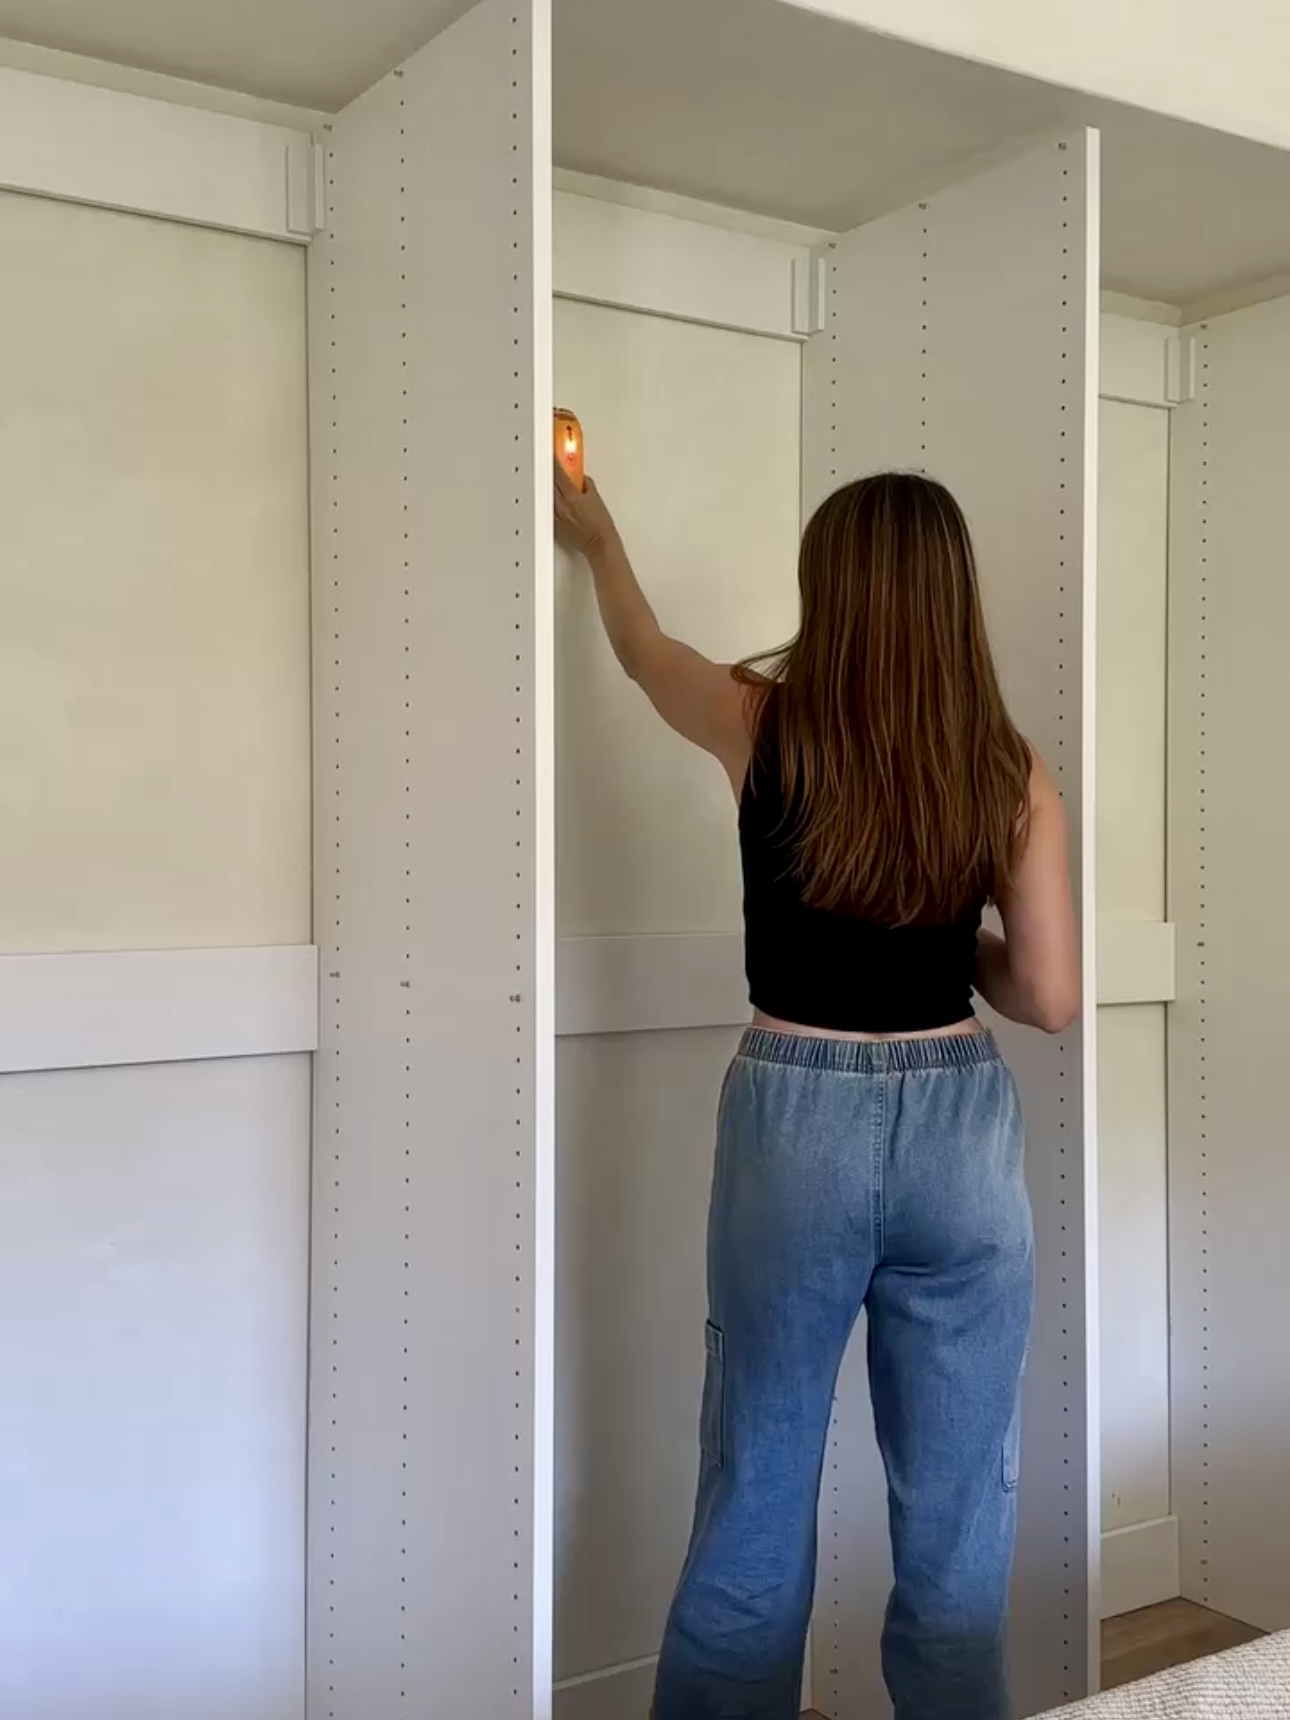
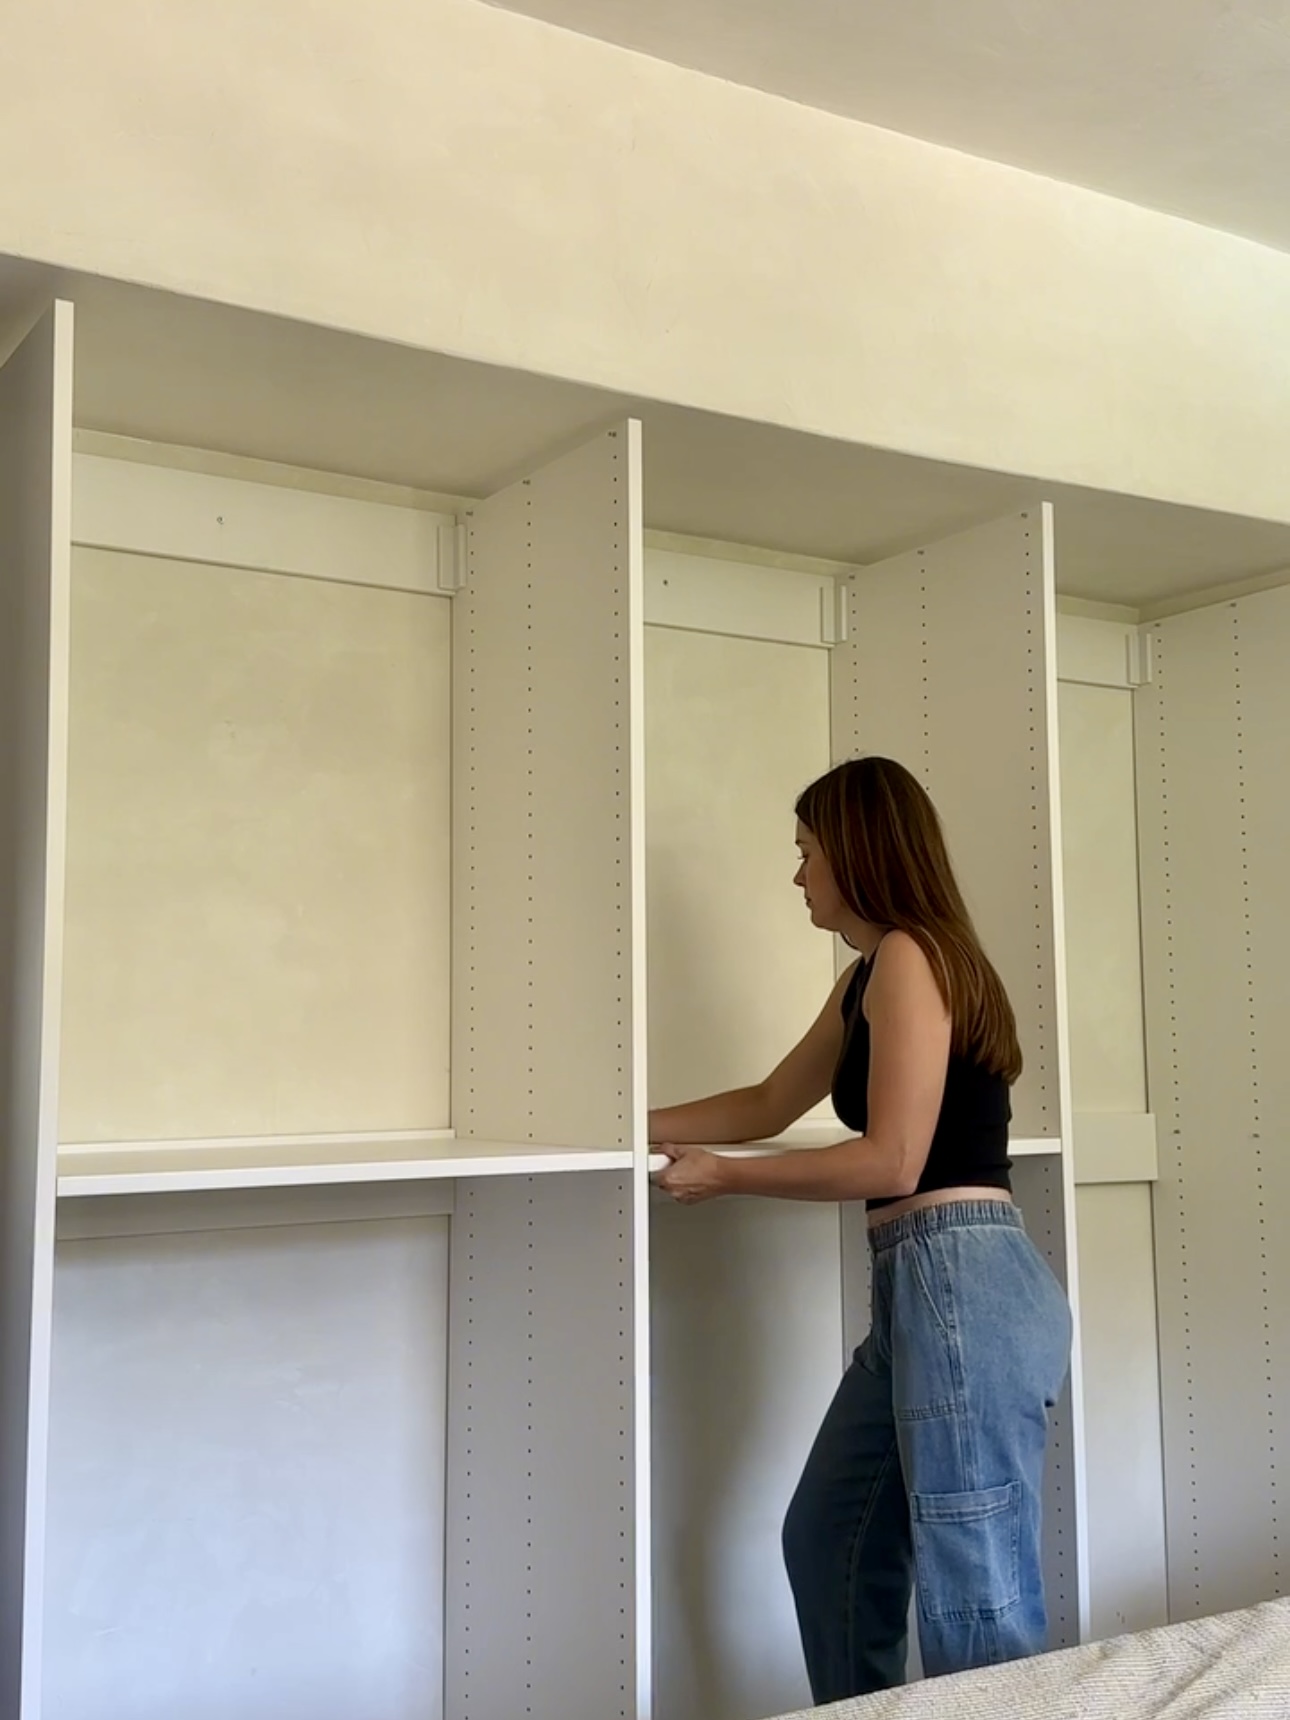
After the wardrobes were built, I secured them to the studs in the wall with my stud finder and laid down the shelves. Stud finders are SO easy to use! You literally just hold and slide it against your wall. Once it beeps, you found a stud!
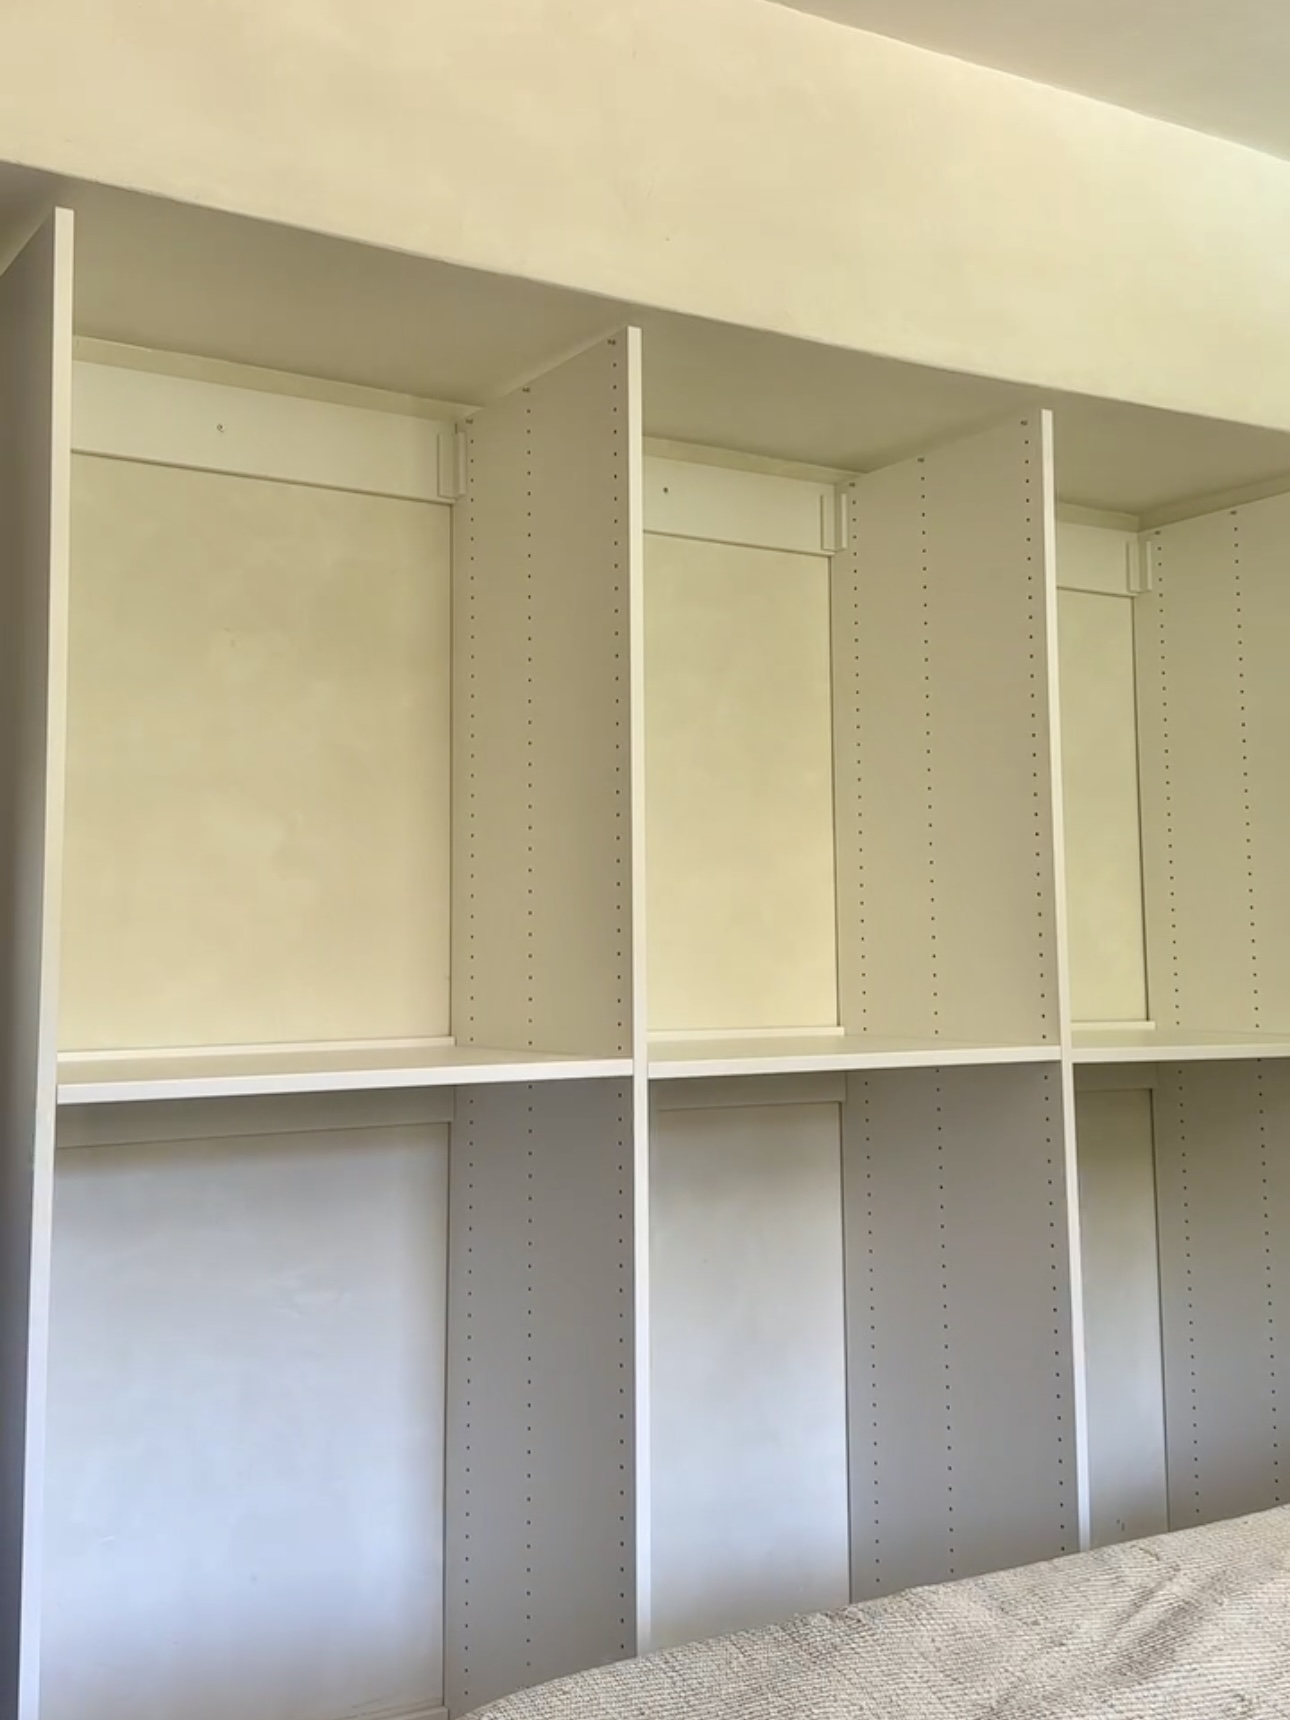
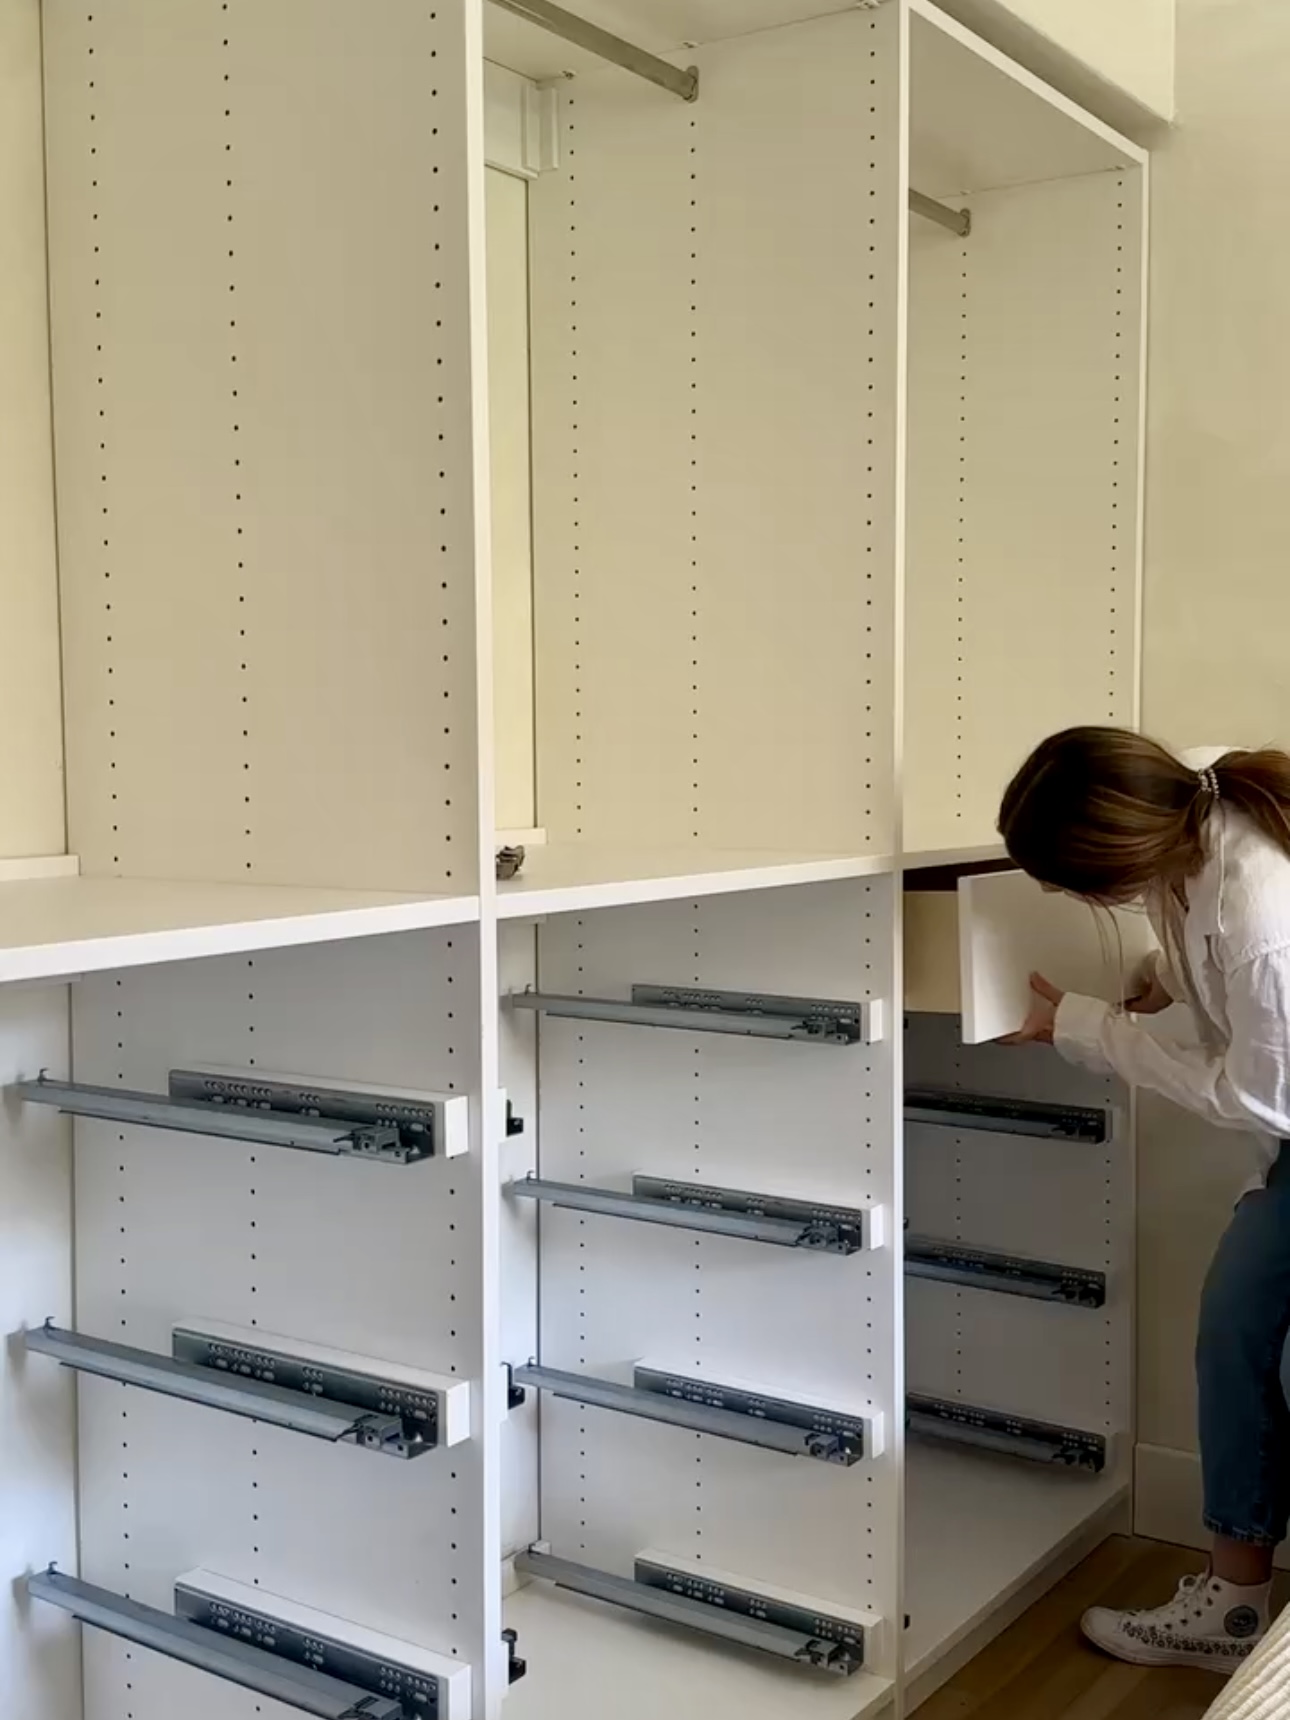
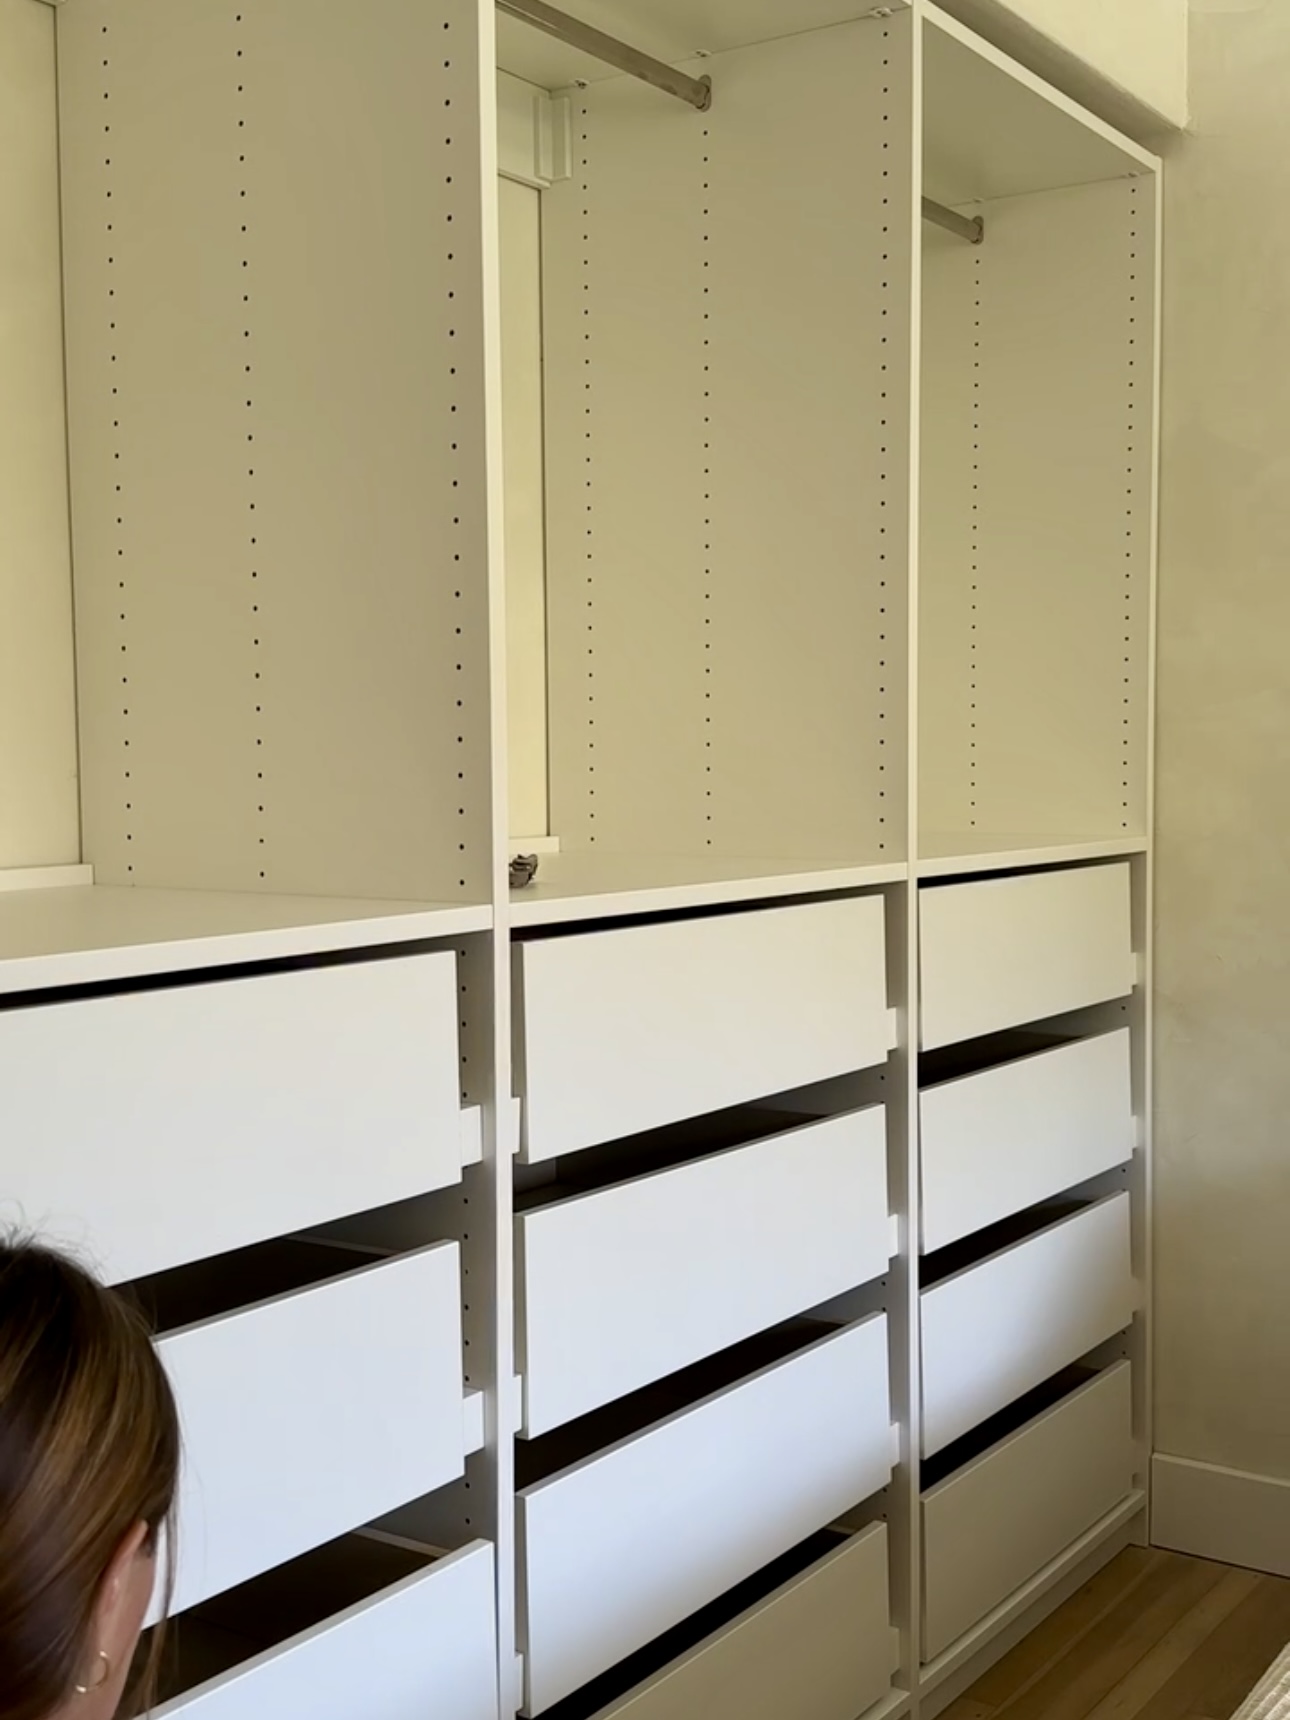
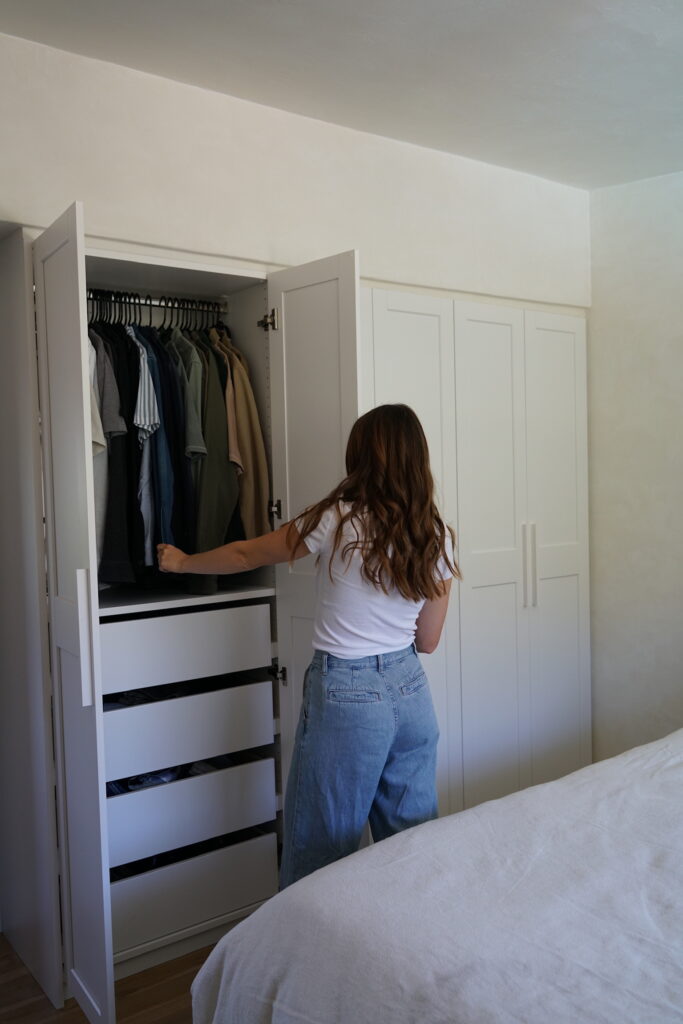
Drawers & Shelves
Next up, I installed the drawer slides and drawers.
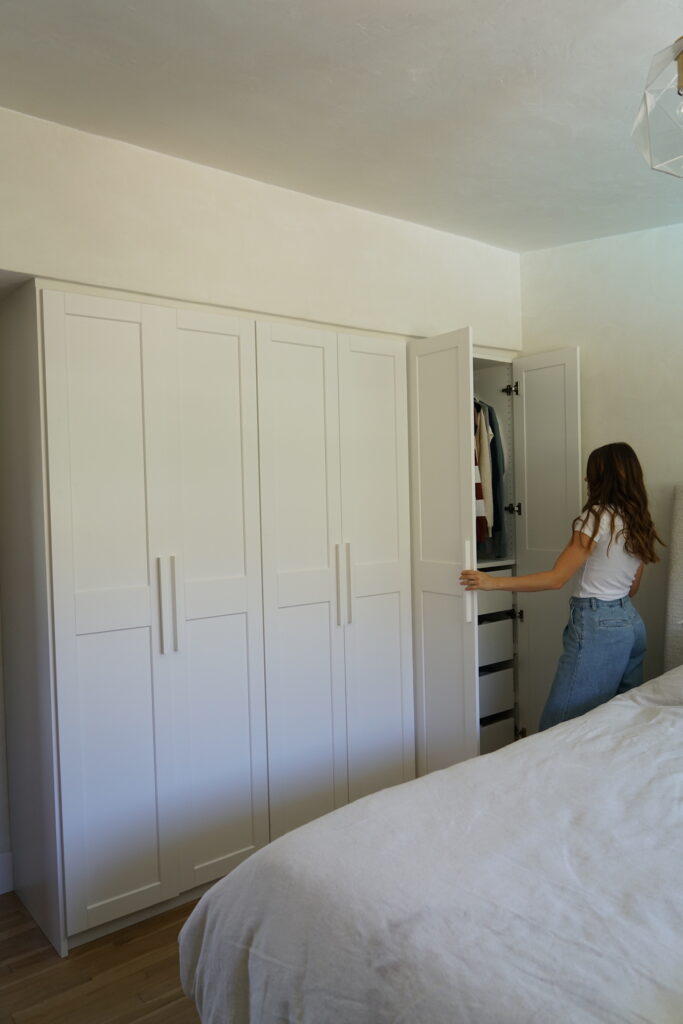
Things really started to come together with the wardrobe doors and hardware. It looks so sleek!
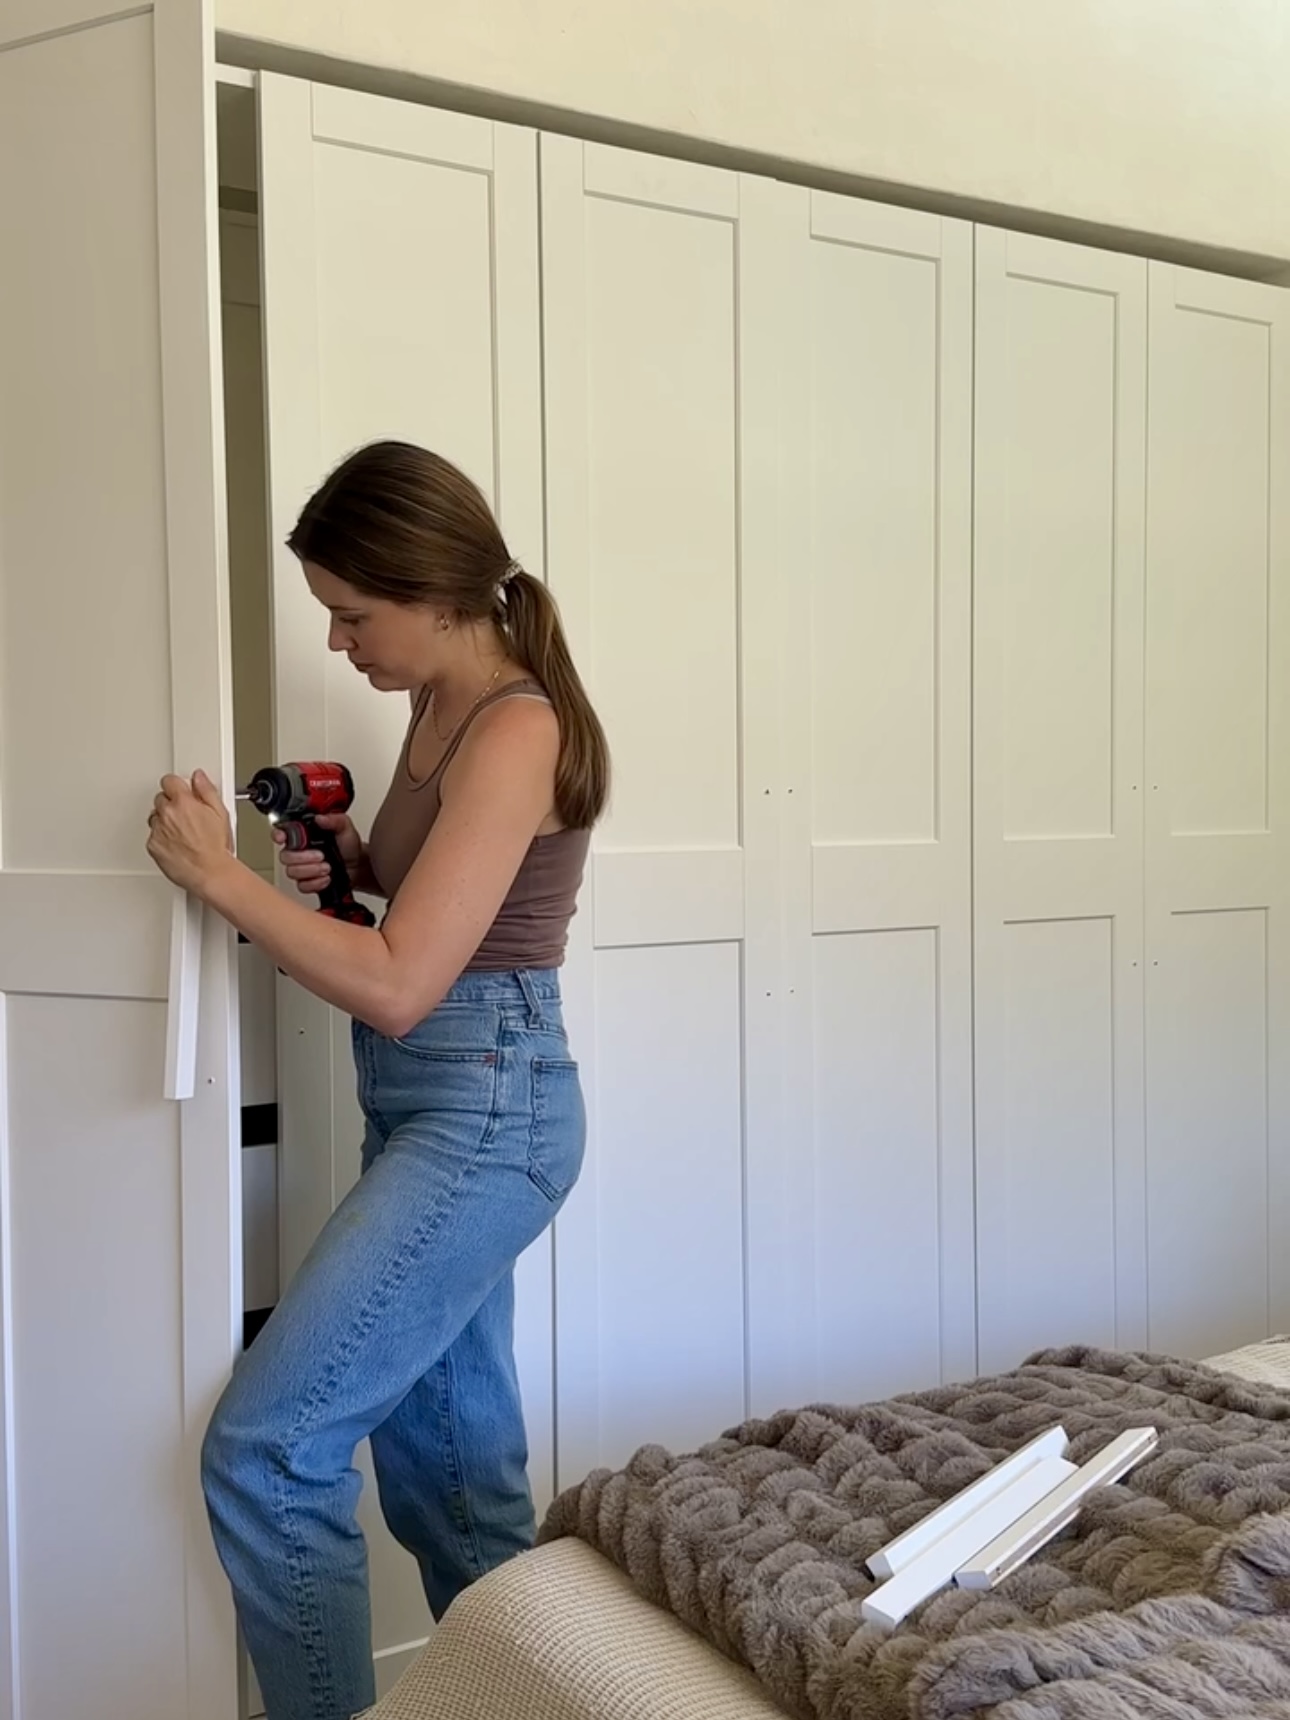
Trim
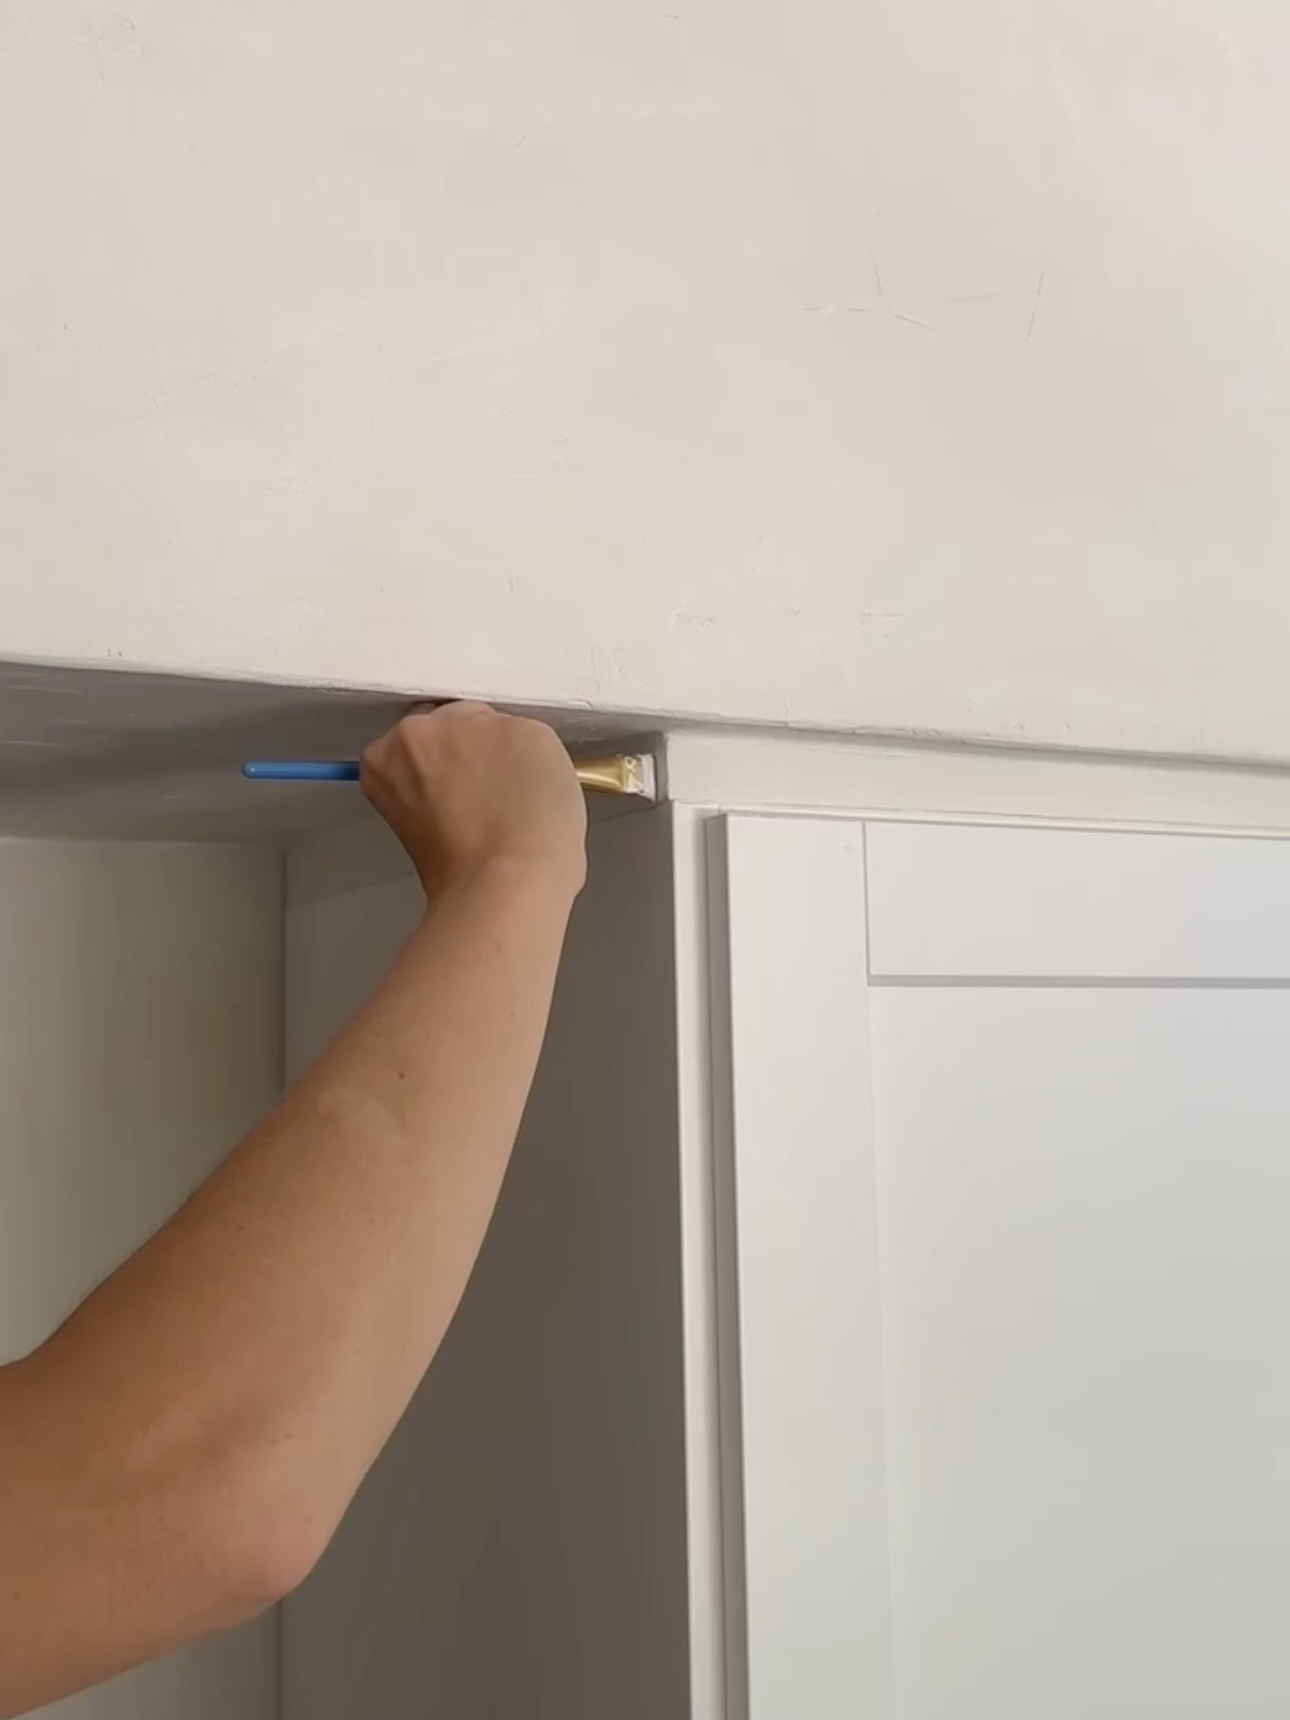
We ran into a little problem. We were so close to being done with this project. However, there was a small gap all along the ceiling. But the wardrobes aren’t recessed enough for crown moulding and the ceiling is sloped. It’s 2″ in one spot and 1 1/4″ in another. First, I tried using 1″ trim and it looked funky because it’s uneven. I also didn’t really have anything to attach trim to because these doors are overlay so I couldn’t nail anything there. I put a piece of trim in the gap and it just made it look worse. So many people said to just “leave it” and that was very tempting. People also suggested trim on the soffit, but there was such a deep overhang when we did that.
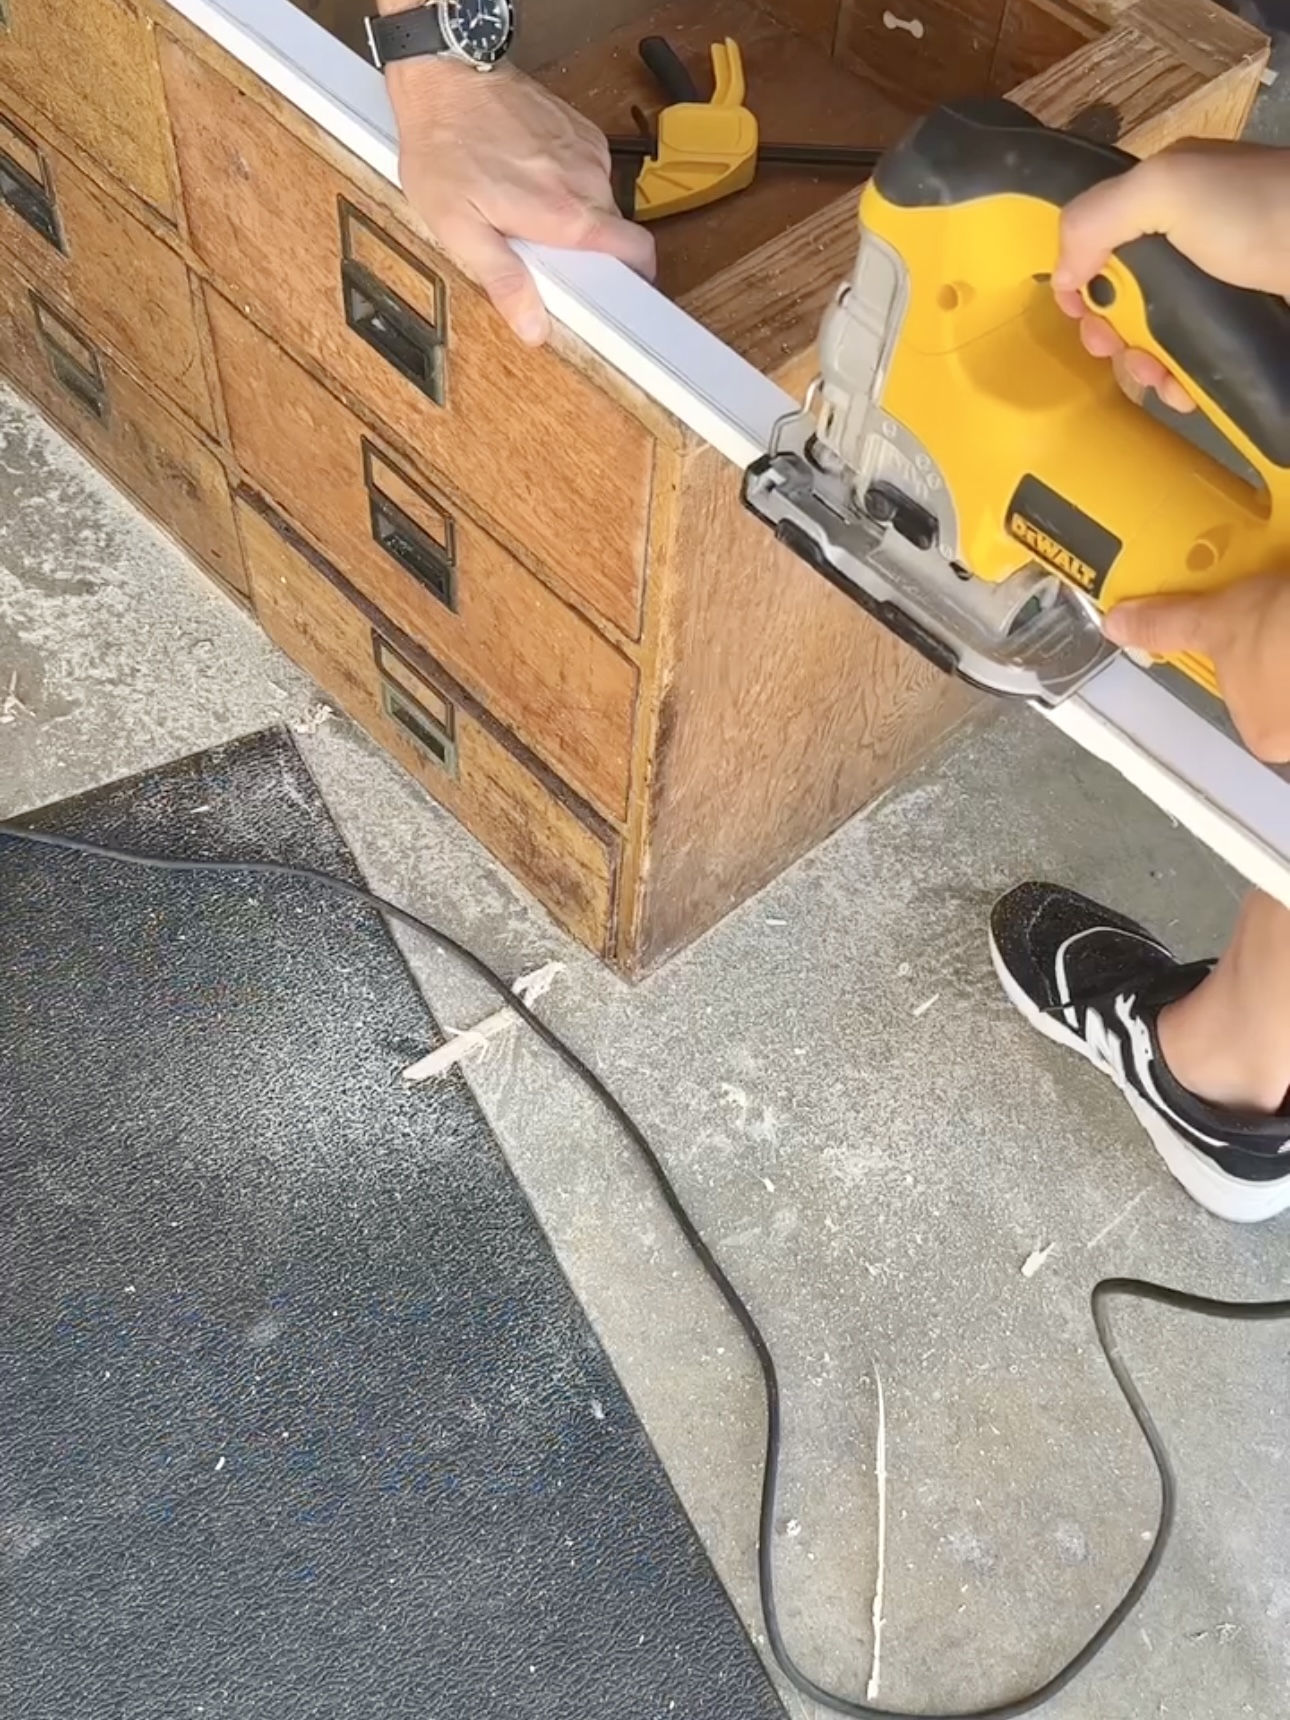
So, I decided to *attempt* to scribe this trim piece. I watched a lot of Youtube videos. Hahah. Here’s the tutorial I used!
I traced everything, measured it out, and it all seemed good to go. Crazy how sloped this line was! I cut down the piece with my jigsaw. Not gonna lie, the longer wall had me back in the garage to adjust my cut 15 times. I was so frustrated. After about 25 cuts and 4 hours on two pieces of trim, we finally got it!
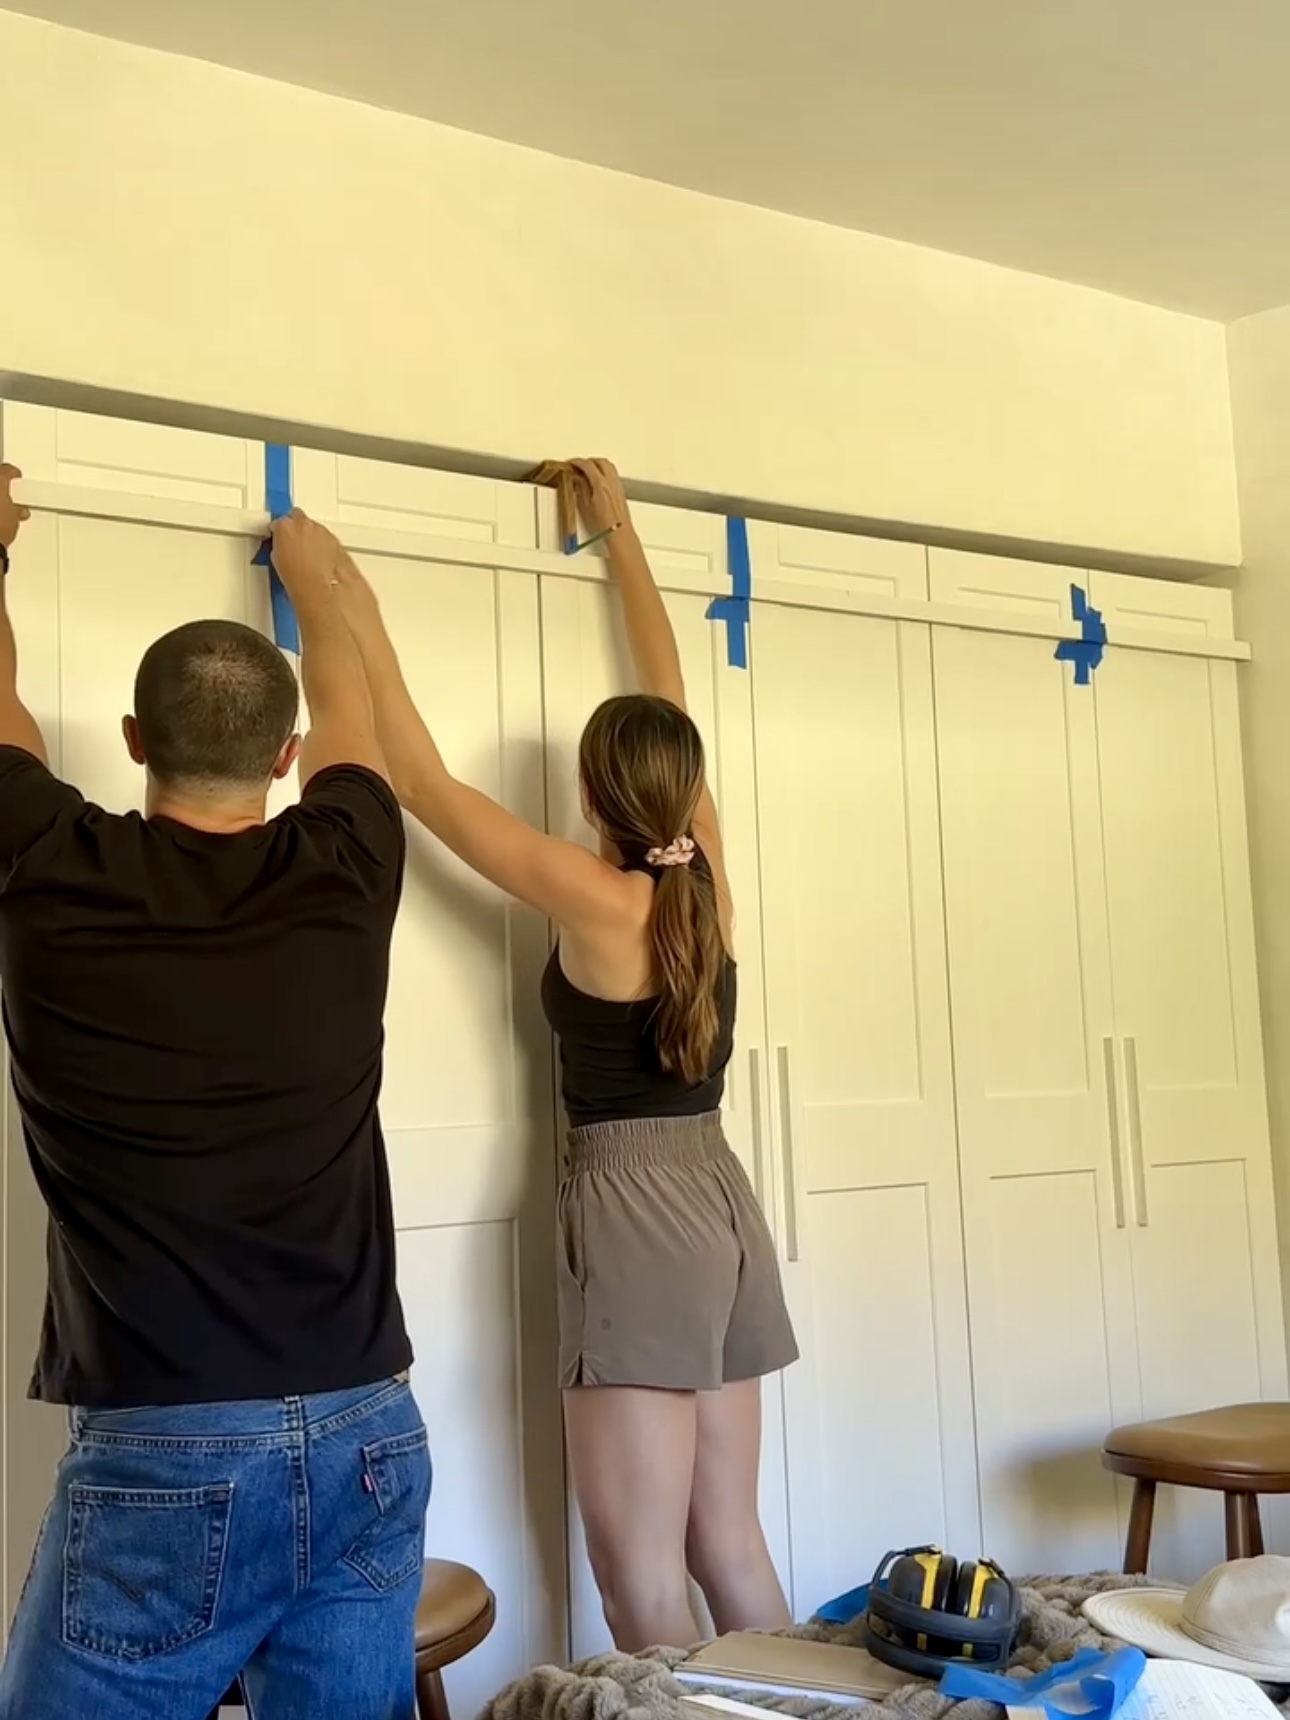
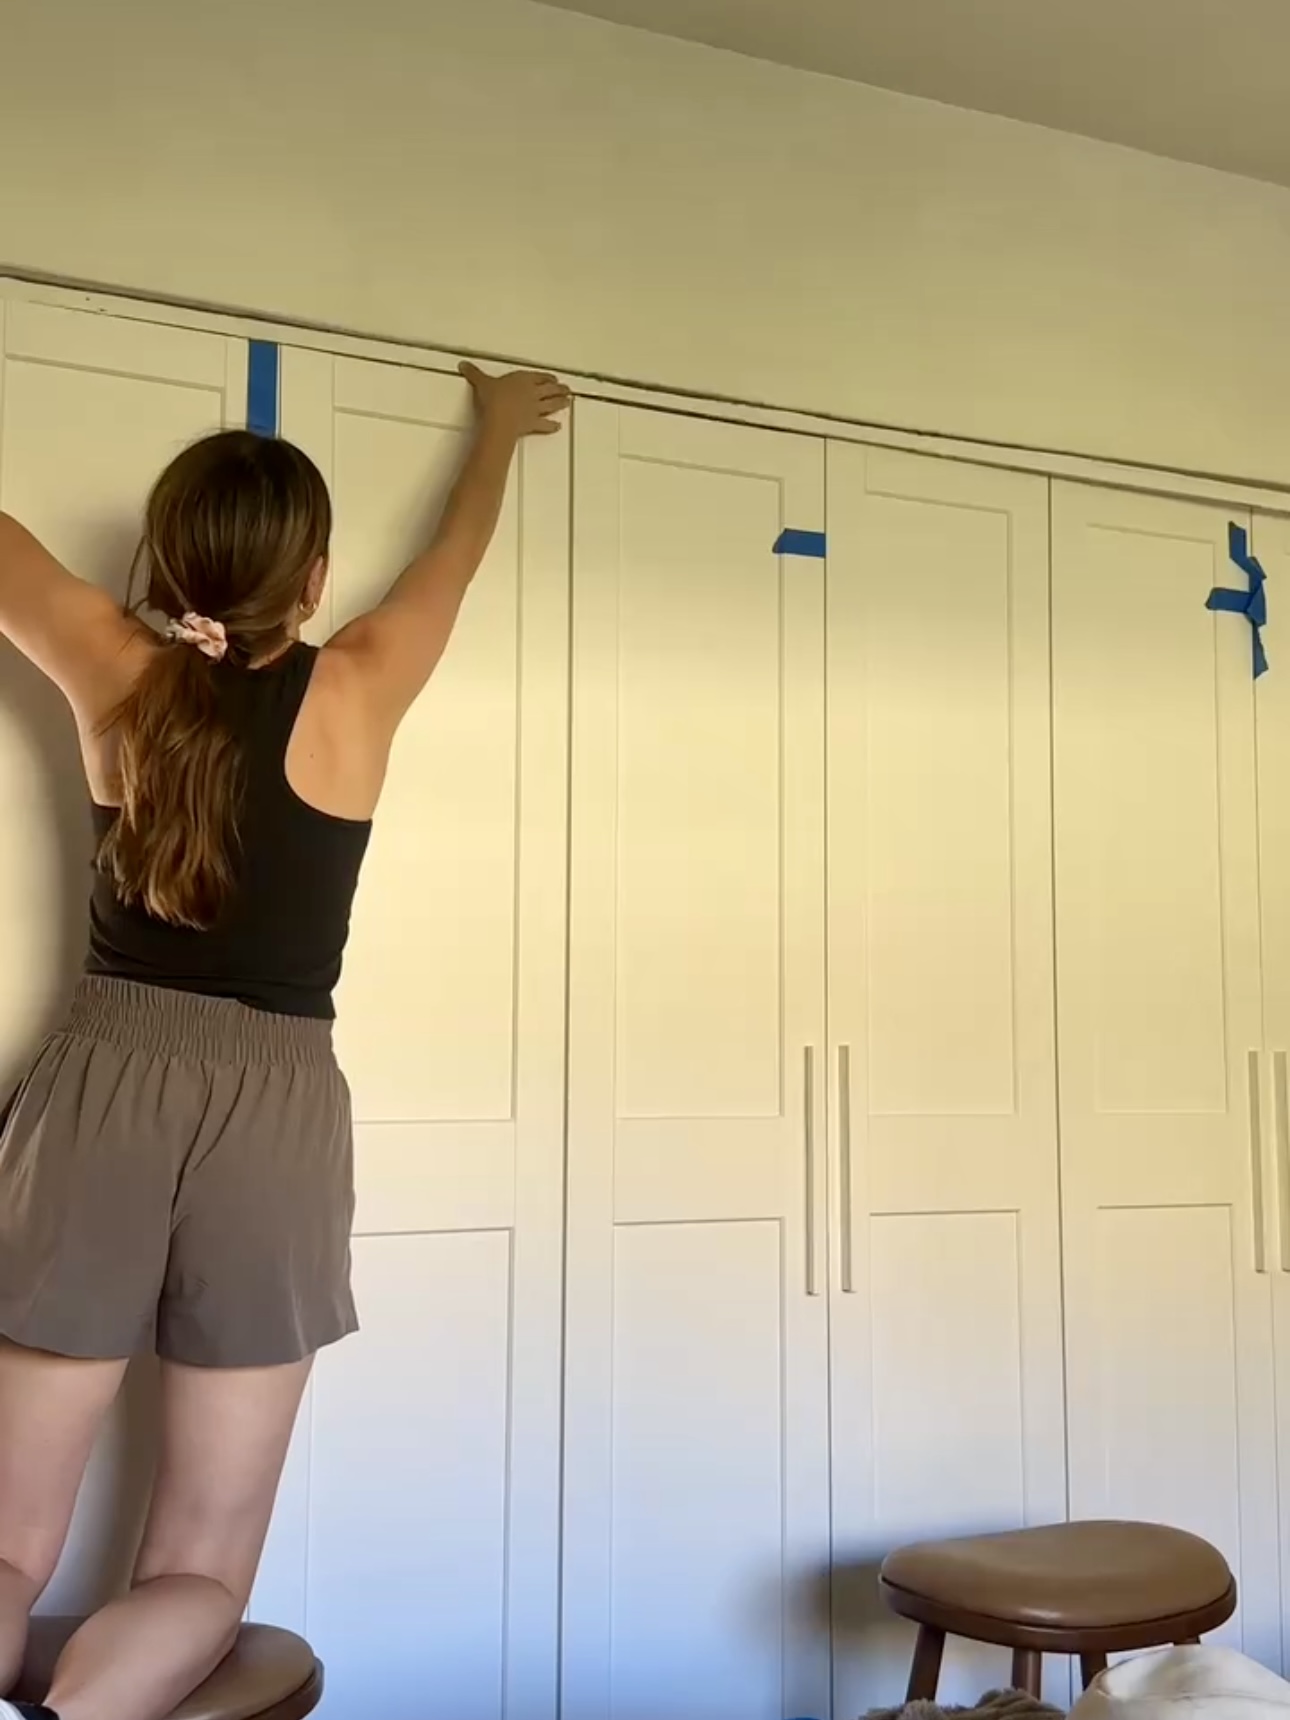
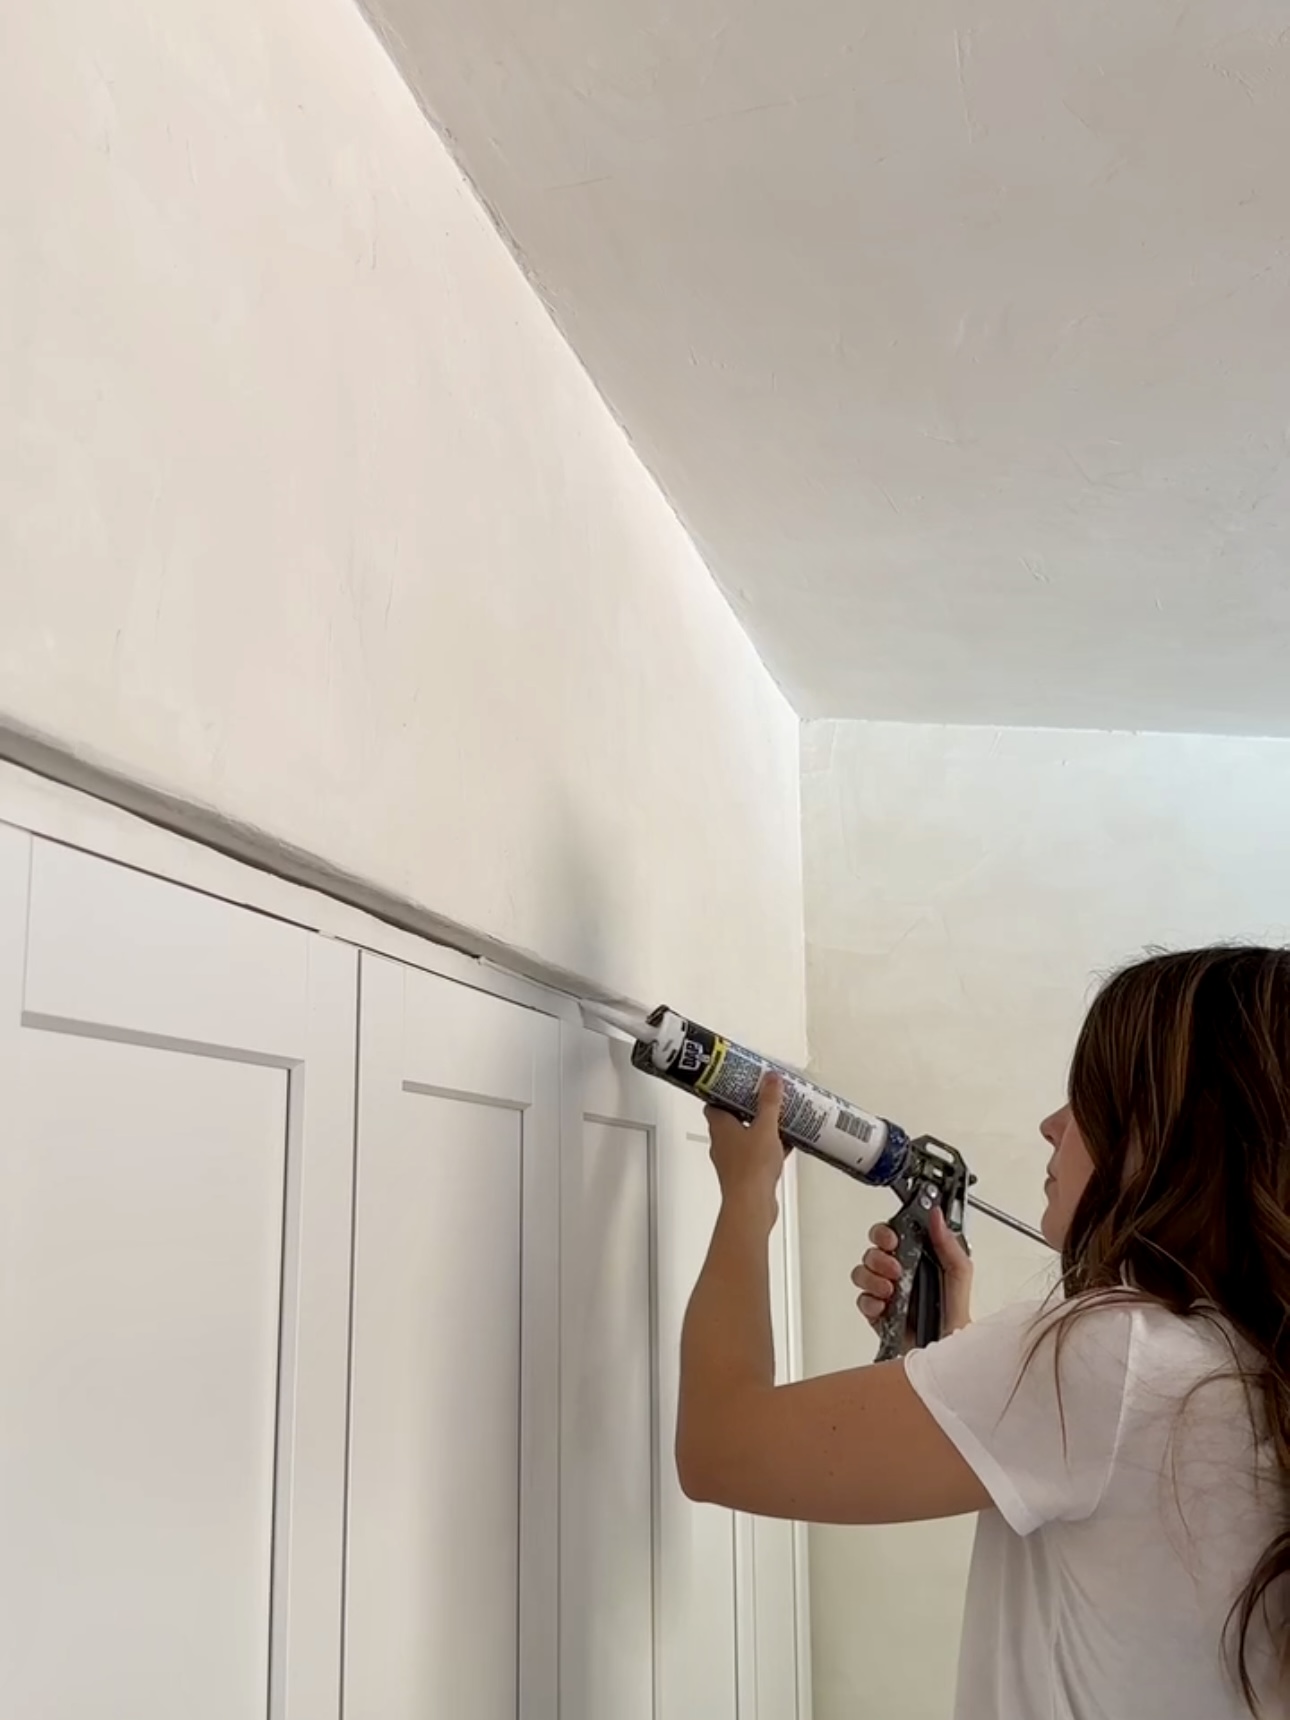
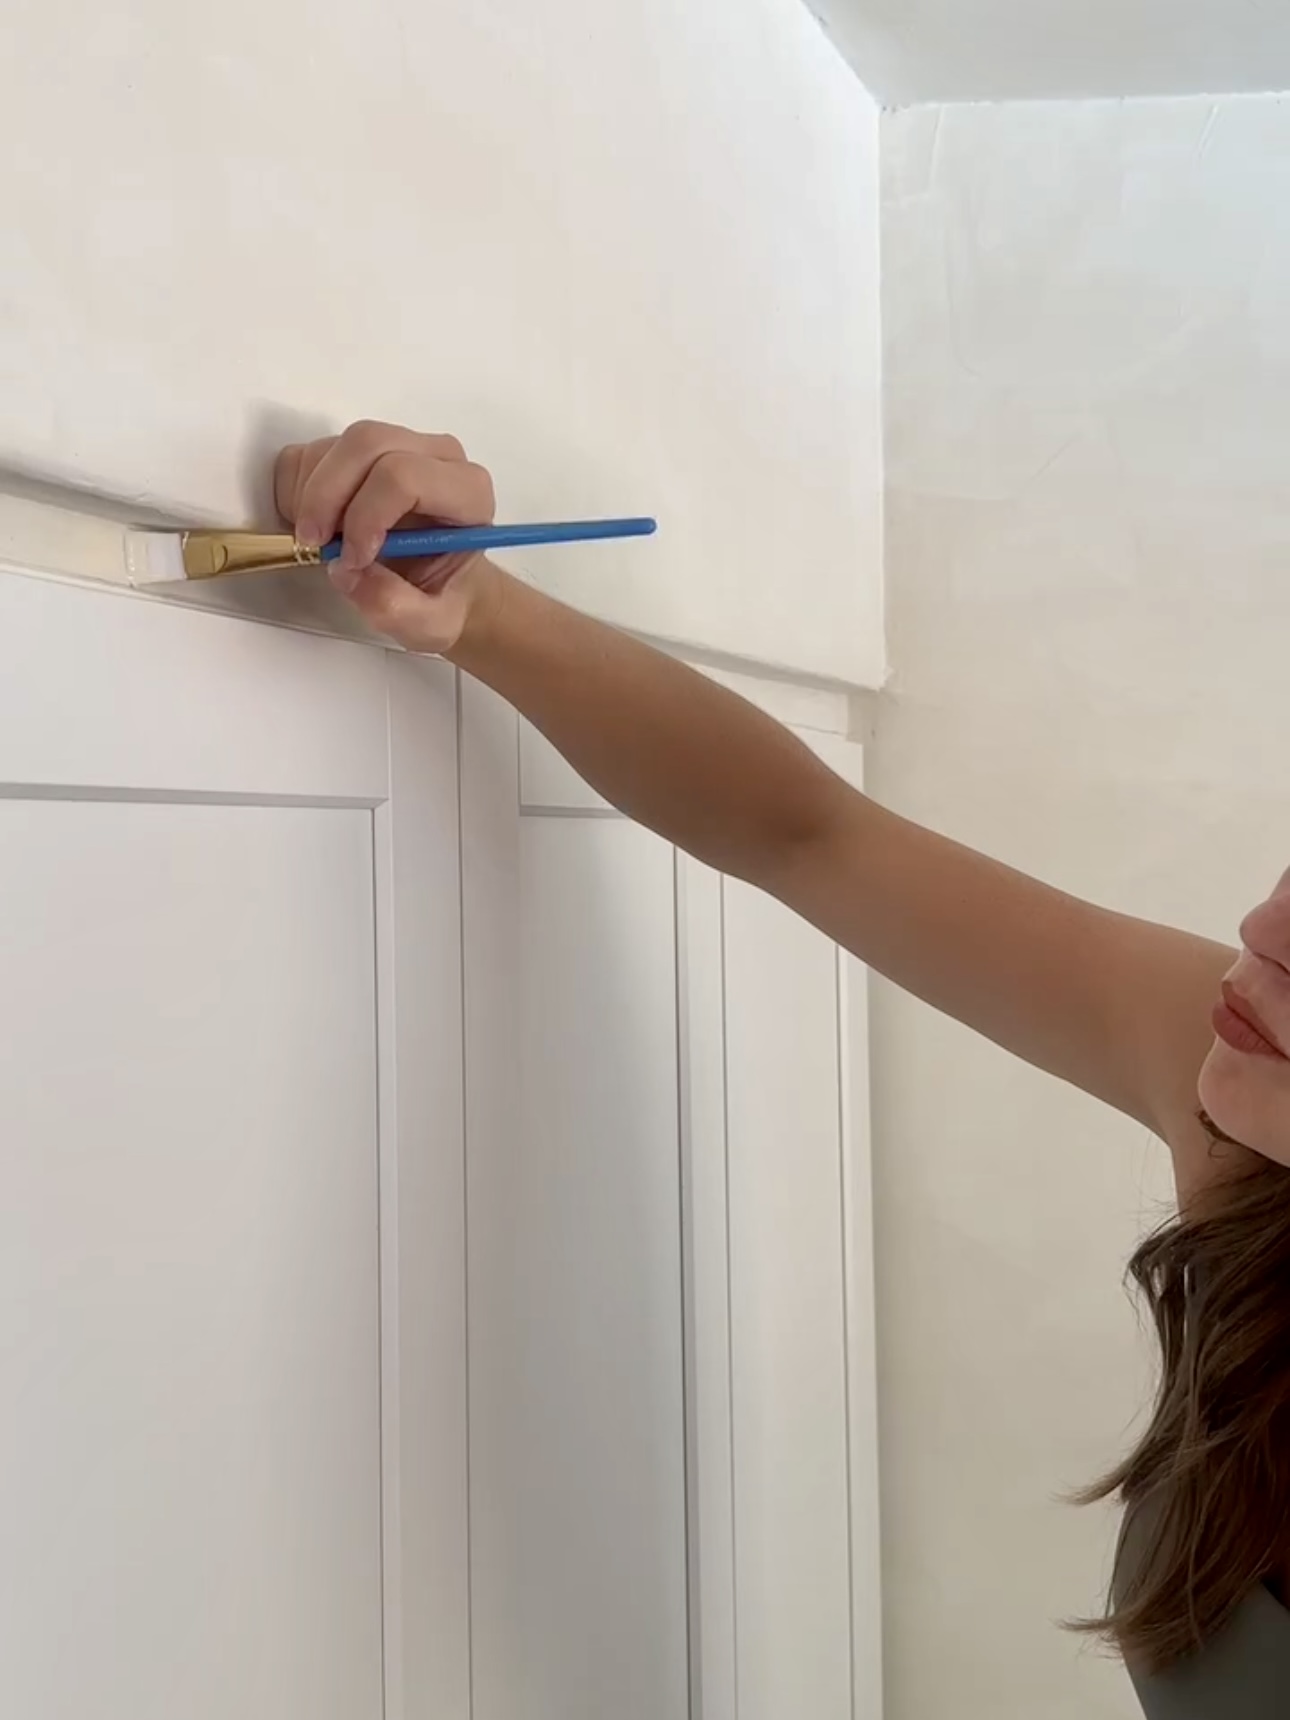
Jake put some scrap pieces between the wardrobes and the ceiling so the trim had something to nail in to. We installed the pieces and caulked it. It looks so good!
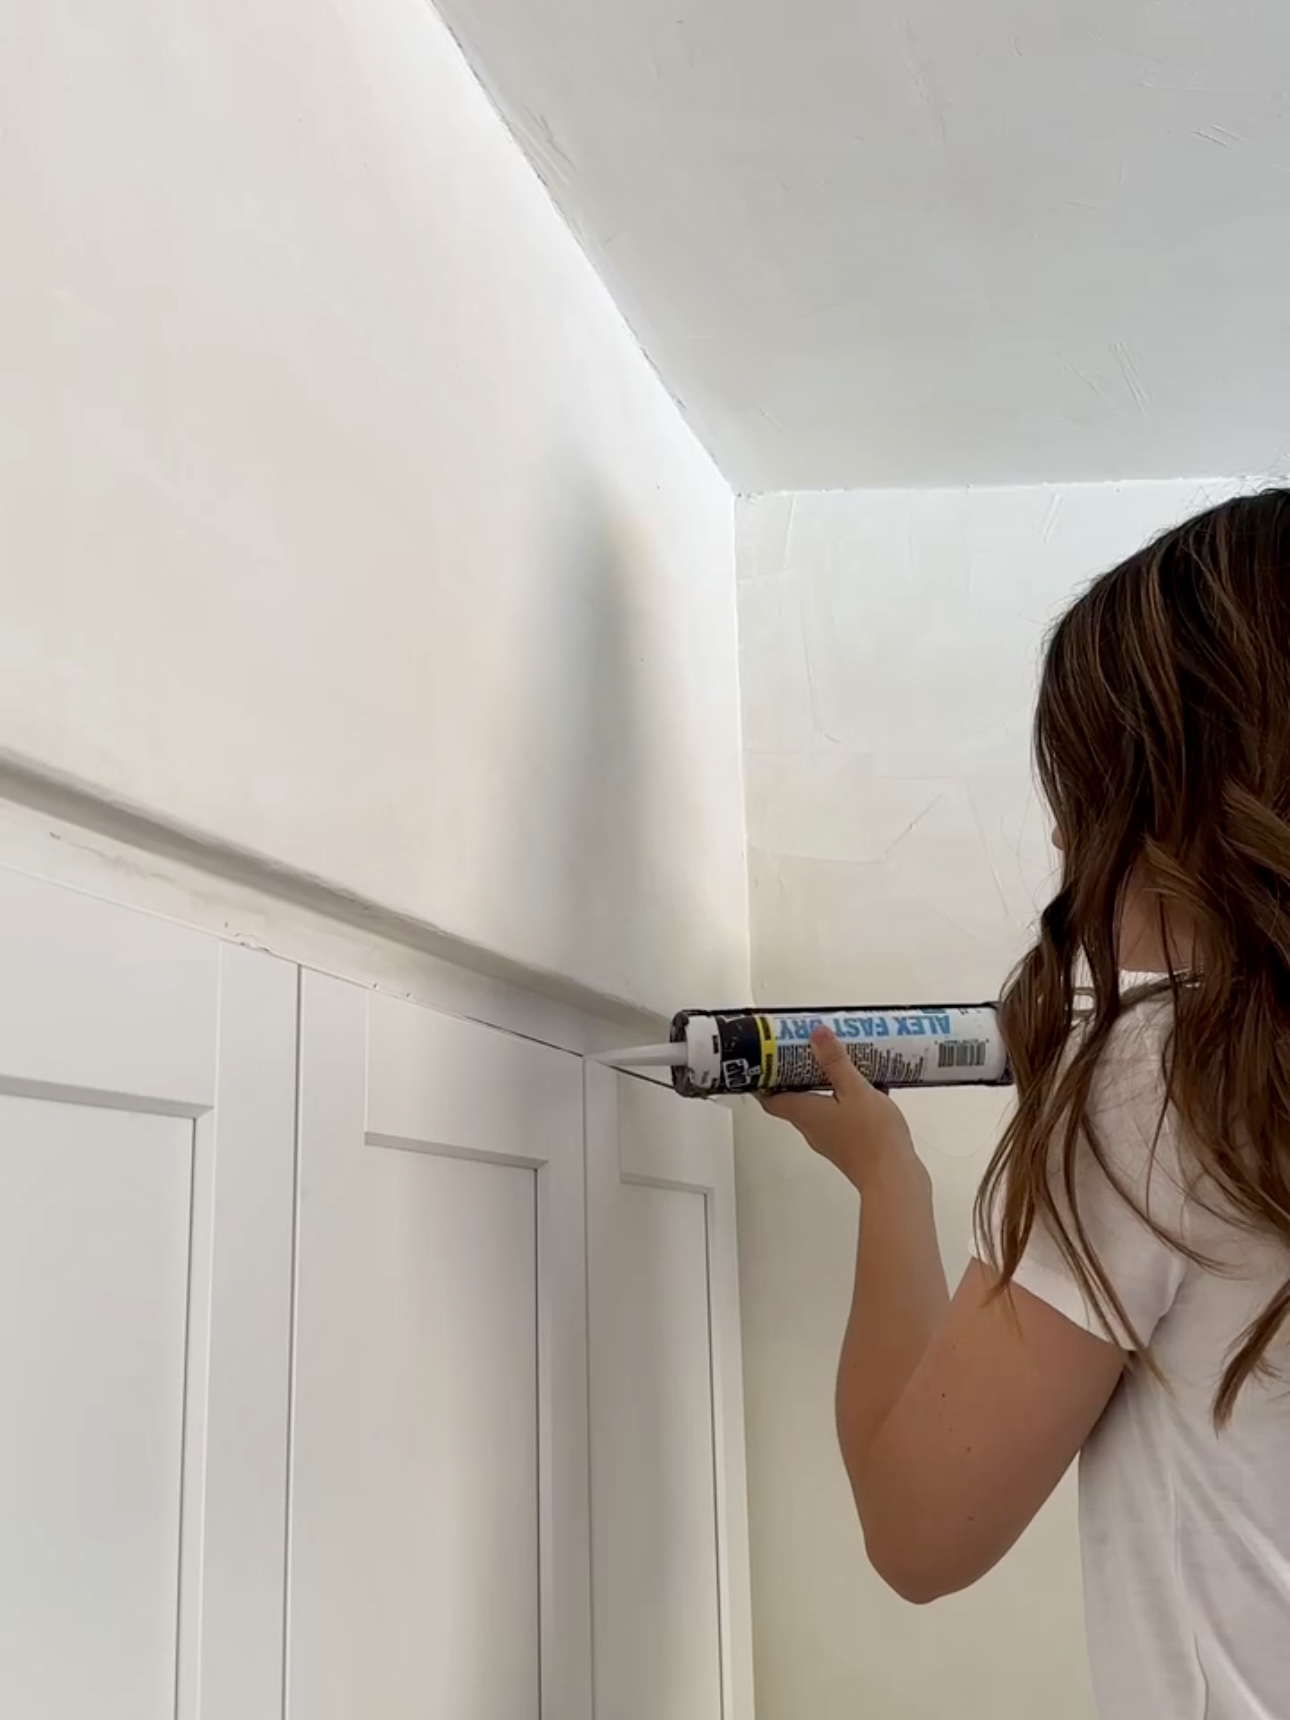
Then, I painted the trim with the same Roman Clay that’s on our walls and it blended so nicely.
It’s so hard to figure this stuff out, but it always feels amazing to learn a new skill – now I know how to scribe!
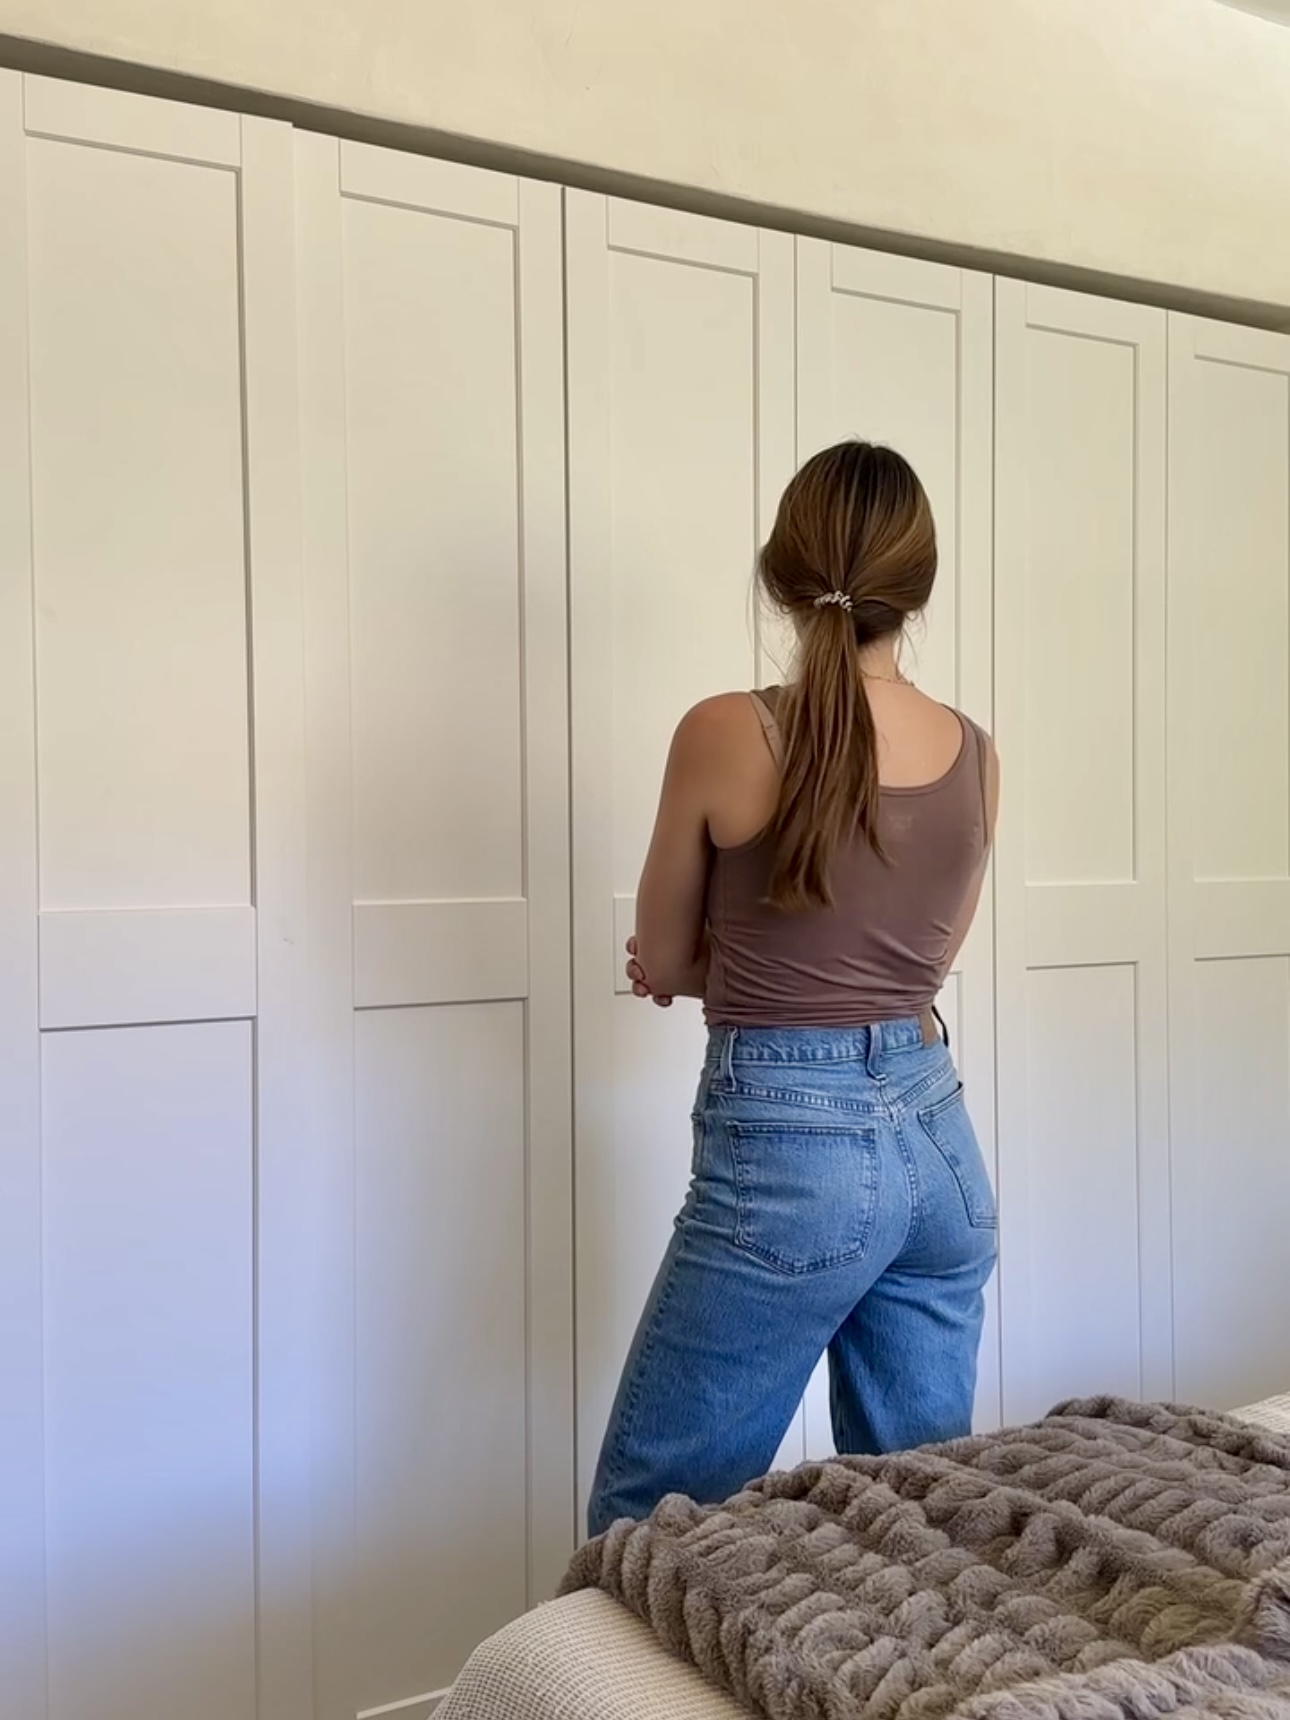
PINCH ME! I’ve imagined a closet here for years and I can’t believe it’s finally real. Thank you Modular Closets 😍
Modular Closets created an exclusive discount code for my followers at 22% off! This is the biggest discount they’ve ever offered. Use code SARAH at checkout!
Now I can turn my gross old closet into a coffee bar…stay tuned ☕️
Comments