
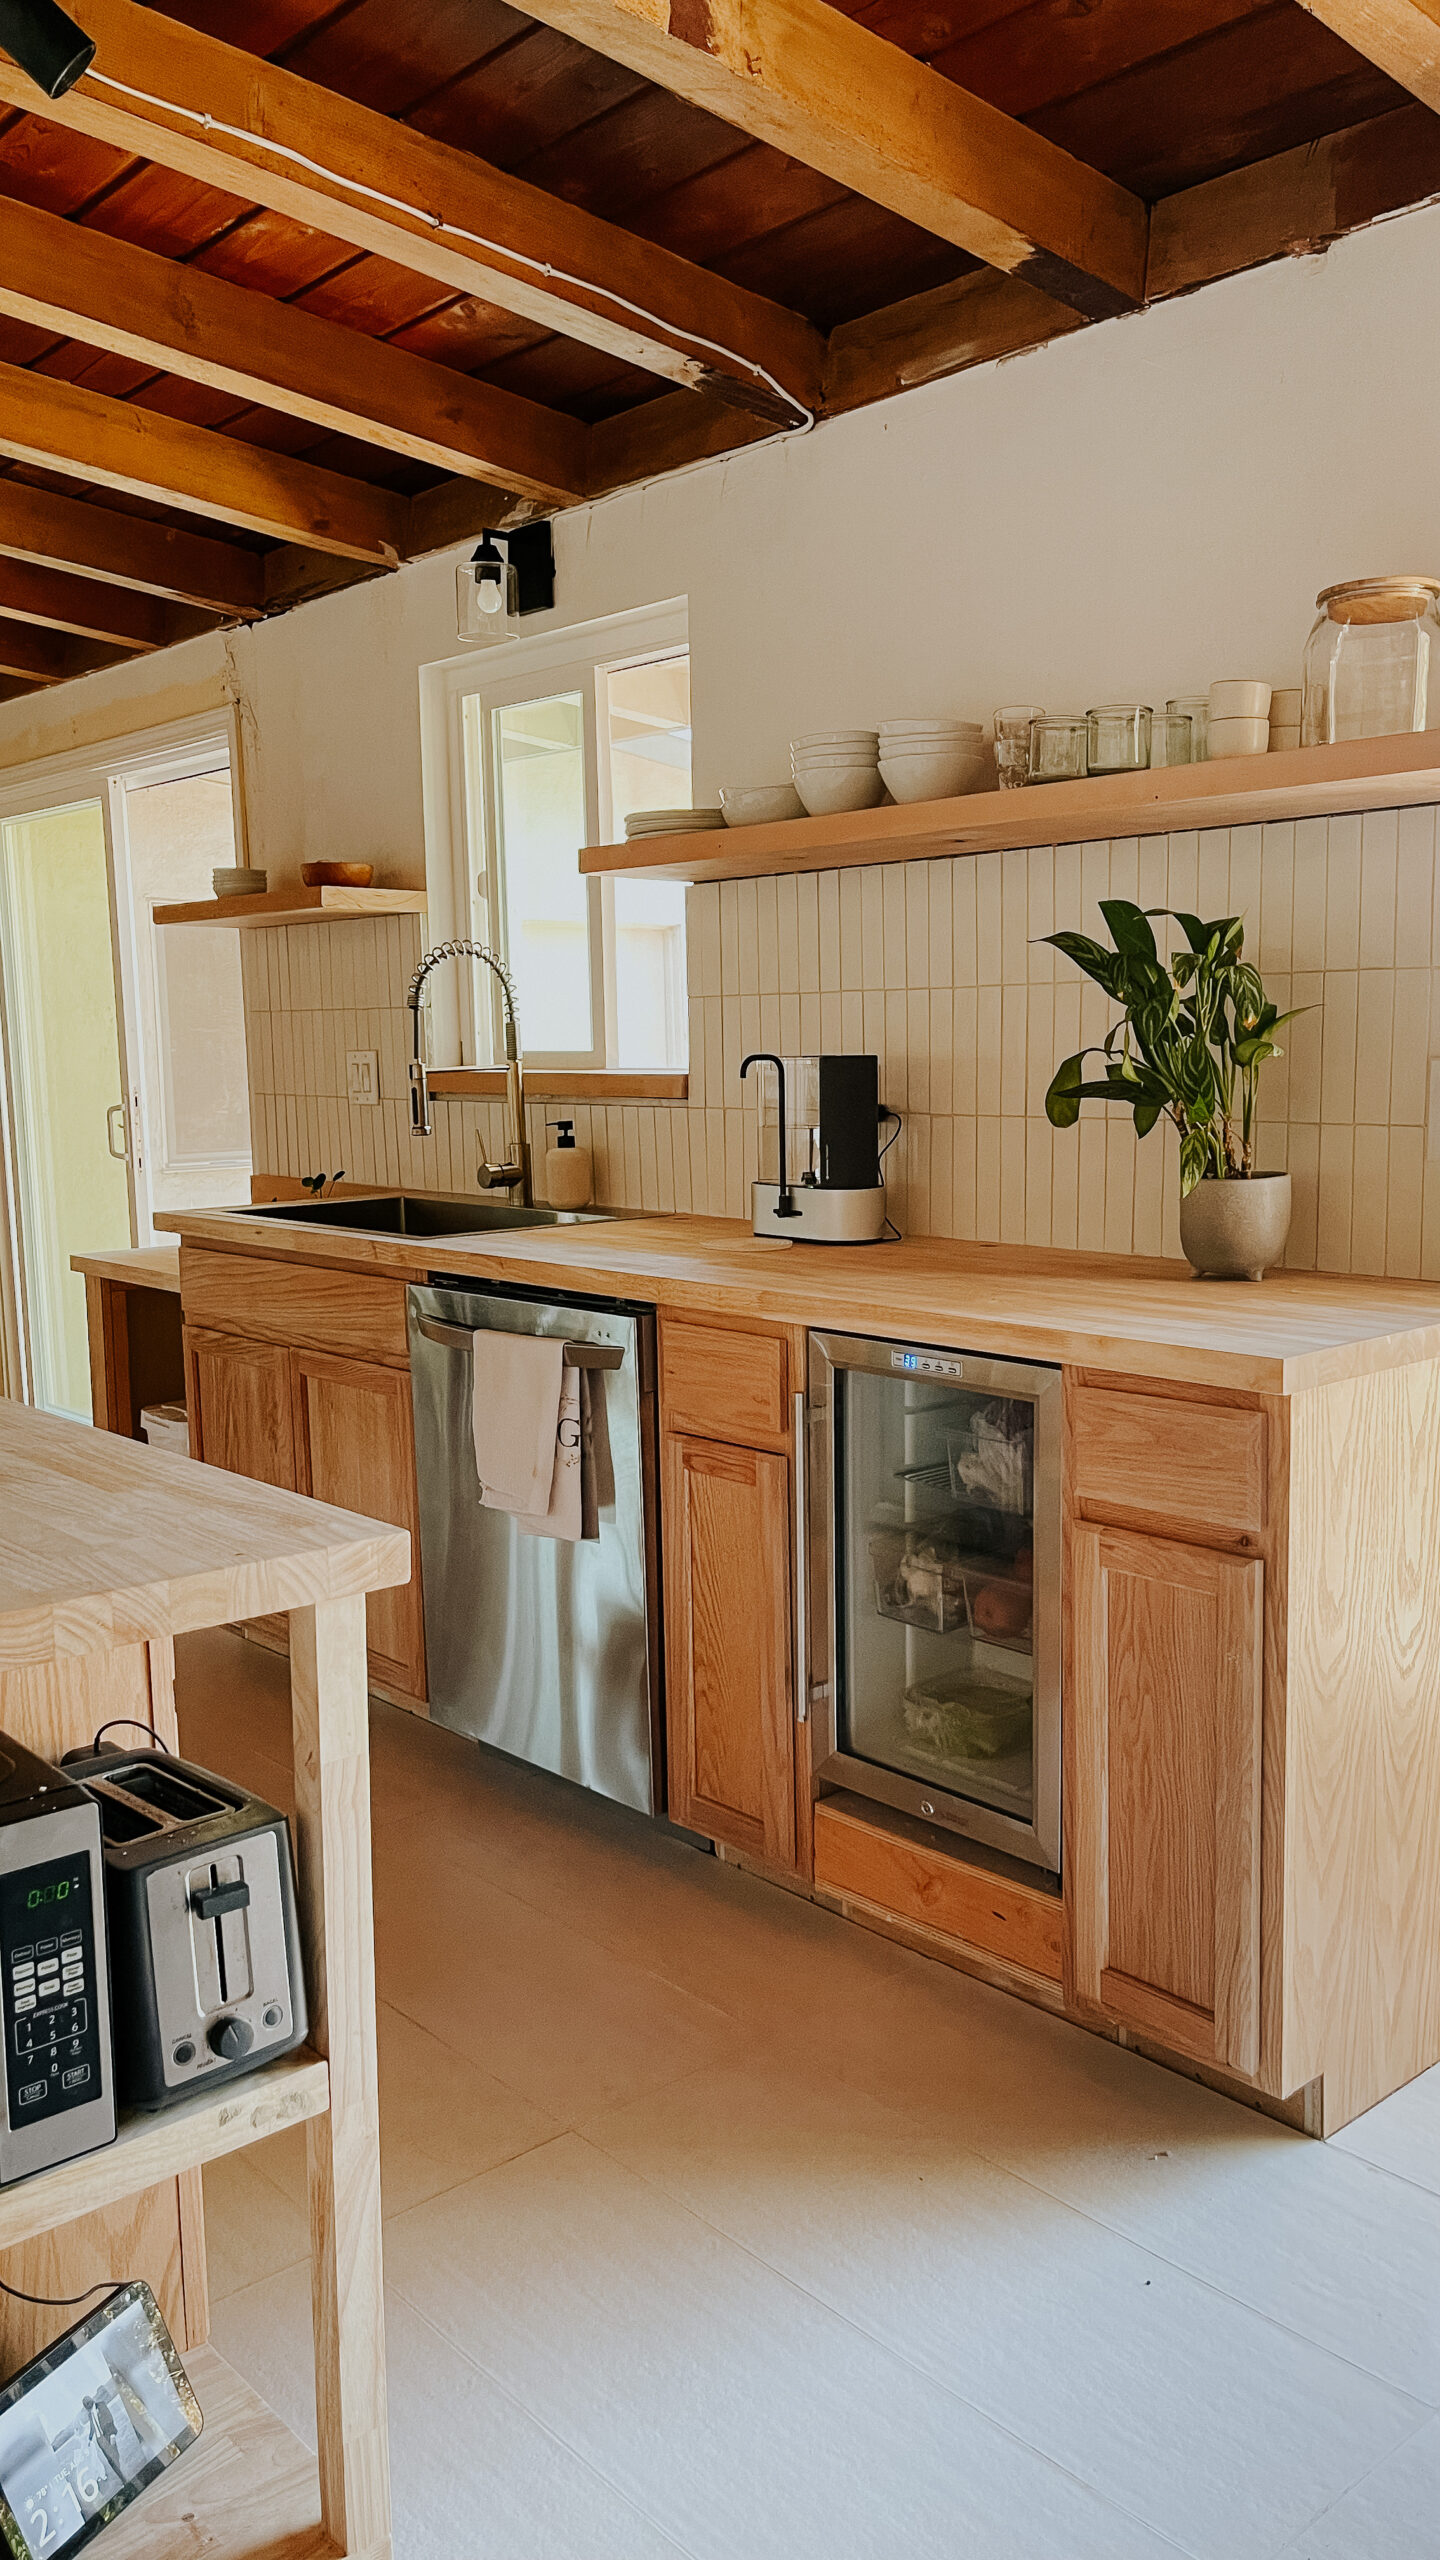
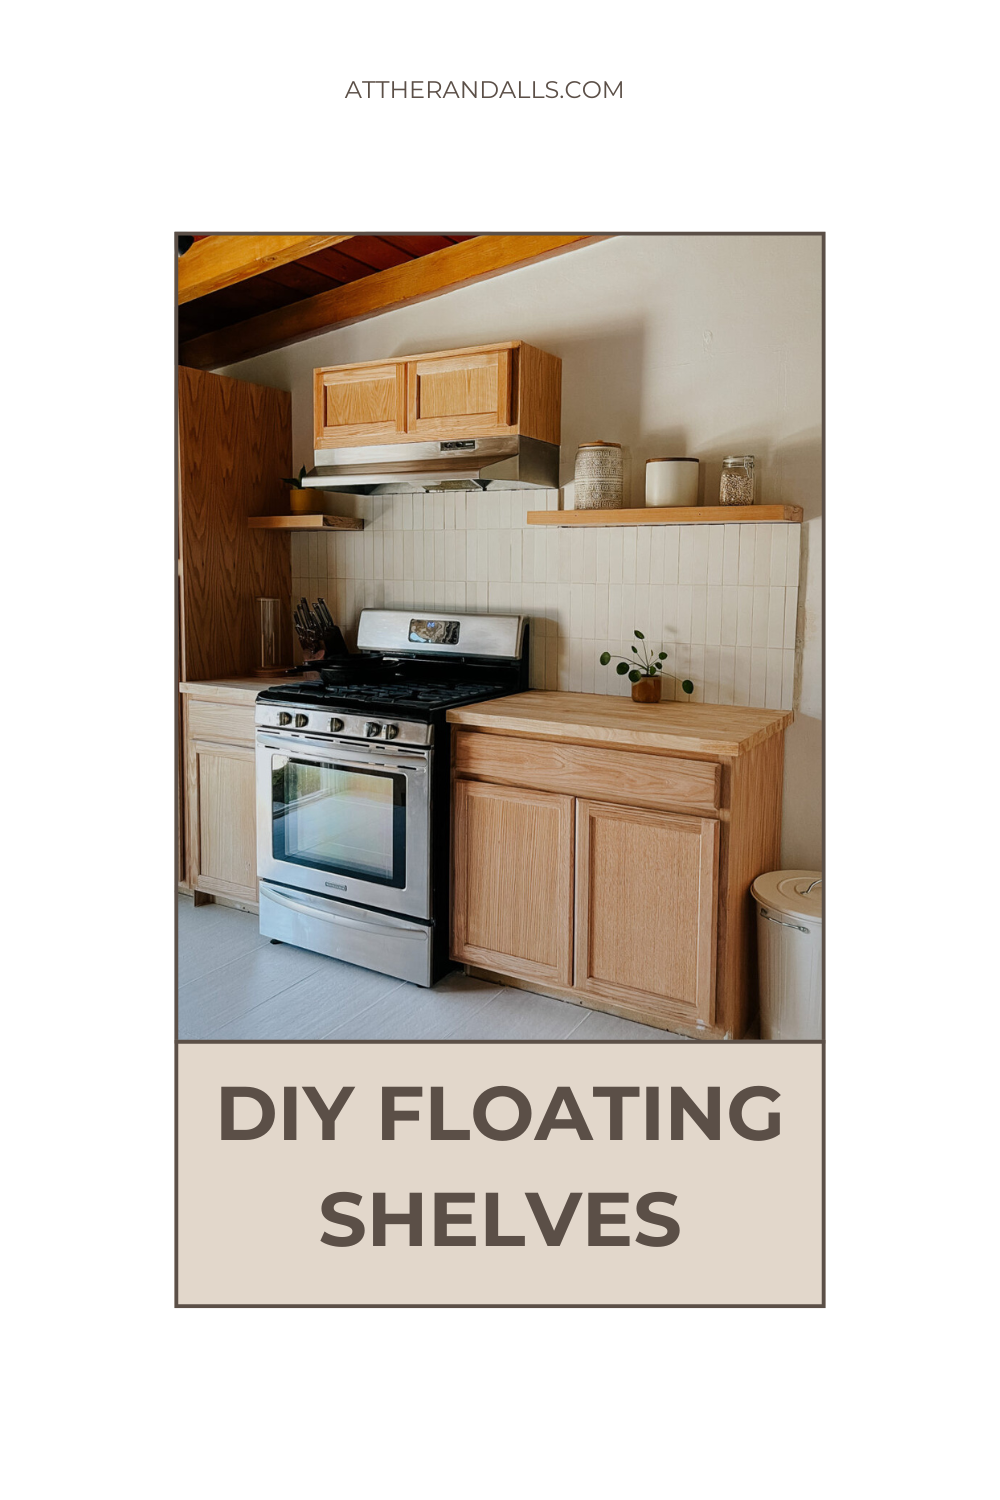
My most frequently asked question in DMs this week is: “Where did you buy those floating shelves?” I wish it was as easy as “tap here!” but these are actually custom-built shelves. We needed something to fit the exact dimensions between patio sliding doors and the window in the middle of the wall.
My brother-in-law sourced 2×11 beech wood from our local lumber yard. Beech wood is significantly cheaper than white oak, but has a similar light look.
The first step is to cut out small sections of drywall so that you can directly access the stud behind. Use a stud finder, then an oscillating tool to cut out the drywall. Then you can screw these brackets directly into your stud. Use a level to make sure these all line up evenly. Here is a list of our top 10 tools!
Materials


Next, you’ll need a good drill guide and an extra long bit. You’re about to drill the longest holes of your life! These holes need to be perfectly straight for this whole thing to work. Use the drill bit, marked with tape at the 10″ point at which you need to stop drilling. You can use your metal bracket to mark where the tape should go.
Installation
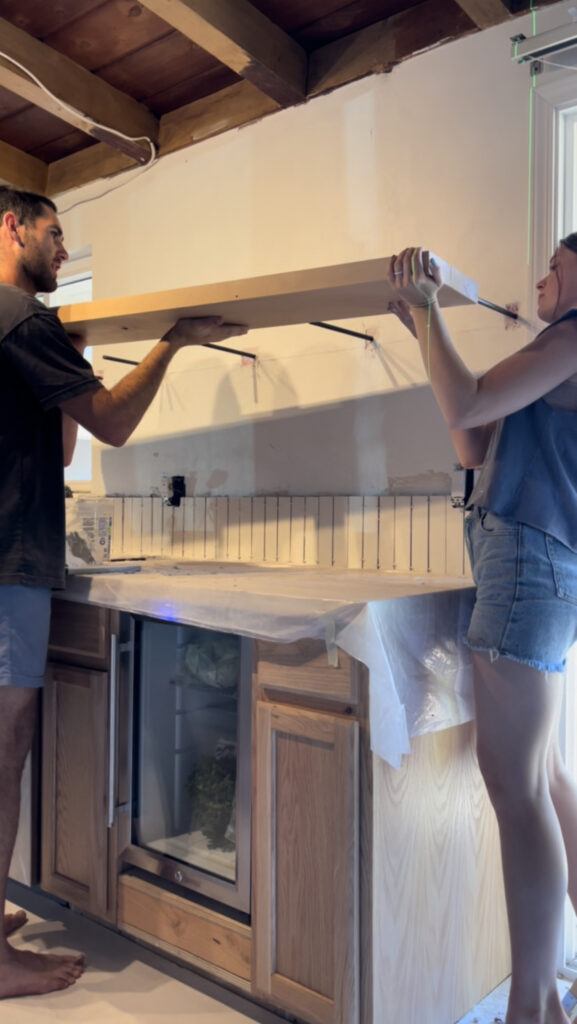
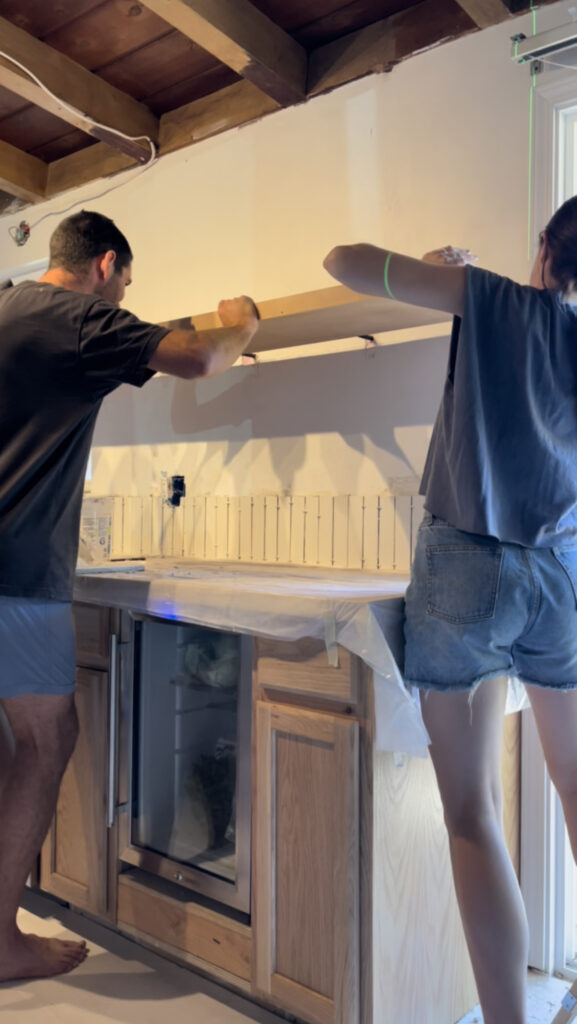
Now, you should be all set to hang the shelf! Fill any gaps in the drywall around the brackets with joint compound or spackle (depending on how much you need to fill), and slowly slide the shelf onto the brackets. You’ll need to insert the brackets into the holes one at a time, bending them slightly. Then you can push the shelf all the way to the wall.
Finish off the project by sealing the wood if you want to protect it against water damage or other discoloration. Viola! Your DIY floating shelves are done!
If you want a non-DIY option, I recommend these Brighton shelves from Pottery Barn. They have different finishes and sizes. We have used them in a room makeover and they are very high quality!
These really were the perfect finishing touch on this $5,000 kitchen makeover.

Comments