
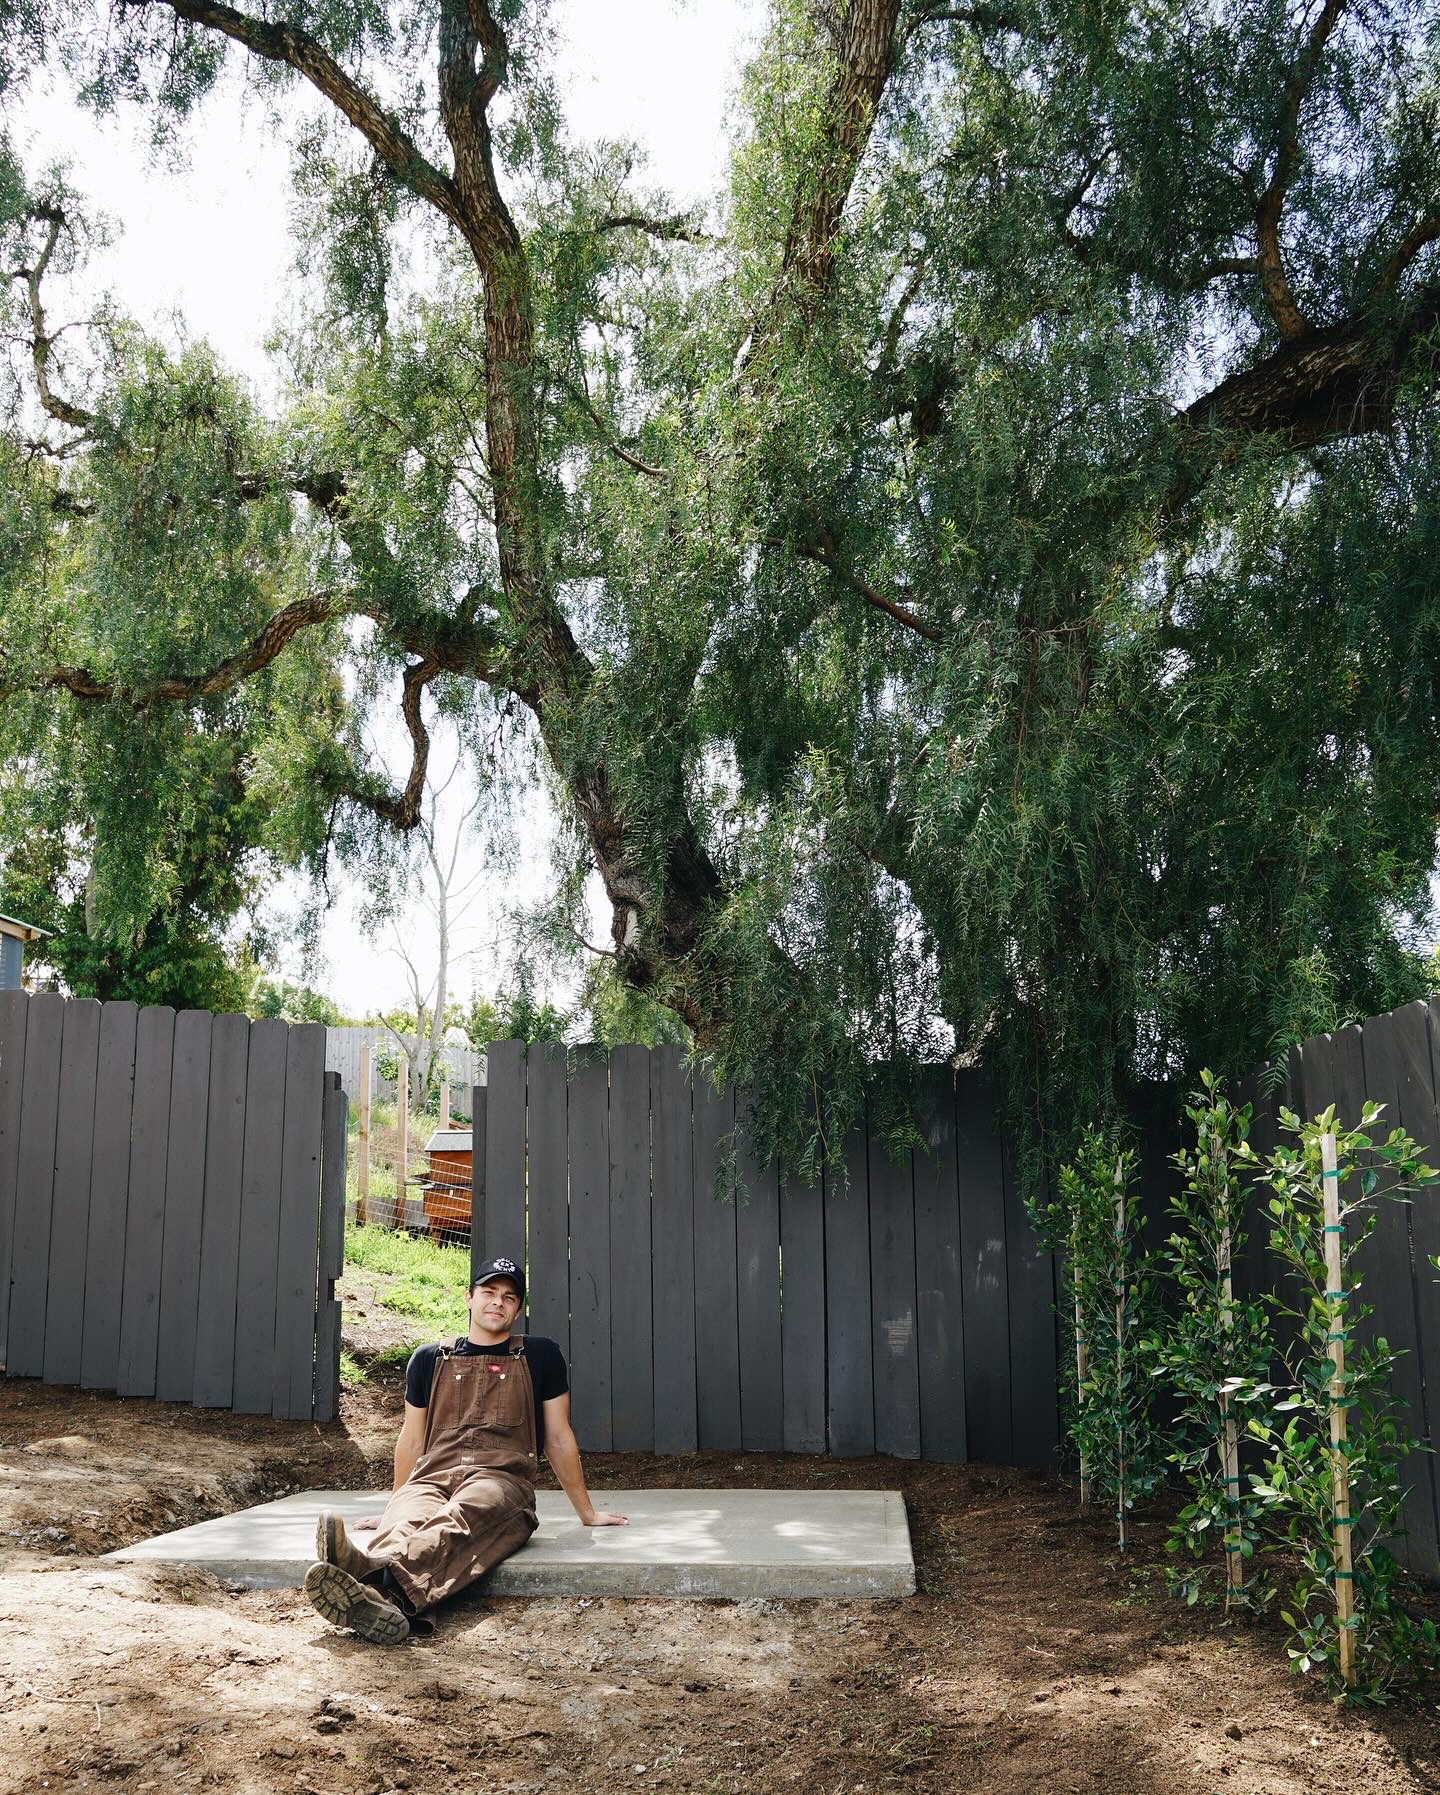
We are making a DIY concrete slab for a garden shed in our yard. Originally we were going to put the shed right behind our house but we want to leave that space free just incase we ever decide to add on. The shed will go in the back right corner of our yard.
We’ve never done this before so we’ll probably learn a ton…hopefully we don’t make any irreversible mistakes😅
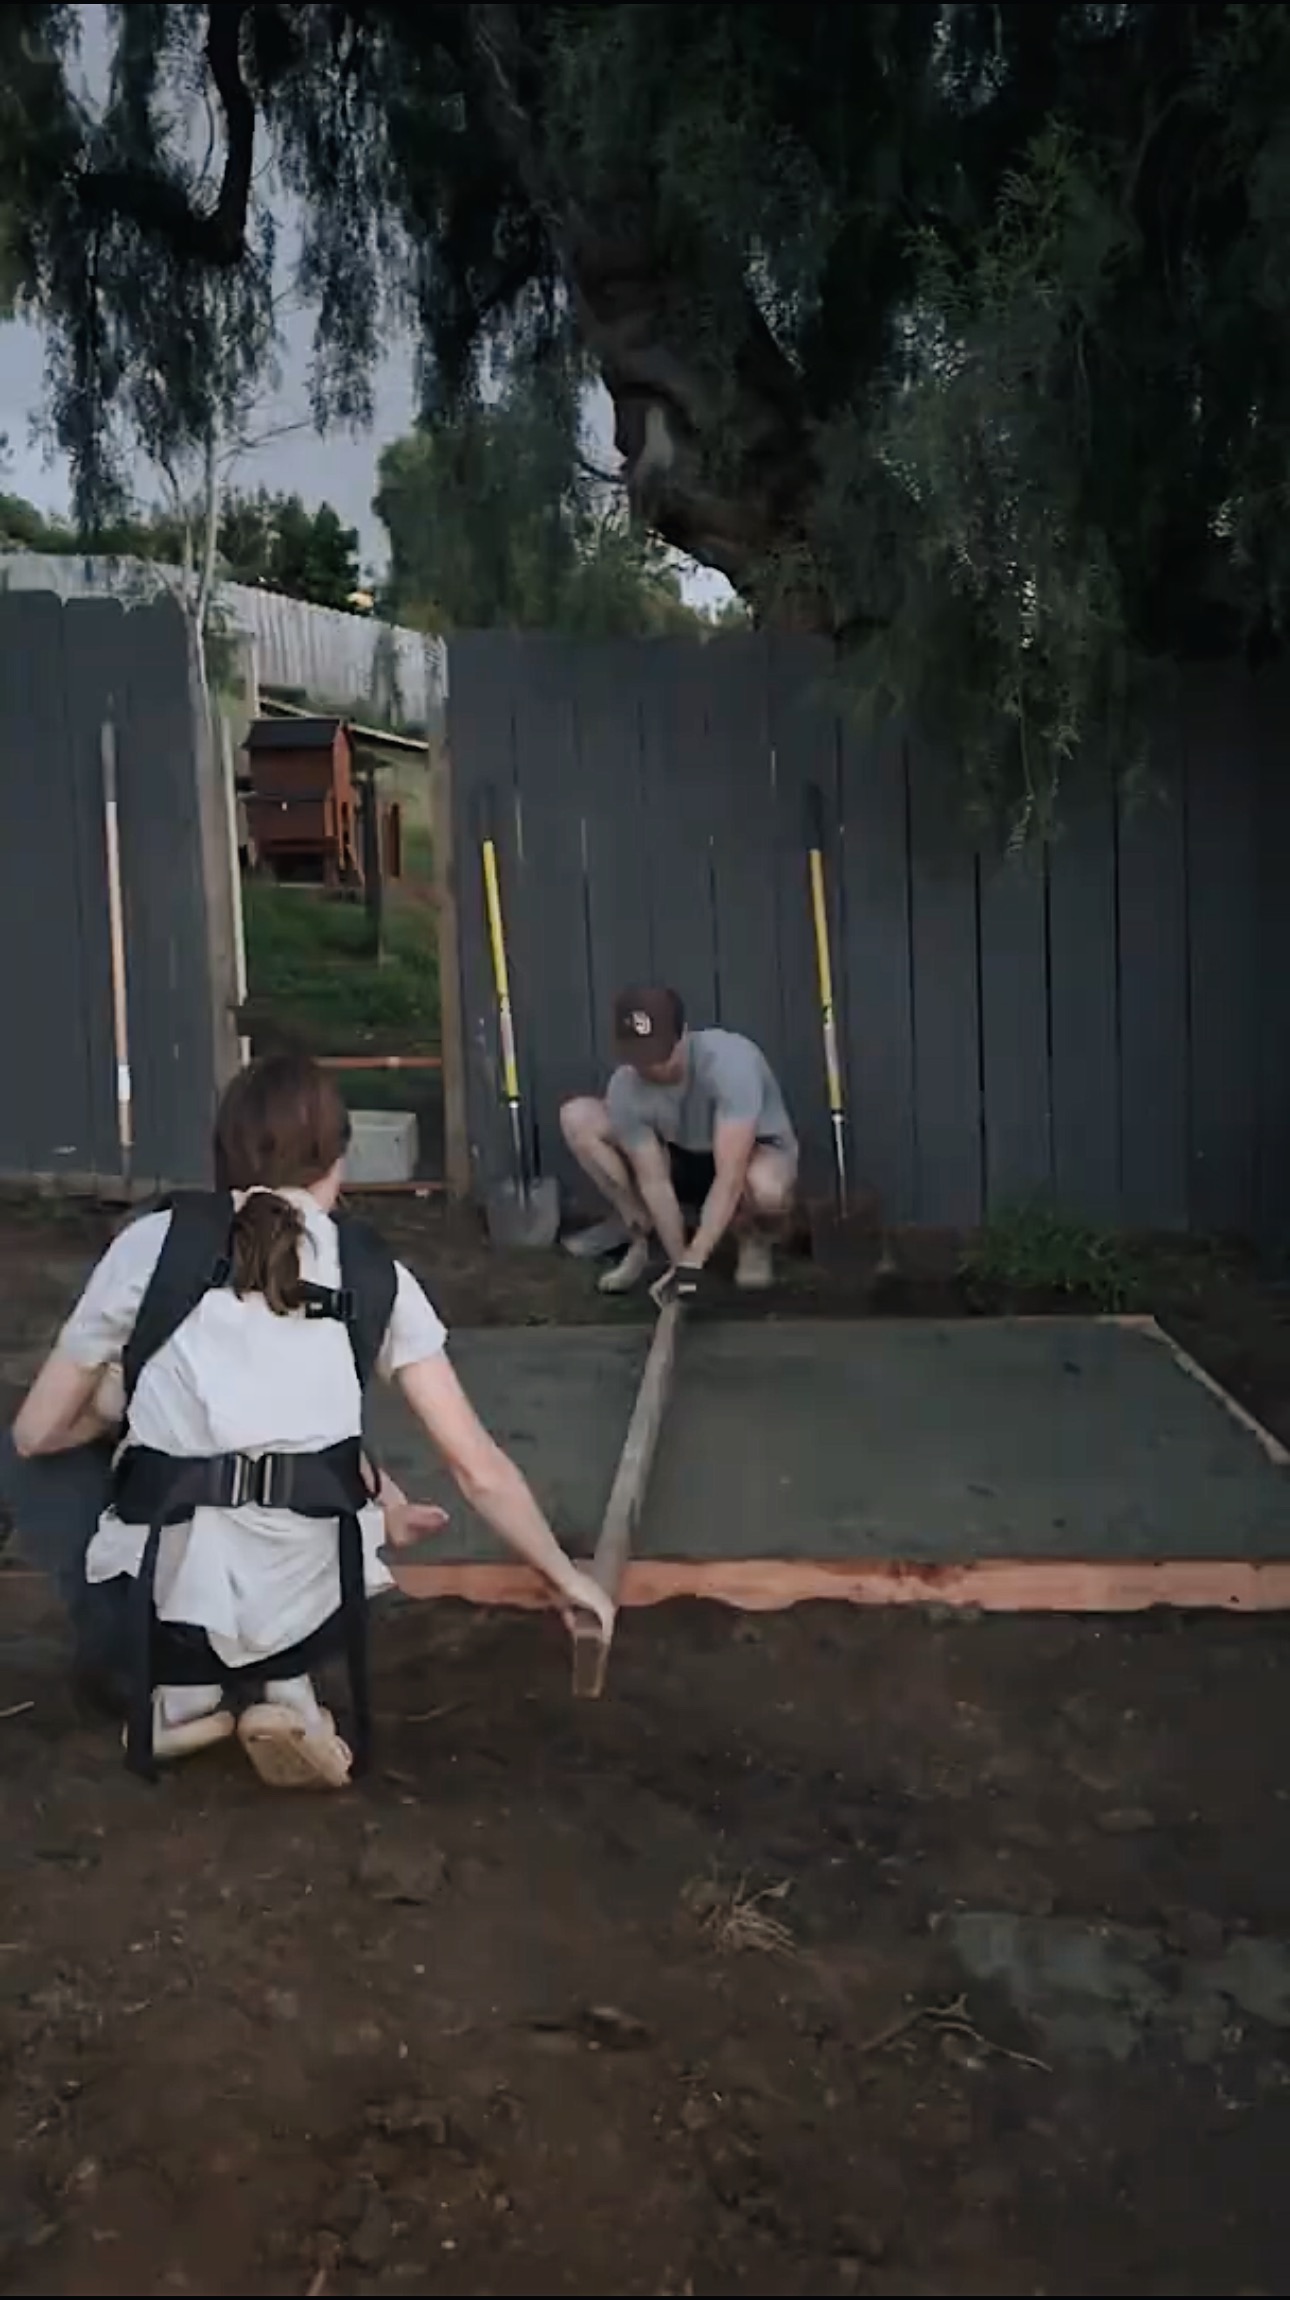
Setting a Frame
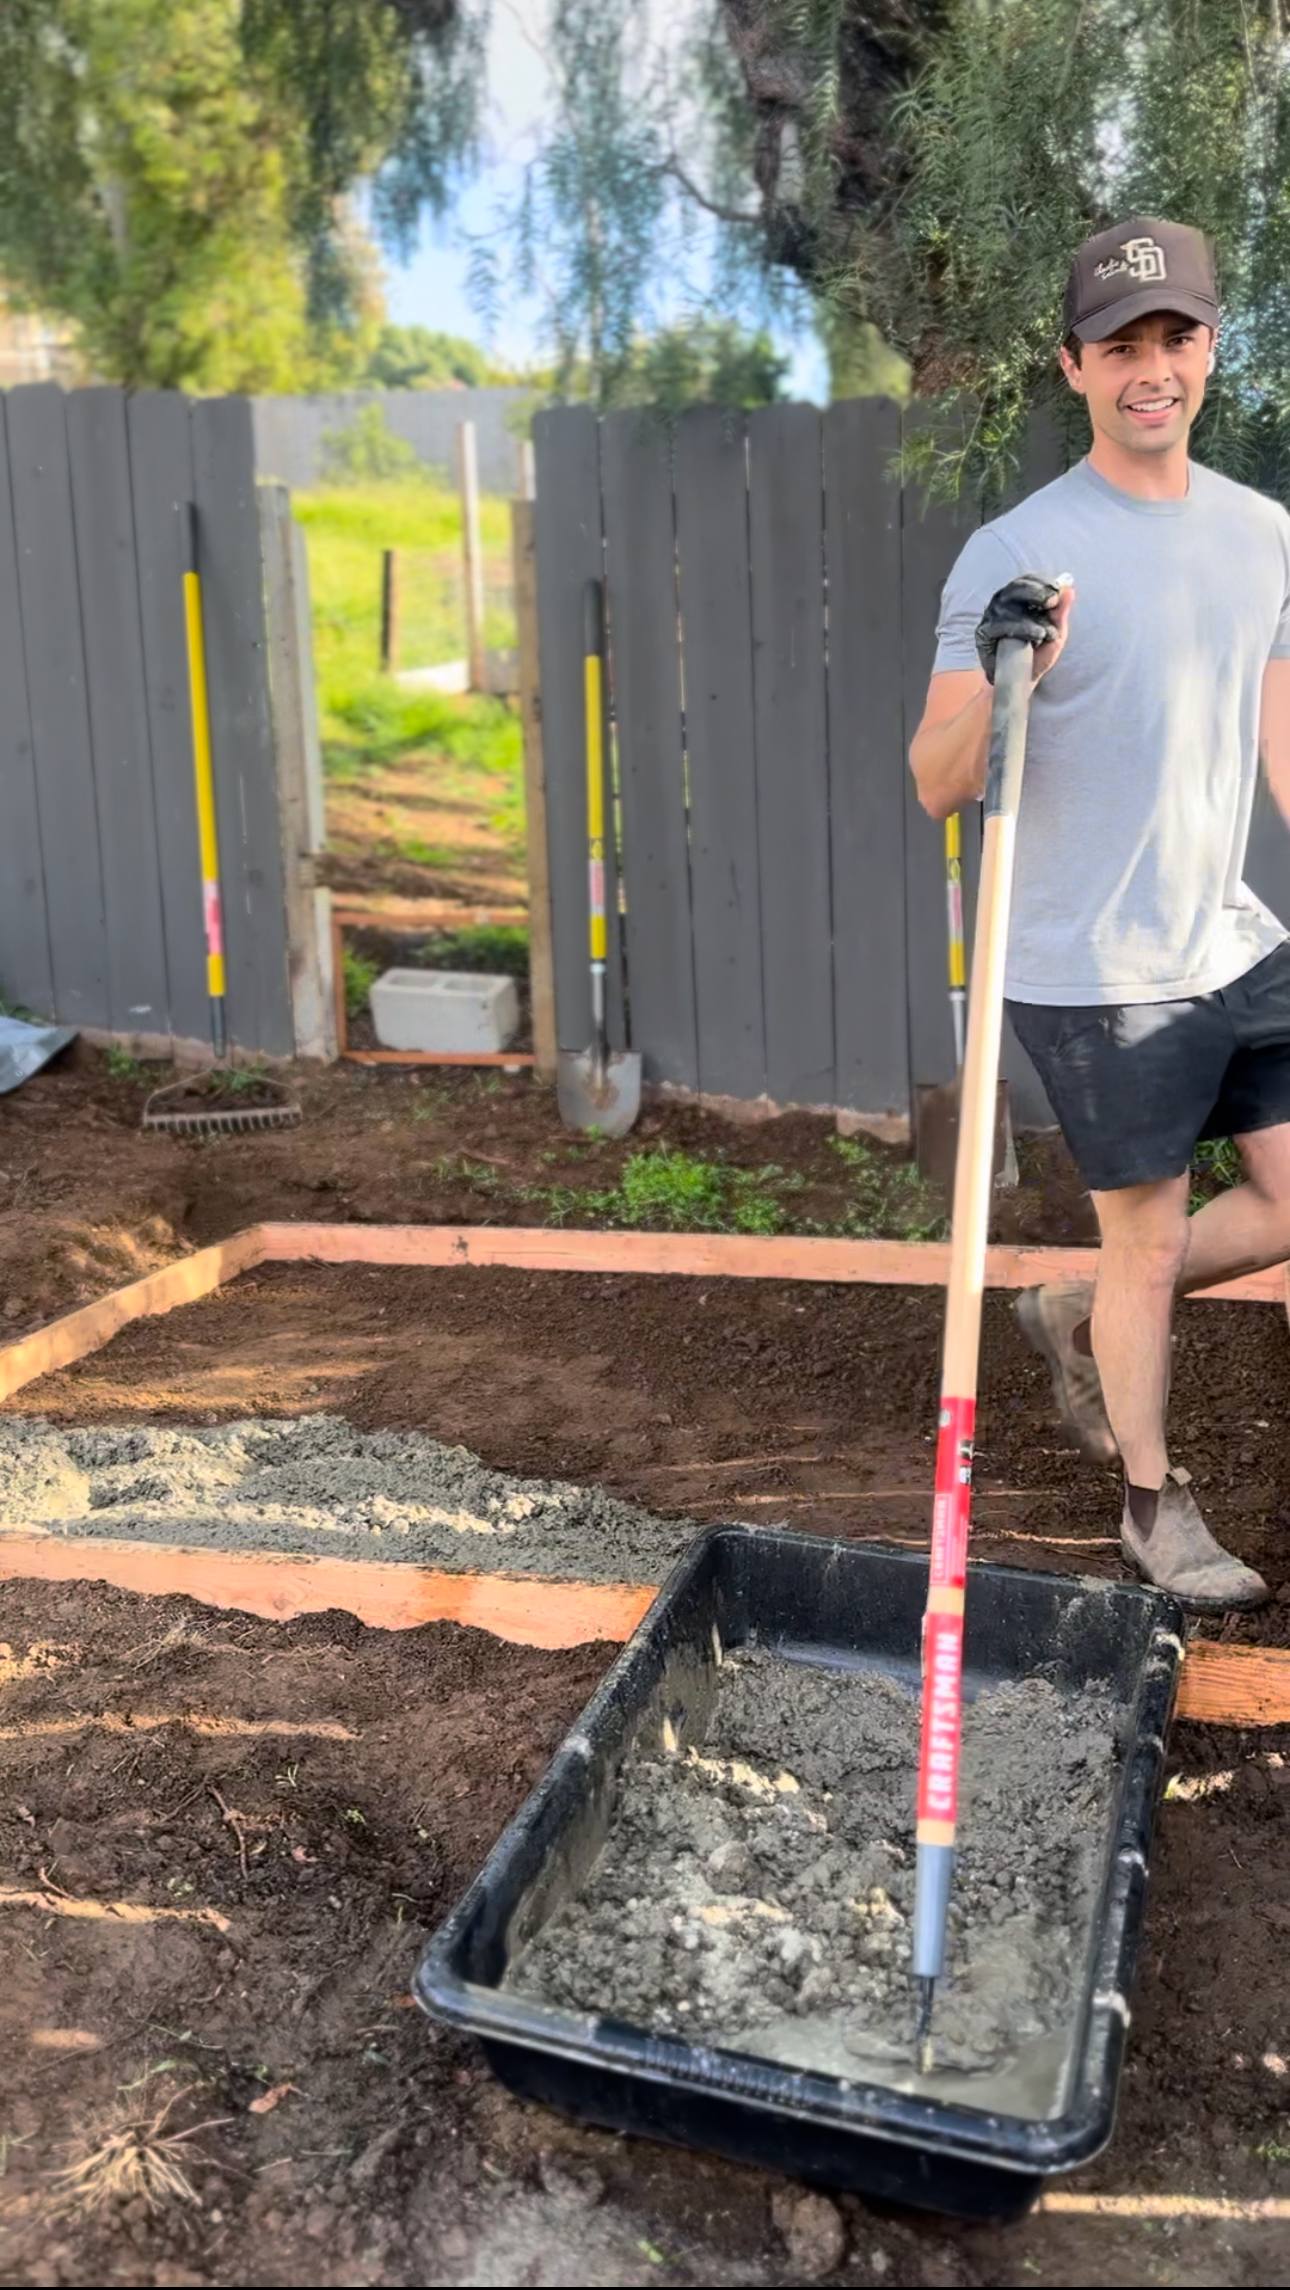
First, Jake leveled out the dirt where the concrete will go. We used 2×4’s for a frame.
Mixing Concrete
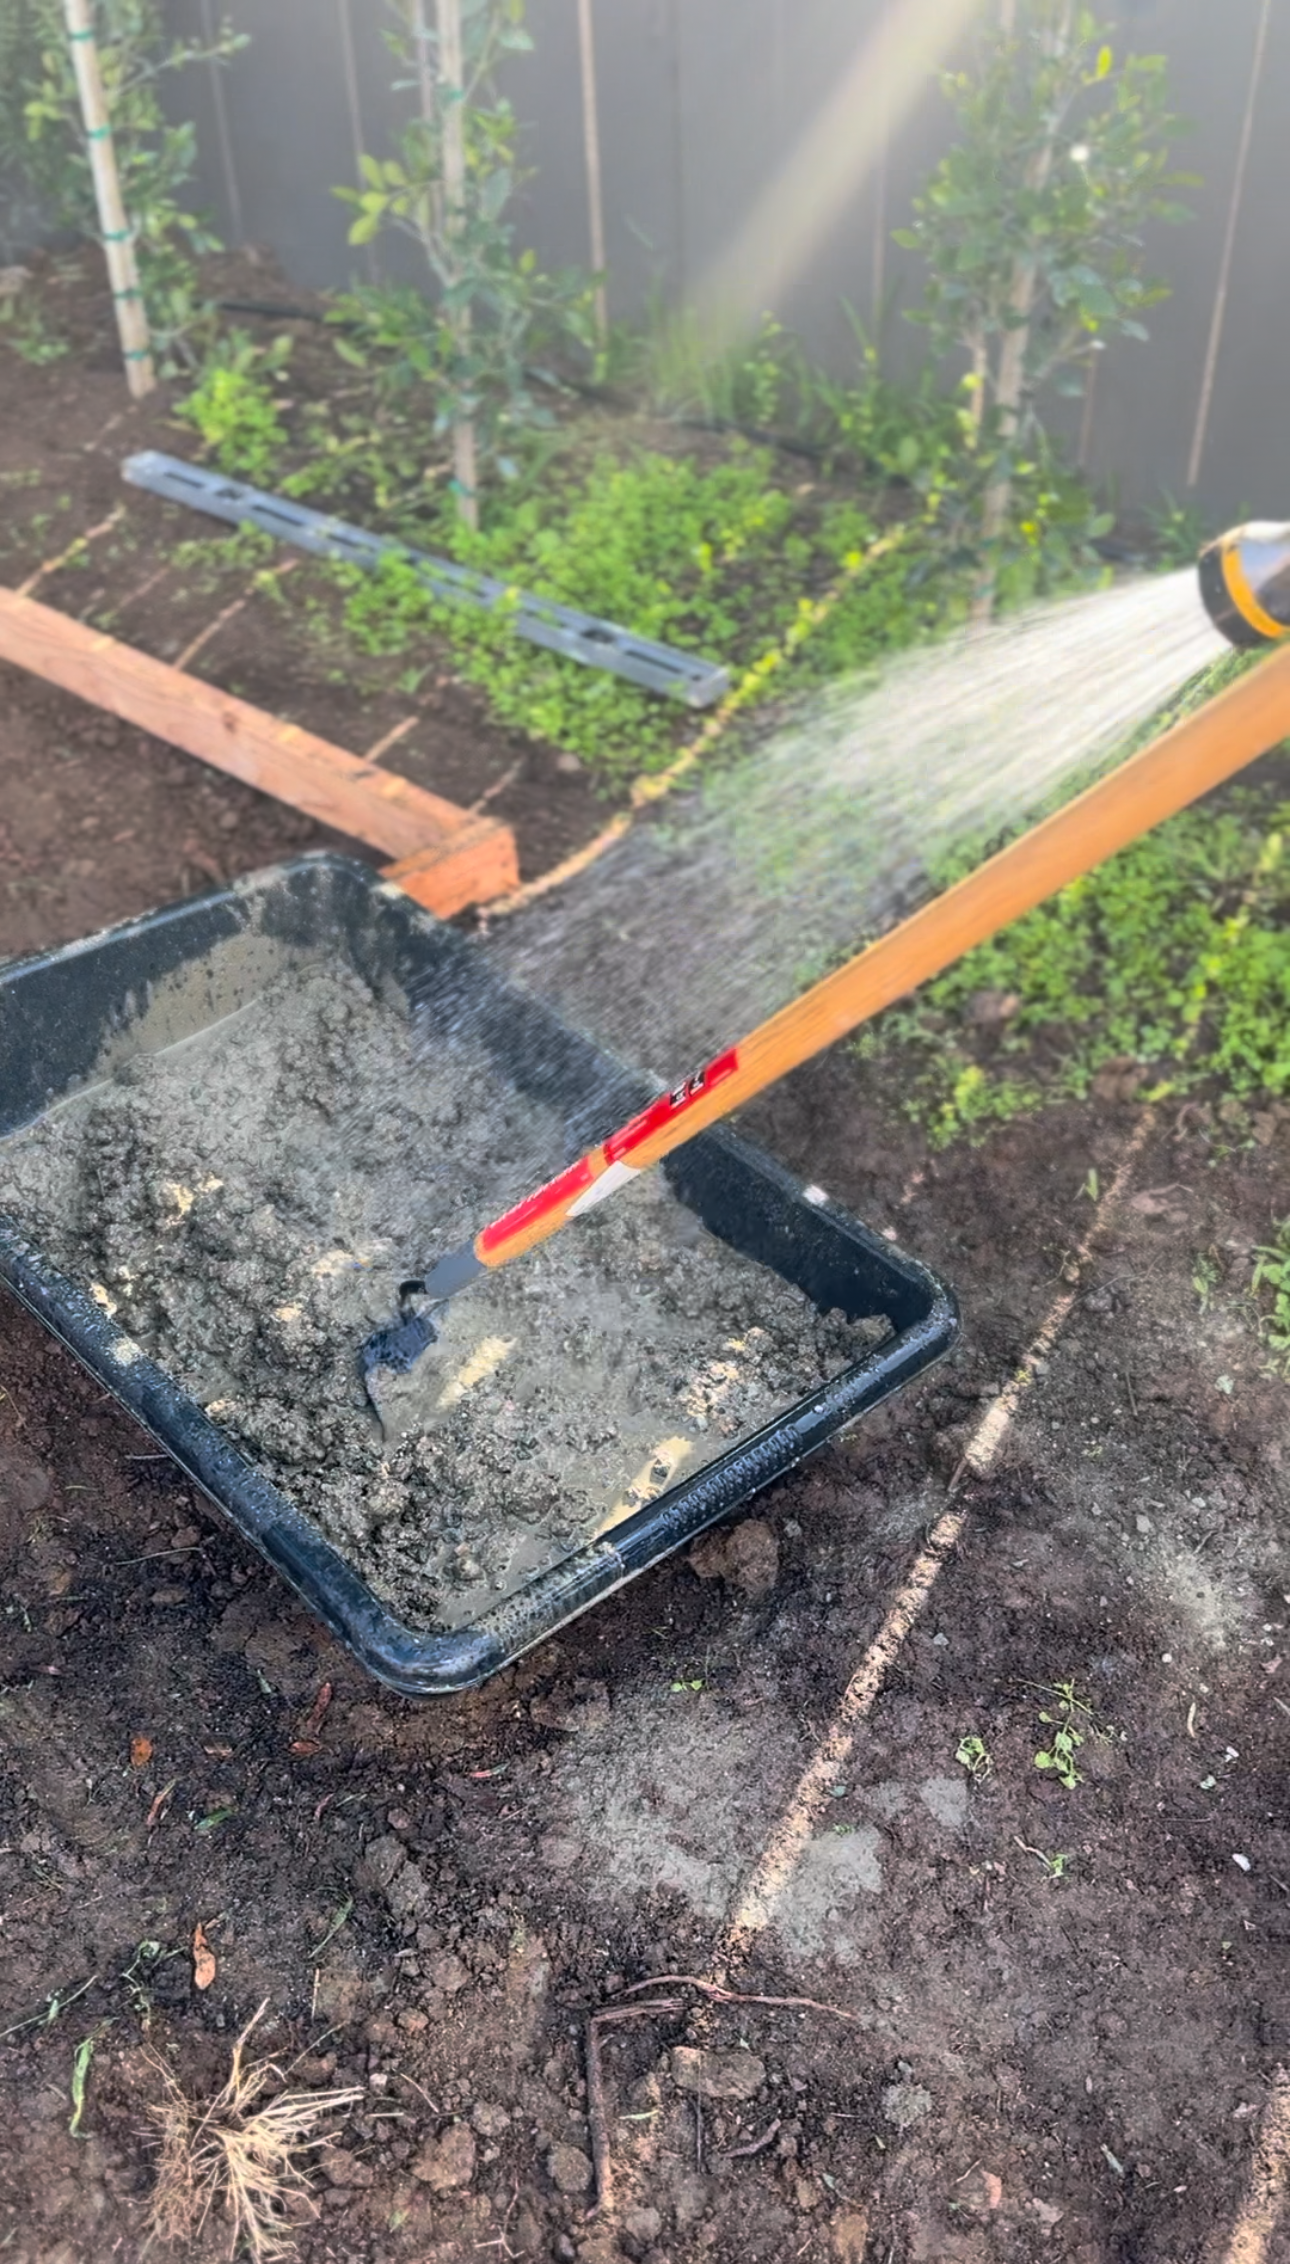
We’re using Quikrete from Lowes for this project! We purchased 40 bags for this 6×8 concrete slab. We spent a total of $159. The bags were just under $4 a piece. We’re mixing the Quickrete in this concrete mixing pan with water using a garden hoe.
A quick note – our concrete slab is only 6×8. For this size, the weight of the shed going on it, and the type of soil we have, rebar wasn’t required. Definitely check the recommendations specific to where you live and how much weight will be going on your concrete slab before making a decision about rebar!
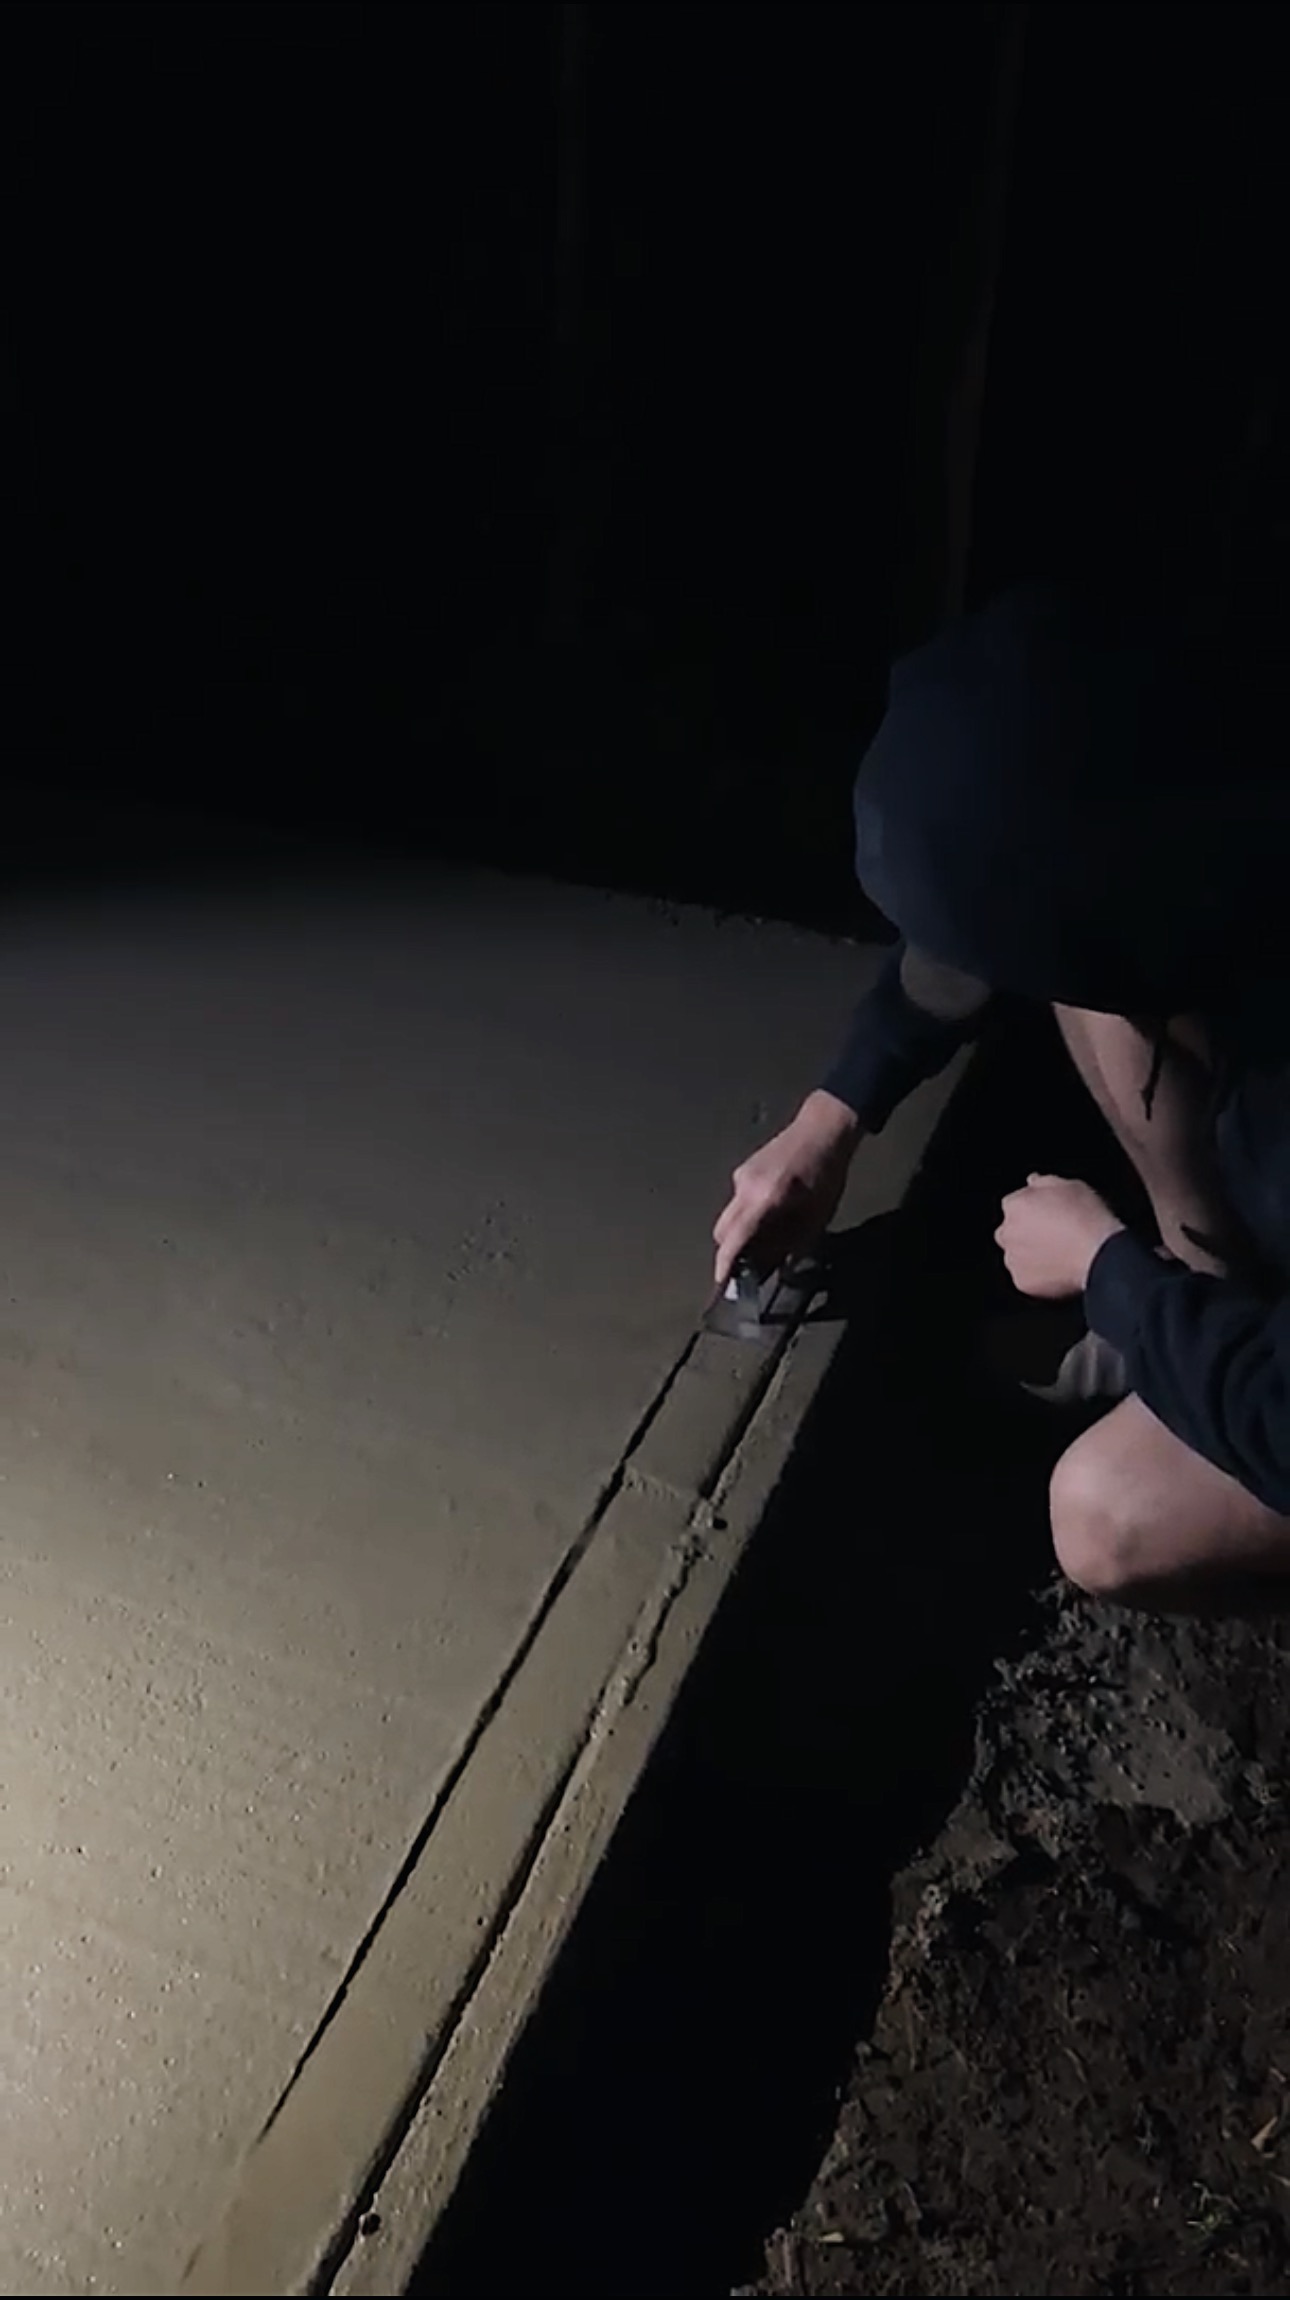
We didn’t plan our timing very well. We ended up having to be outside late into the night to get the finish right. Definitely start this project in the morning if you’re going to do it yourself!
Smoothing Concrete
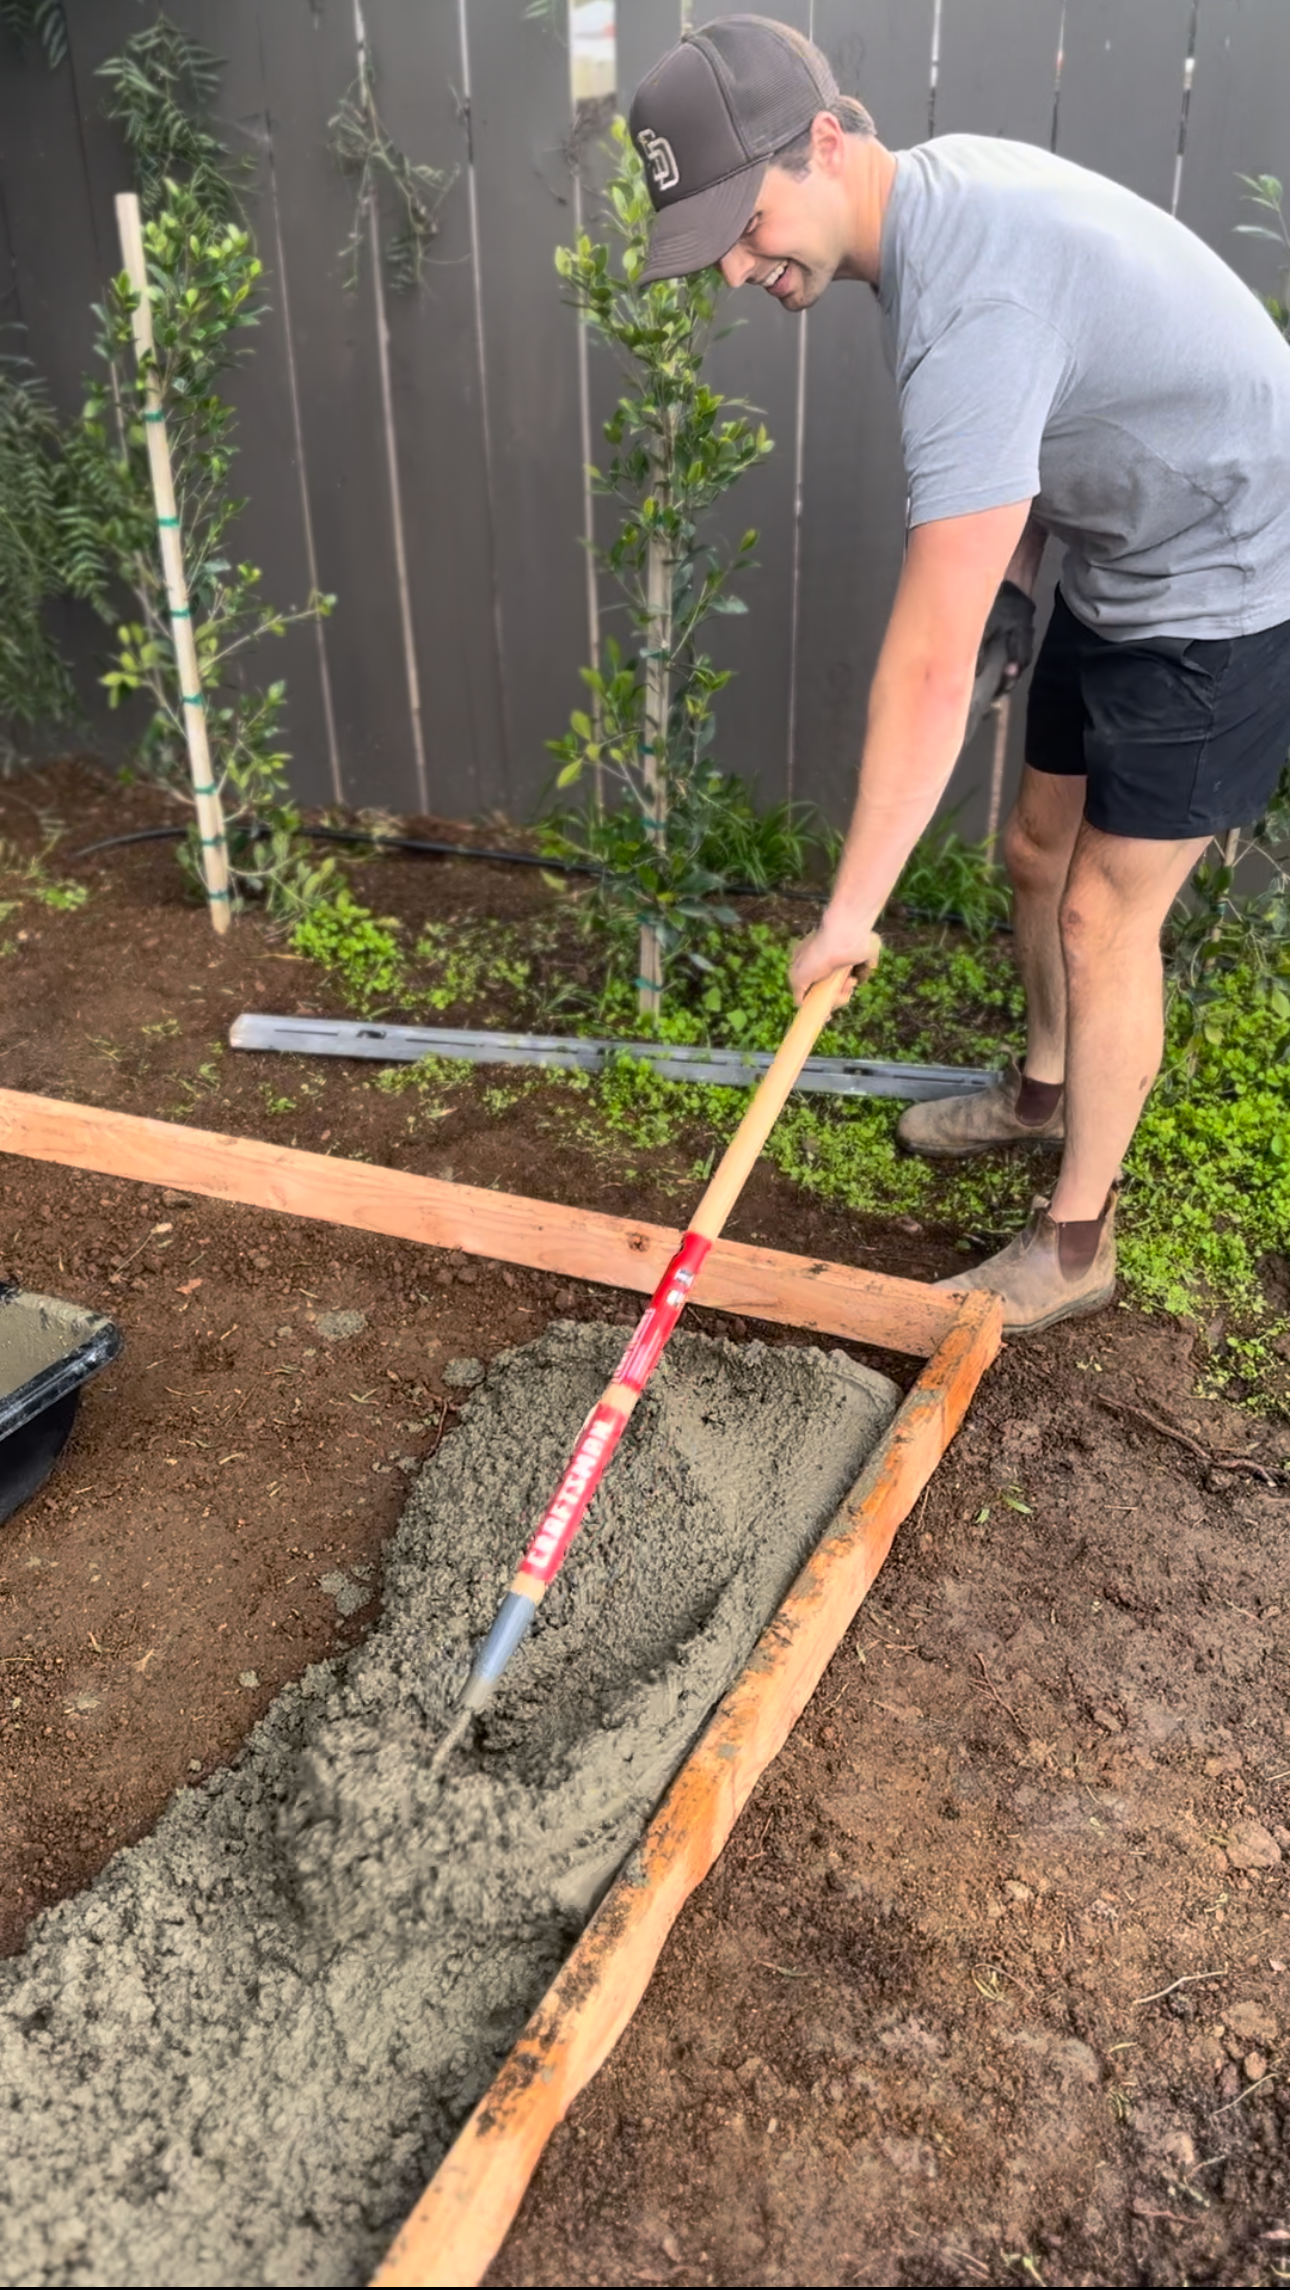
We’re using a 2×4, a concrete edger and concrete trowel to get everything just right. The 2×4, moved across the top of the wood frame, levels any high points in the concrete. The edger creates a small line between the 2×4’s and the actual concrete and give the top of the concrete a more rounded, less aggressive edge. The trowel smooths out all the lines and any rough spots on the concrete.
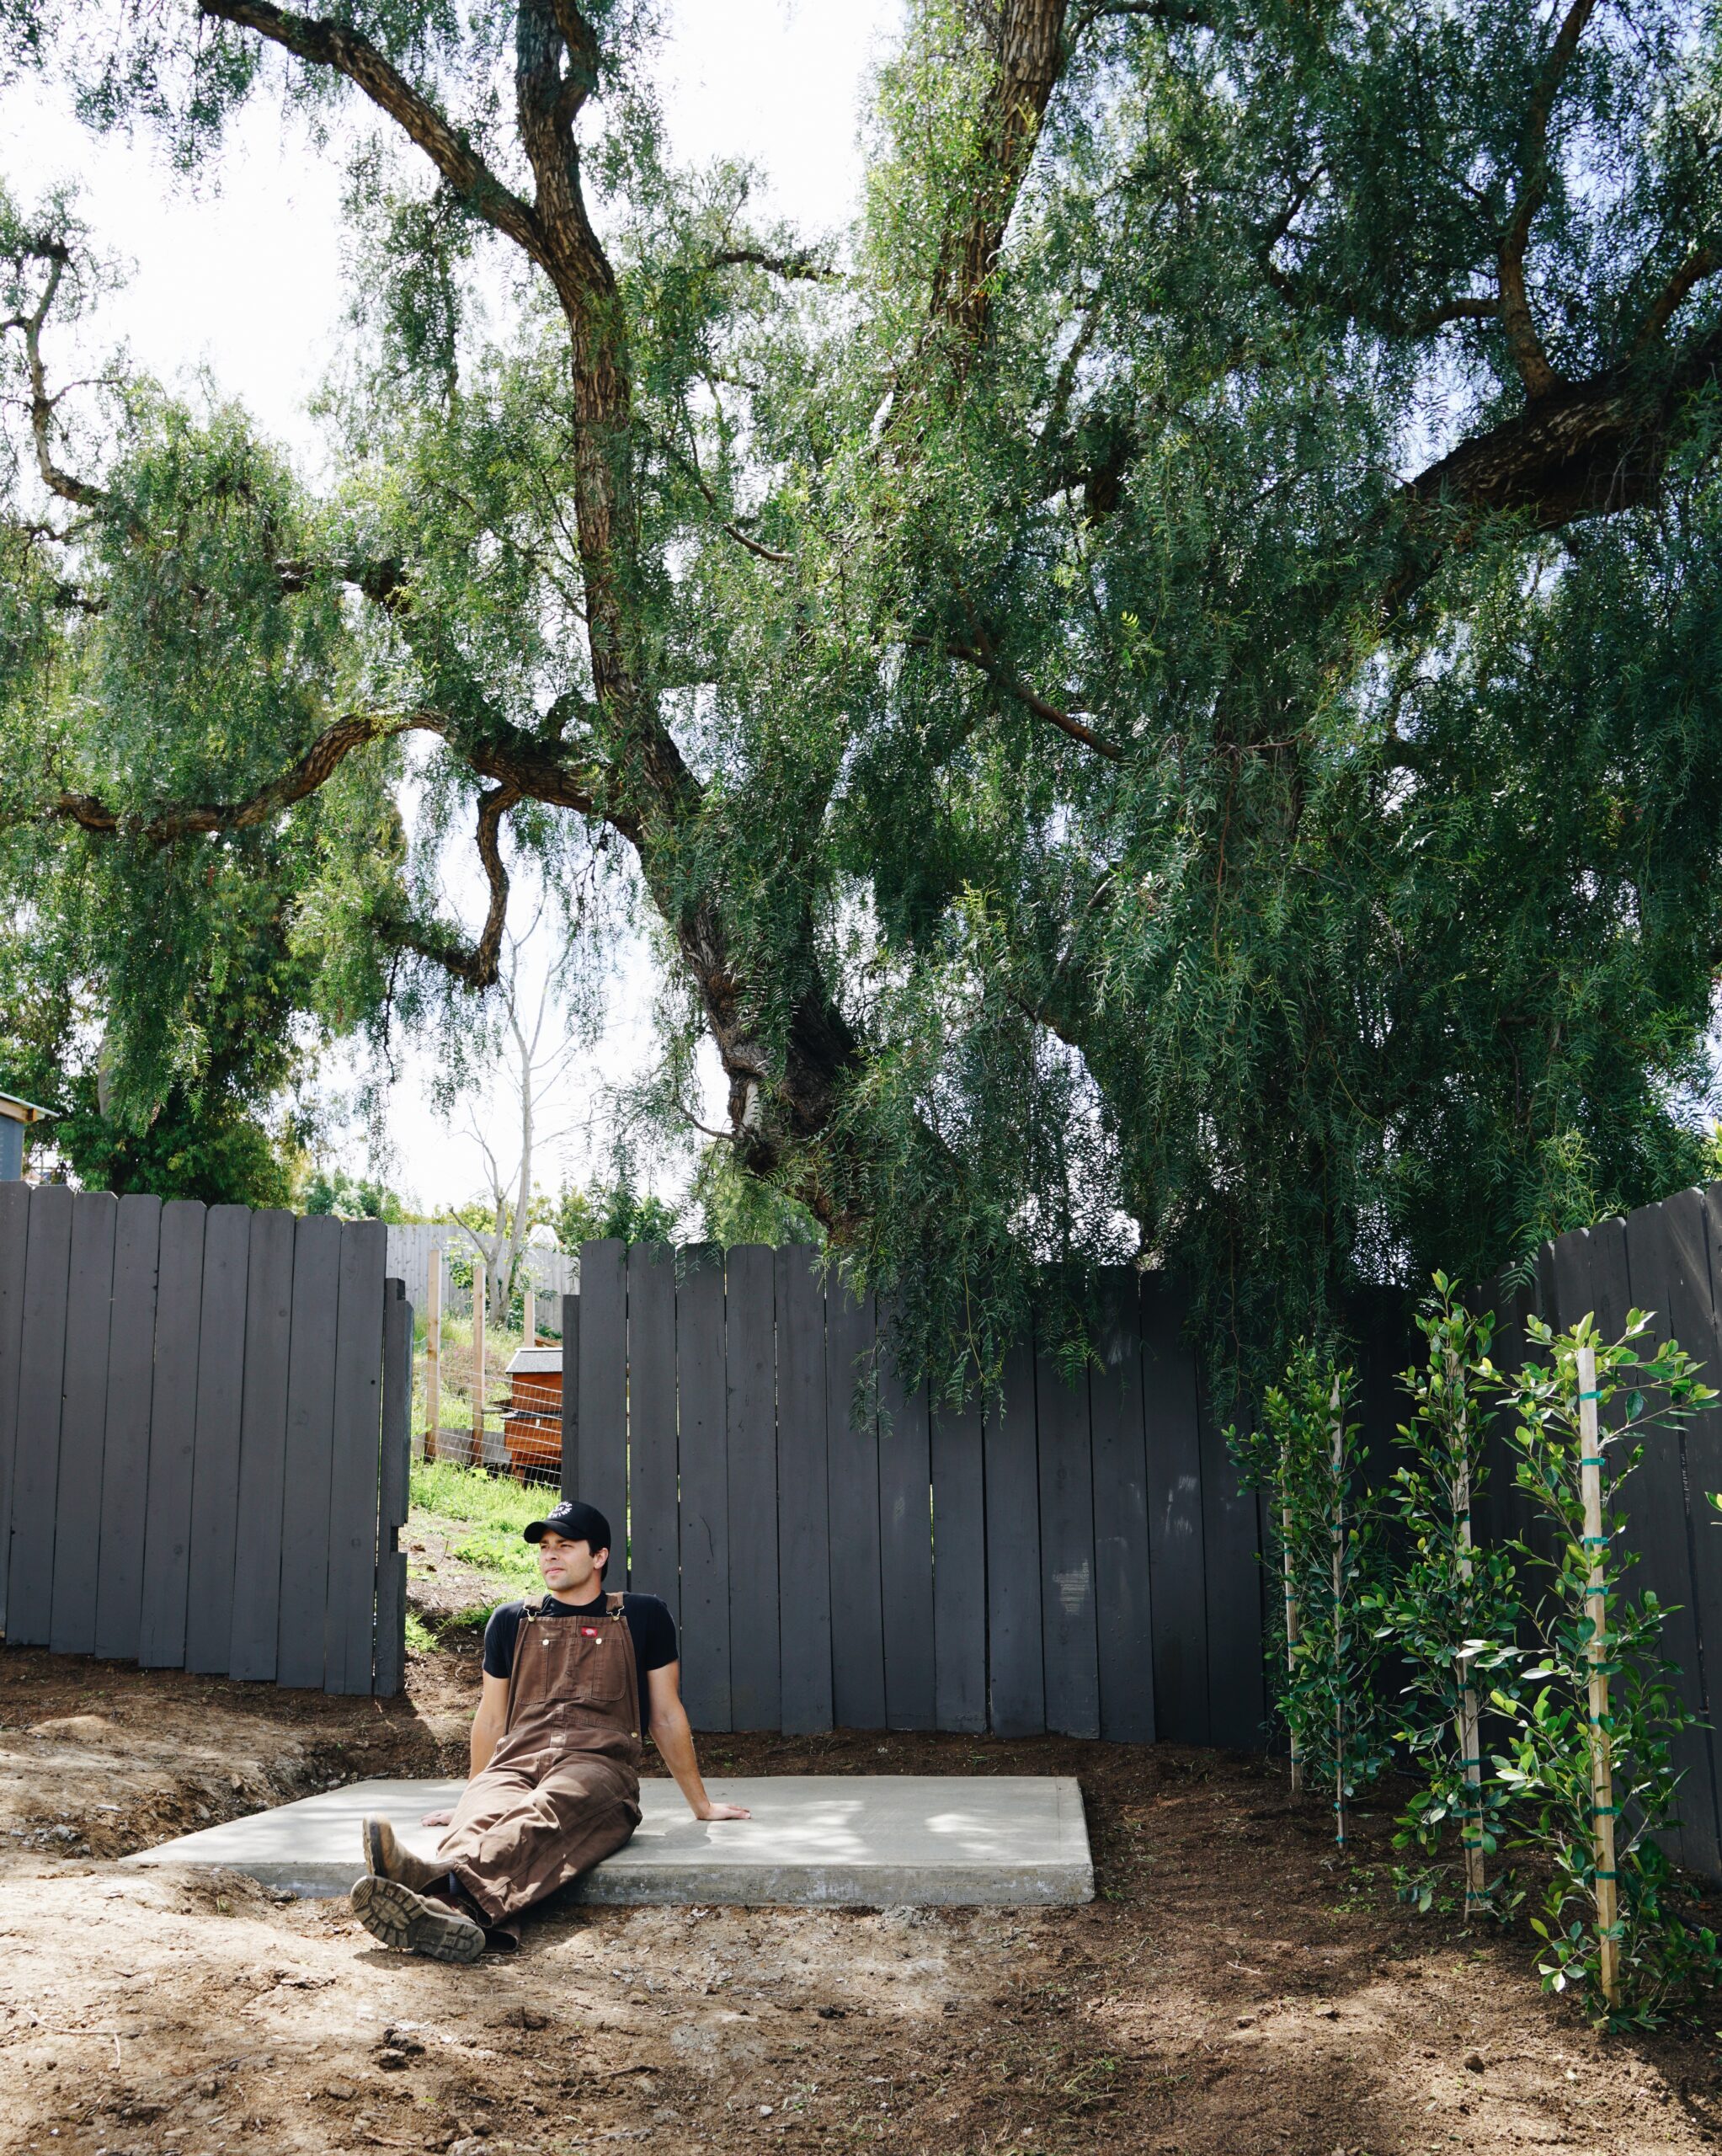
We waited a few days for it to set and it looks amazing!
You can see everything we used for this project in our Shed Links blogpost.
Comments