
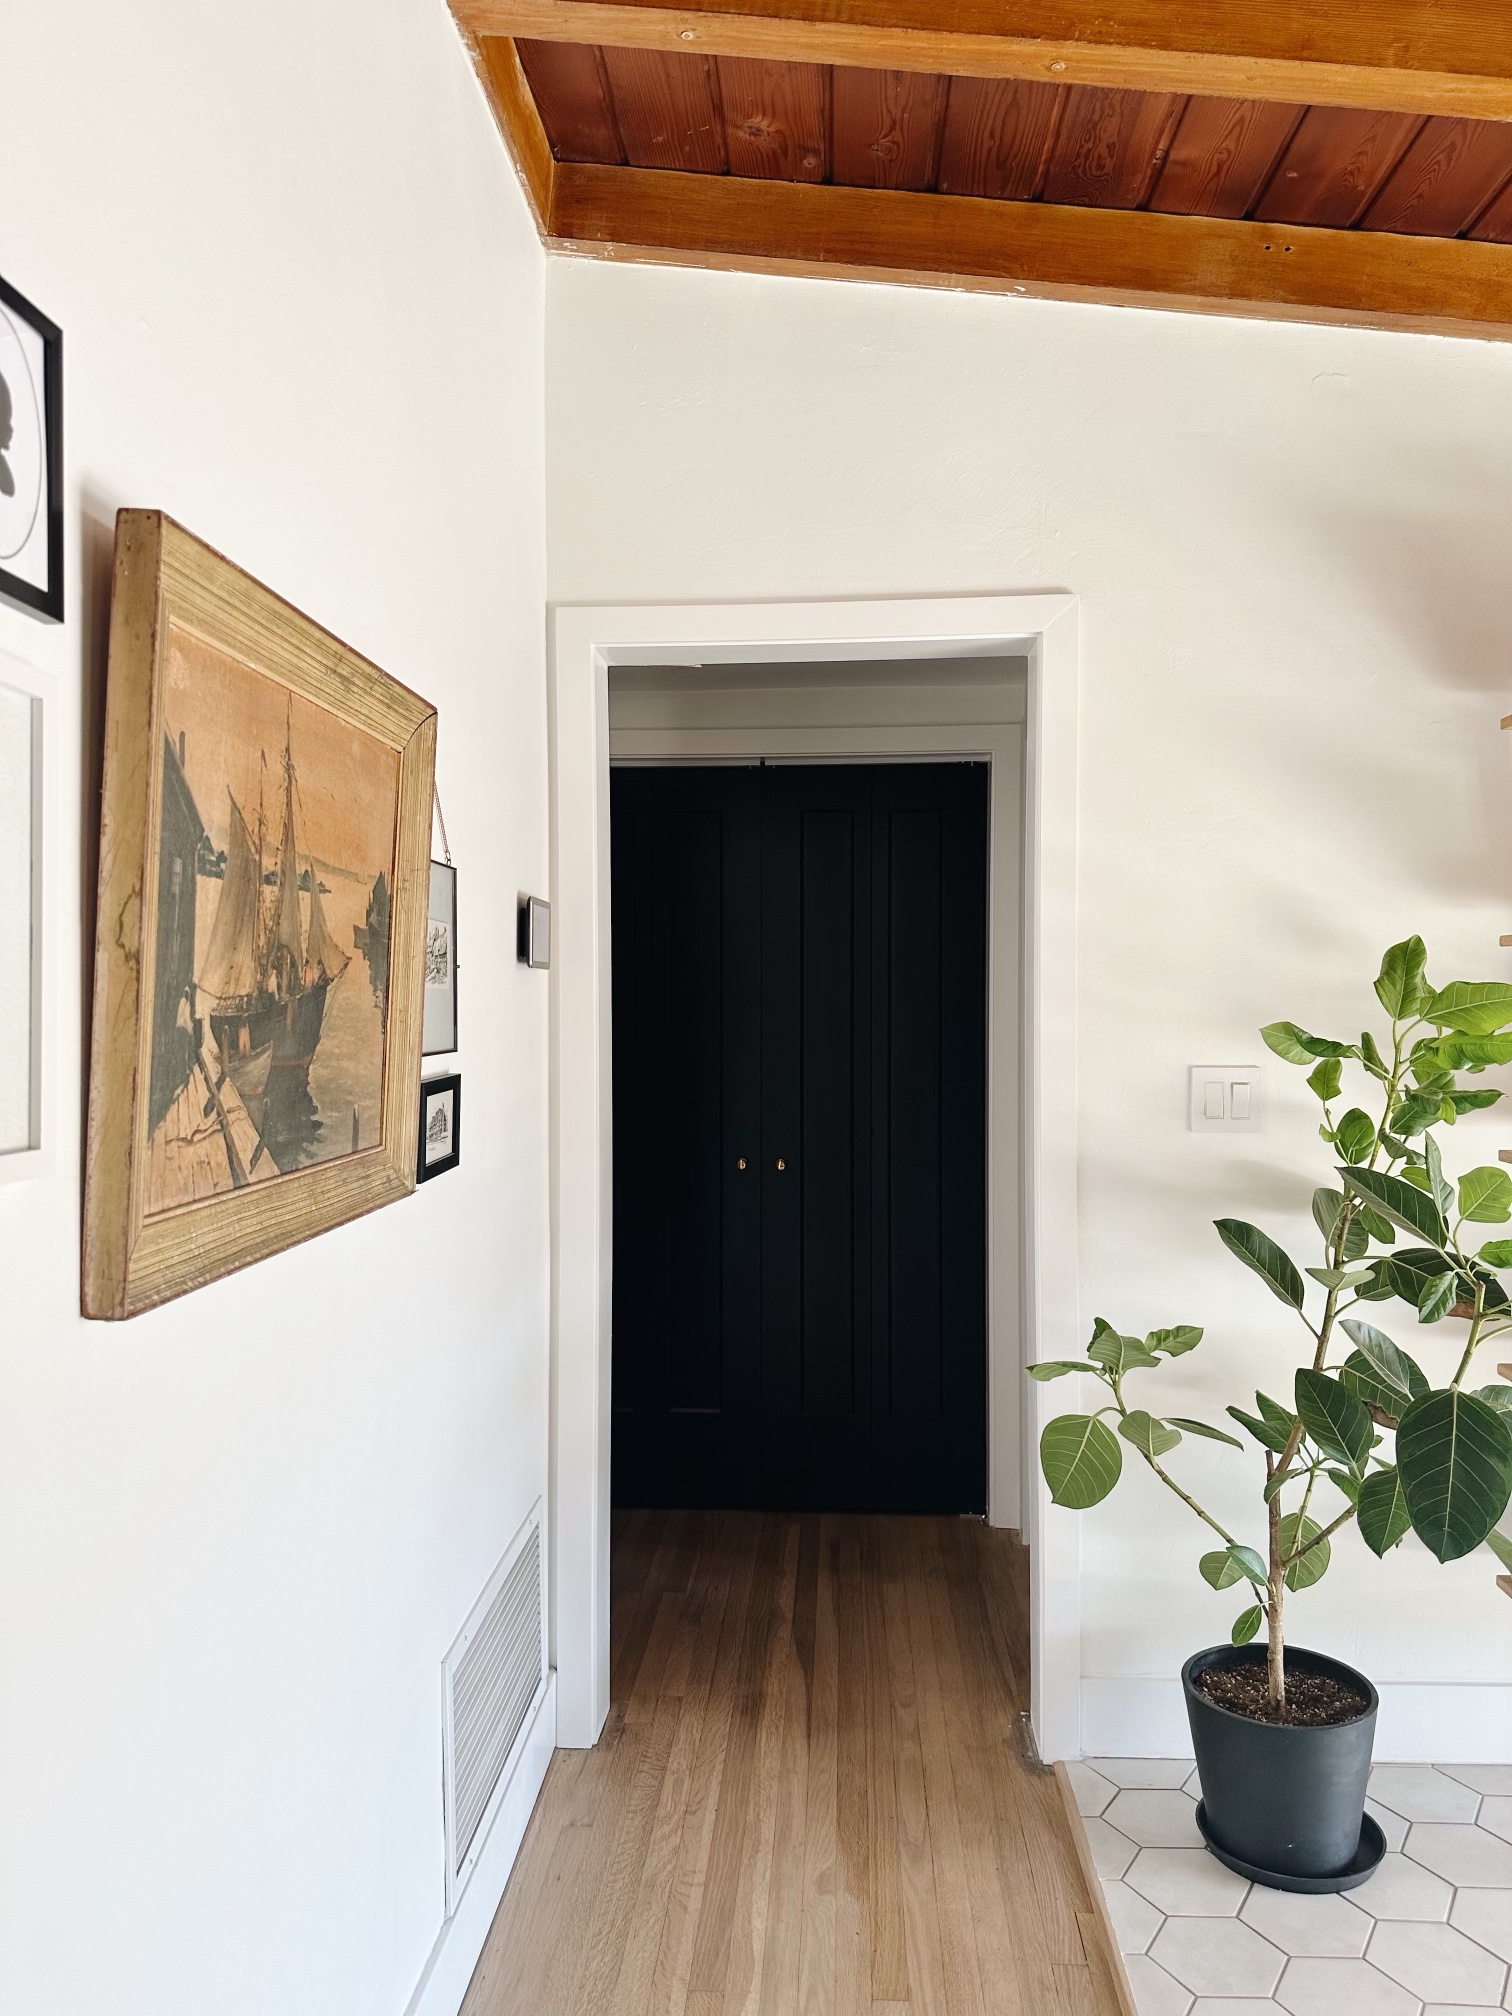
Jake hated all the closet doors when we first moved in, so he took them all out, *ahem*, without asking. I don’t blame him…they were hollow-core doors that were almost 70 years old! Since then, we’ve had “open concept closets” for the last 4 years. I’ve been able to style them and make them look cute and cohesive – but now with Charlie here we are in desperate need of more storage. So hallway closet doors it is!
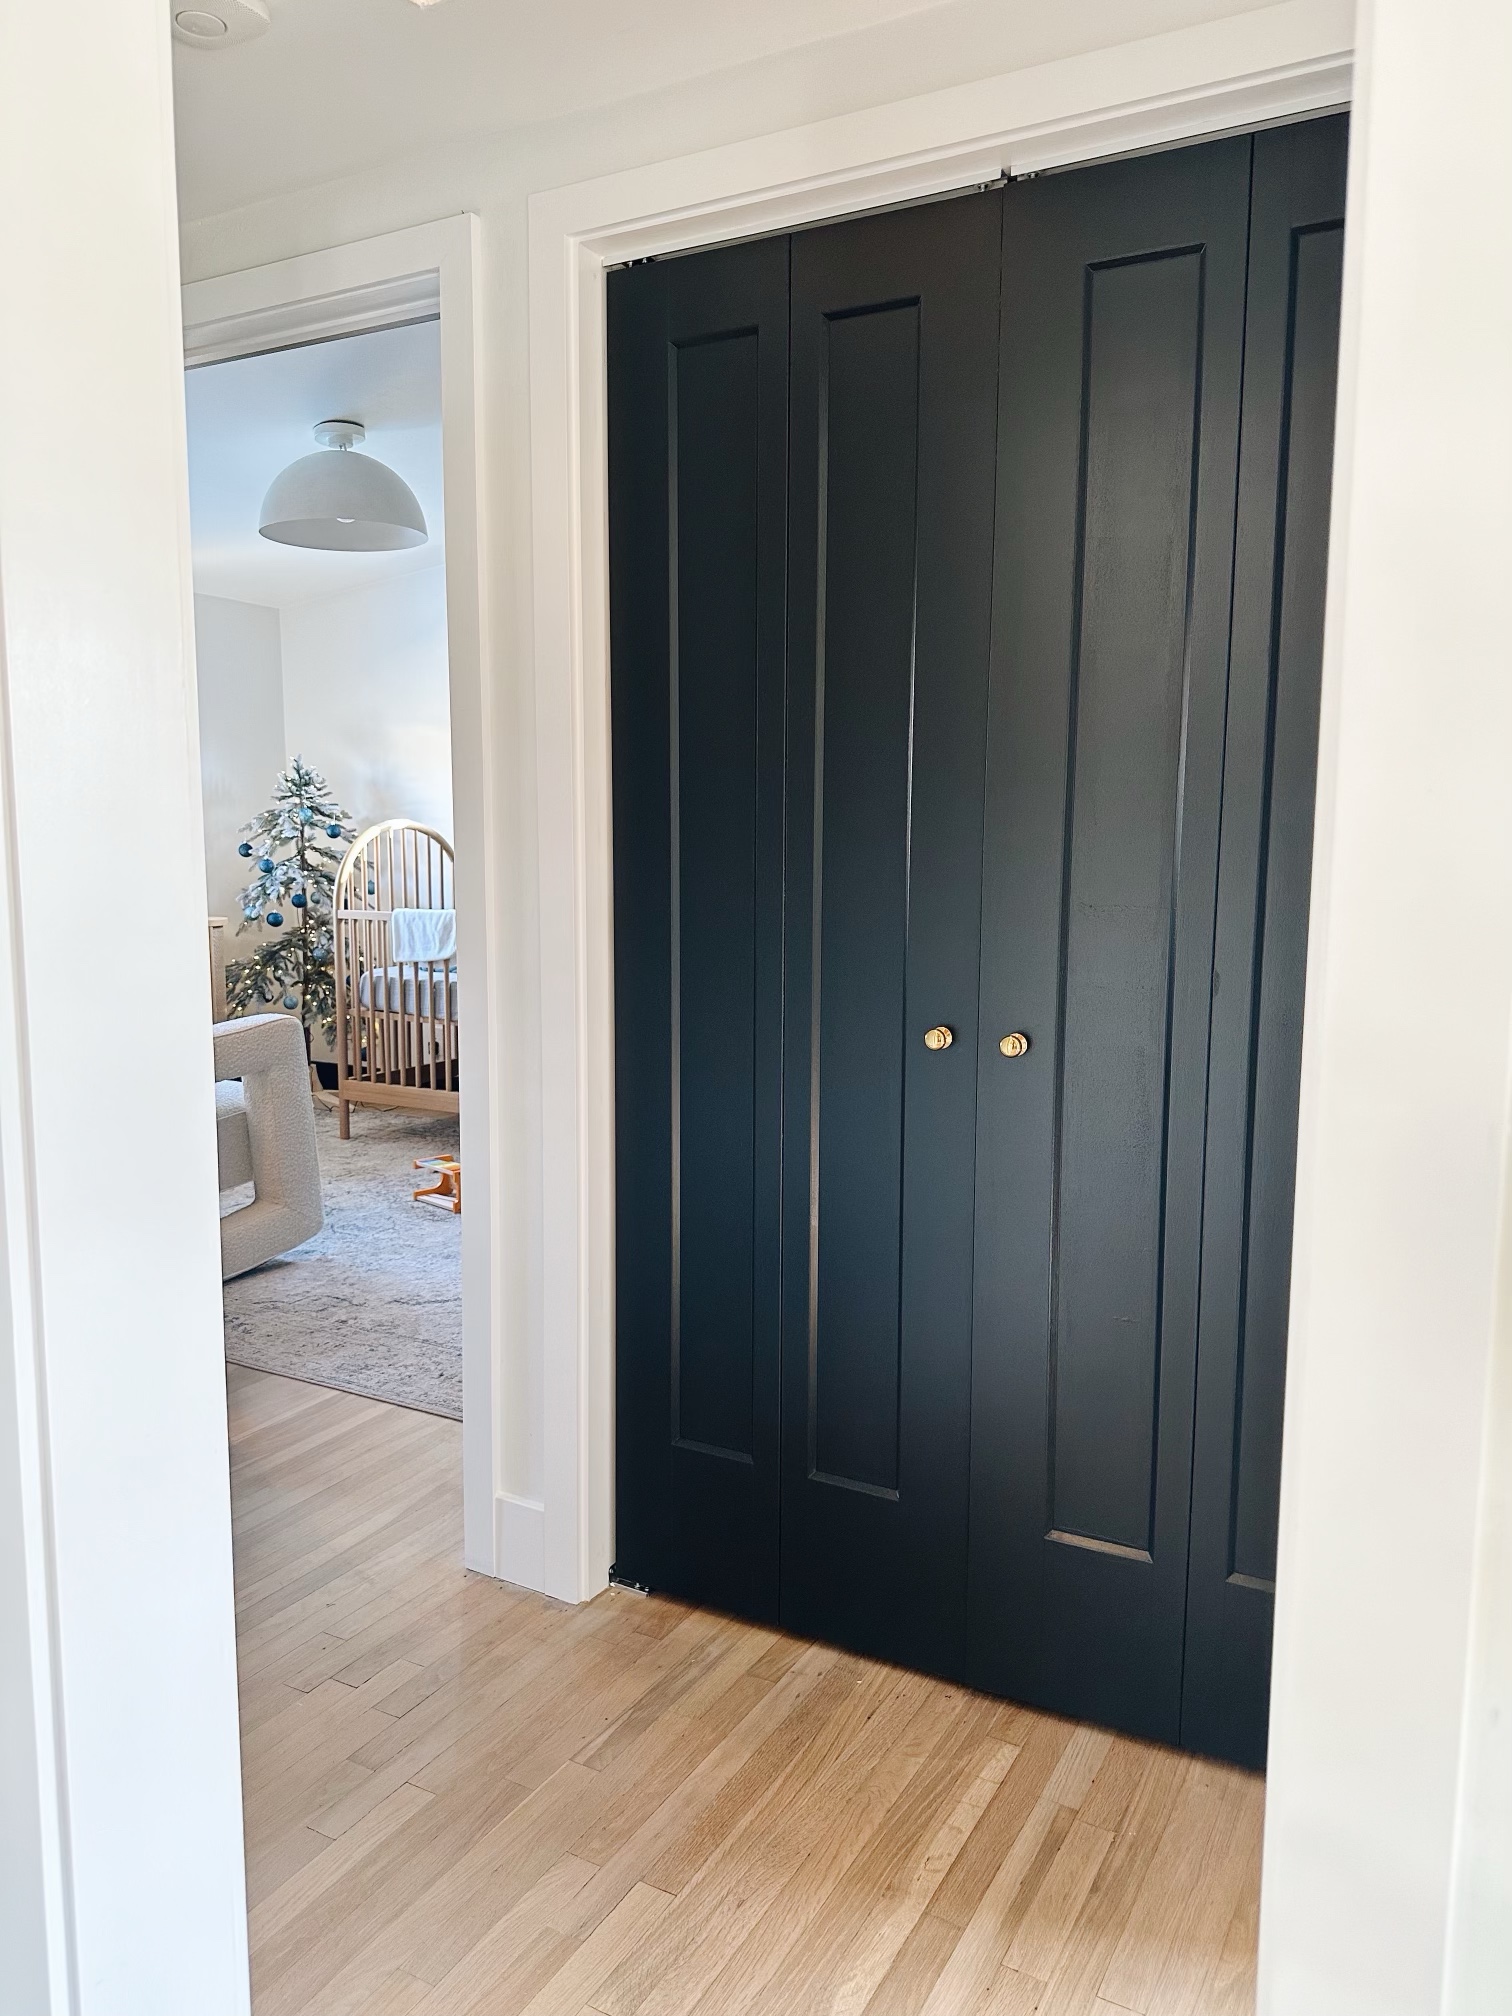
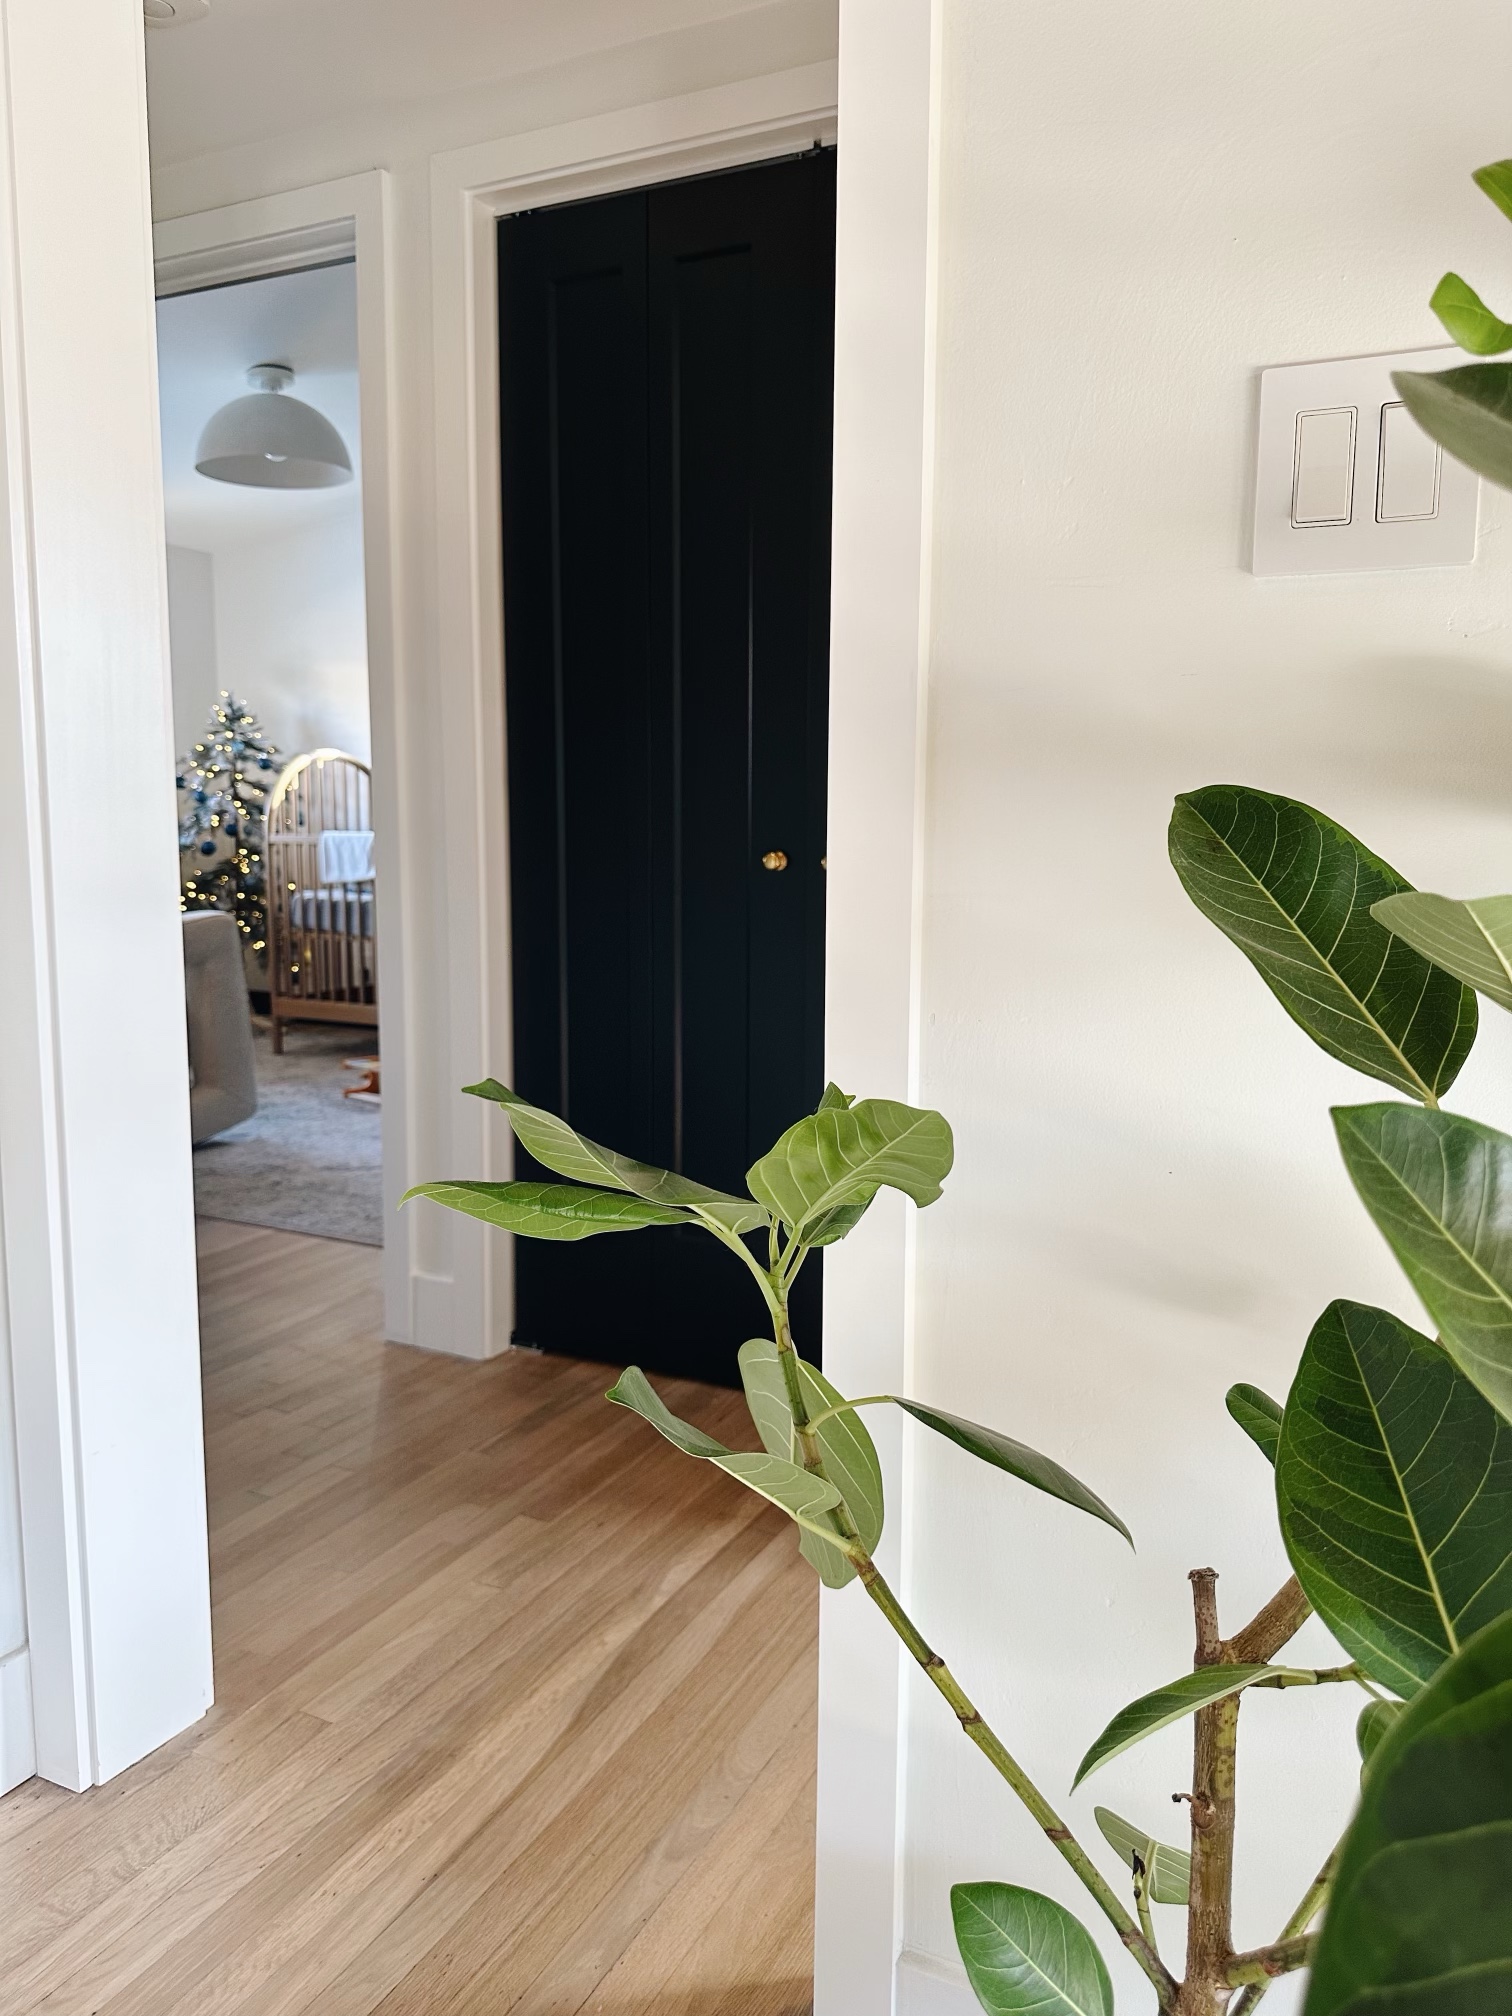
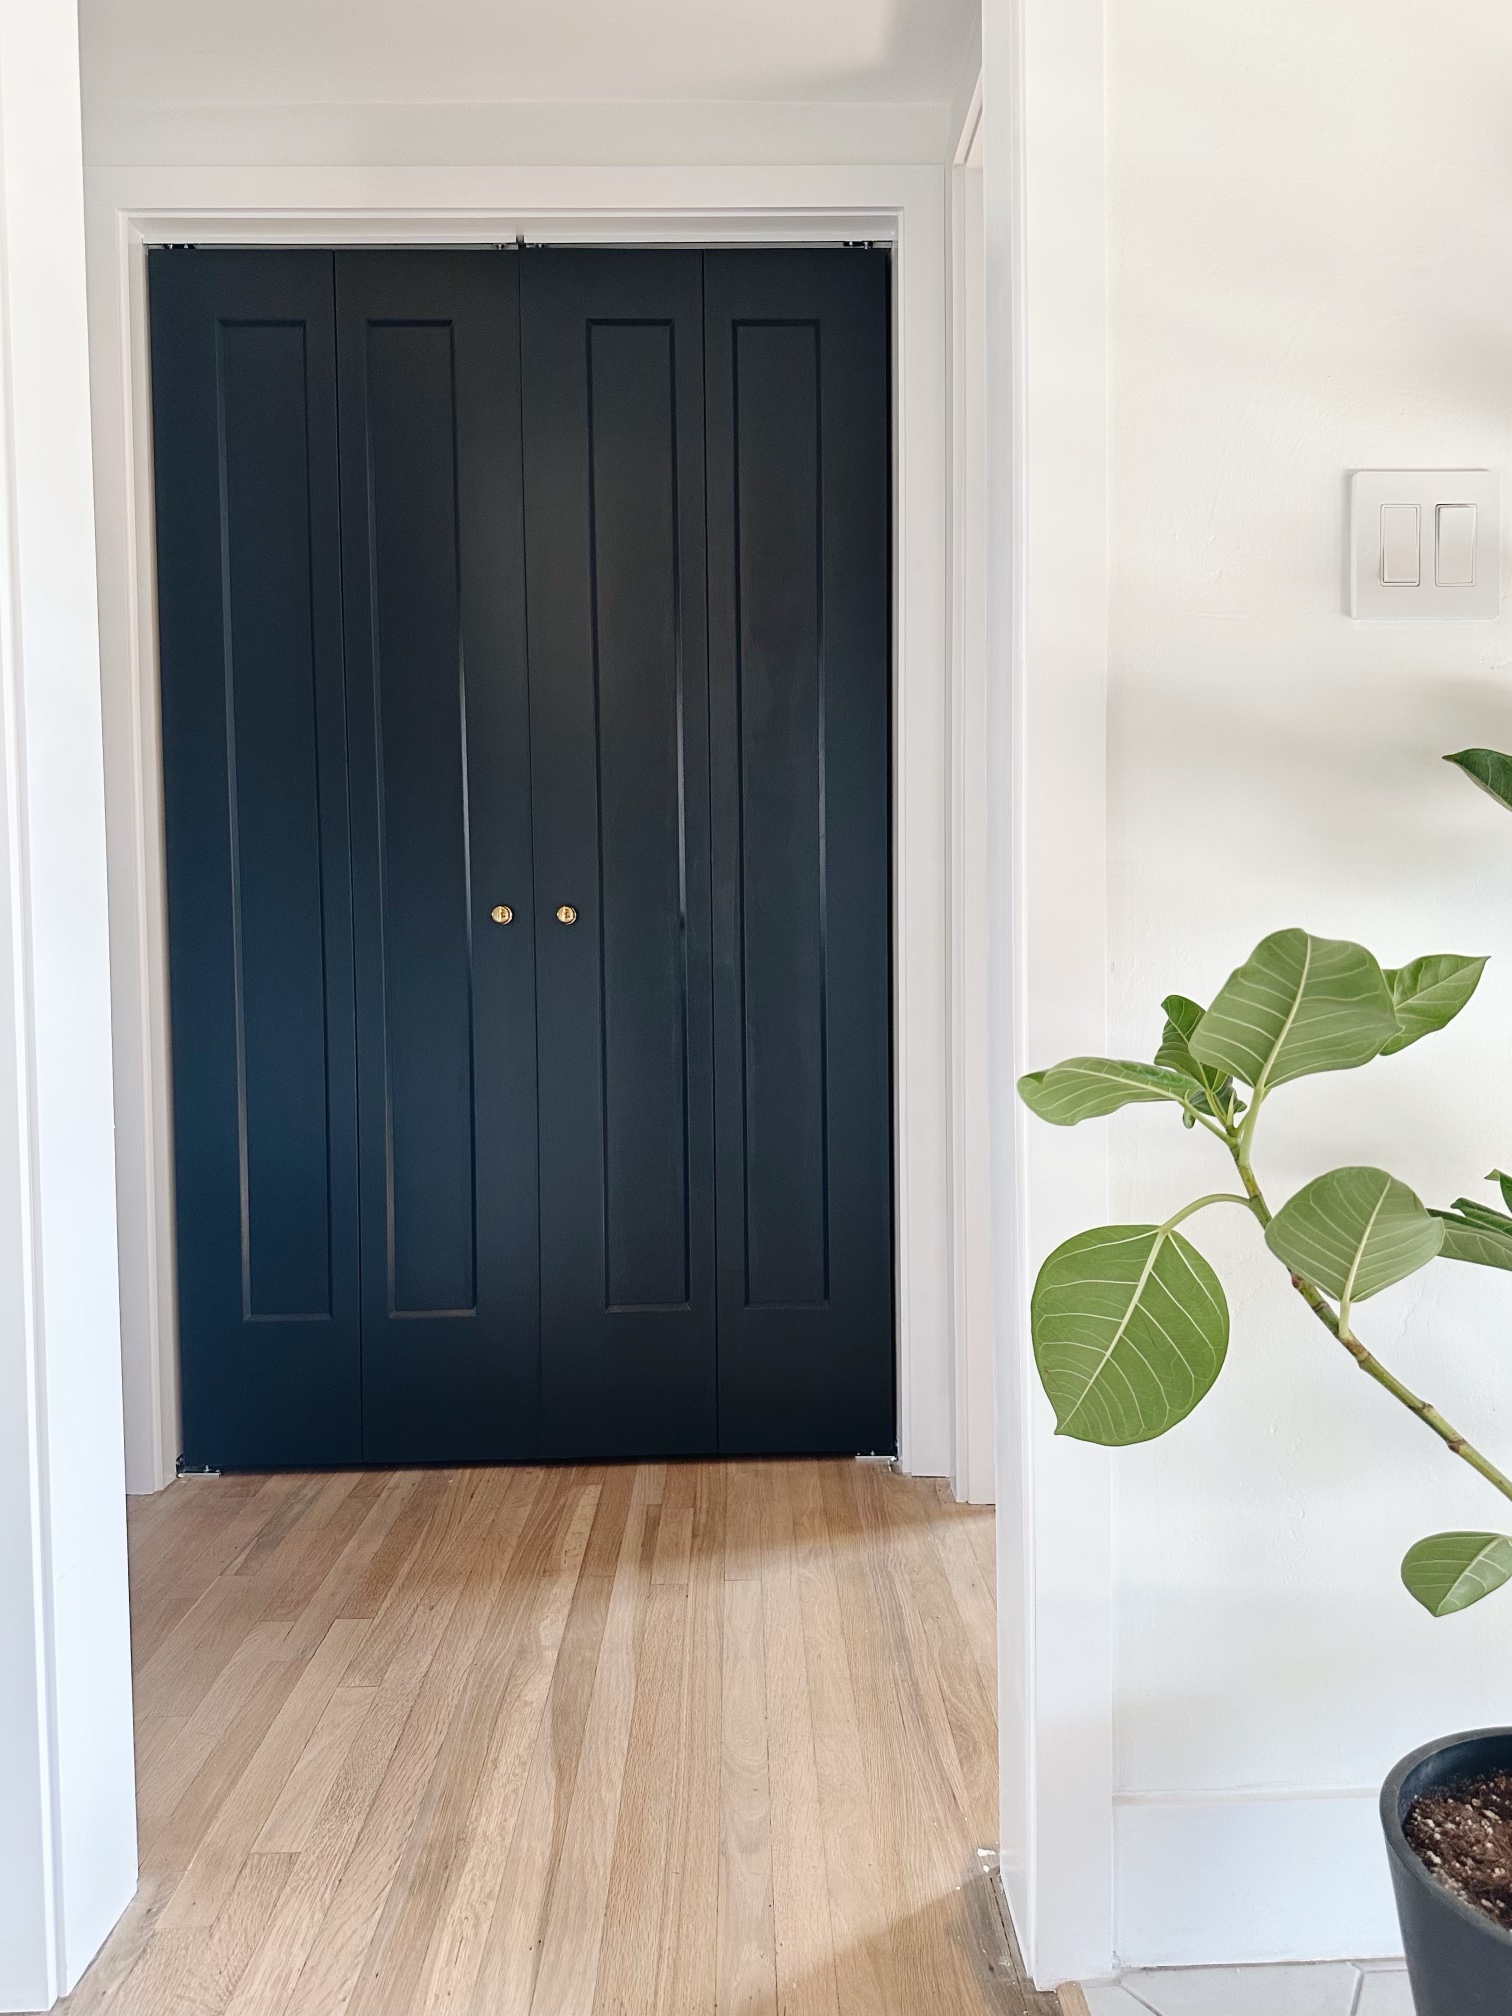
When you walk in the front door, the view is a straight shot to this linen closet. So although this seems like a small project, it really made a big impact on the overall feel of our home. I think it’s the first place the eye naturally goes when looking inside our house. After a few hours of looking and shopping around, we decided on these shaker-style bifold doors from Wayfair.
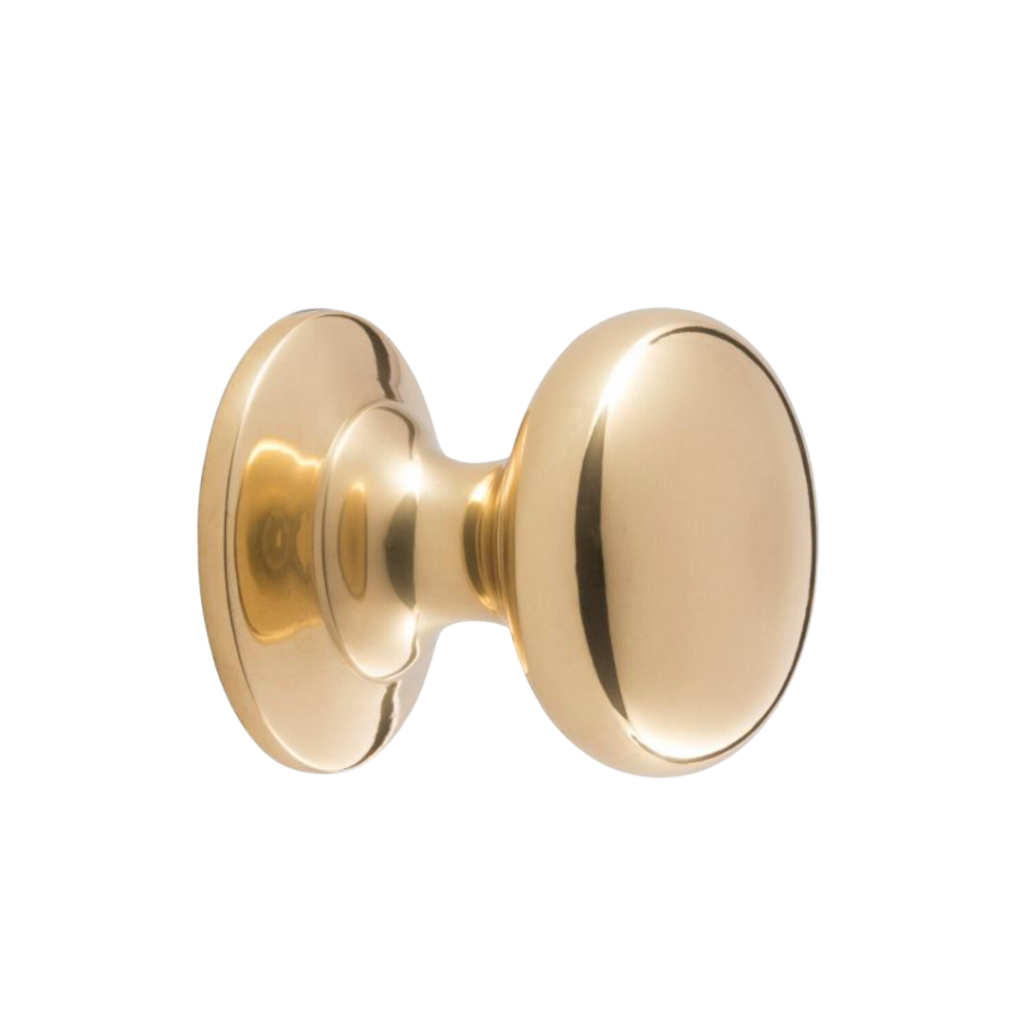
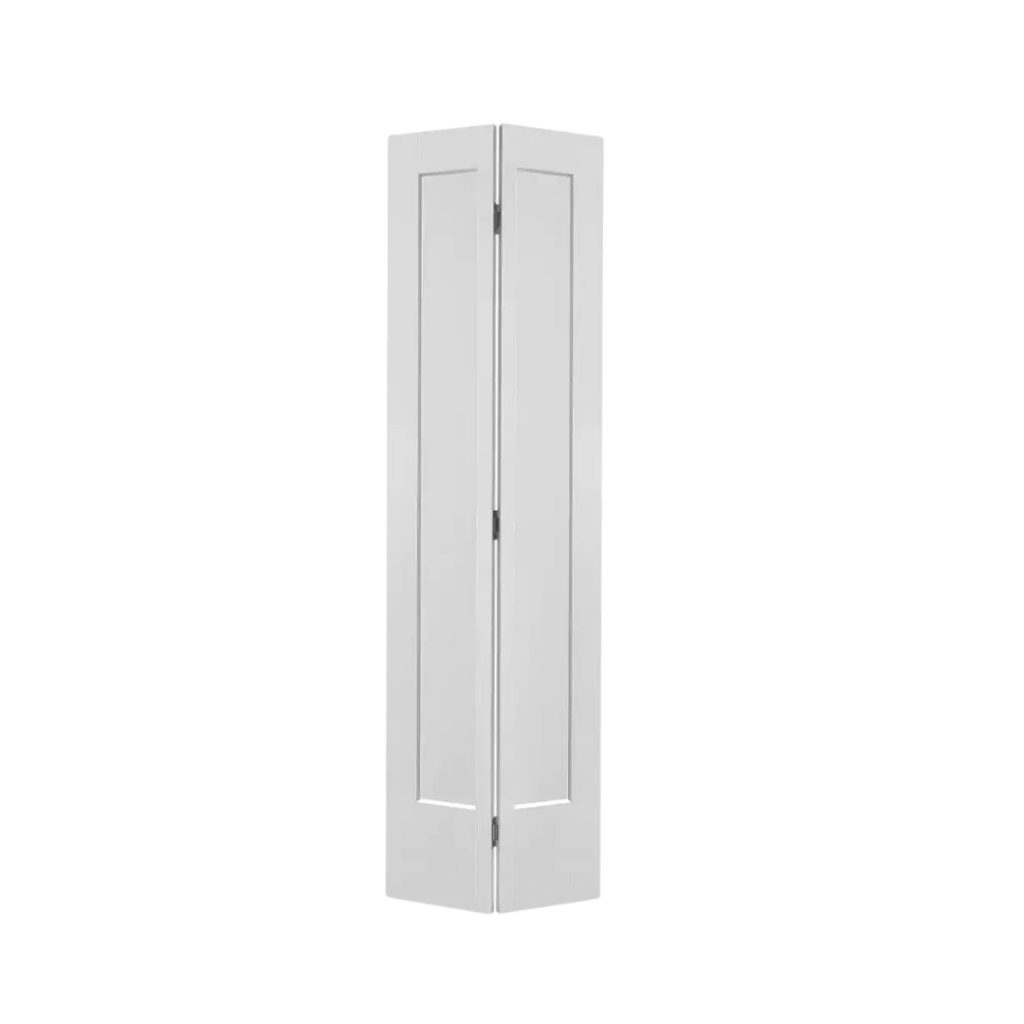

We went with the Barlow Knobs from Rejuvenation hardware. These match our kitchen cabinet knobs so it all flows nicely.
Next, we painted! We used Railings by Farrow and Ball in Estate Eggshell. I’m so glad we used this color! It makes a nice visual triangle of our fridge, primary bedroom door, and the bifold doors.
*As a note, I originally I tried painting the trim and the doors the same dark color and it ended up being too dark in such a tight space (we have 4 doors within 30 square feet). The white trim ended up looking better, in my opinion..
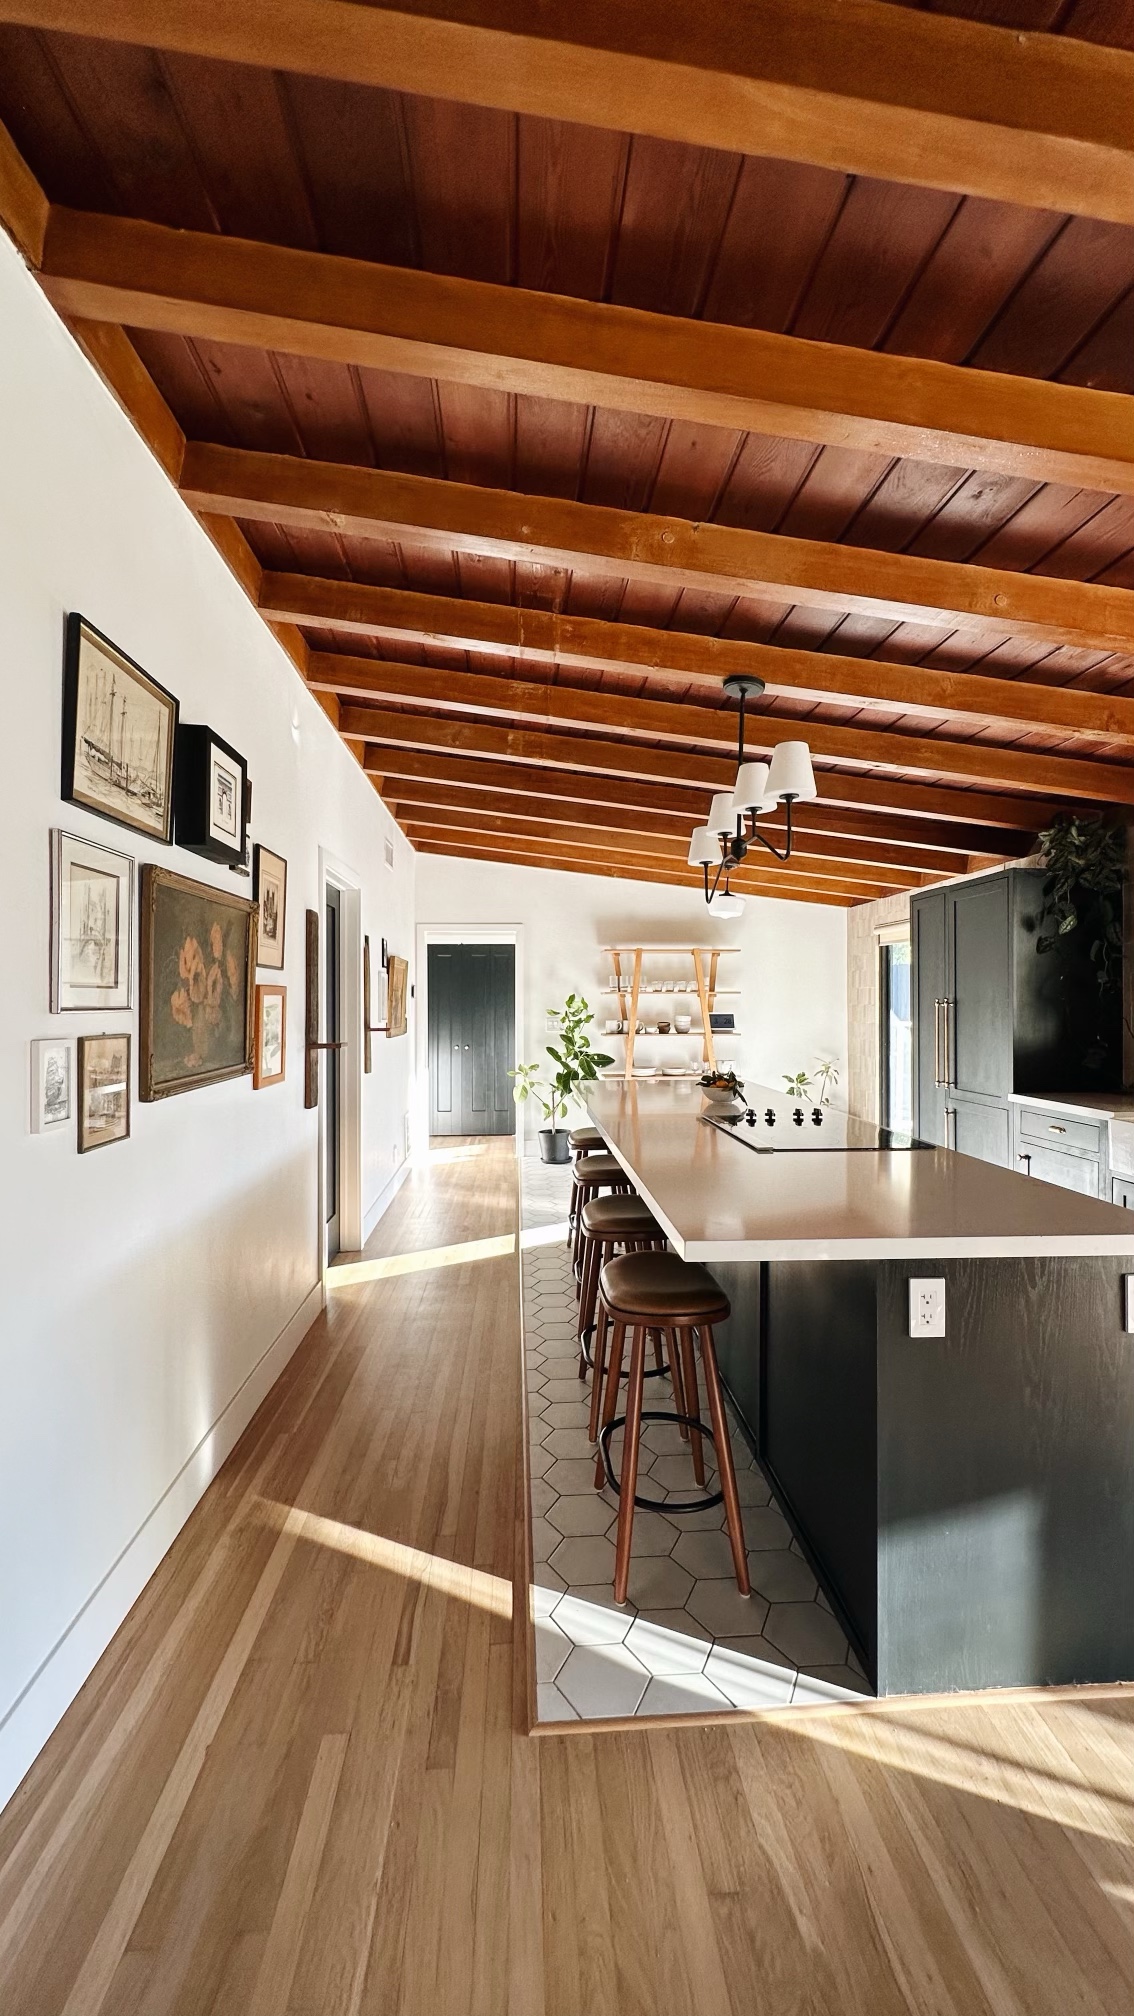
To make room for our Christmas tree in the living room, we moved this Ficus Tree from Bloomscape to this area. They ship fully grown, potted plants that are in such great condition.
I wanted to share the installation process for any of you who might need to swap closet doors soon. I must say, these are SO much easier than standard doors to install. The regular doors gave us a run for our money, but Jake had these up within half an hour.
Installing bifold doors:
1. Paint door jambs and trim. (We did this backwards and I had to paint after installing. It would have been way easier to paint beforehand.)
2. Measure to find the center (depth-wise) of the head jamb
3. After finding center, install right and left top tracks. They will go right up against the right and left door jambs, leaving a small gap in between.
4. Next, measure to find center (depth-wise) of the side jambs, near the floor.
5. Install your bottom brackets. (We installed directly into our hardwood floor, but we did get some feedback that this isn’t “to code.” You may want to install the bottom bracket on a small transition piece to help avoid movement from wood expanding and contracting in different seasons. I’m not sure which state this comment came from.)
6. Set closet doors into top track and bottom brackets. It won’t look perfect quite yet- you can adjust the gap pretty easily by moving the pin that fits into the brackets on the bottom.
7. Paint doors. (You could do this beforehand if you are spraying them, but I found it pretty convenient to paint them after they were hung up.)
8. Install door knobs. (There’s no template for where to install the door knobs but they do recommend installing them towards the middle of each bifold door for easier opening and closing. We opted for installing them towards the end of the doors/middle of the doorway for a seamless look).
I love our new hallway closet doors!
Comments